Stop chamfers on a router table/ spindle moulder.

UKworkshop.co.uk

Help Support UKworkshop.co.uk:

This site may earn a commission from merchant affiliate links, including eBay, Amazon, and others.

MikeG.

Established Member
Joined
24 Aug 2008
Messages
10,172
Reaction score
704
Location
Essex/ Suffolk border
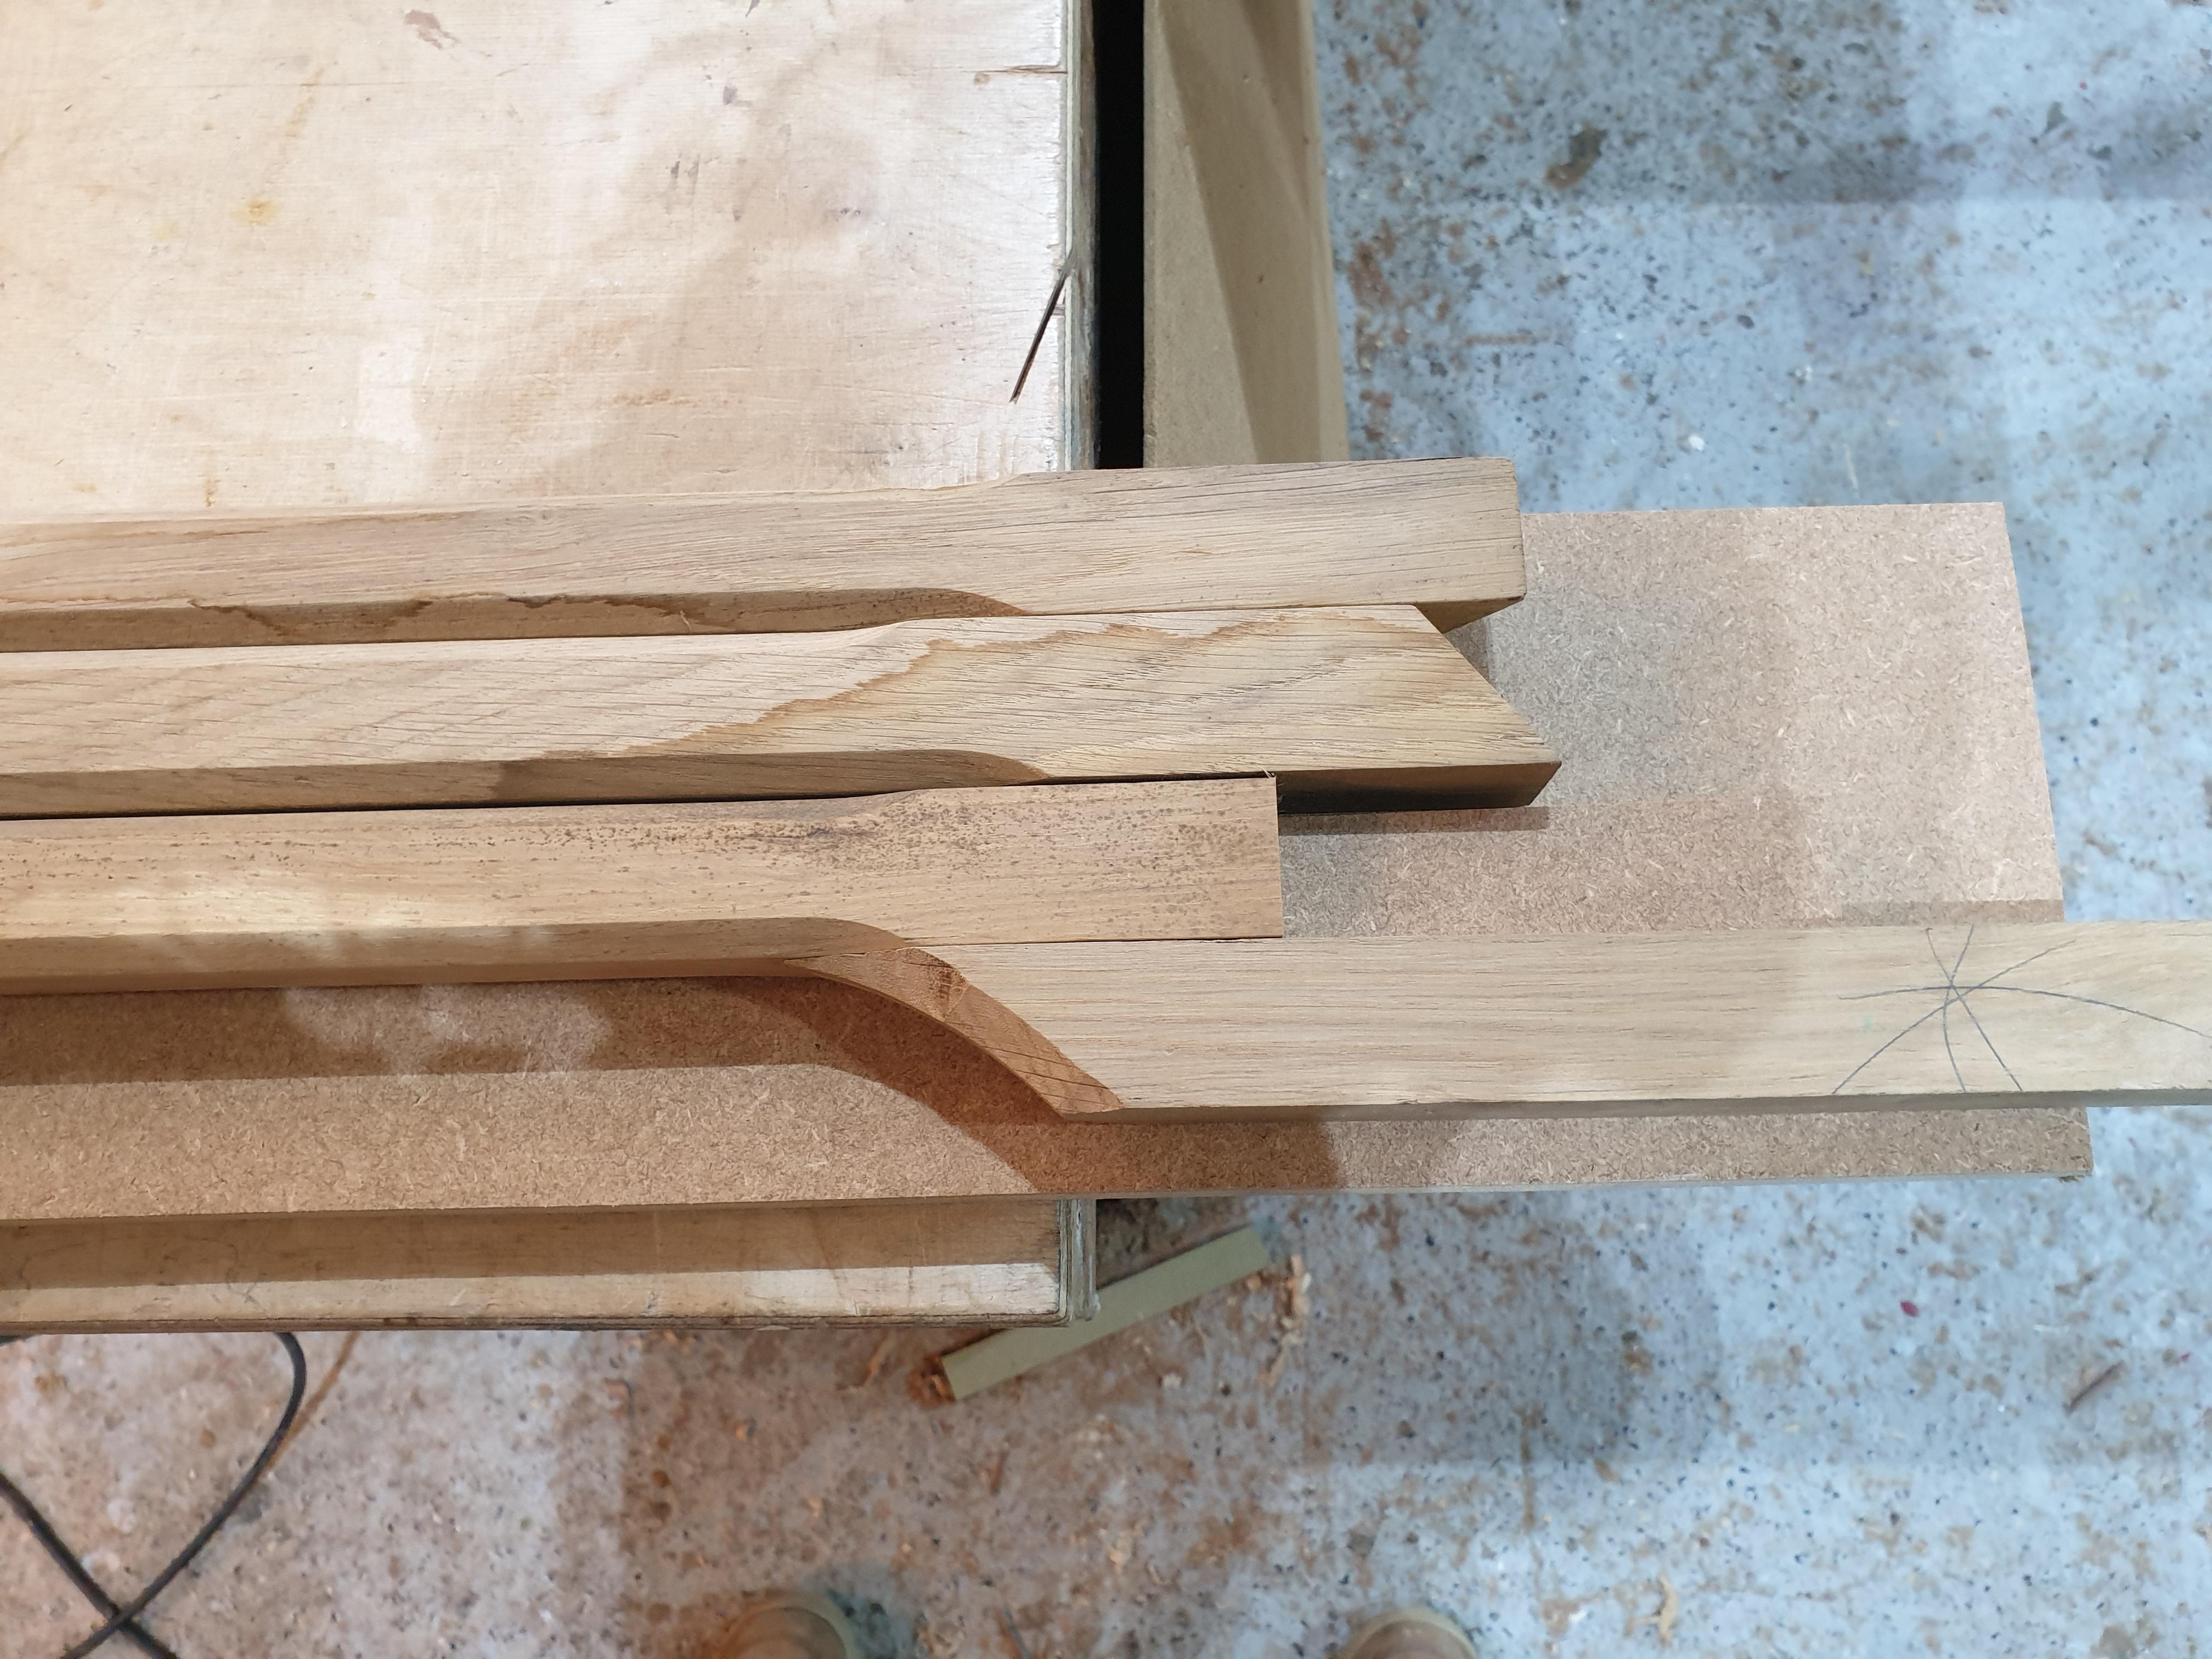
I've always done chamfer stops by hand, even if the chamfer itself was done on a machine. I am now faced with making a staircase of 40 ballusters, each stop chamfered on all 4 sides, and half of them stopped and re-started in the middle (ie 2 stopped chamfers per edge). That's 480 chamfer stops altogether, and I haven't the time to do those all by hand. I really dislike that machined look where the edge is just pushed onto the cutter or taken straight off, and besides, in oak it is very hard to stop that burning.

So, what are the machined alternatives? I have seen on site where the chamfer slopes down from nothing to the full depth over 15 or 20mm, but for the life of me I can't think how that is done on the machine. Is it done on a drum sander, maybe? I can see how it could be done holding the machine and using a template, and if it comes to it, I'll do that. Just to add to the picture, there are 4 different styles of balluster and 3 different lengths (it's a cut string stair).
 
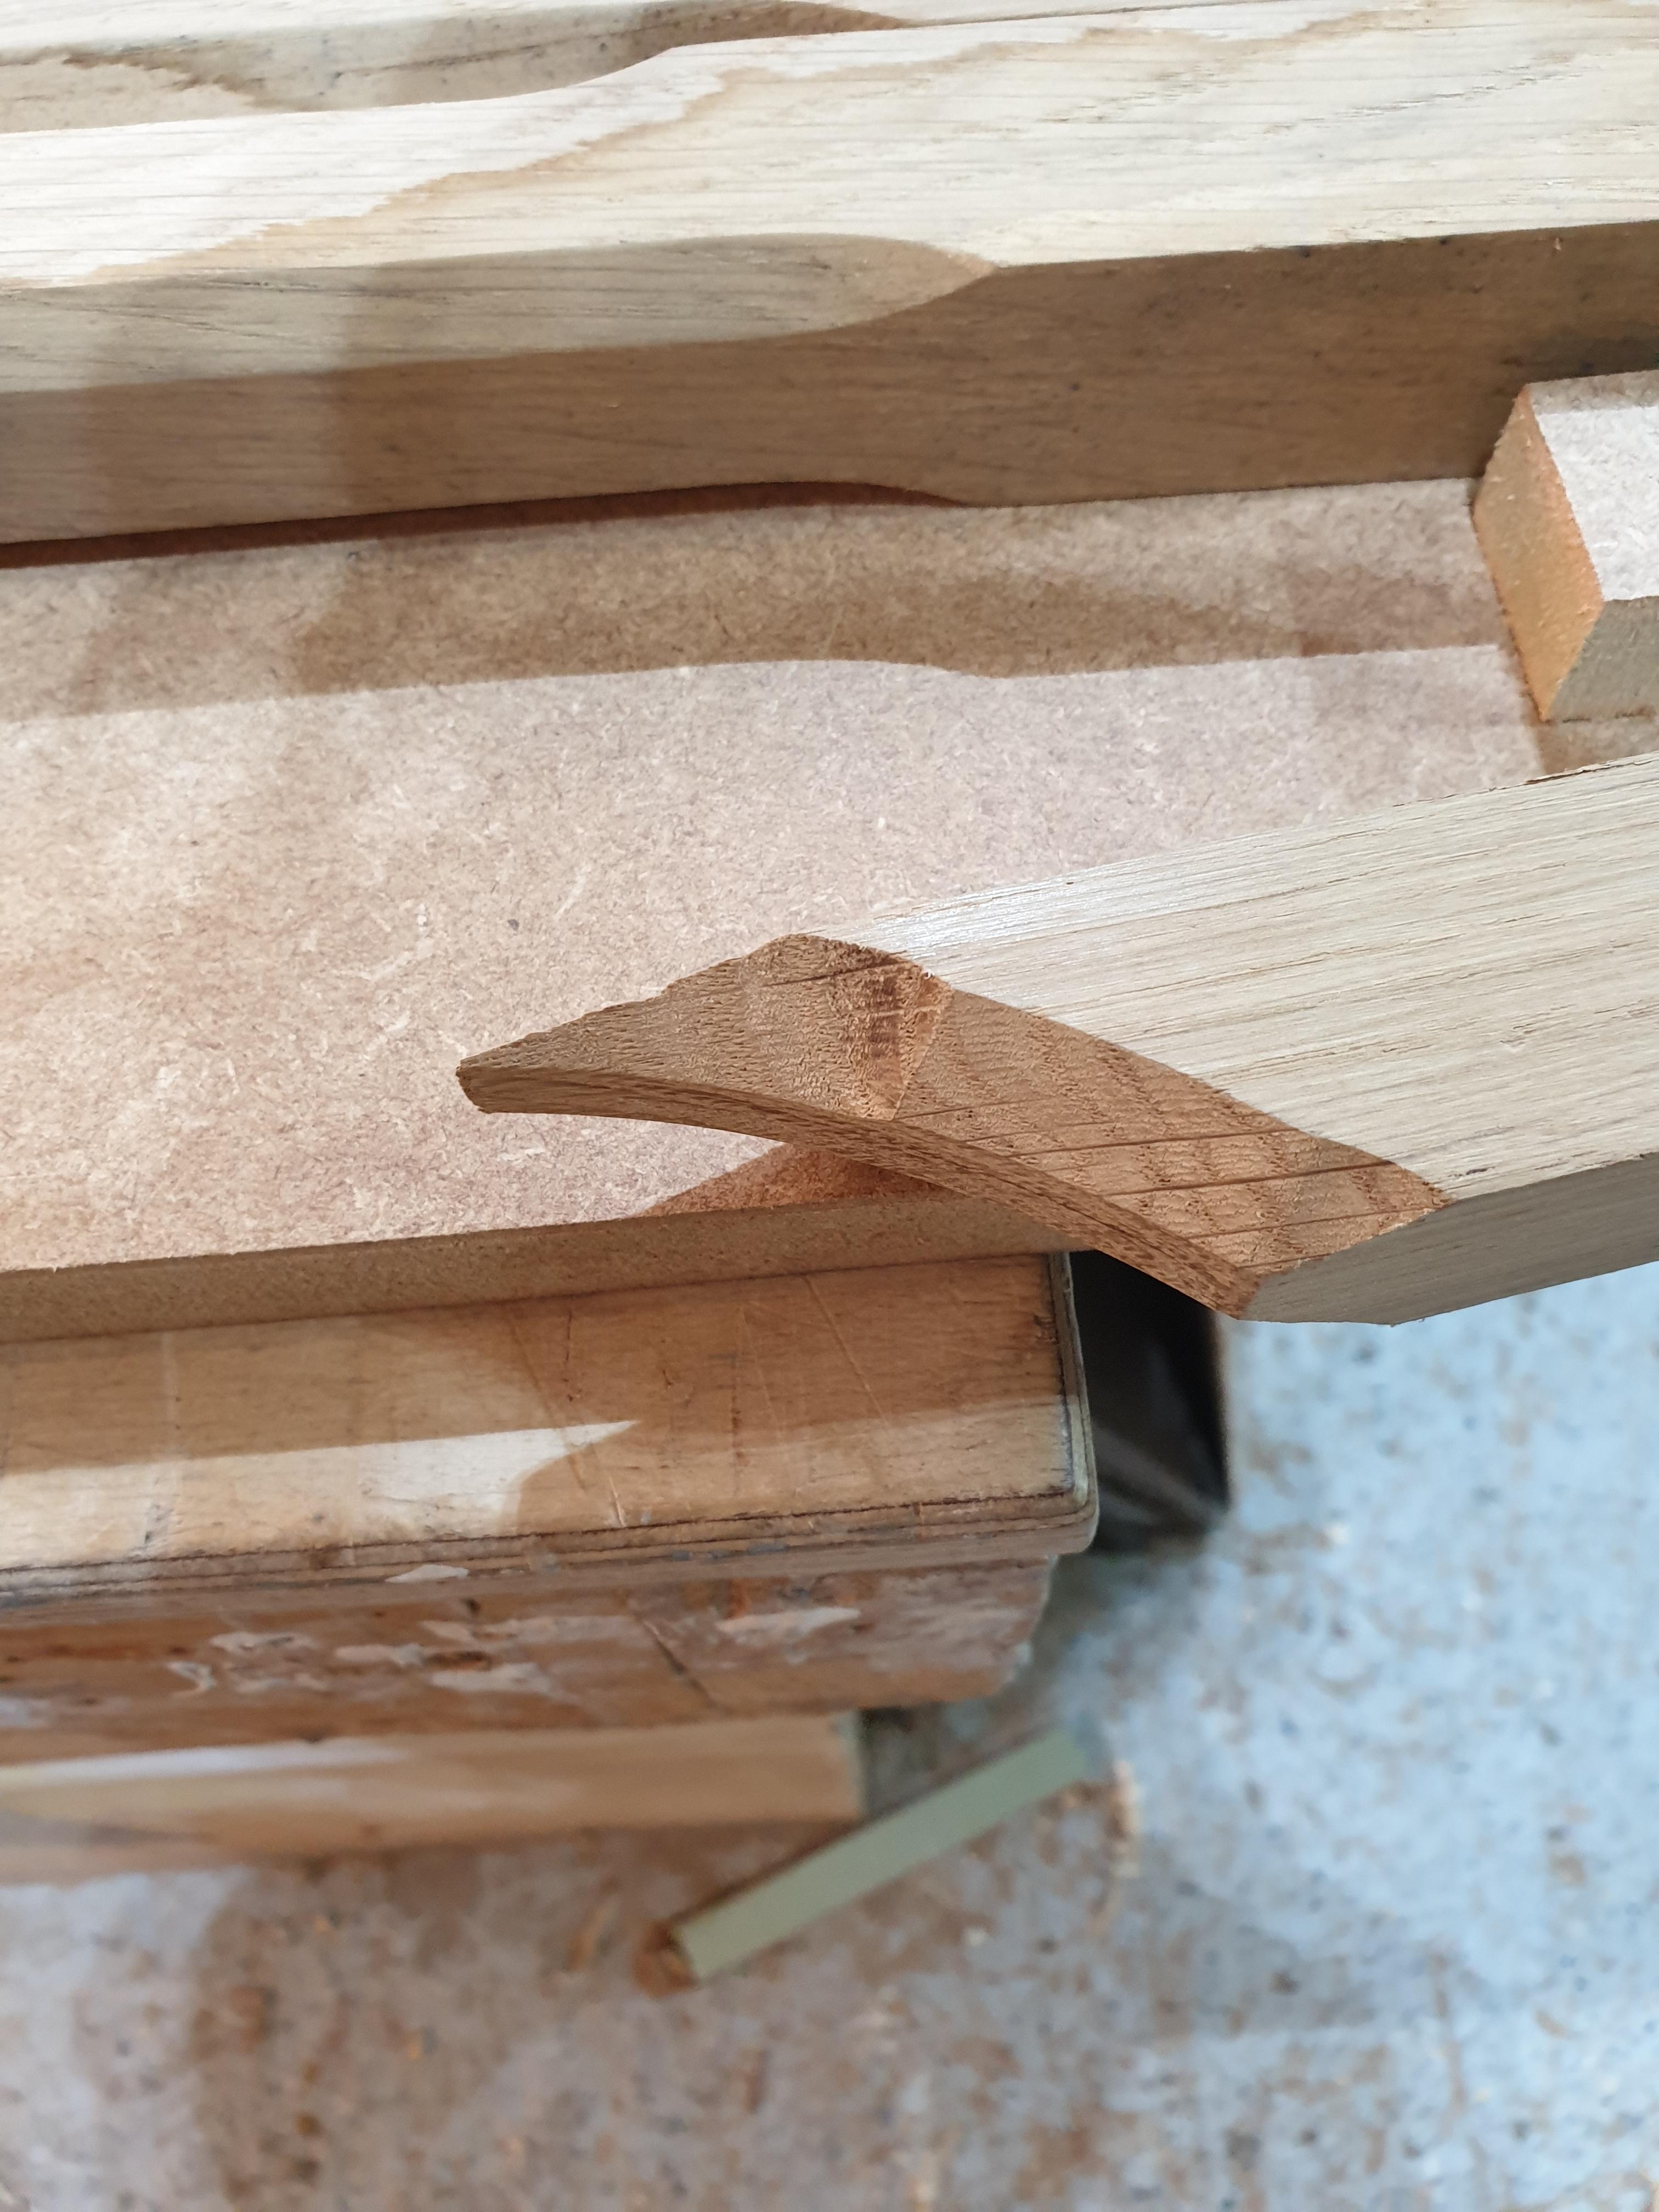
Mike, do you want the surface of the end-chamfer flat or curved? I have done straights a la Bob Wearing: markup, clamp on jig, several careful pushes, knife off fibres. Fairly quick on the four spindles I replaced, but possibly time consumptive on your scale.
Curved ones without obvious cutter marks are more difficult, but can be achieved freehand with a 'ramp on, ramp off' template and router guide. Or, simpler, and more stable, a template on a sled for a router table. Both approaches need good marking out on the template for chamfer positioning. I saw this latter approach years ago, and the fella was working in a converted garage, but he was rattling out a production (pallet) quantity in record time.
HTH, Sam.
 
Have a scrap piece of mdf and make a jig/spindle holder. Start with your longest first
96fc39815fe918f54e7f492a767352dc.jpg

b484378bfac9a88913fe9e8bdc5225b8.jpg

b28309b50647a403d480a5931ad29d25.jpg

Rough and ready mock up but you get the idea. Have some wood the same thickness as your spindles to give some extra width for the router to bear on. Depending on how sweeping your curve is
a185ad23c4700773215cf3b8df5a6f83.jpg

Will alter the sweepyness of the champfer.
Hopefully the pictures should help explain what I mean.


Sent from my SM-G960F using Tapatalk
 
711a12045b2720855c065a4710280e7e.jpg

Plenty of area so the router is stable. I find I get much less burning if the speed is slowed right down

Sent from my SM-G960F using Tapatalk
 
ColeyS1":2ymjk2h9 said:
Have a scrap piece of mdf and make a jig/spindle holder.......

Thanks Coley. Yep, that's what I had in mind when I said I could see how it was done holding the router.
 
Perhaps tilt the workpiece at 45º with a little jig/sled thing, and present it to a straight cutter. You have to drop it on to start the cut but this isn't a problem if the near end is resting against a stop to prevent it from being flung back. If doing two separate chamfers then two separate stops.
 
I think I'd do it that way if I had to use a router. The joy of doing it that way is any chance of breakout is minimised because of the curvy champfer supporting pieces of wood. Depending how it went you could route all for sides, just flipping it over each time then do a final pass half a mm deeper if burning was as issue.
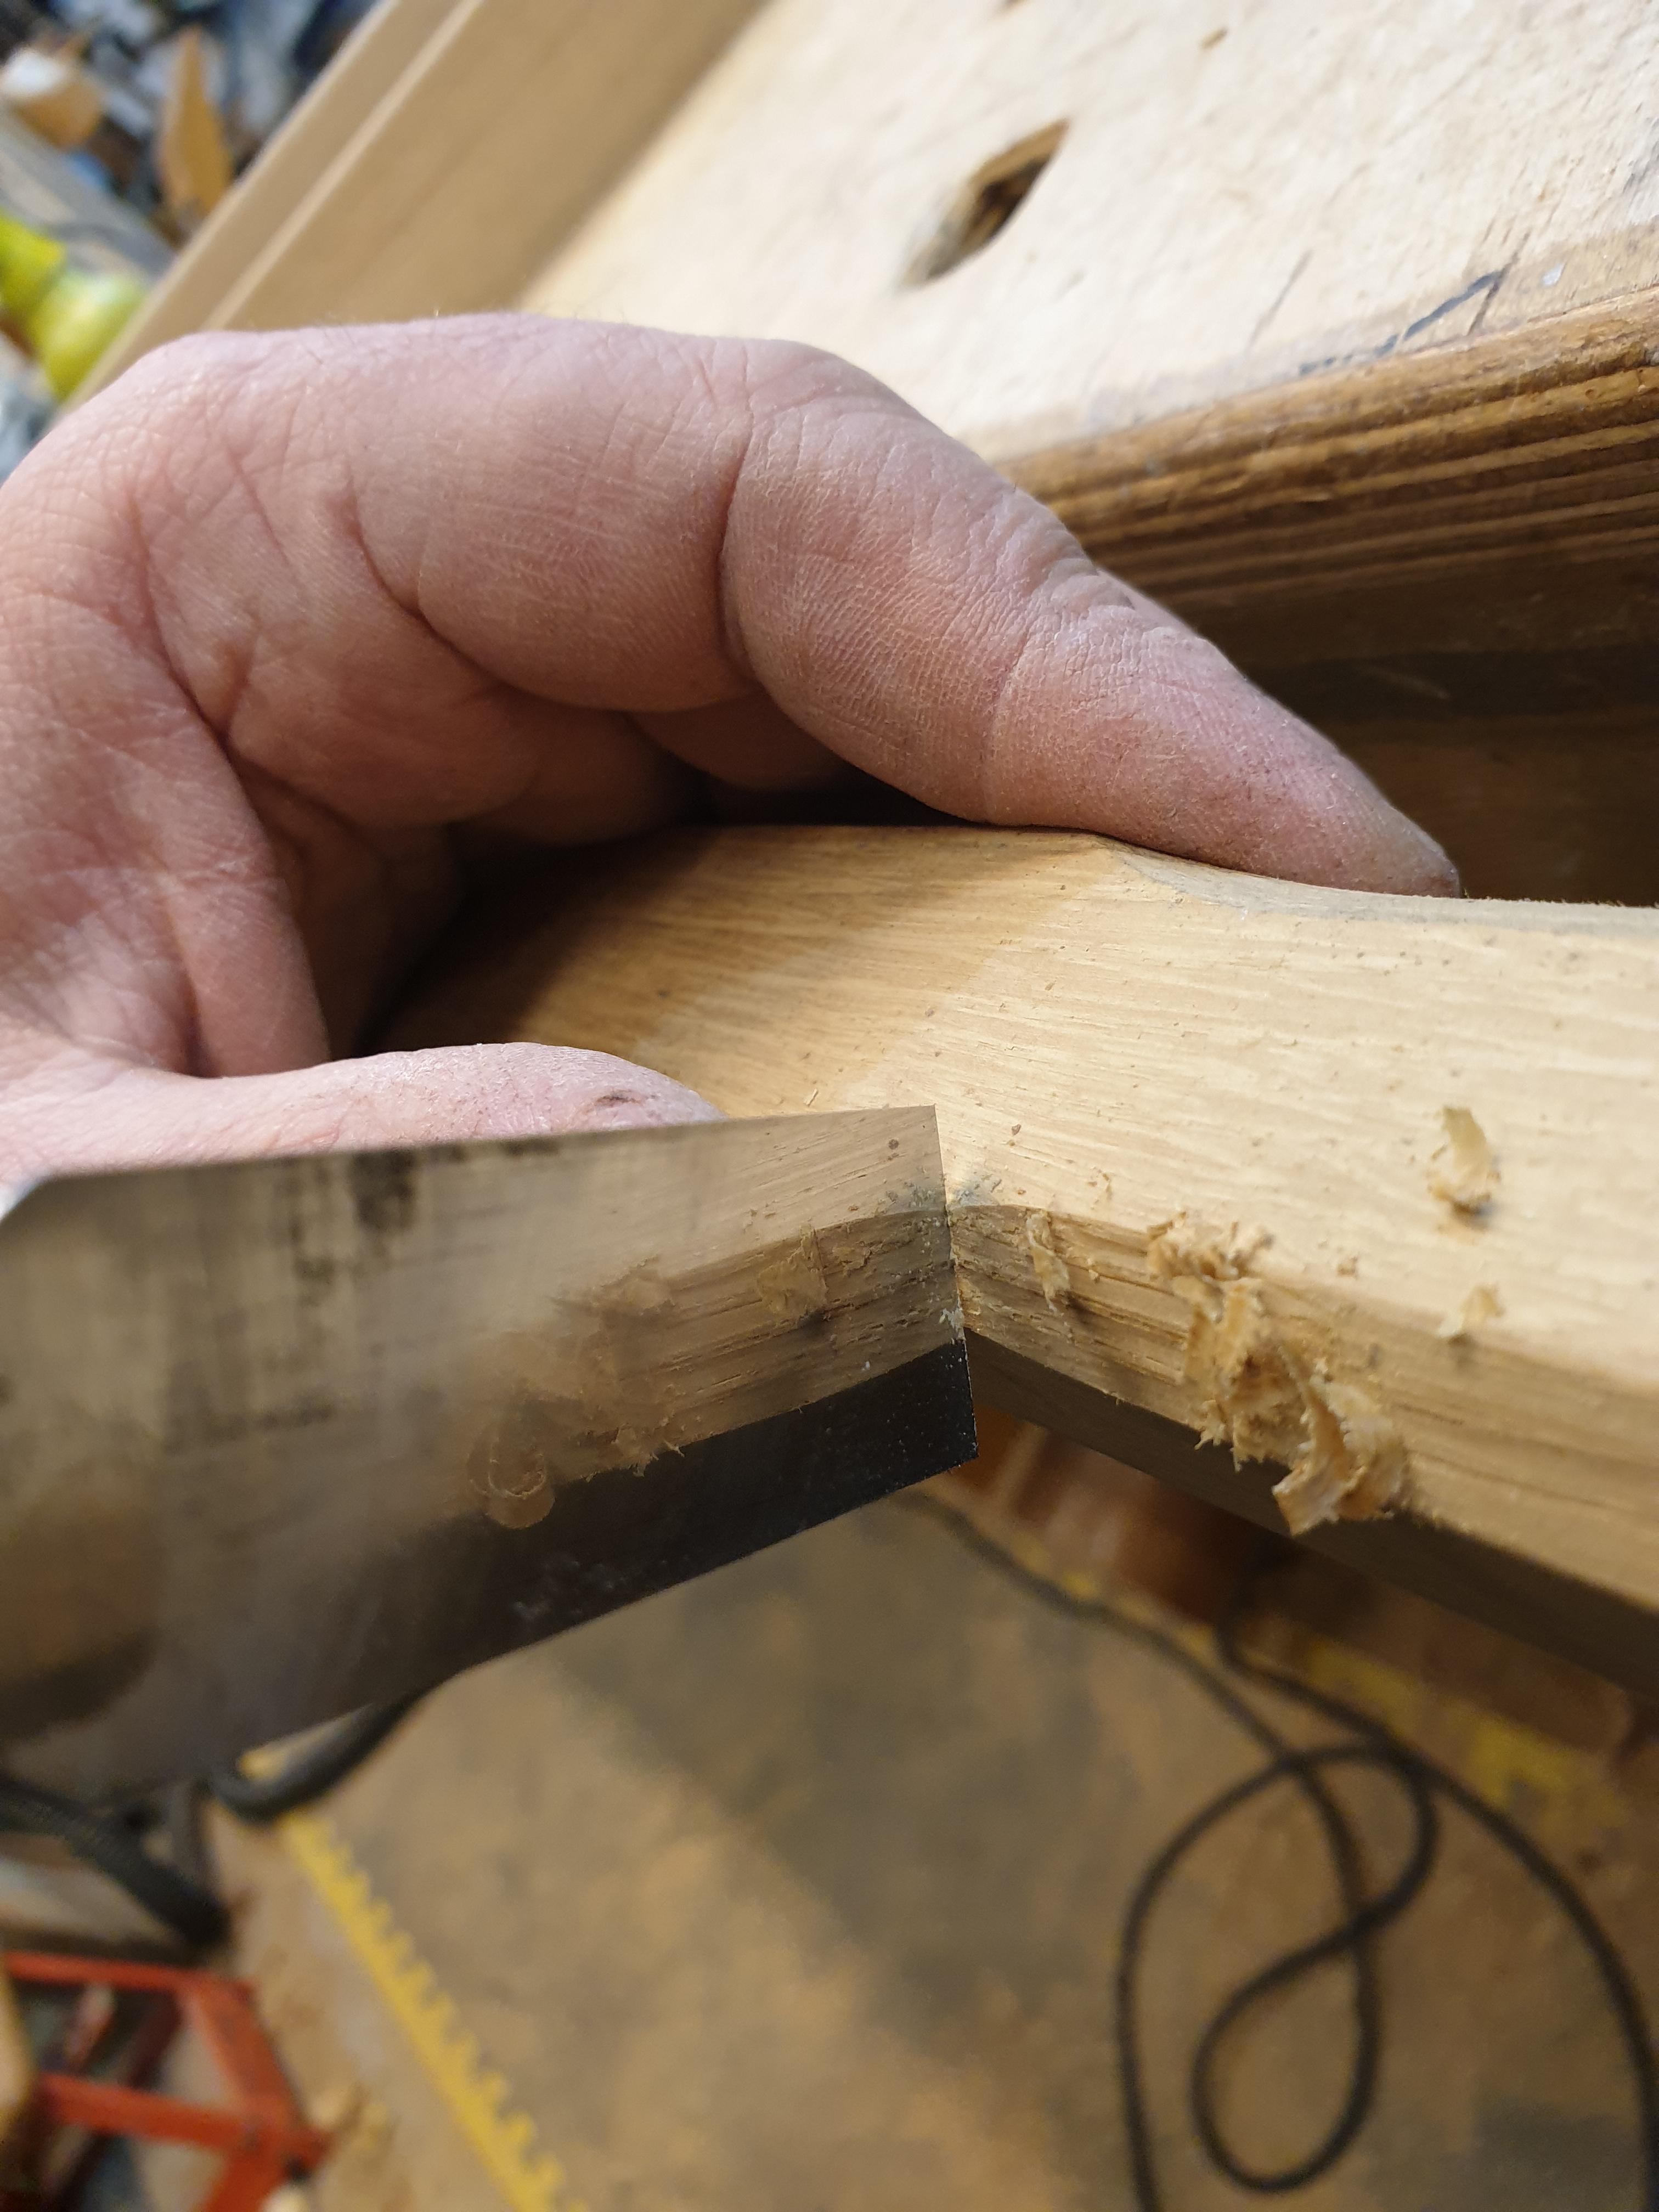
I've found a sharp chisel and a bit of push and scrape
fdaaa8ee0c9cb3128ee563fce29eb87f.jpg

Is the quickest way of removing burn spots if they do occur (I had to hold the chisel in my mouth to take the last picture lol)


Sent from my SM-G960F using Tapatalk
 
Mike my house is a converted Victorian Gothic school with stop chamfers everywhere. I didn't want the machined/round ended look but couldn't think of an alternative way so ended up doing them all on the spindle moulder and just chiselled the rounded bit flat by hand.

I did see a youtube video of a jig someone made to cut them but by the time you made the jig and like you say all the different settings it was as quick to just get on with it!
 
Doug71":2xkzg0t1 said:
.....by the time you made the jig and like you say all the different settings it was as quick to just get on with it!

I've re-counted, Doug, and there are actually 480 chamfer stops to do. An optimistic 20 seconds per chamfer, 10 seconds between, say, and that's 4 hours work just on the chamfer stops. Now I don't mind repetitious hand work, but if I can make a jig in half an hour that's an awful lot of time saved.
 
MikeG.":2uc7r9gk said:
Doug71":2uc7r9gk said:
.....by the time you made the jig and like you say all the different settings it was as quick to just get on with it!

I've re-counted, Doug, and there are actually 480 chamfer stops to do. An optimistic 20 seconds per chamfer, 10 seconds between, say, and that's 4 hours work just on the chamfer stops. Now I don't mind repetitious hand work, but if I can make a jig in half an hour that's an awful lot of time saved.
make a jig in half an hour, spend a day modifying it to make it work perfectly every time.
 
I had this problem in miniature in making these decorative beadings:-
DISPLA~1.jpg

In essence I used Jacob's suggestion, ie, hold the workpiece at 45deg and use a straight cutter to follow a profile. The jig took a lot of effort to perfect mainly because of the small size - everything had to be spot on. It was complicated by the need to vary the length of the profile so that I could tailor it to the overall length of the strip (in order to get an exact number of notches in each strip). It took a couple of hours to set it up for each run, but having done that I could produce a finished length in about 20mins.
Brian
 

Attachments

  • DISPLA~1.jpg
    DISPLA~1.jpg
    221.3 KB
Yojevol":22b7sd46 said:
......In essence I used Jacob's suggestion, ie, hold the workpiece at 45deg and use a straight cutter to follow a profile.....

Thanks Brian. I don't see Jacob's posts, but I had already reached the conclusion that I would likely be using a straight cutter with a bottom bearing guide. I think sitting the workpiece on a sled with the bottom part having the pattern cut into it should work quite nicely. It should be quick and easy to make, too.......and we'll find out later on as I am off out to the workshop now.
 
I'm not sure how a sled could work, Sam, as the bearing on the cutter is at the top.

Sorry, mis-phasing on my part. Sled to bed stair spindle on, with a 'lead off' block into which spindle locates. Depth of 'socket' in lead-off block is distance to chamfer. Cutter bearing rides on spindle face up to lead-off, then transitions onto block. I have seen this somewhere, probably FWW.

Sam

Edit: Coley's method probably better.
 
Lay them all out next to each other, side by side, all at 45 deg, lay a mdf fence accross the top and run a 45 deg cutter (no bearing) accross both ends to create your nice flat 45 degree stops with a sharp edge. Then run your full length chamfers stopping (dropping them in and out) at the routered cross cuts you have just done.
 
I've got it, I think Bob. I can see breakout being an issue that way, and it's two processes, but I'll give it some thought.
 
You've already had some excellent advice from the other lads, but I'll throw in my tuppence. The way I like to do it is with a 45-degree block in the spindle moulder with a couple of stop blocks fixed to each of the fences so that the cut starts and stops where you want it to stop on the spindle itself. Once all set up and with the machine running you butt the end of the spindle up against the right hand stop and gently push the spindle into contact with the cutter. The relatively large diameter of the cutter gives quite a nice arc to the ends with minimal burning if you're using sharp blades. This method allows you to do hundreds in a very short span of time without any tricky set-up or any real thinking.

I've also done it on a surface planer with both beds lowered, but I wouldn't recommend it as it's fiddly and a bit more dangerous. Fiddly + dangerous = lack of fingers.

Roy Sutton had an excellent demonstration of the method in his spindle moulding video back in the day, fortunately, somebody uploaded it to youtube and it's free to all to watch. 18:55 onwards if you want to see the technique, I personally don't use a jig on such a small cut but that's up to you.

[youtube]4n6yTHMBX54[/youtube]

Edit: I've done a bit of thinking after seeing Bob's reply, you want a sharp corner at the ends of the cut if I'm reading right?
 
Trevanion":1fqzrylh said:
You've already had some excellent advice from the other lads, but I'll throw in my tuppence. The way I like to do it is with a 45-degree block in the spindle moulder with a couple of stop blocks fixed to each of the fences so that the cut starts and stops where you want it to stop on the spindle itself..........

I don't have a spindle moulder, and the technique you describe (and is in the video) but transferred to a router table leads to the very look I am trying to avoid.I appreciate that it would work with a SM due to the much larger diameter.
 
MikeG.":23i2raoj said:
I don't have a spindle moulder, and the technique you describe (and is in the video) but transferred to a router table leads to the very look I am trying to avoid.I appreciate that it would work with a SM due to the much larger diameter.

Ah, apologies! I had assumed from the title you were looking for a solution for either.

I'd probably get one of these bits from Wealden and make up a jig with a template to follow, unless you wanted a massive chamfer. Alternatively, if your table will take router bushings you could use one of those for the template to bear against and just use a regular chamfer cutter.
 
Back
Top