June Woodturning Challenge - PLEASE POST YOUR ENTRIES HERE

UKworkshop.co.uk

Help Support UKworkshop.co.uk:

This site may earn a commission from merchant affiliate links, including eBay, Amazon, and others.
Status
Not open for further replies.

henton49er

Established Member
Joined
16 Sep 2010
Messages
1,241
Reaction score
1
Location
Beautiful, but wet, Mid-Wales
Please post your entries for the June Woodturning Challenge on this thread

Challenge Requirements: “Pot Pourri Bowl and Lid”
This month’s rules are:-

The Challenge is open to anyone and everyone
Your entry must be new and made specifically for the Challenge
Entries must be made entirely of wood which to be turned on a lathe using woodturning tools
There are no maximum or minimum size restrictions
Bought in or metallic lids not allowed
Typically a pot pourri bowl is a (possibly) pierced bowl with a (definitely) pierced and loosely fitting lid.
Segmented turning, decoration, colouring, pyrography are not allowed
Piercing, hollowing and texturing are allowed, but the principal requirement is for the judge to be able to see your turning skills.

Please post 3 images of your work along with a brief note about how you made it, what tools and finishes you used, what woods you used and the entry’s dimensions etc. Please note guidance on photos given by Paul Hannaby in the thread announcing the results of the May Challenge.

1 showing a general view
1 showing a view inside both bowl and lid (side by side?)
1 showing a bottom view of the bowl

A fourth picture may be added (but is not compulsory) if needed to show any interesting details of your entry.

Image size - please use image size 640 x 480 0.3 mp, as in previous challenges

Please upload your pictures and description between 10pm on the 26th June and 10pm on the 28th June.

Please also send me a PM giving me your own opinions of 1st, 2nd and 3rd places amongst the entries (other than your own) between 10pm on 28th June and 10pm on 30th June (for me to compile the entrants’ scoring).


Roundup
 
My attempt, I'm calling a "Turkish Delight" Lidded Bowl. The bowl is Holly as is the finial. The lid is walnut and though the photo's don't do it justice it was so gorgeous I couldn't bring myself to make any holes in it. Hence strictly speaking I've failed to qualify because it's not pierced. It was turned using a woodworm screw, then chucked with a recess and the bottom reverse turned in cole jaws leaving an undercut base to avoid wobble into which I scored some decorative lines with a skew point. The finial was combination skew and spindle gouge. The bowl and lid were bowl gouges, bit of sheer scraping with a round nose scraper. Sanded to 400 then Nyweb to 1200, Cellulose SS and Microcrystalline wax. Forgot to add the lid was turned using the same procedure as the bowl and the inside is undercut. There is actually a bead marking the transition between side and top of lid but it doesn't show well on the pics. A shoulder on the rim seats the lid on the bowl.

If it's not allowed I will entirely understand and not be offended :) The walnut was only acquired last week and I've hardly turned any to date. I've fallen in love with it and just couldn't bring myself to complete the plan and adulterate it as I have a limited supply.
Lidded Bowl Holly and walnut 1.jpg

Lidded Bowl Holly and walnut 2.jpg

Lidded Bowl Holly and walnut 3.jpg

Lidded Bowl Holly and walnut 4.jpg
 

Attachments

  • Lidded Bowl Holly and walnut 1.jpg
    Lidded Bowl Holly and walnut 1.jpg
    180.7 KB
  • Lidded Bowl Holly and walnut 2.jpg
    Lidded Bowl Holly and walnut 2.jpg
    161.9 KB
  • Lidded Bowl Holly and walnut 3.jpg
    Lidded Bowl Holly and walnut 3.jpg
    200.4 KB
  • Lidded Bowl Holly and walnut 4.jpg
    Lidded Bowl Holly and walnut 4.jpg
    145.4 KB
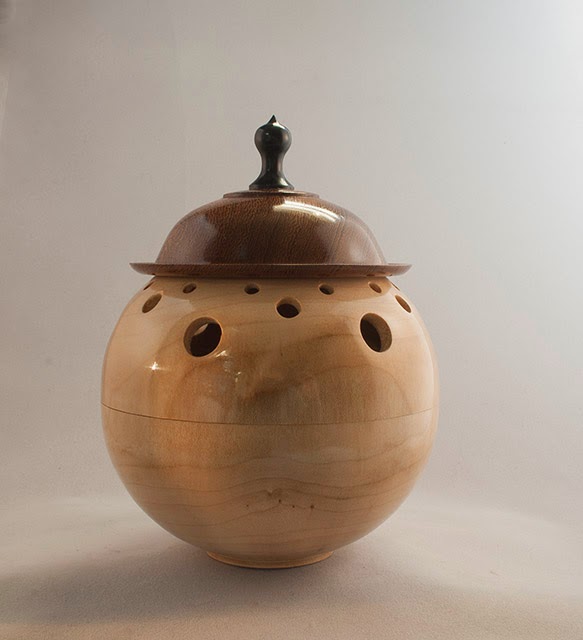
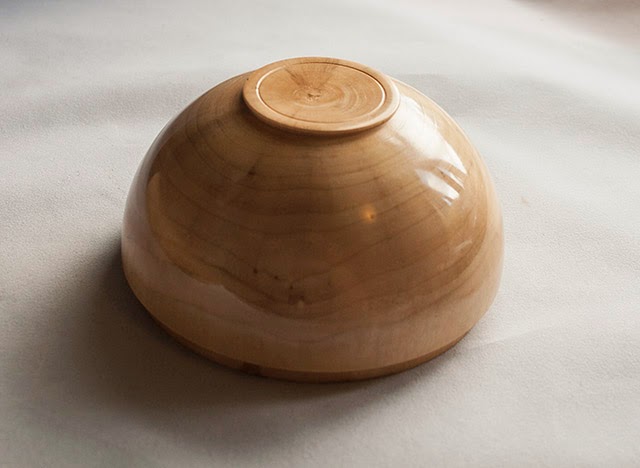
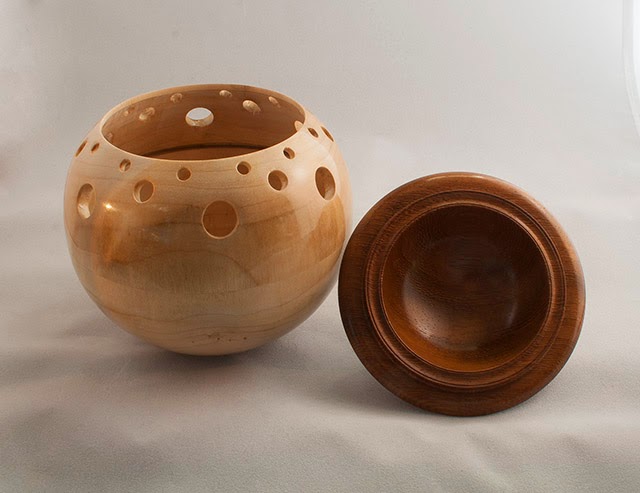
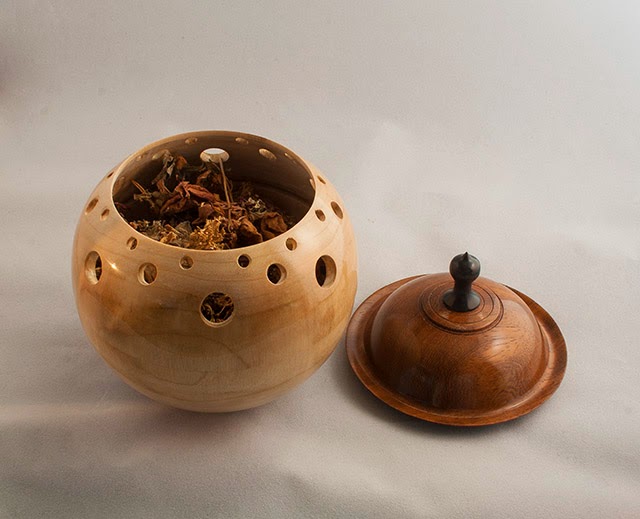
Pot pourri in , guess what, manitoba maple, and mahogany and wenge. Turned on a screw to get a spigot going and then remount and hollow out and then remount and finish off the bottom. Lid of mahogany, i roughed out and then drillled the holes, using the most excellent indexing on the TITAN and then turned to finish and drilled the hole for the knob. Turned the knob and glued into the lid. sanded to 220 and fnished with lacquer. about 5" by 5".thanks and please support the challenge.
 

Attachments

  • P1020250.jpg
    P1020250.jpg
    123.7 KB
  • P1020248.JPG
    P1020248.JPG
    159.6 KB
  • P1020251.JPG
    P1020251.JPG
    172.6 KB
Bowl is made from a very plain piece of chestnut - I used purple stain and polished with hard wax. The lid is oak, not stained for contrast.
The circumference is 10cm; height 10cm.
The 'customer' for this is my daughter and her favourite colour is purple - hence the use of stain. The turning was straight forward, I have undercut the rim which the lid sits on, my first attempt at something like this.

Sammo
 

Attachments

  • June Comp.jpg
    June Comp.jpg
    102.6 KB
  • June Comp 3.jpg
    June Comp 3.jpg
    106.7 KB
  • June Comp 2.jpg
    June Comp 2.jpg
    99.2 KB
  • June Comp 1.jpg
    June Comp 1.jpg
    81.6 KB
This was certainly a challenge, not having anything other than some very long brad point bits to do the piercing with I found that aspect tricky, mainly due to the nature of the wood, the base is Sycamore and it left a lot of little fibres which did not want to go away regardless of my efforts with abrasives and tools.

I made the base in two halves as it seemed the best way I could get a decent finish inside on the pierced section, having done that it looked rather like a Mr Man, so I made an appropriate hat as a lid and thus created Mr Pot Pourri, I am uncertain how Arthur Lowe would have handled his voice though!

The Hat is made from Iroko and the finial is Ebony.

Tools were 1/2" bowl gouge, 1/2" spindle gouge, carbide square scraper, fine detail spindle gouge.

Finish is shellac on the body and sealer with MC wax for the hat.

Images show the complete ensemble, Base, Body whole, and fully loaded. The Hat and body fits are snug but not tight.

Dimensions are overall width 120mm Hieght 160mm Wall thickness of base 5mm top is 3mm

Mr-P-1.jpg


Mr-P-5.jpg


Mr-P-3.jpg


Mr-P-4.jpg
 
So here's my Pot Pourri bowl with a pierced lid.

It's made from a single piece of Poplar and is about 4 inches in diameter and 3 inches deep.

After rounding the blank I shaped the outside of the lid leaving a small tenon and then cut the slots with a fluted cutter in my Dremel which was clamped (but not securely enough it turns out) to the toolrest. The lathe indexing system measured the angles to get me 12 slots which were cut to about 5 mm depth. The lid was then parted off and set aside while the main bowl was shaped and hollowed out with gouges and a scraper before sanding through to 600 grit and a couple of coats of cellulose sanding sealer were applied.

The lid was then remounted in the chuck via the small tenon that had been left and the inside hollowed to reveal the slots and a small lip put in place so that the lid stays in place. Once shaped the lid was sanded and the slots hand sanded to try and even up the sides. It was then removed from the lathe and the centre mark was used on the bench drill to centre a large drill bit to remove the tenon and leave the central hole which can be used to remove the lid. Once the sanding was all finished the lid was also sealed with two coats of CSS.

Finally the whole assembly was buffed to a nice smooth shine.

Tools used were roughing gouge, spindle gouge, bowl gouge and parting tool (plus Sorby Sandmaster !)
 

Attachments

  • Pot_pourri_bottom.jpg
    Pot_pourri_bottom.jpg
    110.9 KB
  • Pot_pourri_top.jpg
    Pot_pourri_top.jpg
    116.7 KB
  • Pot_pourri_side3.jpg
    Pot_pourri_side3.jpg
    142.2 KB
Pot Pourri

mounted on screw chuck and outside turned with spigot
mounted on spigot and turned inside
lid was mounted on screw chuck , dovetail cut inside
holes drilled freehand through outside to inside
mounted on dovetail and turned outside
remounted on screw and turned inside removing dovetail
had to leave nub inside because of screw length
finial to hide screw chuck hole

sanded to 320 and sanding sealer
unknown woods ..sorry
all turned with bowl gouge and parting tool

Steve
 

Attachments

  • 1.jpg
    1.jpg
    39.4 KB
  • 2.jpg
    2.jpg
    31.4 KB
  • 3.jpg
    3.jpg
    36.7 KB
  • 4.jpg
    4.jpg
    34.3 KB
This my Pourri Bowl
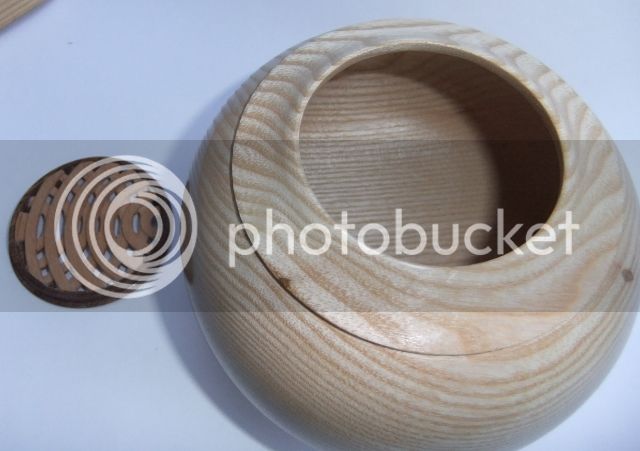
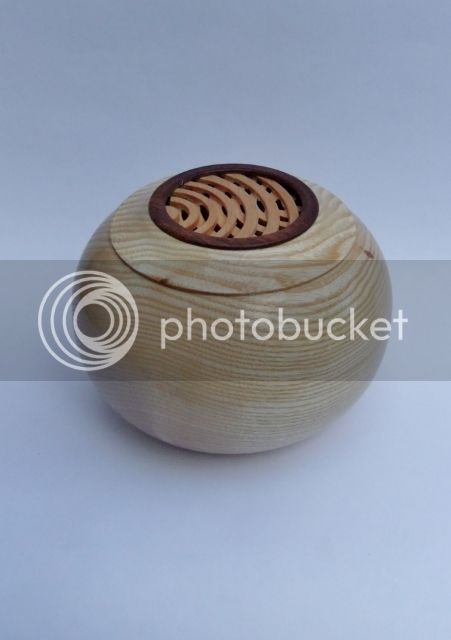
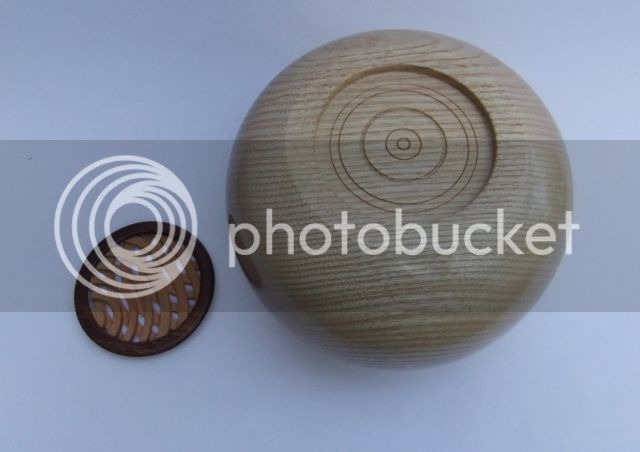
The Bowl is Ash? and the lid is mahogany the Finial is Oak I have not made any holes in the lid as the side has a hole in the bark recess so the perfume can come through when the lid is on or you can have the lid off for better release. I used a Bowl gouge, skew Chisel,scraper,Parting tool and a Robert Sorby hollowing tool, all sanded down to 80 grit and sealed with sanding sealer.
100_1975[1].jpg
100_1974[1].jpg
100_1985[1].jpg
 

Attachments

  • 100_1975[1].jpg
    100_1975[1].jpg
    64.8 KB
  • 100_1974[1].jpg
    100_1974[1].jpg
    58.3 KB
  • 100_1985[1].jpg
    100_1985[1].jpg
    70.2 KB
Here is my effort. This one has been a real challenge, first bowl, first lid, first piercing :)
Bowl is Cedar, lid is Sycamore. Size 145mm wide by 125mm tall including the lid.
Tools used, Bowl Gouge, parting tool and Hope 6mm carbon hollower.
Base was mounted on a screw chuck and outside shaped with tenon on foot then reversed to hollow out and reversed again in a donut chuck to finish foot. Lid was turned with a screw chuck and then reversed on bowl for finishing.
Finish is hard wax oil but on reflection I wish I had used sanding sealer and mc wax.

IMG_1584.jpg

IMG_1586.JPG

IMG_1588.JPG
 

Attachments

  • IMG_1584.jpg
    IMG_1584.jpg
    140.8 KB
  • IMG_1586.JPG
    IMG_1586.JPG
    154.9 KB
  • IMG_1588.JPG
    IMG_1588.JPG
    196.4 KB
This pot is made from beech, measures about 5" across the lid was mounted on a backplate and the first side turned then reversed and the second side turned. The main pot was turned using a hollowing tool the whole thing is sanded to 600grit.

57bad49e-51be-4446-aa22-e854e90a3036_zpsb03173fa.jpg


62929e46-9e6a-4fb6-90d7-6a14d3511750_zpsd76c4223.jpg


b366fe2f-8e18-4741-8a2a-cc29930b9fc9_zpsffe12527.jpg


Sorry for short description but trying to post this in the middle of a field
 
Status
Not open for further replies.

Latest posts

Back
Top