We've been needing a shed for some time, and the brief I got from my client (SWMBO) was that it needed to be large enough for all the garden equipment and that she didn't want to have to look at it from the kitchen window. Given that this looks over the back garden, and that I wasn't going to put it underground, and that I had put my "Harry Potter invisibility cloak" down somewhere and couldn't find it, this presented a problem.
The compromise solution was that it shouldn't look like a warehouse, and so the New England style salt box roof style shed was conceived. This is an adaption from the one shown in the Taunton Book on sheds.
Working on the basis that if you build it twice as big as you think you'll need, it will turn out to at least half the size you actually need, I settled on 12' x 8' which would make the best use of sheet materials, and would also be the maximum size that would fit between the hedge and the trees in the preferred location.
The back garden slopes down to the house somewhat, and this gives a clue as to how much earth was needed to be dug out. The diagonal piece of 6 x 2 is horizontal.
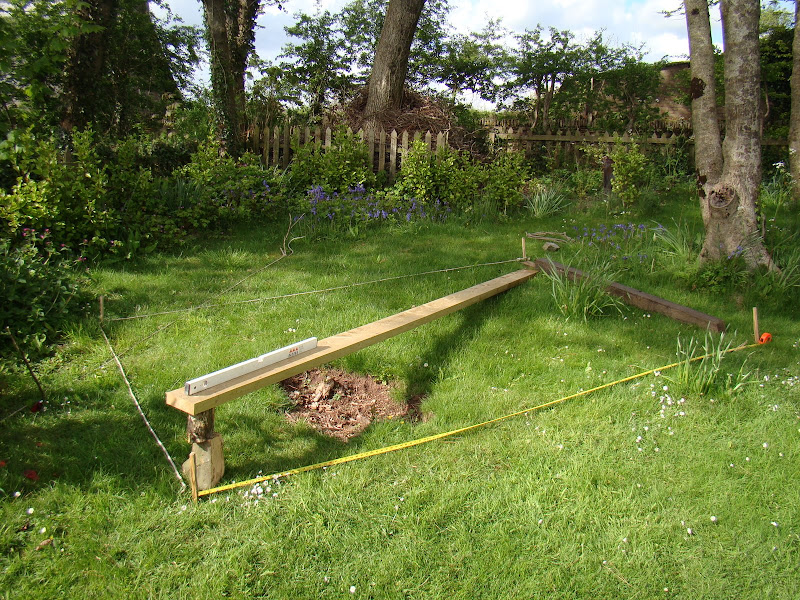
Having established the footprint, it became clear that it would need an additional 2' all the way round.
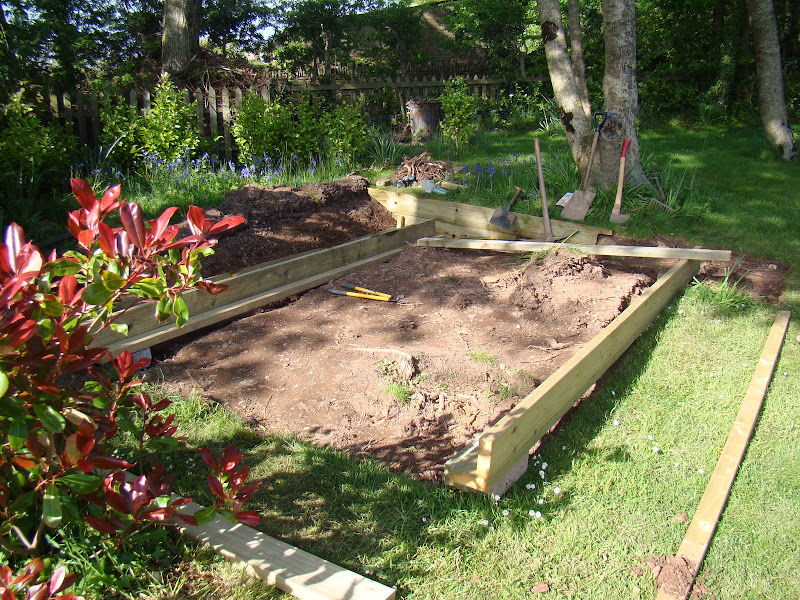
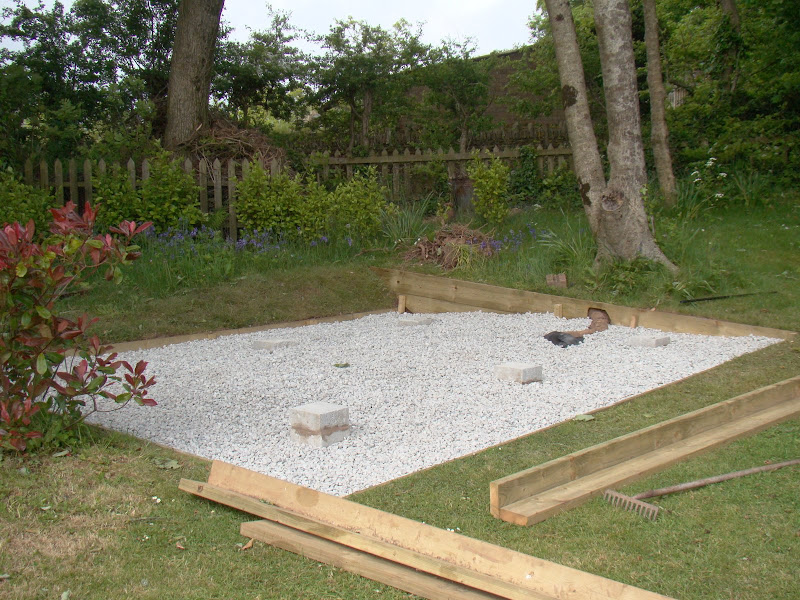
Six concrete block supports were layed on a bed of cement approx one block below ground level, on a firm, undisturbed substrate. The final prepared area was framed with gravel boards, lined with a weedproof membrane and covered with about 2" of gravel. And yes, that is a tree root you can see on the far side. I didn't want to cut through it, and it will be well below the bottom of the floor joists.
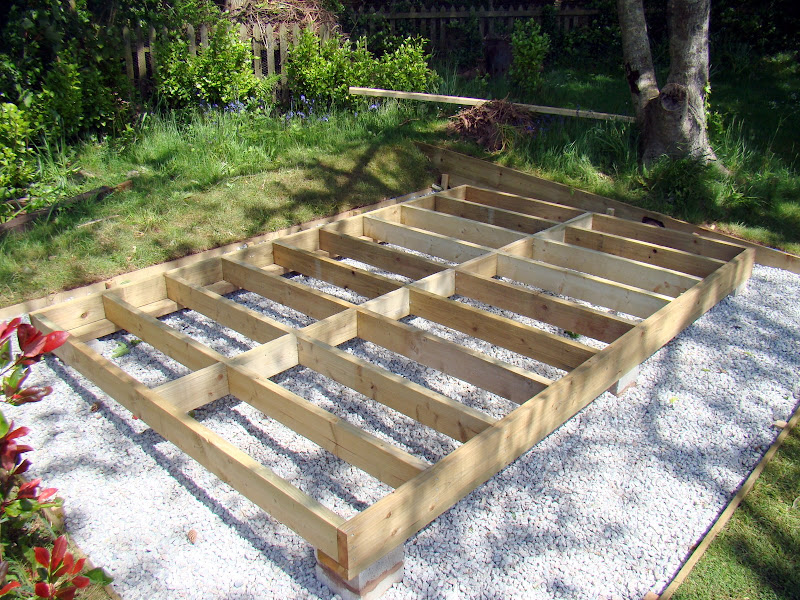
The frame for the floor rests on some DPC on the piers, and was built from 6" x 2", resting on an "L" shaped front and back beam, and with short lengths of 6" x 2" in between to stop twisting and to act as support for the edge of the 18mm ply floor panels.
Now comes a cock-up. I studiously took WIP photos of the roof joists and walls under construction, and somehow deleted them from the camera before downloading them! But here is the sequence. Having made the floor, I treated it with 2 coats of decking oil to protect it from the elements whilst it was still open to the weather, and then used it as a platform on which to build the walls and joists.
I marked out the roof trusses on the floor, and then screwed small blocks down to it to form a jig. This meant that all 8 roof trusses were identical. I then marked out one gable end on the floor, and used one of the trusses to mark out the shape of the roof on the floor. Blocks were screwed to the floor to form a jig so that both gables would be identical, and also that they would match the trusses. The frame was set out in 3" x 2", covered in 11mm OSB, and then clad in shiplap, which I had already painted with Cuprinol Heritage cream so that there should be no lines showing following any shrinkage. The gables are asymmetrical so having made one gable, the 2nd gable was set out on exactly the same jig, but then turned over before it was clad in OSB and shiplap - so I didn't have 2 left ends! Finally, I ran up a couple of louvred vents to set in the gables to aid ventilation.
Having made the gables, they weighed an absolute b***** ton, and I pulled a muscle in my back shifting them off the floor onto the garden to make way for the next wall - so out of action for 3 weeks!
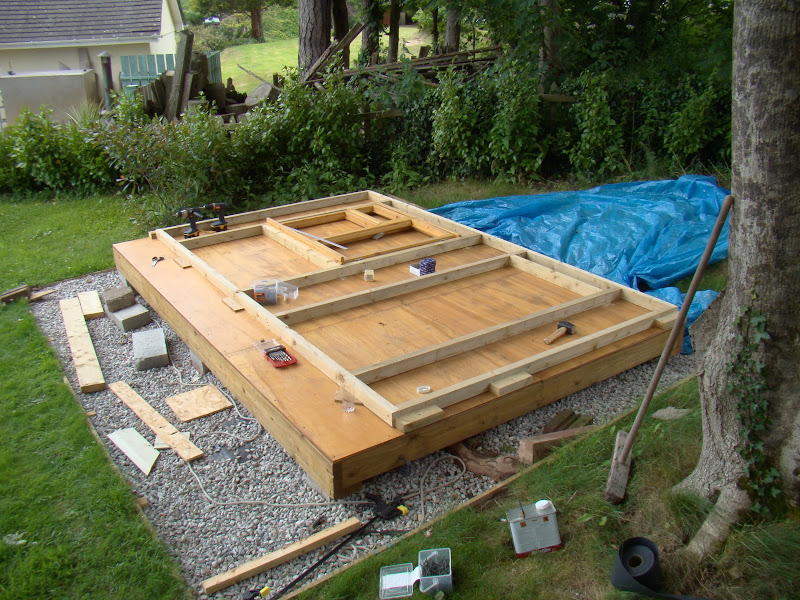
The front and back walls were made in a similar way. Here is the front wall on the floor jig. I've used blocks of 3" x 2" as side blocks which will ensure that the finished wall will fit nicely between the gables. Having learned the hard way how heavy the end result would be, I elected to leave the front and back walls unclad to make them lighter to manoeuvre into position, and just put a temporary diagonal brace across them to keep them square.
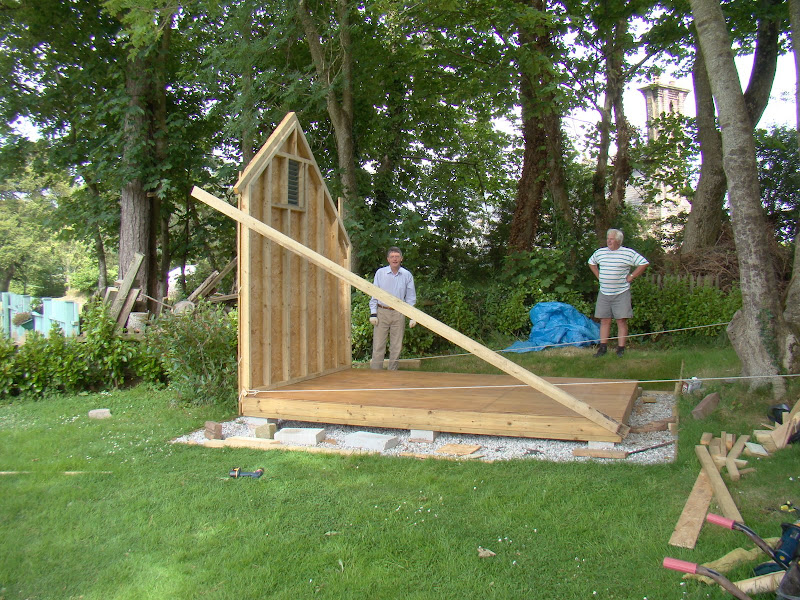
Next job, buy some beers and get the neighbours in. Up goes the first gable. The cladding overhangs the bottom of the wall by 7" so that it covers the floor joists. Ropes attached to the bottom corners and made fast to a tree ensured that the gable didn't slip off the floor as we lifted it into position.
The back wall goes up next.
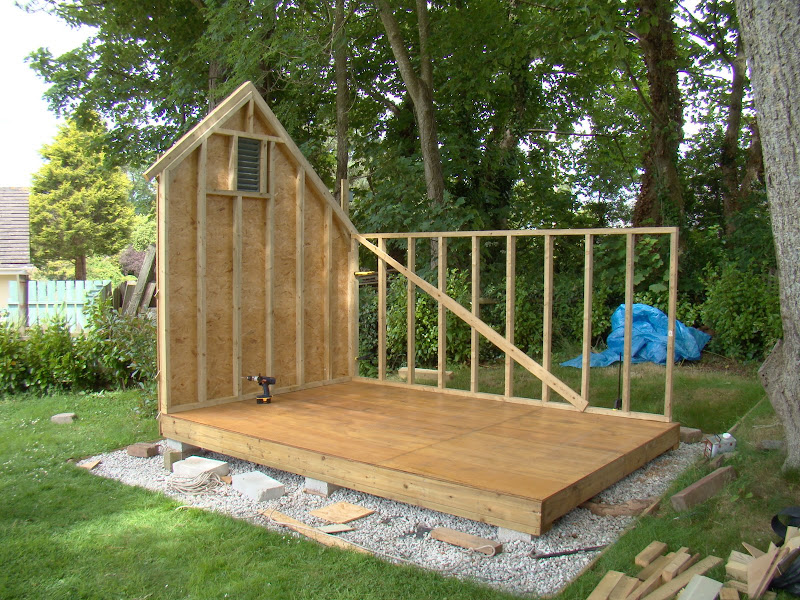
Followed by 2nd gable, and last of all, the front. The frames were screwed together at the corners and through the frames into the floor. The vertical pieces on the gable ends are temporary to stop the shiplap curling, as they are not yet nailed down the sides, as I will be slipping some DPC underneath and wrapping it around the corners to help weather proof the joins.
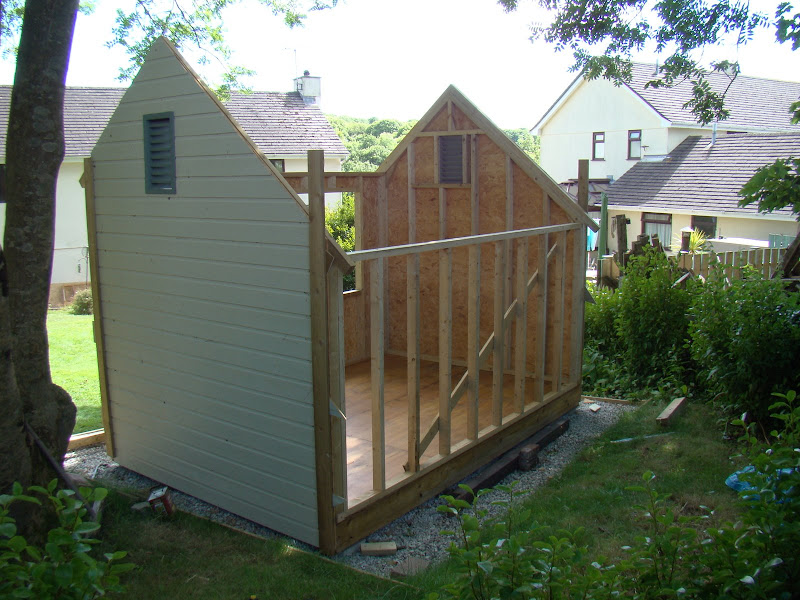
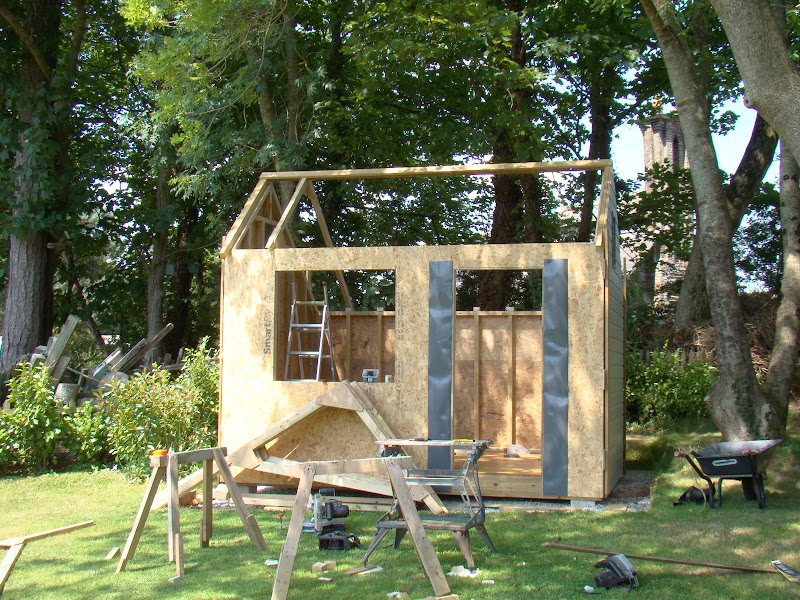
On goes the front cladding and the first of the roof trusses. I found it easier to line them up after I had attached two pieces of 4" x 1" along the ridge to form a "V" for the top of the joists to locate in to.
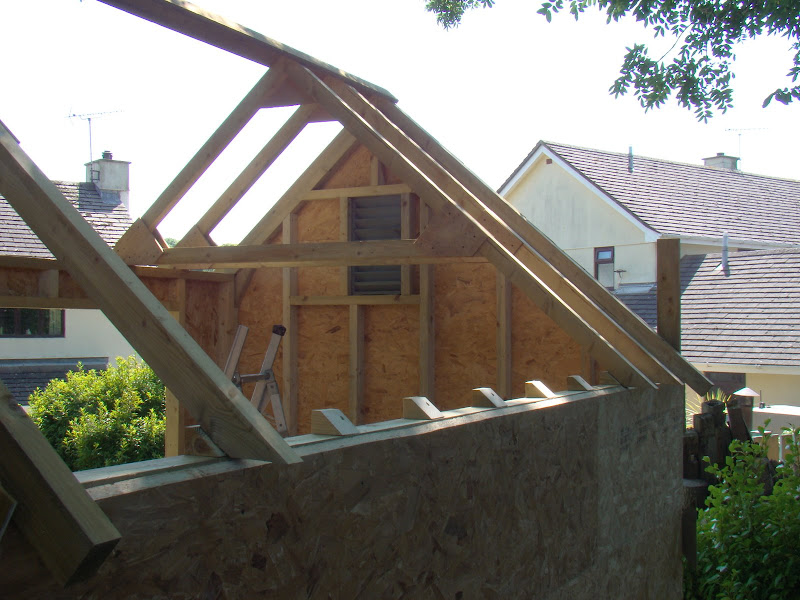
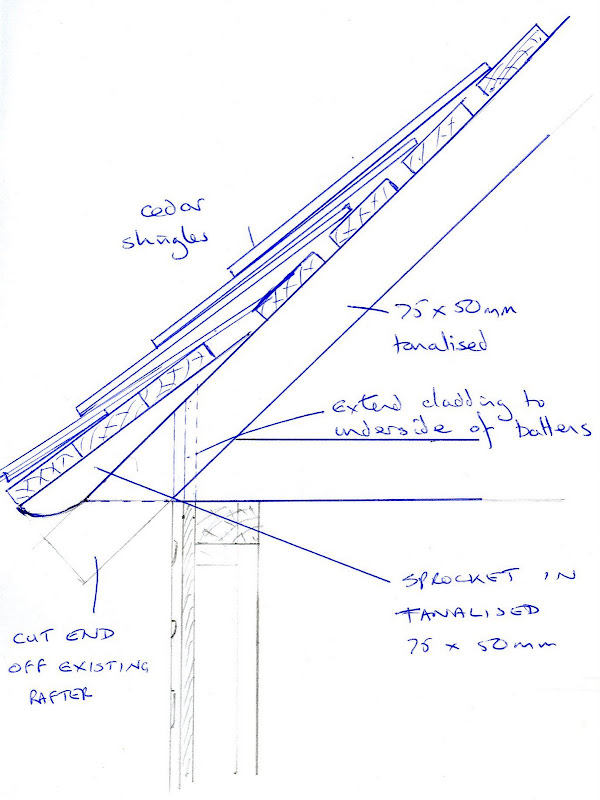
Discussions next about roofing. Initial plan had been for felt shingles, but SWMBO decided she wanted cedar shingles. This meant that the roof would have to be covered with battens rather than a sheet material (which I had already bought). We also decided, as an after thought, that we'd like the lower courses to have a "kick" to them, and that the front and back should show sprockets instead of being boxed in. This was covered in a separate thread.
Never having laid shingles before, I decided to start on the back slope which couldn't be seen from the house, and hoped that by the time I got to the front I would have made all the mistakes I was going to make. I'm using a piece of left over battening, clamped at each end to ensure that each row is straight, and using stainless steel ring shank nails. There was a howling gale blowing throughout the roofing stage and loose shingles from my pile were blowing all over the garden.
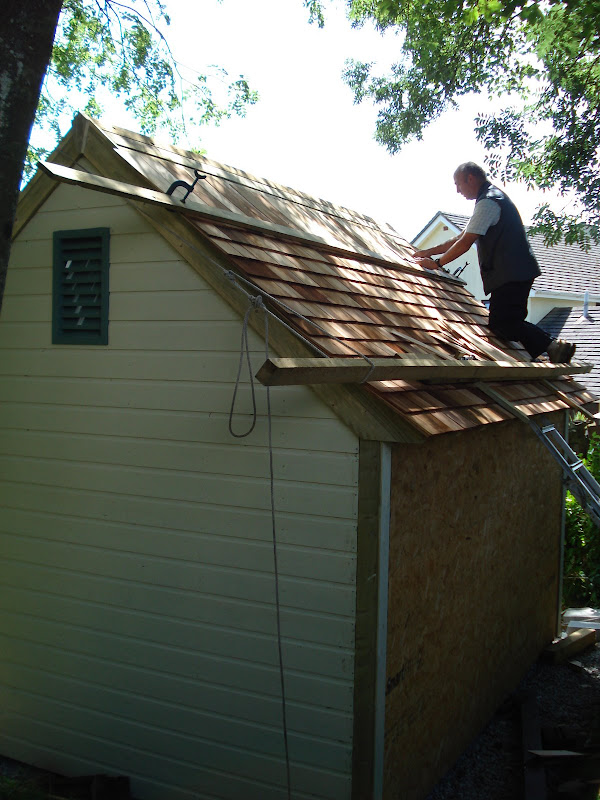
For the ridge, I've taken the shingles to the top, covered the ridge with a strip of 8" DPC, and then added the final row of shingles. For each row, by running a square along the supporting batten, I've ensured that they don't develope a slant, and a piece of tape on the square shows where the nails should go.
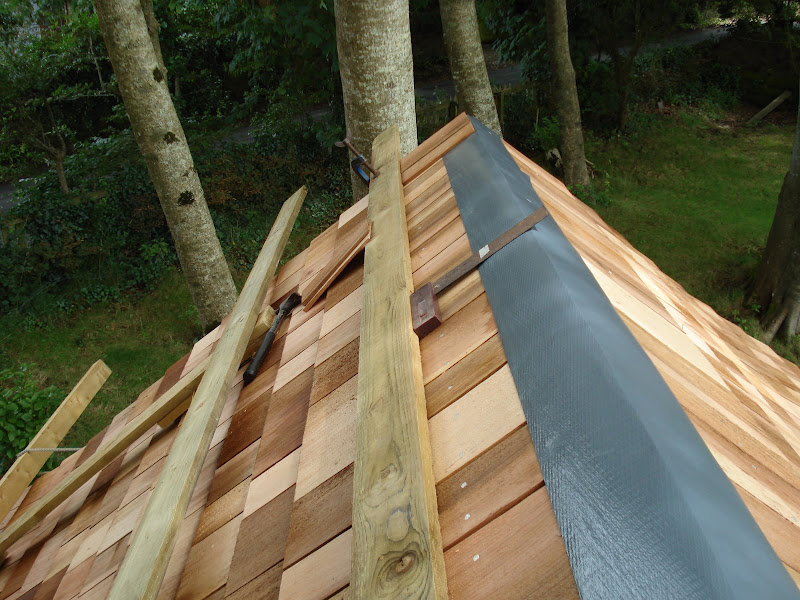
The ridge was finally covered by shingles laid with the grain along the roof line, starting from both ends and meeting in the middle.
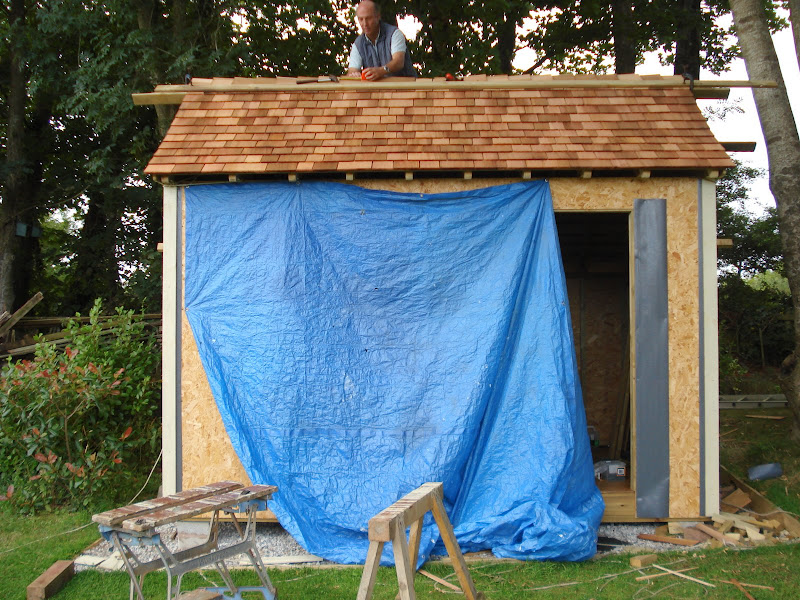
Final touches were to run up a brace and ledge t/g stable door, and cover over the corners. As an after-thought I've treated the shingle roof with Osmo UV Protection which claims to reduce the rate at which the shingles will weather to grey by a factor of 12, as well as inhibiting the growth of moss and algae, which I thought would be a good idea bearing mind it is partially under trees.
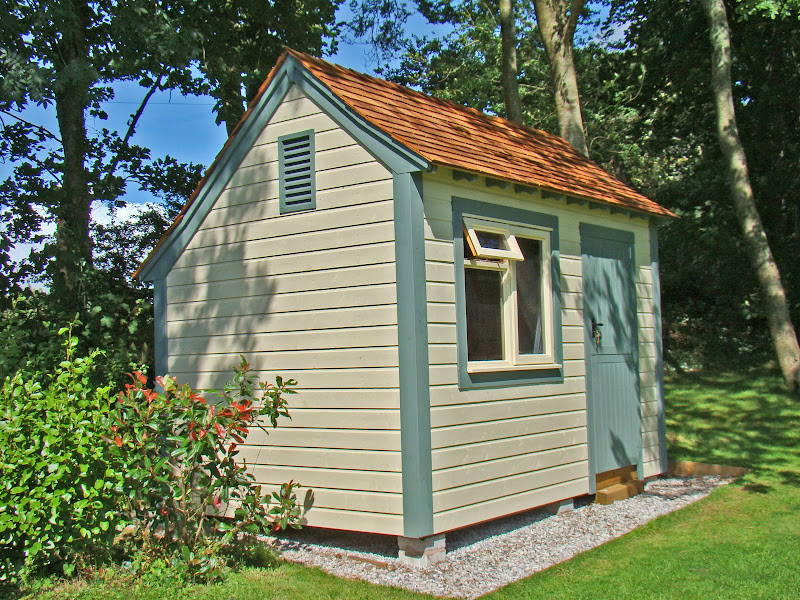
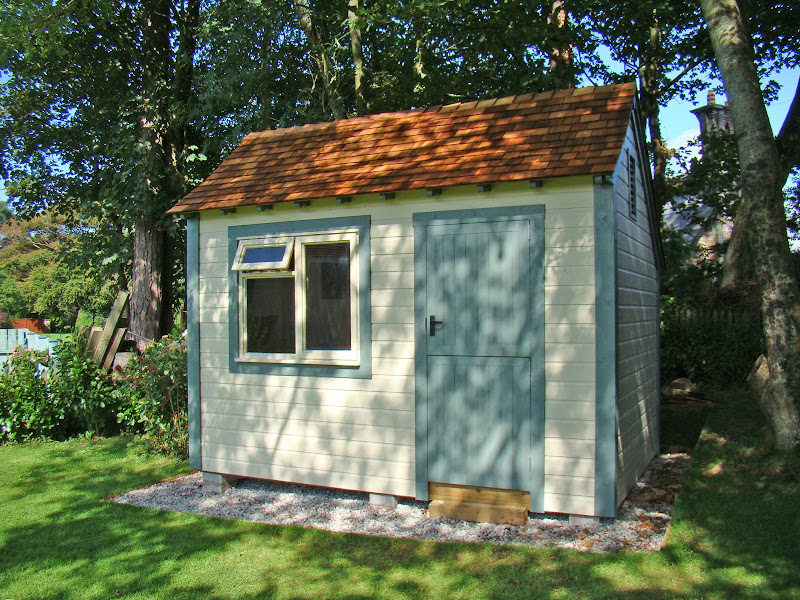
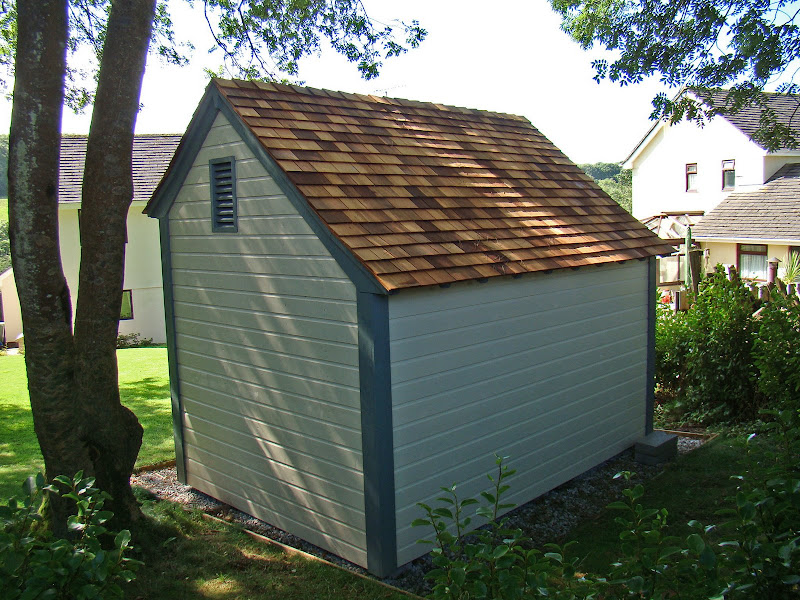
I'm quite pleased with the result. This was not a budget job - overall cost was about £1,300, which I think is a lot for a shed! But it is way more robust than anything from the DIY sheds, and hopefully different to what anyone else has. Costs could have been cut by going for a felt roof - the shingles alone were £350, plus £32 for the stainless steel nails, and £45 for the UV protection - so over £400 for the roof covering alone. I think the cost of something similar from a manufacturer would have been nearer £3,500, and that not including the considerable work in preparing the base. And it could double up as a studio, garden office or summerhouse.
The compromise solution was that it shouldn't look like a warehouse, and so the New England style salt box roof style shed was conceived. This is an adaption from the one shown in the Taunton Book on sheds.
Working on the basis that if you build it twice as big as you think you'll need, it will turn out to at least half the size you actually need, I settled on 12' x 8' which would make the best use of sheet materials, and would also be the maximum size that would fit between the hedge and the trees in the preferred location.
The back garden slopes down to the house somewhat, and this gives a clue as to how much earth was needed to be dug out. The diagonal piece of 6 x 2 is horizontal.

Having established the footprint, it became clear that it would need an additional 2' all the way round.

Six concrete block supports were layed on a bed of cement approx one block below ground level, on a firm, undisturbed substrate. The final prepared area was framed with gravel boards, lined with a weedproof membrane and covered with about 2" of gravel. And yes, that is a tree root you can see on the far side. I didn't want to cut through it, and it will be well below the bottom of the floor joists.

The frame for the floor rests on some DPC on the piers, and was built from 6" x 2", resting on an "L" shaped front and back beam, and with short lengths of 6" x 2" in between to stop twisting and to act as support for the edge of the 18mm ply floor panels.

Now comes a cock-up. I studiously took WIP photos of the roof joists and walls under construction, and somehow deleted them from the camera before downloading them! But here is the sequence. Having made the floor, I treated it with 2 coats of decking oil to protect it from the elements whilst it was still open to the weather, and then used it as a platform on which to build the walls and joists.
I marked out the roof trusses on the floor, and then screwed small blocks down to it to form a jig. This meant that all 8 roof trusses were identical. I then marked out one gable end on the floor, and used one of the trusses to mark out the shape of the roof on the floor. Blocks were screwed to the floor to form a jig so that both gables would be identical, and also that they would match the trusses. The frame was set out in 3" x 2", covered in 11mm OSB, and then clad in shiplap, which I had already painted with Cuprinol Heritage cream so that there should be no lines showing following any shrinkage. The gables are asymmetrical so having made one gable, the 2nd gable was set out on exactly the same jig, but then turned over before it was clad in OSB and shiplap - so I didn't have 2 left ends! Finally, I ran up a couple of louvred vents to set in the gables to aid ventilation.
Having made the gables, they weighed an absolute b***** ton, and I pulled a muscle in my back shifting them off the floor onto the garden to make way for the next wall - so out of action for 3 weeks!
The front and back walls were made in a similar way. Here is the front wall on the floor jig. I've used blocks of 3" x 2" as side blocks which will ensure that the finished wall will fit nicely between the gables. Having learned the hard way how heavy the end result would be, I elected to leave the front and back walls unclad to make them lighter to manoeuvre into position, and just put a temporary diagonal brace across them to keep them square.

Next job, buy some beers and get the neighbours in. Up goes the first gable. The cladding overhangs the bottom of the wall by 7" so that it covers the floor joists. Ropes attached to the bottom corners and made fast to a tree ensured that the gable didn't slip off the floor as we lifted it into position.

The back wall goes up next.

Followed by 2nd gable, and last of all, the front. The frames were screwed together at the corners and through the frames into the floor. The vertical pieces on the gable ends are temporary to stop the shiplap curling, as they are not yet nailed down the sides, as I will be slipping some DPC underneath and wrapping it around the corners to help weather proof the joins.

On goes the front cladding and the first of the roof trusses. I found it easier to line them up after I had attached two pieces of 4" x 1" along the ridge to form a "V" for the top of the joists to locate in to.


Discussions next about roofing. Initial plan had been for felt shingles, but SWMBO decided she wanted cedar shingles. This meant that the roof would have to be covered with battens rather than a sheet material (which I had already bought). We also decided, as an after thought, that we'd like the lower courses to have a "kick" to them, and that the front and back should show sprockets instead of being boxed in. This was covered in a separate thread.

Never having laid shingles before, I decided to start on the back slope which couldn't be seen from the house, and hoped that by the time I got to the front I would have made all the mistakes I was going to make. I'm using a piece of left over battening, clamped at each end to ensure that each row is straight, and using stainless steel ring shank nails. There was a howling gale blowing throughout the roofing stage and loose shingles from my pile were blowing all over the garden.

For the ridge, I've taken the shingles to the top, covered the ridge with a strip of 8" DPC, and then added the final row of shingles. For each row, by running a square along the supporting batten, I've ensured that they don't develope a slant, and a piece of tape on the square shows where the nails should go.

The ridge was finally covered by shingles laid with the grain along the roof line, starting from both ends and meeting in the middle.

Final touches were to run up a brace and ledge t/g stable door, and cover over the corners. As an after-thought I've treated the shingle roof with Osmo UV Protection which claims to reduce the rate at which the shingles will weather to grey by a factor of 12, as well as inhibiting the growth of moss and algae, which I thought would be a good idea bearing mind it is partially under trees.


I'm quite pleased with the result. This was not a budget job - overall cost was about £1,300, which I think is a lot for a shed! But it is way more robust than anything from the DIY sheds, and hopefully different to what anyone else has. Costs could have been cut by going for a felt roof - the shingles alone were £350, plus £32 for the stainless steel nails, and £45 for the UV protection - so over £400 for the roof covering alone. I think the cost of something similar from a manufacturer would have been nearer £3,500, and that not including the considerable work in preparing the base. And it could double up as a studio, garden office or summerhouse.


