I thought I would bring together some of the combined knowledge of the Axminster TS-250-2, there are a few derivatives of this saw under many guises, however this is a thread dedicated to the Axminster model.
For those that don't know the saw, it is a perfectly capable hobby saw, with a 250mm blade, cast iron top and is available with a cast iron side slide table, metal extension and upgraded fence: http://www.axminster.co.uk/axminster-ho ... w-ax943888
The first thing to carry out on this saw as with any other is alignment of the blade to the mitre slots, this is done by loosening four cap head bolts on the top of the table, the bolts now have a *threaded plate* they are screwed into below the pivot trunnion, do not undo the bolts too far or the plate will fall off, ensure all the blade adjustment locks are undone also (tilt and height), once you take off the blade insert at the bottom right corner there is a black rod this is one of the pivots for the motor assembly and is easily accessed from above the table to lever it into position to get the blade parallel to the table mitre slot, when checking for parallel its best to use the same tooth on the saw blade to check the dimension to the mitre slot, i.e. turn the blade through 90 degs to check the other end of the mitre slot, otherwise any distortion in the blade will be carried over to the dimension, see page 28 of the manual: http://www.axminster.co.uk/media/downlo ... manual.pdf
*threaded plate* at the time of posting this was a recent modification to the saw and only came to light later in the thread, so some of the later posts and earlier threads highlighting difficulty in adjusting the saw no longer apply, it is now very easy and able to be carried out above the table. Also thanks to Pike for pointing out that the locking mechanism for the saw tilt and height functions should also be loosened off to allow the whole assembly to move.
As with all table or cabinet saws the dust pick up is the most often talked about inadequacy, most have an open underside to allow shavings and dust to just fall to the floor with an extract on one side to hopefully pick up the detritus, with the Axminster TS-250-2 there is a simple solution, Axminster sell what is called a big mouth dust hood: http://www.axminster.co.uk/big-mouth-dust-hood-200114 this fits in between the support rails under the saw almost perfectly, a few millilitres needed to be trimmed off one side to fit.

A few self tapping screws and washers are all that is needed to hold it in place, there is debate about if the holes in the cabinet need sealing with tape, personally I have found it works very well with them sealed.
The blade, belt and motor inside the cabinet are protected by a dust shroud, this needs to be modified to take advantage of the new dust hood, the dust shroud is part No 20 page 32 of the manual: http://www.axminster.co.uk/media/downlo ... manual.pdf the modifications consist of removing one side and the connecting flange so it looks like this internally.

There are some who have just removed the dust shroud completely, this I feel could be detrimental to the belt drive due to being exposed to dust and debris, also the motor would be likely to draw in dust that is not deflected away from it.
I am at the moment making/drawing up a crown guard dust extract to compliment the underside of the table modification, but have to say that the current modifications have proved to be extremely effective in collecting all but a small amount of dust which is on the table top, the crown guard I previously had on my Triton Workcentre proved very effective and will form the basis of the new guard.
As with all saw tables of this type a stand of some kind is required for it to sit on, the 86Kg saw being too heavy to lift onto a bench each time it is needed, it also enables a convenient height to be achieved, this height I have made the same as my workbench, router table and Planner thicknesses top, enabling each to be used as an outfieed or infeed to each other, I have made my own units mobile by the addition of locking braked castors: http://www.castors-online.co.uk/acatalo ... tml#SID=39 These have proved to be most durable in use.
The stand can be of any type, indeed Axminster make one specifically for this saw: http://www.axminster.co.uk/axminster-ho ... and-508213 however this is not mobile, but could be made so, but it does not take into account the available side table extension: http://www.axminster.co.uk/axminster-ho ... kit-508313 There is also available a side slide mitre table: http://www.axminster.co.uk/axminster-ho ... kit-508214 or all the components can be bought as a complete kit at a small saving in cost in the option list at the side of the saw’s listing on the Axminster site: http://www.axminster.co.uk/axminster-ho ... w-ax943888
Many different options are available to build a base for this unit and inspiration can be drawn from the many different types shown on the internet: https://www.google.co.uk/search?q=home+ ... WQQsAQImQE
I chose my own route as I wanted something full width of the available options for the saw, this at the moment just consists of a mobile base on castors:

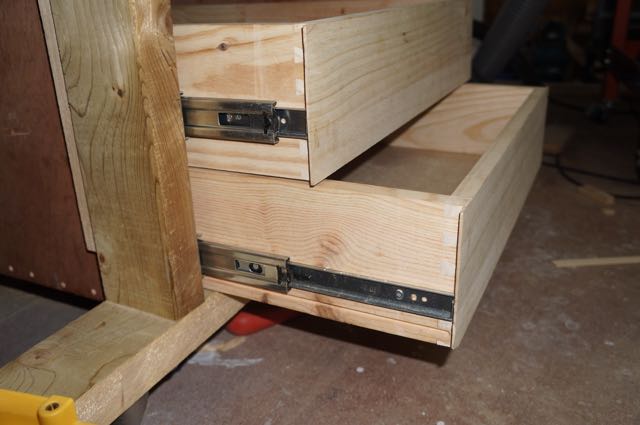
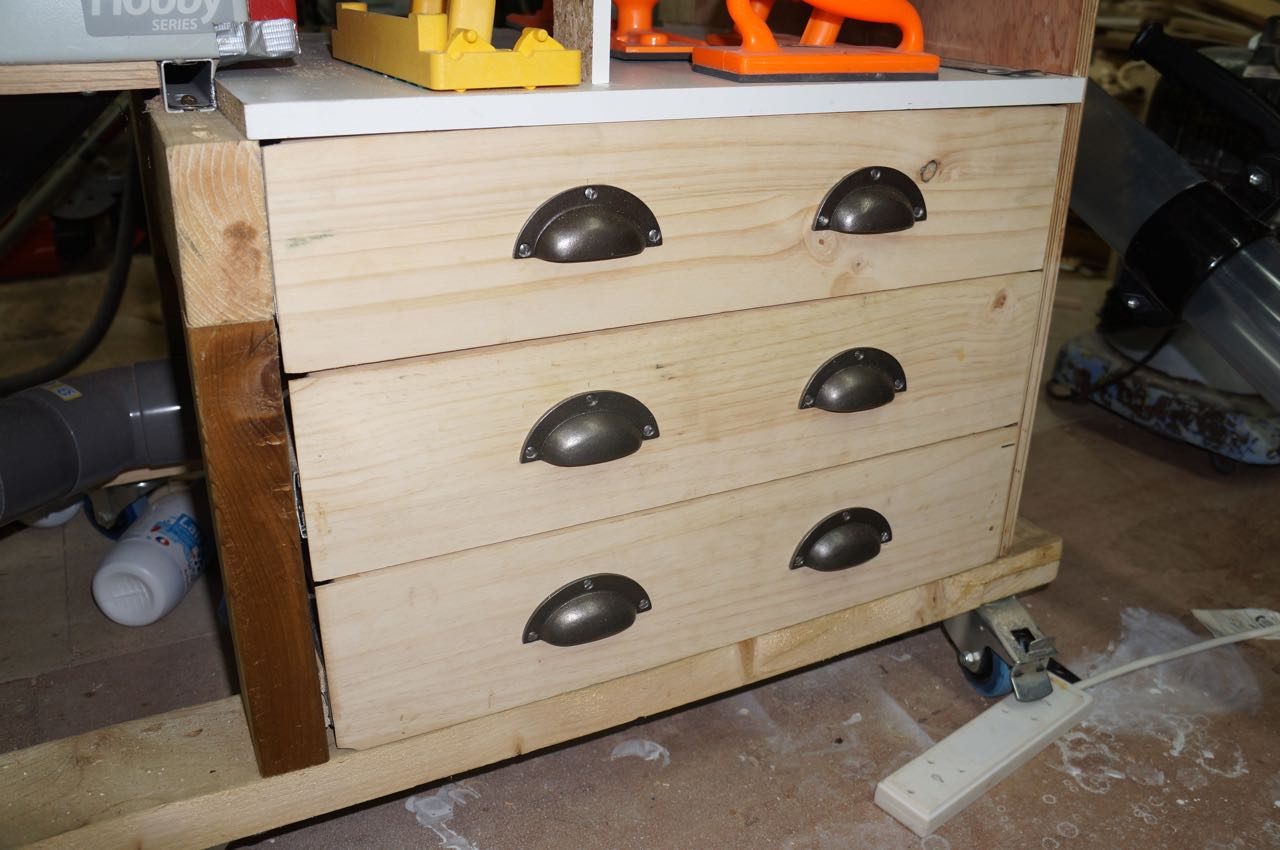
It will eventually be fitted out with drawers and peg board sides to accommodate the paraphernalia we all seem to accumulate, whilst carrying out this absorbing hobby.
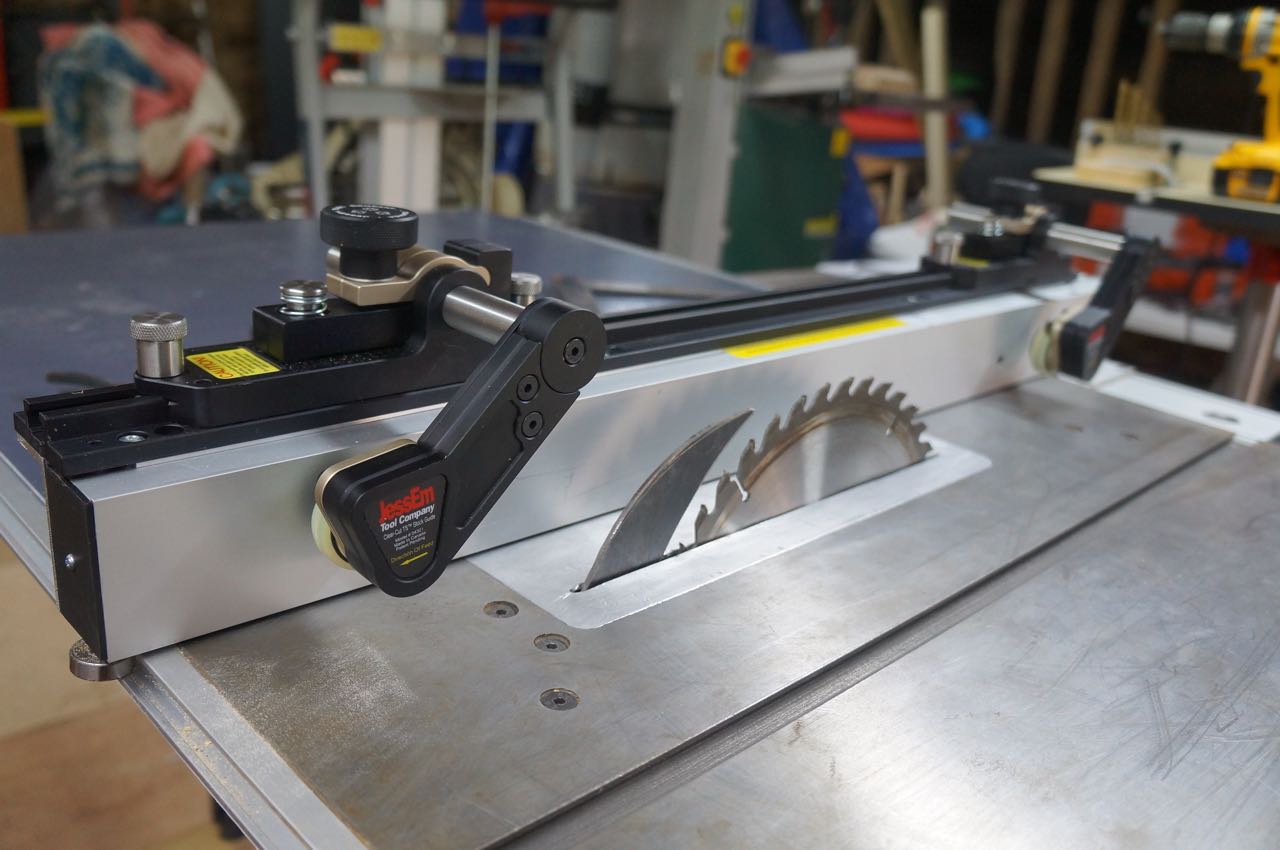
If buying the available extension table, you also get two new fence rails and a much longer fence, this reaches full width of the table and has a bearing on the far end that is pulled into place when the cam lock lever is depressed on the fence control end, this is a significant upgrade from the standard short fence which is only supported on one end, when setting up it is important to zero in the fence without the sub fence attached otherwise the scale on the left of the blade will be out of alignment when using the fence for small rips on the left of the blade.
Mike
Extension of extract hood picture added:

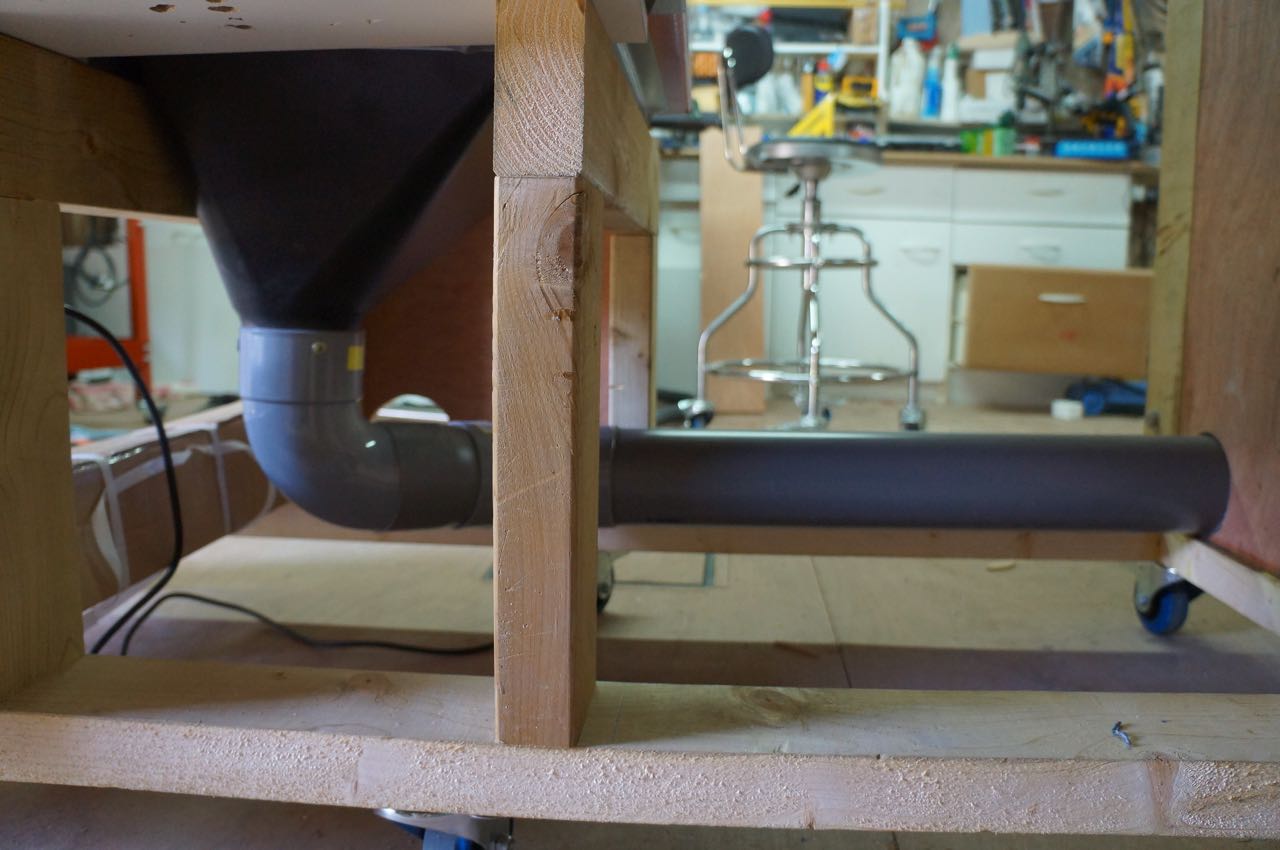
May have to re-arrange the extraction point as it interferes with using my bench as an outfeed table, the bench having full depth doors and drawers, may turn this around by 90degs and take the hose out behind the proposed draws at low level, too many 90deg bends are not a good idea so at the moment envisage using two 45deg bends to re-position the outlet.
French soil pipe is 100mm so fits perfectly, pics below show eventual arrangement.

For those that don't know the saw, it is a perfectly capable hobby saw, with a 250mm blade, cast iron top and is available with a cast iron side slide table, metal extension and upgraded fence: http://www.axminster.co.uk/axminster-ho ... w-ax943888
The first thing to carry out on this saw as with any other is alignment of the blade to the mitre slots, this is done by loosening four cap head bolts on the top of the table, the bolts now have a *threaded plate* they are screwed into below the pivot trunnion, do not undo the bolts too far or the plate will fall off, ensure all the blade adjustment locks are undone also (tilt and height), once you take off the blade insert at the bottom right corner there is a black rod this is one of the pivots for the motor assembly and is easily accessed from above the table to lever it into position to get the blade parallel to the table mitre slot, when checking for parallel its best to use the same tooth on the saw blade to check the dimension to the mitre slot, i.e. turn the blade through 90 degs to check the other end of the mitre slot, otherwise any distortion in the blade will be carried over to the dimension, see page 28 of the manual: http://www.axminster.co.uk/media/downlo ... manual.pdf
*threaded plate* at the time of posting this was a recent modification to the saw and only came to light later in the thread, so some of the later posts and earlier threads highlighting difficulty in adjusting the saw no longer apply, it is now very easy and able to be carried out above the table. Also thanks to Pike for pointing out that the locking mechanism for the saw tilt and height functions should also be loosened off to allow the whole assembly to move.
As with all table or cabinet saws the dust pick up is the most often talked about inadequacy, most have an open underside to allow shavings and dust to just fall to the floor with an extract on one side to hopefully pick up the detritus, with the Axminster TS-250-2 there is a simple solution, Axminster sell what is called a big mouth dust hood: http://www.axminster.co.uk/big-mouth-dust-hood-200114 this fits in between the support rails under the saw almost perfectly, a few millilitres needed to be trimmed off one side to fit.

A few self tapping screws and washers are all that is needed to hold it in place, there is debate about if the holes in the cabinet need sealing with tape, personally I have found it works very well with them sealed.
The blade, belt and motor inside the cabinet are protected by a dust shroud, this needs to be modified to take advantage of the new dust hood, the dust shroud is part No 20 page 32 of the manual: http://www.axminster.co.uk/media/downlo ... manual.pdf the modifications consist of removing one side and the connecting flange so it looks like this internally.

There are some who have just removed the dust shroud completely, this I feel could be detrimental to the belt drive due to being exposed to dust and debris, also the motor would be likely to draw in dust that is not deflected away from it.
I am at the moment making/drawing up a crown guard dust extract to compliment the underside of the table modification, but have to say that the current modifications have proved to be extremely effective in collecting all but a small amount of dust which is on the table top, the crown guard I previously had on my Triton Workcentre proved very effective and will form the basis of the new guard.
As with all saw tables of this type a stand of some kind is required for it to sit on, the 86Kg saw being too heavy to lift onto a bench each time it is needed, it also enables a convenient height to be achieved, this height I have made the same as my workbench, router table and Planner thicknesses top, enabling each to be used as an outfieed or infeed to each other, I have made my own units mobile by the addition of locking braked castors: http://www.castors-online.co.uk/acatalo ... tml#SID=39 These have proved to be most durable in use.
The stand can be of any type, indeed Axminster make one specifically for this saw: http://www.axminster.co.uk/axminster-ho ... and-508213 however this is not mobile, but could be made so, but it does not take into account the available side table extension: http://www.axminster.co.uk/axminster-ho ... kit-508313 There is also available a side slide mitre table: http://www.axminster.co.uk/axminster-ho ... kit-508214 or all the components can be bought as a complete kit at a small saving in cost in the option list at the side of the saw’s listing on the Axminster site: http://www.axminster.co.uk/axminster-ho ... w-ax943888
Many different options are available to build a base for this unit and inspiration can be drawn from the many different types shown on the internet: https://www.google.co.uk/search?q=home+ ... WQQsAQImQE
I chose my own route as I wanted something full width of the available options for the saw, this at the moment just consists of a mobile base on castors:

It will eventually be fitted out with drawers and peg board sides to accommodate the paraphernalia we all seem to accumulate, whilst carrying out this absorbing hobby.
If buying the available extension table, you also get two new fence rails and a much longer fence, this reaches full width of the table and has a bearing on the far end that is pulled into place when the cam lock lever is depressed on the fence control end, this is a significant upgrade from the standard short fence which is only supported on one end, when setting up it is important to zero in the fence without the sub fence attached otherwise the scale on the left of the blade will be out of alignment when using the fence for small rips on the left of the blade.
Mike
Extension of extract hood picture added:

May have to re-arrange the extraction point as it interferes with using my bench as an outfeed table, the bench having full depth doors and drawers, may turn this around by 90degs and take the hose out behind the proposed draws at low level, too many 90deg bends are not a good idea so at the moment envisage using two 45deg bends to re-position the outlet.
French soil pipe is 100mm so fits perfectly, pics below show eventual arrangement.


