Axminster TS-250 upgrading base and dust extraction.

UKworkshop.co.uk

Help Support UKworkshop.co.uk:

This site may earn a commission from merchant affiliate links, including eBay, Amazon, and others.

bobblezard

1 step forward, 2 back, 2 forward - rest - repeat
Joined
28 Jan 2013
Messages
231
Reaction score
51
Location
Uk
Hi,
I've had my TS-250 for around 9 months and have found it a good machine however seriously let down by the dust extraction. Also it has a large footprint for its size) and is a pain in the proverbial to move.
So I'm thinking a plywood base incorporating castors and a dust box and hood. Also tempted to extend it to be able to support the pressed steel table extension and include storage.
Has anyone done similar? I was sure I saw a pic a while ago but can't find it, Cheers
 
Sorry eventually found PaulR's posts from 2008 (should have searched TS-200 too :-o) . Something to aspire to, will be trying same but with a dustbox instead of one or both drawers. Will have to think about the router table idea too, must admit really don't like the pressed steel extension...
 
You may be interested in this:


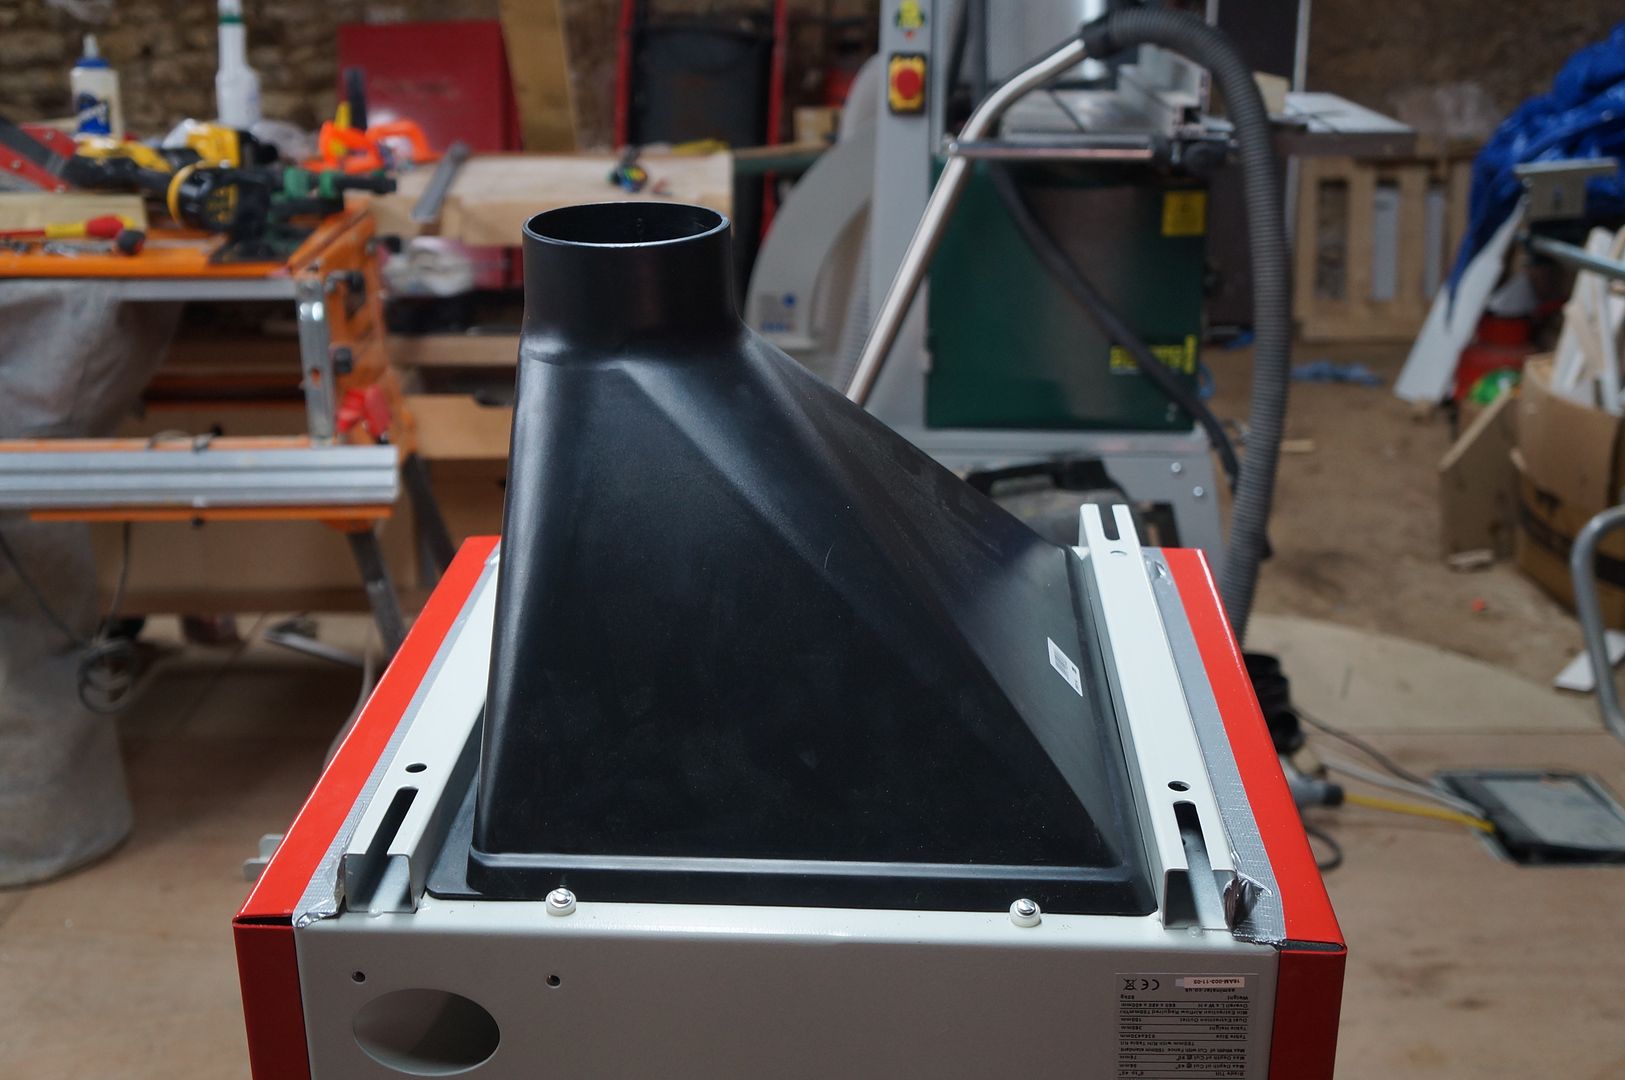
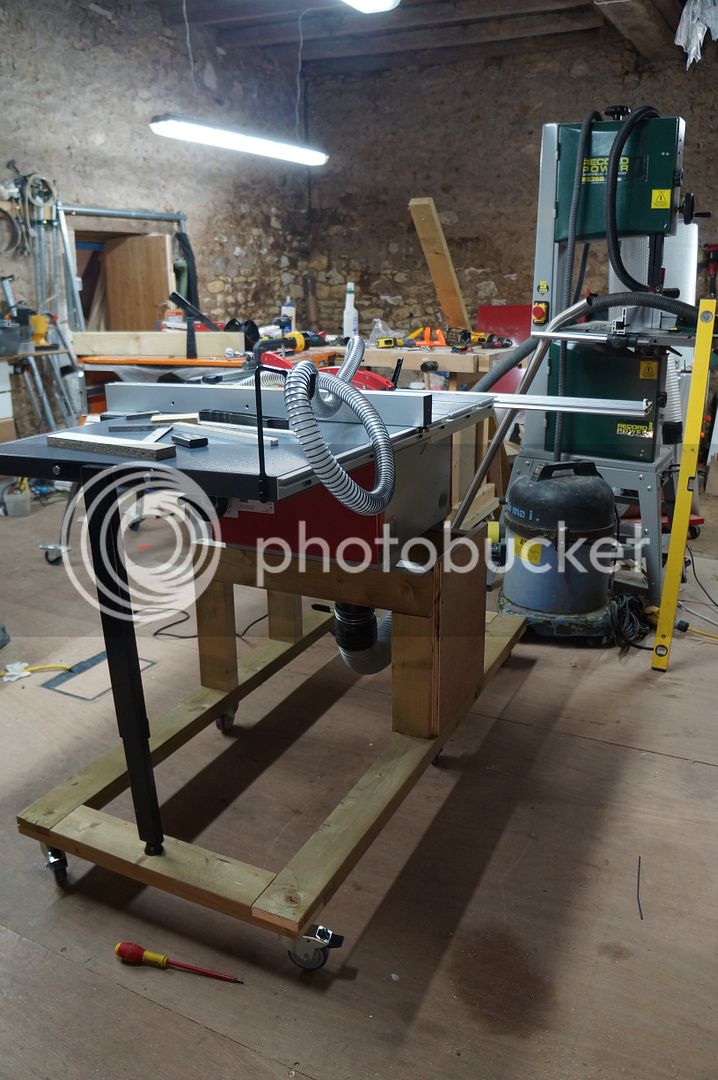
Its the big mouth exhaust duct supplied by Axminster, just put one on my recently delivered TS-250 and am building the rolling base at the moment:


Mike
 
I found the extraction rubbish on mine too. My saw is mounted on the legstand, and I have a wheeled kit under that so it's not too bad to move. I don't have or have much need of the extention table as most of my work involves the use of either a crosscut sled or my wegie sled. In an attempt to improve the dust capture, I sealed the base with a plywood sheet and installed a second 100 MM outlet in the base. My extractor will run 2 100mm hoses consecutively, so I run them both and this has improved the airborne dust. I find the extraction from the guard is still rubbish and I'm not sure if it's being helped or hindered by using 2 feeds.overall though the extraction is better for being modified. I can't use the guard with the crosscut sled anyway. Overall I'm very happy with my saw, and with very little fettling it has proved to be accurate and repeatable.
 
Going on the basis that the TS 250 seems to be a slightly scaled-up version of the Kity 419[cough], er, TS 200:

DX on most cabinet saws is rubbish, almost by definition, as the things simply chuck too much dust around, literally. Traditionally, you used to let it fall where it would and drop down to the bottom of the cabinet, and sent the lad in there once a week with dustpan and brush. My grandfather's mill had decent-sized pits underneath the big Wadkin circular (table) saws, and cleaning (shovelling) those out was a six-monthly thing. To be fair, bigger-kerfed blades and no man-made boards meant bigger chips, so there was relatively less fine dust floating about compared to our uses.

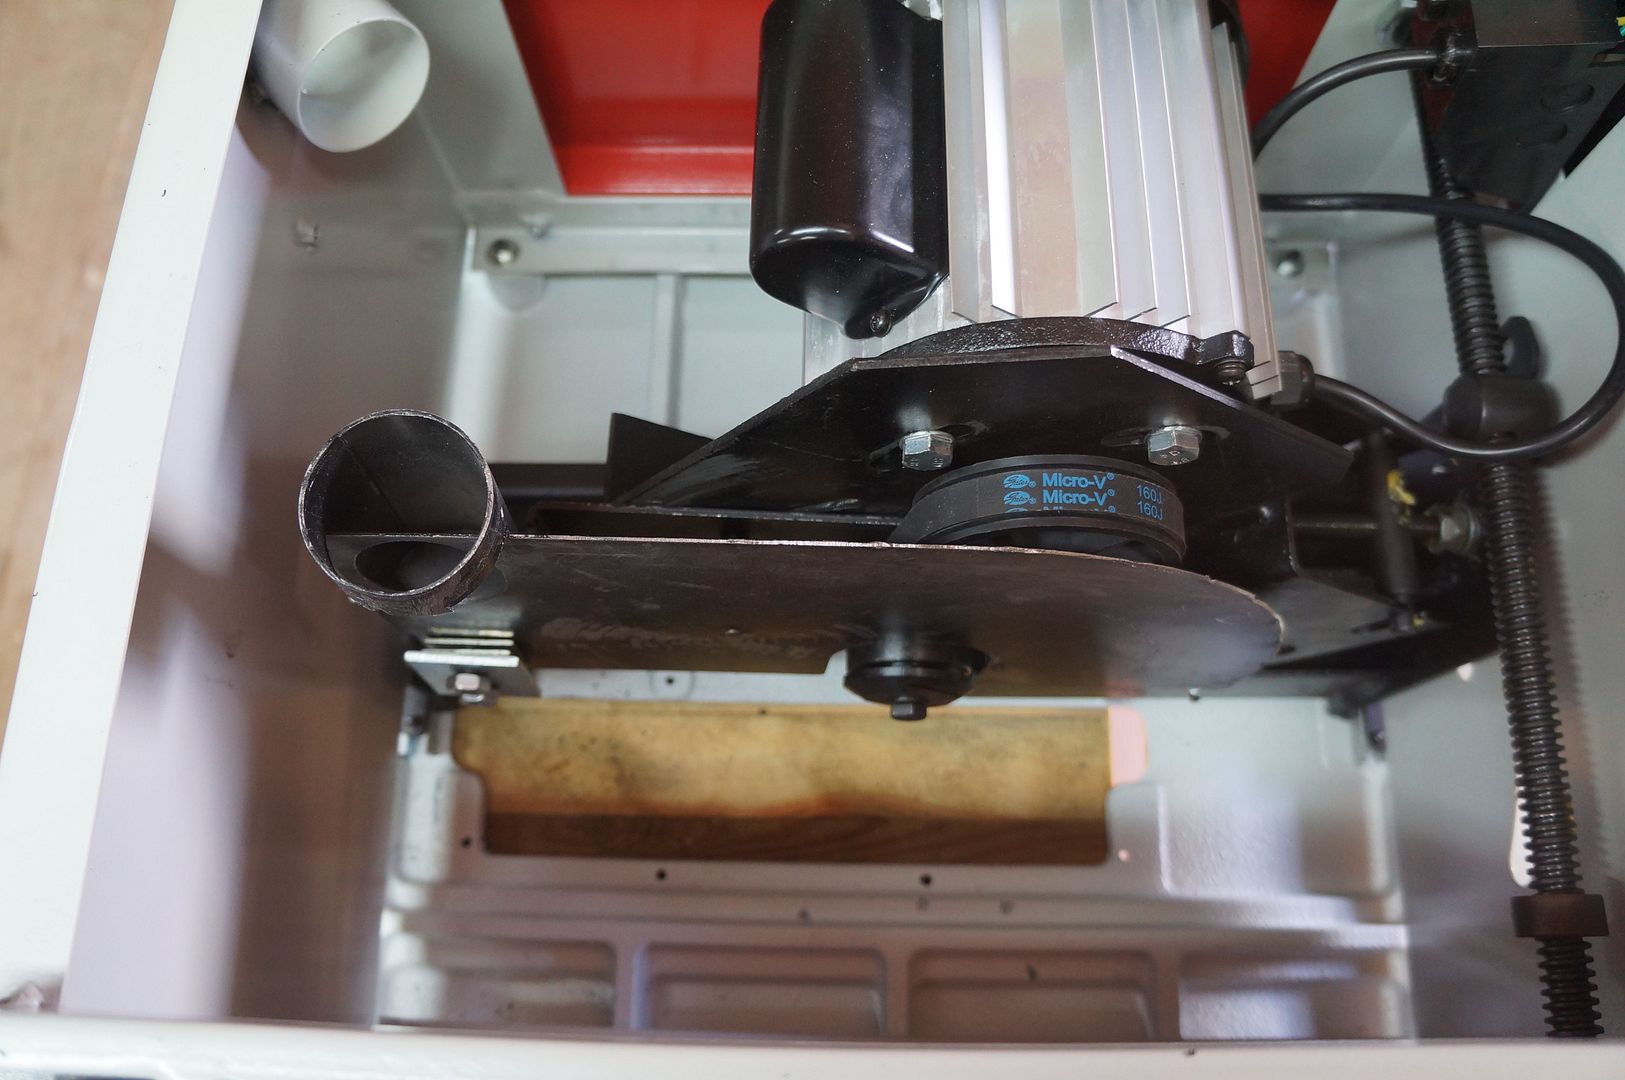
The standard mod on the Kit[ahem] TS 200 was to remove the side of the blade guard and the nozzle, inside the cabinet and block up the big quadrant hole where the nozzle came out of the back. This reduced clogging mainly, and let the dust get away from the blade better. The trouble spot in those saws is really the belt behind the guard - keeping that side of the guard fitted keeps the worst of the "high speed" dust away from the belt and pulleys. On the Kity/TS 200, the mounting pillars for the guard also keep the riving knife mounting aligned with the tilt + rise and fall carriage of the saw. So you wouldn't want to remove it completely in any case, as the riving knife would flop around.

I'd hope this arrangement has been improved on the TS 250, as it was rather poor design (there's also a thin steel strap on the older TS 200s, which keeps the knife reasonably upright, and that strap bends very easily).

Honestly, I think you are doing the best that can be done by putting a big hopper on the bottom. If you take off the side of the guard inside (involves cutting through tack welds, probably, so is not easily reversible), that might also improve the amount of chips & dust that goes all the way round on the blade, back up topside. That's the stuff that the crown guard hose catches (theoretically!).

But I note that even very big panel saws have crown guard extraction, so clearly nobody has a perfect answer.

If you then make it easy to remove a side panel for regular cleaning (or get used to having to tip the thing over), and use something like teflon spray on the leadscrews inside so that less sawdust sticks to them, you'll probably have fettled it to be as good as it gets. Of course you'll be resigned to doing a proper hoover-out occasionally, depending on how much you use it and what you cut with it. Man made boards will be far worse than natural timber, and MDF worst of all.

The chute and 4" attachment shown above probably work best. It's what I have too (on a TS 200).

The last owner of my old Kity had also tried to block up the gaps under the table, where it sits on the cabinet frame. I wouldn't do that, personally, and I removed the gaffer tape applied. I don't think a howling gale through the blade plate is a good idea, especially if using a ZCI - you need air volume moving, not just a big pressure difference.

Get a big, floppy masonry paintbrush, or one of these:
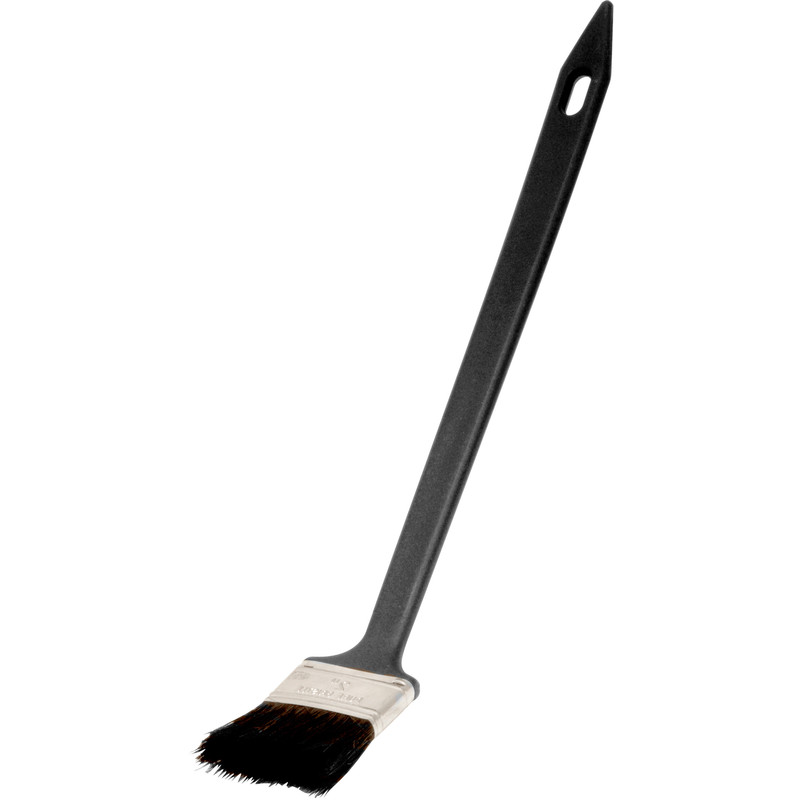

HTH, E.
 
Do you need the leg for the extension wing to always be down? or can you leave it off when moving or when there is little weight on it? I was thinking of using one of these on castors and hadn't thought about that leg.
 
Eric The Viking":3n1z77b3 said:
The standard mod on the Kit[ahem] TS 200 was to remove the side of the blade guard and the nozzle, inside the cabinet and block up the big quadrant hole where the nozzle came out of the back. This reduced clogging mainly, and let the dust get away from the blade better. The trouble spot in those saws is really the belt behind the guard - keeping that side of the guard fitted keeps the worst of the "high speed" dust away from the belt and pulleys. On the Kity/TS 200, the mounting pillars for the guard also keep the riving knife mounting aligned with the tilt + rise and fall carriage of the saw. So you wouldn't want to remove it completely in any case, as the riving knife would flop around.

I'd hope this arrangement has been improved on the TS 250, as it was rather poor design (there's also a thin steel strap on the older TS 200s, which keeps the knife reasonably upright, and that strap bends very easily).
HTH, E.

No improvement I am afraid, its still the same, however I did remove the side of the blade guard and nozzle and blocked up the little quadrant hole, I also sealed all the other slots and gaps to force the extraction air to suck through the blade insert, its very strange and I have never seen it mentioned that we suck from below the blade and also try and suck above through the crown guard, the two opposing air flows must fight each other to a certain extent, so this afternoon I put a blower on the crown guard to try it out, needs work. LOL

If you have the extended table and fence rail, IMO the saw could be moved without the leg being down as the fence rail is strong enough in cantilever to support the table, unloaded, just put the leg back down once moved.

Mike
 
MikeJhn":555u40sv said:
Eric The Viking":555u40sv said:
The standard mod on the Kit[ahem] TS 200 was to remove the side of the blade guard and the nozzle, inside the cabinet and block up the big quadrant hole where the nozzle came out of the back. This reduced clogging mainly, and let the dust get away from the blade better. The trouble spot in those saws is really the belt behind the guard - keeping that side of the guard fitted keeps the worst of the "high speed" dust away from the belt and pulleys. On the Kity/TS 200, the mounting pillars for the guard also keep the riving knife mounting aligned with the tilt + rise and fall carriage of the saw. So you wouldn't want to remove it completely in any case, as the riving knife would flop around.

I'd hope this arrangement has been improved on the TS 250, as it was rather poor design (there's also a thin steel strap on the older TS 200s, which keeps the knife reasonably upright, and that strap bends very easily).
HTH, E.

No improvement I am afraid, its still the same, however I did remove the side of the blade guard and nozzle and blocked up the little quadrant hole, I also sealed all the other slots and gaps to force the extraction air to suck through the blade insert, its very strange and I have never seen it mentioned that we suck from below the blade and also try and suck above through the crown guard, the two opposing air flows must fight each other to a certain extent, so this afternoon I put a blower on the crown guard to try it out, needs work. LOL

If you have the extended table and fence rail, IMO the saw could be moved without the leg being down as the fence rail is strong enough in cantilever to support the table, unloaded, just put the leg back down once moved.

Mike

Thanks for that.

My TS200 is in pieces at the moment, but when I do reassemble it. I intend to try it without blocking up the areas round the top of the frame. l have a suspicion that the better airflow will help, as it's going top-to-bottom, which is how we want the dust to go, too. I doubt it will ever be perfect - table saws usually aren't.
 
Eric

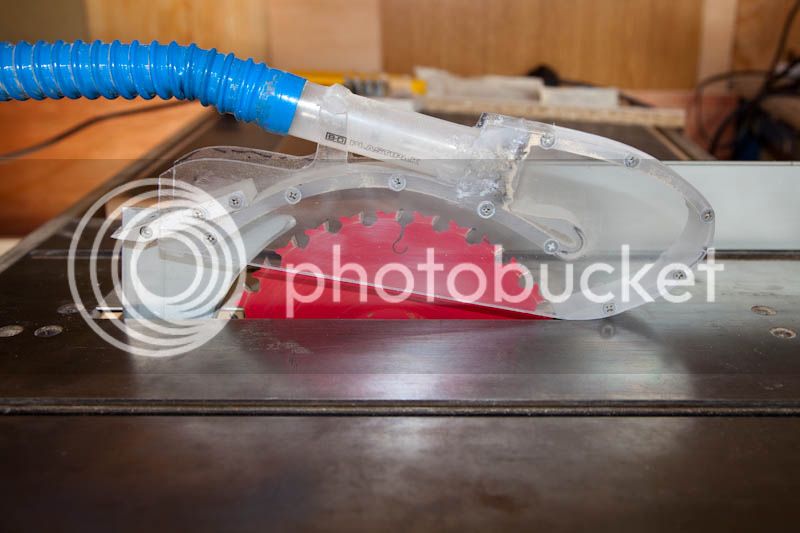
Have to say I am very happy with the dust extraction from under the table, nothing seems to be anywhere except on the top, my conclusion is its coming from the front of the blade as it hits the workpiece, the crown guard I made for the Triton cured that (pic below) by keeping the blade totally enclosed above the workpiece and applying a negative pressure in front of the blade where the tooth of the blade first hits, I am going to do the same thing to the TS-250 as soon as I have finished the current project? its only a 212m/sq house re-build, so should not be long. #-o I told my OH I did not want another project. (hammer)


Mike
 
transatlantic":2bn6y3nh said:
Do you need the leg for the extension wing to always be down? or can you leave it off when moving or when there is little weight on it? I was thinking of using one of these on castors and hadn't thought about that leg.

Just another thought, the leg already has a thread on the bottom for the adjustable foot, why not just replace it with a castor, you may have to brace the leg to prevent it bending the fixings whilst being moved.

Mike
 
Thanks for that Mike, I've got a 350x350mm extraction hood but it's not as deep as the Axi big mouth but should do. I should follow your example and just get started but time is an issue and the saw does work...
 
Having now used this saw for a few days lining the inside of chimney alcove I am impressed with the accuracy and cutting ability of it, the dust collection under the table with the big mouth duct is excellent, I would say near 100% with the Numatic on the crown guard there is very little to clear up, I would say about a tea cup full after four cuts down a 25mm x 2500mm chipboard sheets, I am not sure how this compares with other saws, but its a quantum lead from the Triton.

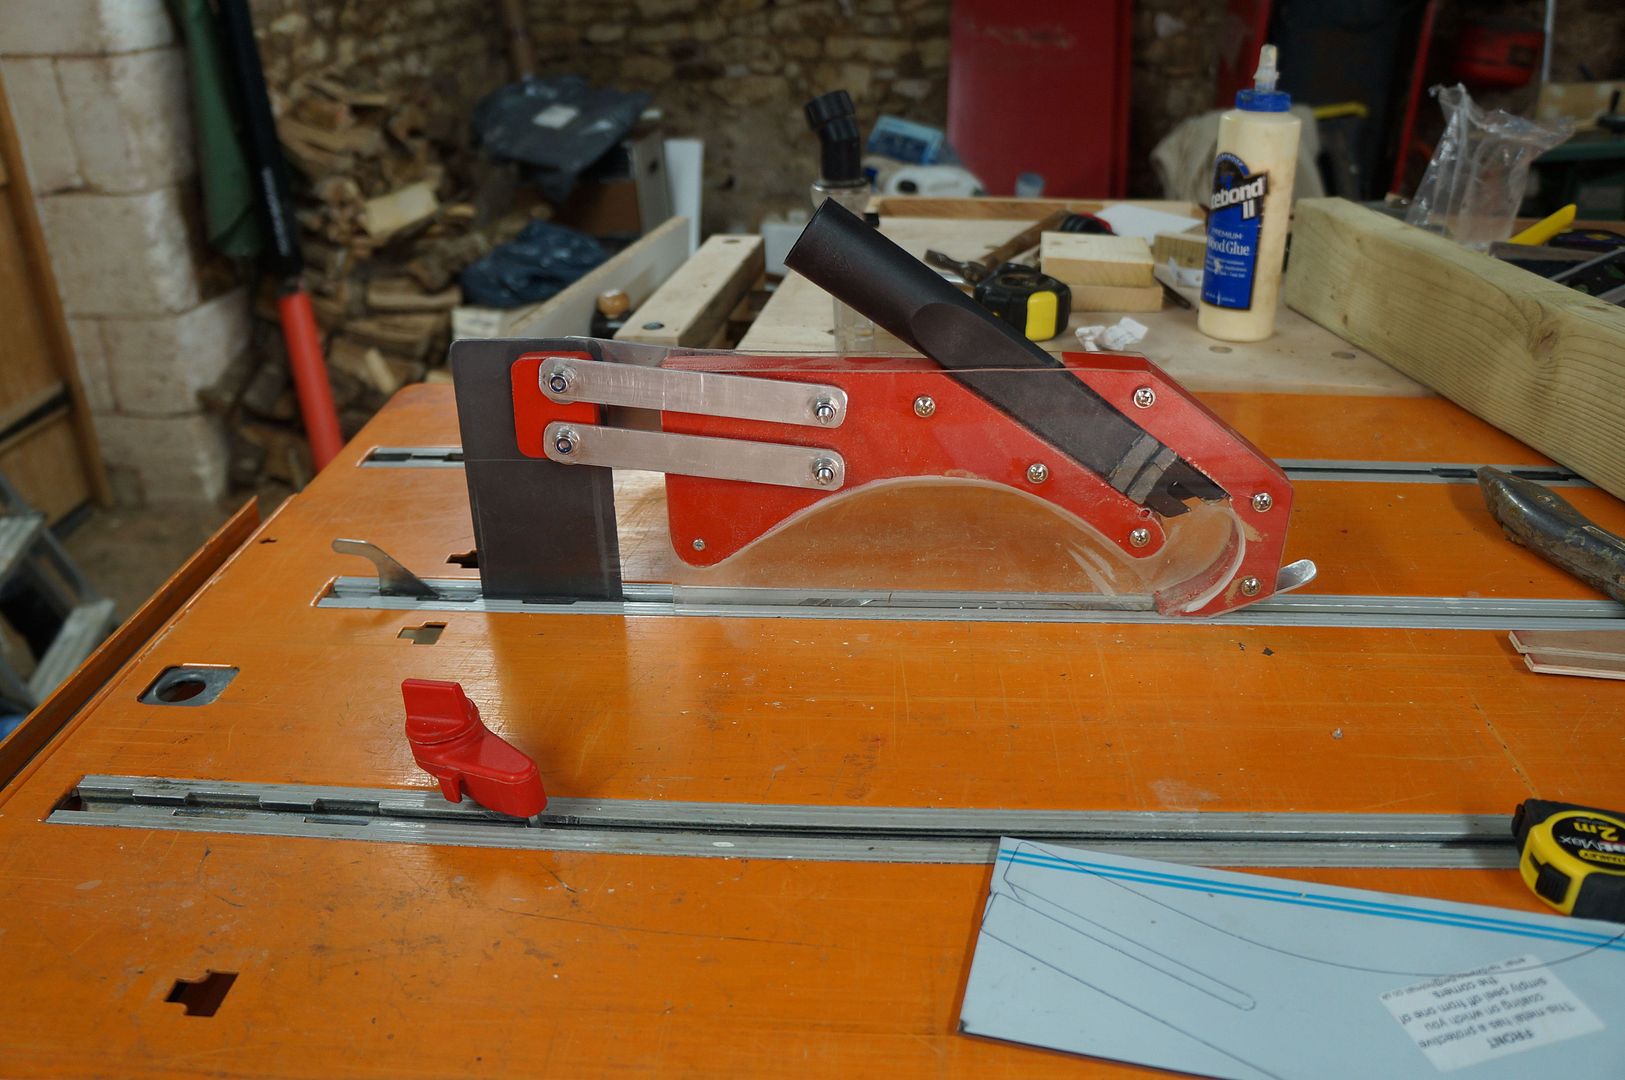
Now to design a better crown guard, possibly out of clear polycarbonate, may give the parallelogram fixing to the riving knife a second thought.

Mike
 
MikeJhn":1915bj3b said:
You may be interested in this:

Its the big mouth exhaust duct supplied by Axminster, just put one on my recently delivered TS-250 and am building the rolling base at the moment:

Mike

Hi Mike.

Please can you confirm if the exhaust duct you mentioned is this one:

axminster /big-mouth-dust-hood-200114

Sorry, don't have permission to post links for some reason..

Many thanks in advance.

Joe
 
That's the one here is the link: http://www.axminster.co.uk/big-mouth-dust-hood-200114 it needs a few mill taken off one side to fit between the support runners and for it to work effectively you need to modify the internal dust shroud.

Photo shows the inside after modification, once you have yours upside down all will become clear, I blocked off every hole I could find internally and externally to ensure my extractor was sucking everything through the blade insert, even the mounting holes inside the support runners where taped over.


Mike
 
Back
Top