Bodgers
Established Member
The throat plate that comes with my new Axy table saw is much better than the old TS200, but the actual clearance is way too large, enough for strips to regularly get trapped and caught up.
I tried MDF for a throat plate before, but it didn't work due to it being much to flaky down to the small details needed on my old table-saw cut out.
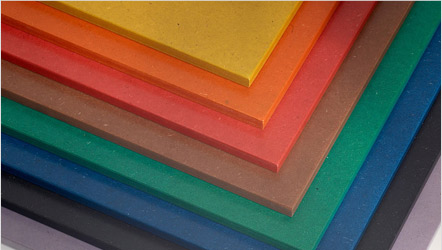
So this time, I went for Valchromat. It is a sort of high density version of MDF, usually coloured all the way through. An A3 sized 9mm sheet can be had for about £10-12 delivered.

I could have just rough cut this on the bandsaw and then used a flush trim bit on a router, using the existing throat plate as a template. But...I wanted to complicate things, and use the X-Carve CNC. It hasn't had much use in the 18 months I've had it and I wanted to see if this hobby CNC is capable of high accuracy machining. I've only used it for signs for the kids bedrooms and other stuff where 100% relative accuracy isn't needed. These machines do come in for criticism - mainly over rigidity and consistency. I have the 2nd gen (2017 on) 750mm machine and it has always seemed rigid enough to me.
First job was to flatten the waste board, using a sub board as a base. I'd never done this before, and I knew the factory board wasn't dead flat. The reason being that the throat plate needed to be 1.5mm thinner than the actual 9mm Valchromat stock I was using, so it would need the whole surface of the material milled down by 1.5mm. Any unevenness in the wasteboard would affect the flatness of the throat plate.
Flattening using a, ahem, 'Bottom Cleaning' bit...
https://youtu.be/ArrDcHSYr2w
Next up was to measure and photograph the throat plate, with a ruler as reference and then import that into Fusion 360. I don't use Sketchup anymore as Fusion is much better suited to CNC and 3D printing as it comes with CAM modes for CNC work. It also seems a much better designer to me than Sketchup.

Once the model was done, I used the CAM mode to generate a cutting path for the plate and for milling the plate surface down. I then generated the GCode and sent to the XCarve where I set it off cutting...
Cutting
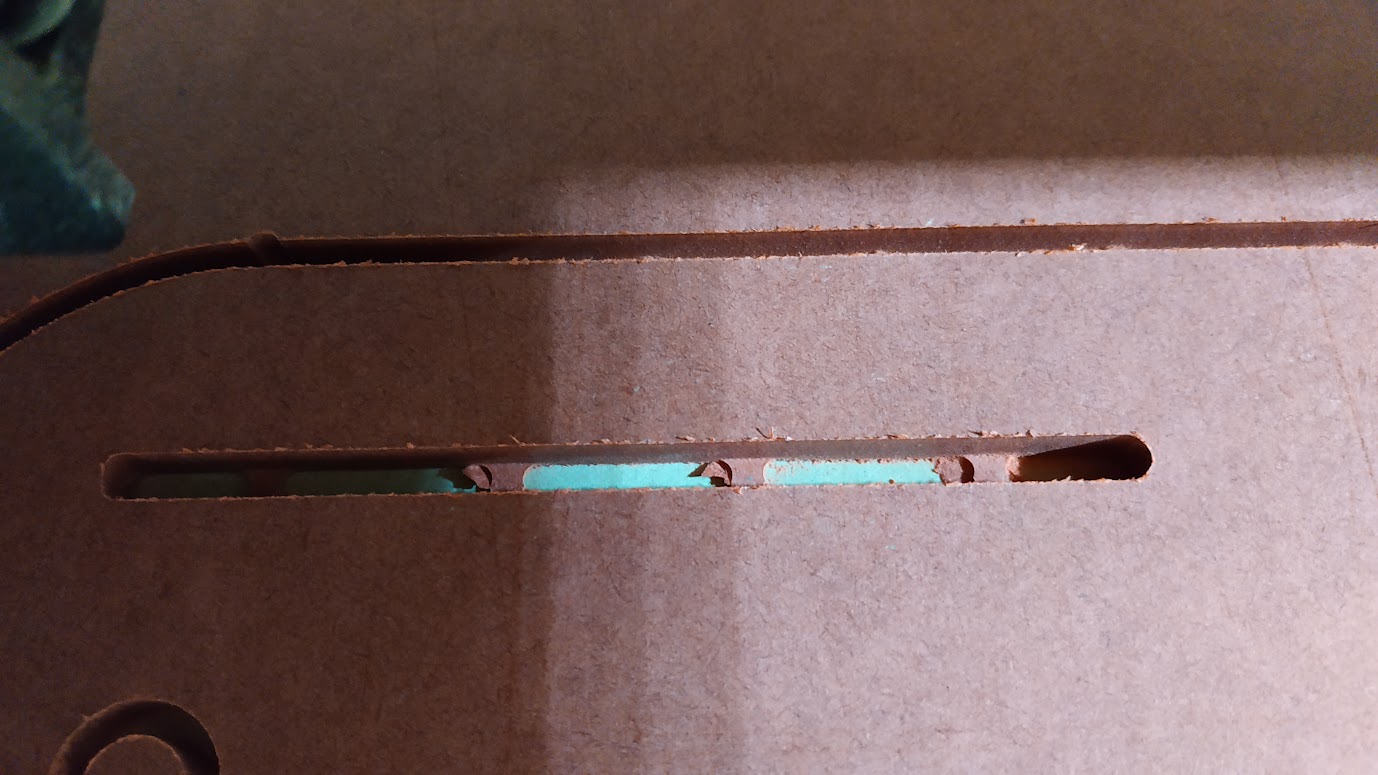
This shows the fruits of levelling the waste board - the white area between those tabs (that are left in the machining process to stop the work piece flying out) is not the waste board, but the untouched double-sided tape used to stick the work piece down - pretty accurate!

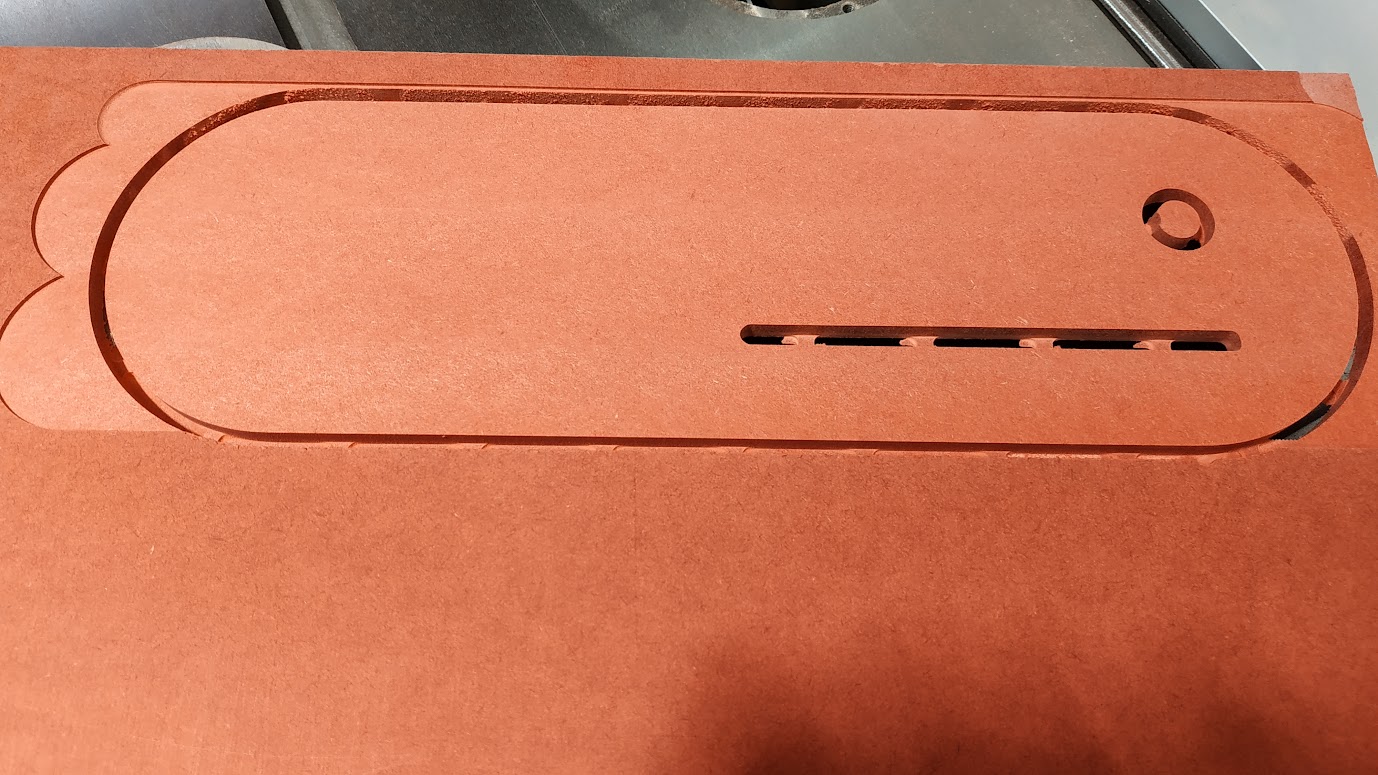
The milled plate, off the CNC:

With the plate popped out, I then did the old fence clamping trick to punch through with the saw blade
Blade punch-through
I then sprayed with a few coats of Lacquer and the fit is 100% bang on...
Fitting the plate
For just using a photo with the measurements, the accuracy is excellent.
Anyways, a bit long winded, but I thought it might be interesting for anybody interested in the CNC process...
I tried MDF for a throat plate before, but it didn't work due to it being much to flaky down to the small details needed on my old table-saw cut out.
So this time, I went for Valchromat. It is a sort of high density version of MDF, usually coloured all the way through. An A3 sized 9mm sheet can be had for about £10-12 delivered.

I could have just rough cut this on the bandsaw and then used a flush trim bit on a router, using the existing throat plate as a template. But...I wanted to complicate things, and use the X-Carve CNC. It hasn't had much use in the 18 months I've had it and I wanted to see if this hobby CNC is capable of high accuracy machining. I've only used it for signs for the kids bedrooms and other stuff where 100% relative accuracy isn't needed. These machines do come in for criticism - mainly over rigidity and consistency. I have the 2nd gen (2017 on) 750mm machine and it has always seemed rigid enough to me.
First job was to flatten the waste board, using a sub board as a base. I'd never done this before, and I knew the factory board wasn't dead flat. The reason being that the throat plate needed to be 1.5mm thinner than the actual 9mm Valchromat stock I was using, so it would need the whole surface of the material milled down by 1.5mm. Any unevenness in the wasteboard would affect the flatness of the throat plate.
Flattening using a, ahem, 'Bottom Cleaning' bit...
https://youtu.be/ArrDcHSYr2w
Next up was to measure and photograph the throat plate, with a ruler as reference and then import that into Fusion 360. I don't use Sketchup anymore as Fusion is much better suited to CNC and 3D printing as it comes with CAM modes for CNC work. It also seems a much better designer to me than Sketchup.
Once the model was done, I used the CAM mode to generate a cutting path for the plate and for milling the plate surface down. I then generated the GCode and sent to the XCarve where I set it off cutting...
Cutting
This shows the fruits of levelling the waste board - the white area between those tabs (that are left in the machining process to stop the work piece flying out) is not the waste board, but the untouched double-sided tape used to stick the work piece down - pretty accurate!
The milled plate, off the CNC:
With the plate popped out, I then did the old fence clamping trick to punch through with the saw blade
Blade punch-through
I then sprayed with a few coats of Lacquer and the fit is 100% bang on...
Fitting the plate
For just using a photo with the measurements, the accuracy is excellent.
Anyways, a bit long winded, but I thought it might be interesting for anybody interested in the CNC process...


