Windowboard installation

UKworkshop.co.uk

Help Support UKworkshop.co.uk:

This site may earn a commission from merchant affiliate links, including eBay, Amazon, and others.

prophet

Member
Joined
24 Apr 2020
Messages
15
Reaction score
0
Location
notts
Morning folks
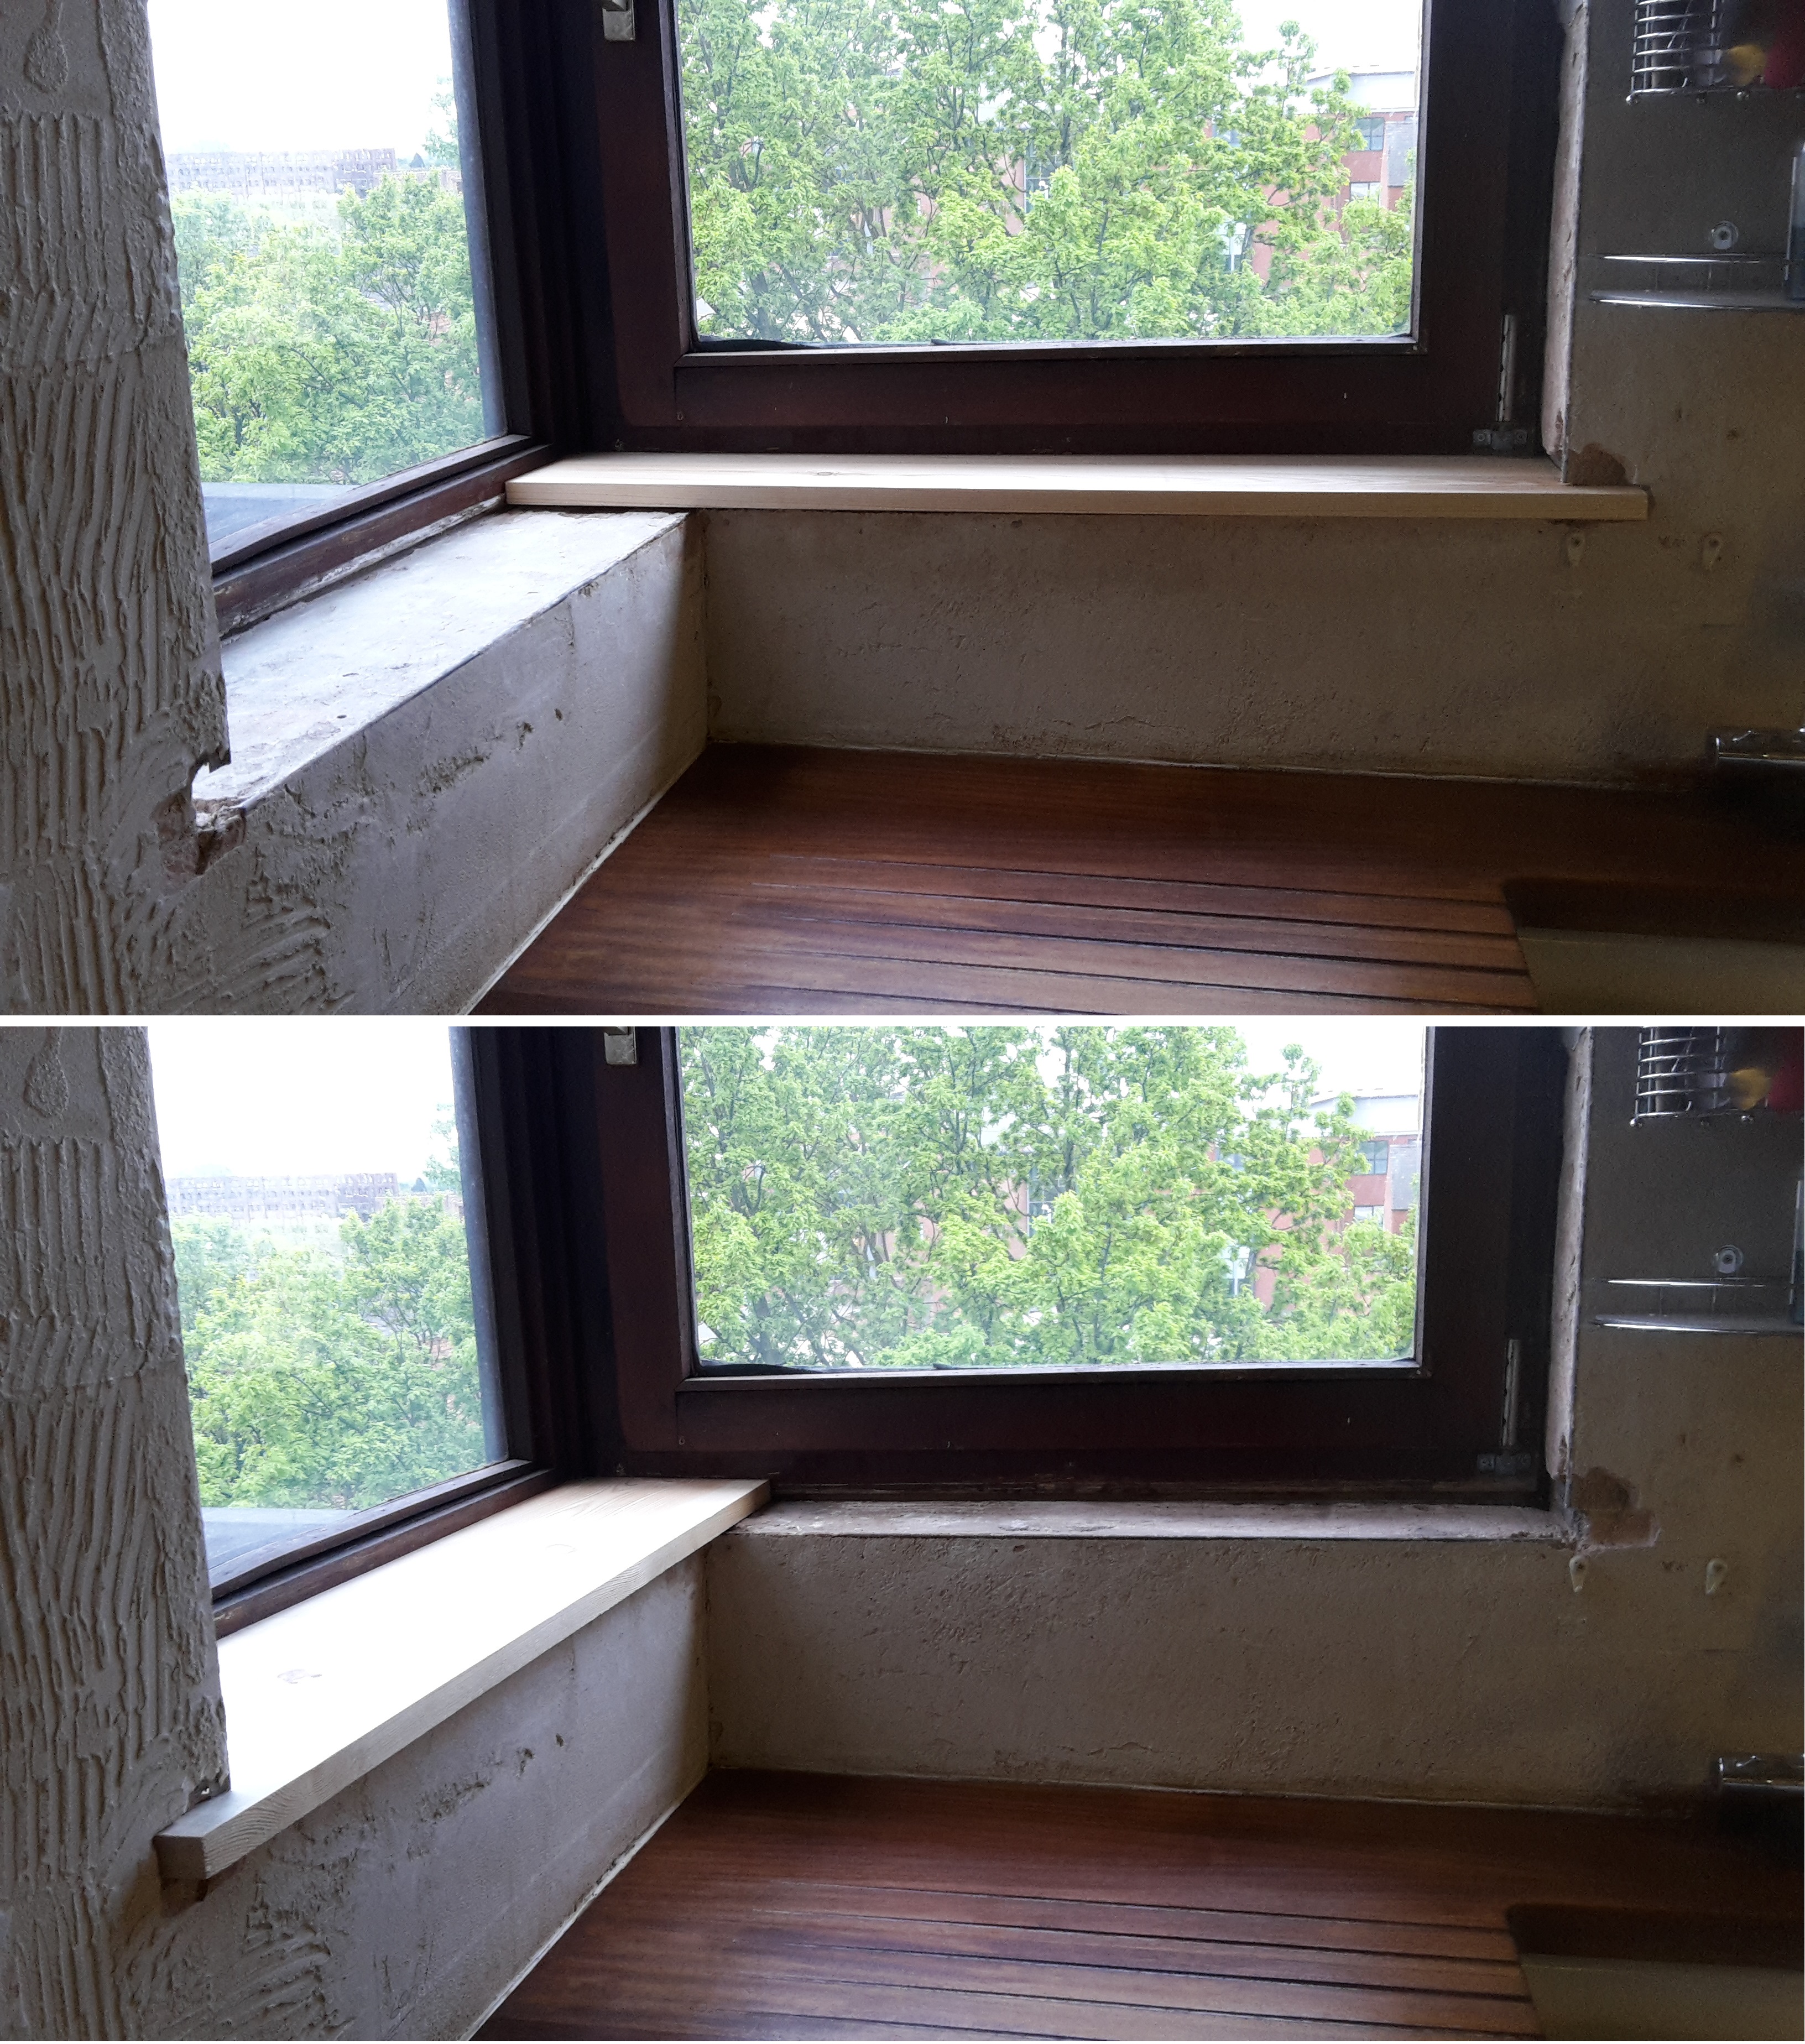
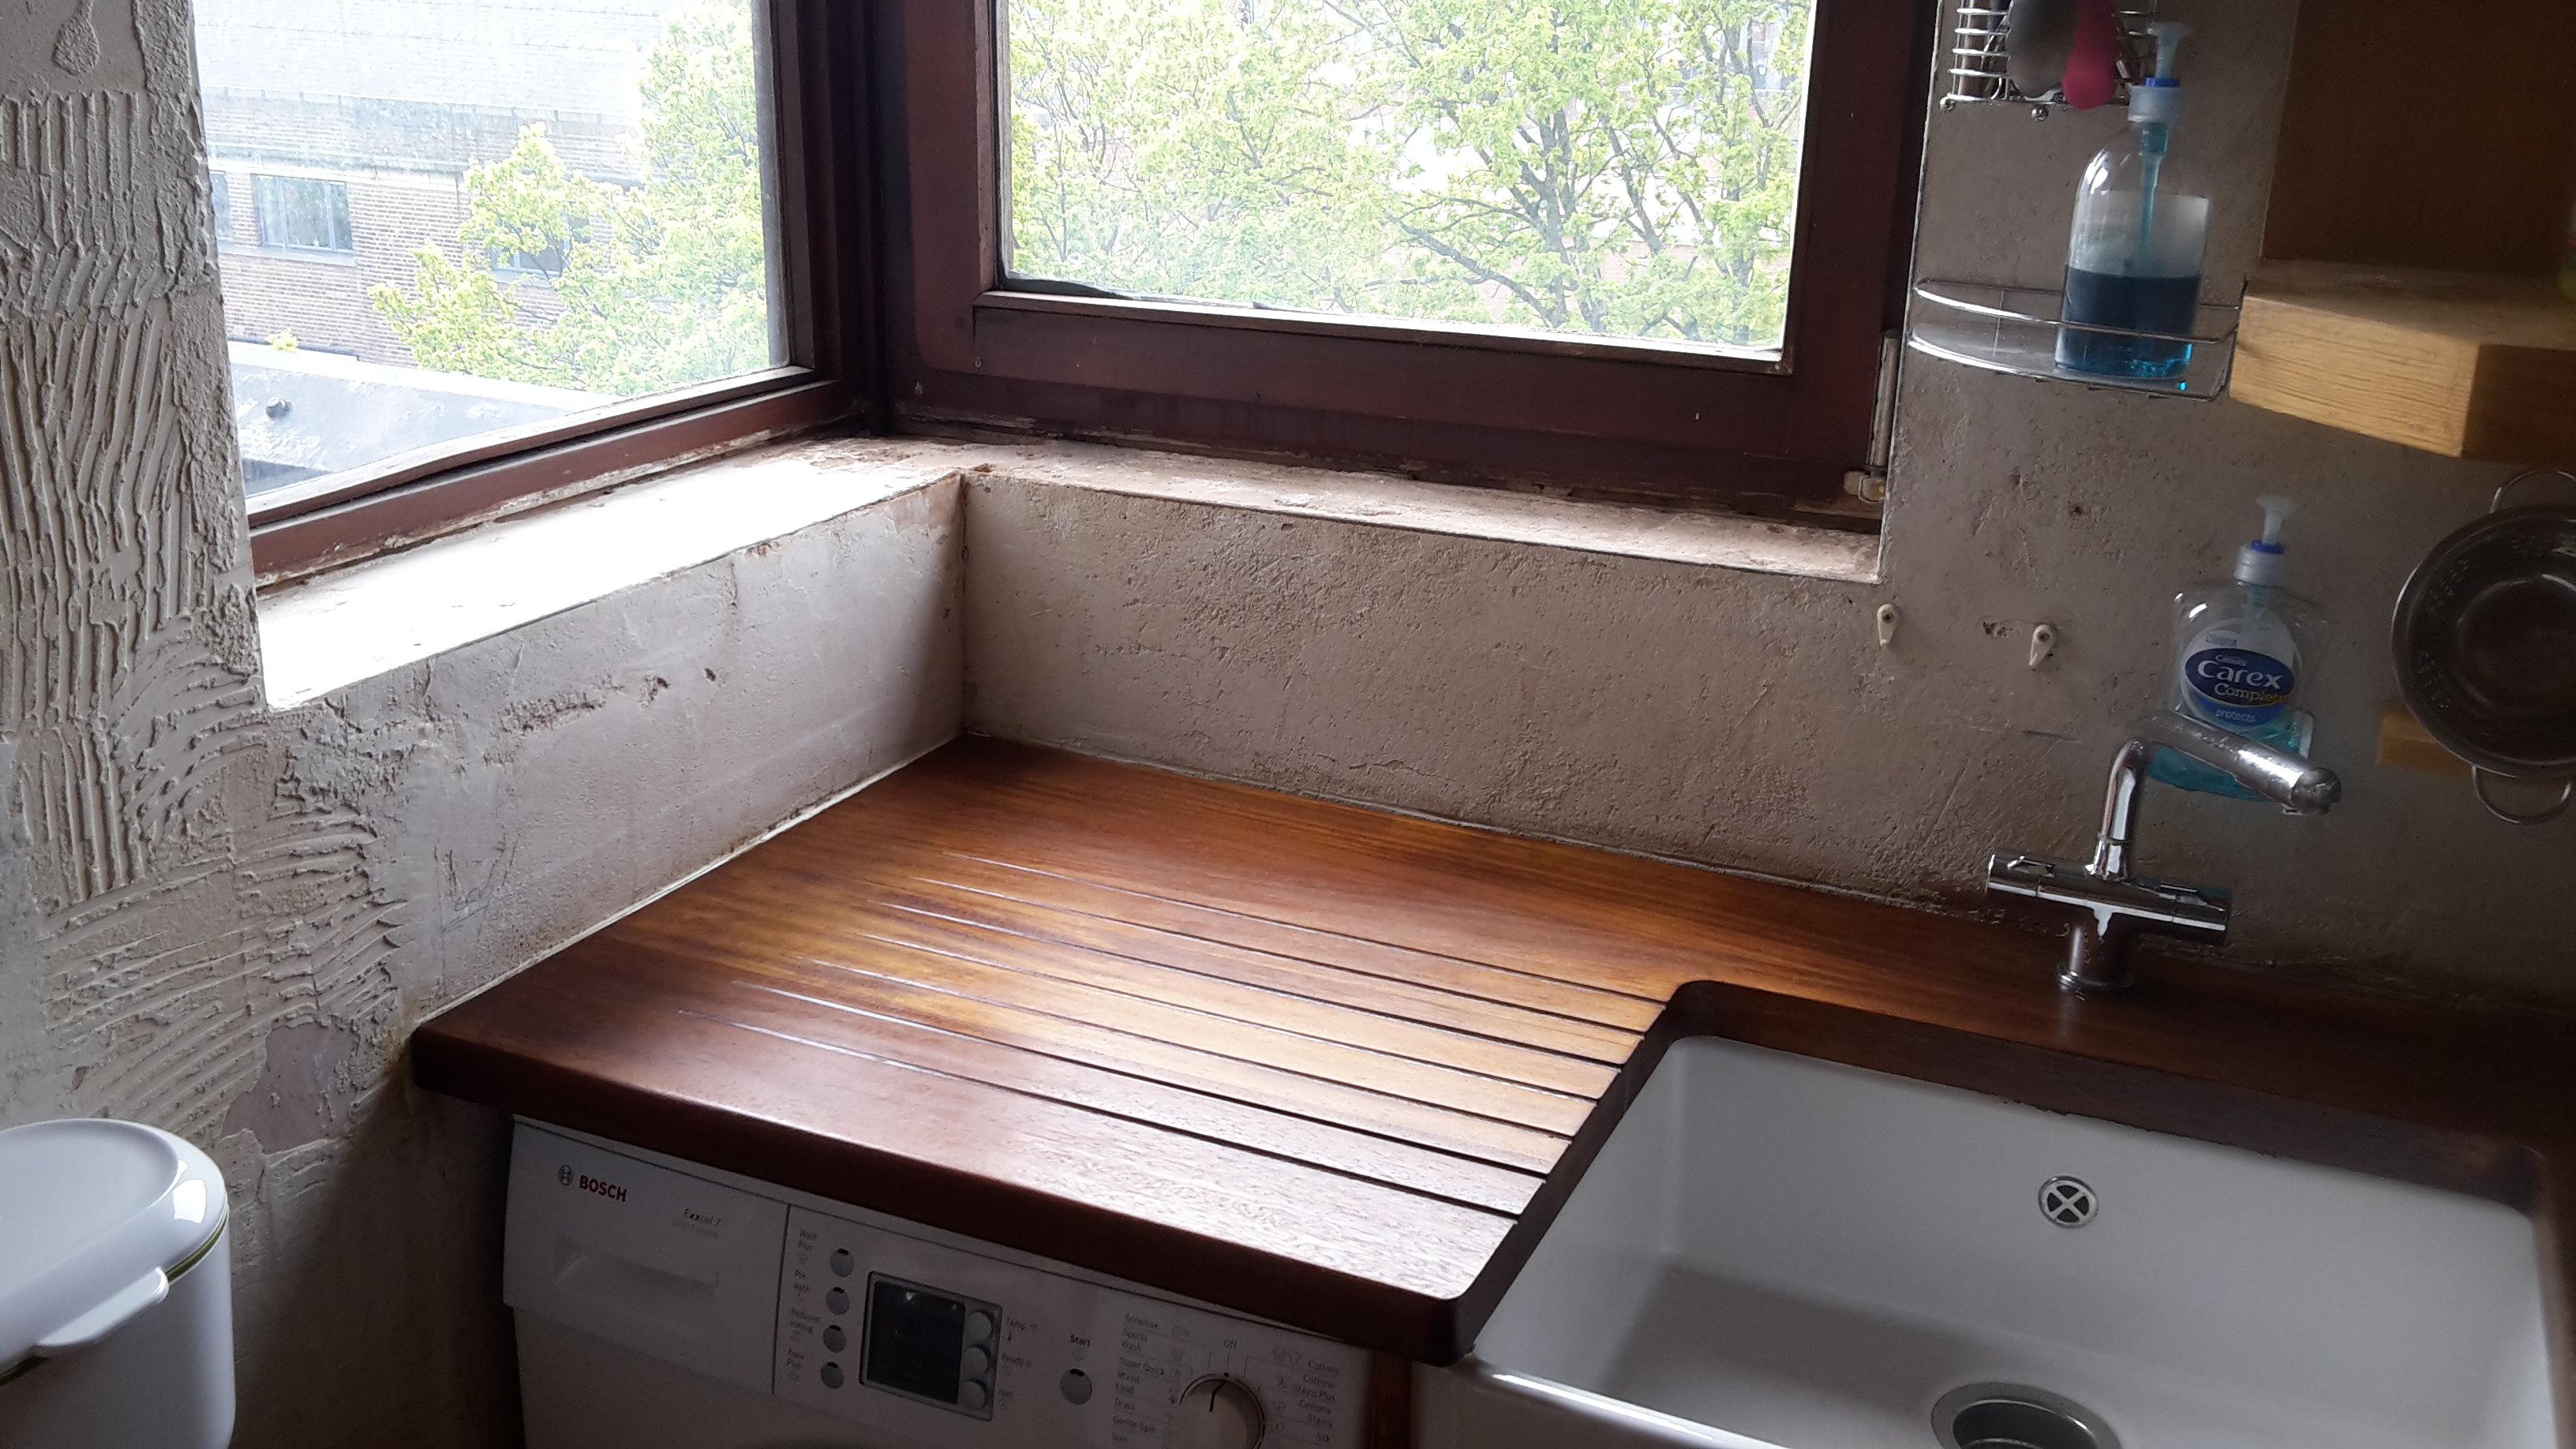
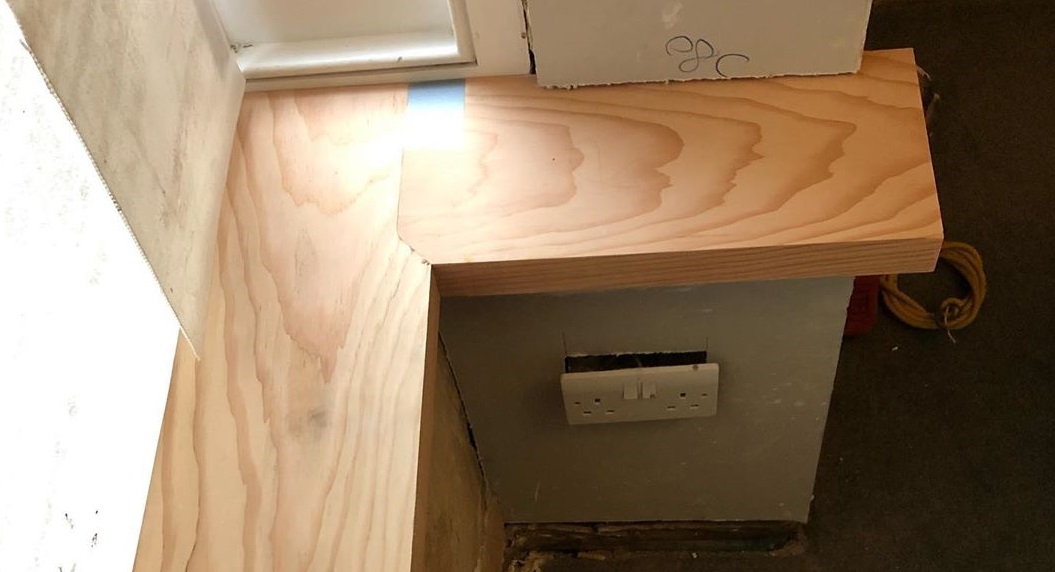
After refurbishing my Iroko counter top last week I've decided to get stuck into some other, long put-off, jobs and was hoping to get some tips/pointers on fitting a timber windowboard (never done before) in place of what was originally a tiled ledge.
My (probably a bit dodgy) plan is:
  • Rip down (ledges are different widths) 27mm pineboard allowing 25mm overhang
  • Quarter round top and bottom overhang edges
  • Mitre and join using jointing plate on the underside
  • Fit and install as one unit simply butting up to the frame on both ledges
I plan to finish walls and reveal in light turquoise subway tiles
Any constructive criticism of this plan would be most appreciated
20200425_095938.jpg
 
commercially bought window board usually has a tongue on the back edge that fits into the groove on the frame. but your groove looks to be too low to allow that. you could buy window board and cut to width which would save rounding over the front as it will already be rounded over
 
Joining the 2 boards with a mitre prior to fixing introduces greater possibility for error, especially if the two surfaces on which they sit are not perfectly level with each other.

Why not fit one board then scribe the other off it?
 
I can't see how you could pre-fix the boards into an L shape and still be able to get them into position. And why would you mitre? You're only asking for trouble that way.
 
If you used a sheet of MRMDF you could cut the full shape out without having a joint in the corner, plus you won't have to worry about movement with it. If you're tiling above the worktop again though I would tile the windowsill too.
 
MikeG.":2prgfbbr said:
I can't see how you could pre-fix the boards into an L shape and still be able to get them into position. And why would you mitre? You're only asking for trouble that way.

You can get it into position, but it's bloody awkward and your measuring and angles have to be spot on. You might have to undercut the far edge which you'd be lowering into position last ( which in this case would be the left hand cut)
 
flying haggis":3edutwo3 said:
commercially bought window board usually has a tongue on the back edge that fits into the groove on the frame. but your groove looks to be too low to allow that. you could buy window board and cut to width which would save rounding over the front as it will already be rounded over
Yes, the groove is at the bottom of the frame so pre-made window board with tongue isn't an option. Anyway I prefer to do the rounding over as I can get it how I like it.

Marineboy":3edutwo3 said:
Joining the 2 boards with a mitre prior to fixing introduces greater possibility for error, especially if the two surfaces on which they sit are not perfectly level with each other. Why not fit one board then scribe the other off it?
After taking account of yours and others' comments I'm inclined to agree and will go down this path as you suggest.

MikeG.":3edutwo3 said:
I can't see how you could pre-fix the boards into an L shape and still be able to get them into position. And why would you mitre? You're only asking for trouble that way.
Although I'm not going to attempt pe-fixing the boards now I still think it's acheivable but it'd be "bloody awkward" as owen stated. Just wondering why you don't think mitreing's the way to go?

Woody2Shoes":3edutwo3 said:
If this were my house I'd tile it, perhaps using quarry tiles or similar terracotta.
I did consider tiling but was overuled by she who must be obeyed.

owen":3edutwo3 said:
If you used a sheet of MRMDF you could cut the full shape out without having a joint in the corner, plus you won't have to worry about movement with it. If you're tiling above the worktop again though I would tile the windowsill too.
Did actually consider chopping down a full sheet of pineboard to do the same. Not a fan of MDF so not an option for me or SHMBO.

Appreciate all the responses folks. It's good to get other's opinions.
I'll post back once completed.
Cheers
Prophet
 
prophet":1mqzt3ya said:
............Just wondering why you don't think mitreing's the way to go?........

Mitres are the work of the devil. They are to be avoided whenever possible. :wink: :lol: It's a pain trying to make them strong, and trying to clamp them, let alone adjust them if those windows aren't at 90 degrees, for instance. I'd be doing a mason's mitre (like a kitchen worktop...a little mitre to get past the edge moulding, then a right angle).
 
I'd go with Mike's suggestion of a masons mitre and dropping the pieces in separate, any other way would be a nightmare to try and get in there without it looking shoddy.

I like to make these window boards, they're a 20mm board with a 50mm drop at the front to imitate a thicker section of timber which is held on with a lockmitre that shoots past at each end to make it look like it's embedded into the wall. It's not fooling anyone who's got pretty keen eyes but I think it looks nice, if a little bit time consuming to fit.

cMy1eDn.jpg


mNUrqND.jpg
 
I realise that one's supervisor/carer is an extremely important stakeholder, but I foresee lots of water stains and sun bleaching. In any event, I think that making a template might be very helpful - out of hardboard or something similar. I think I'd make this in one piece with a spline/loose tenon to stengthen the joint at the corner.
 
I would say because the ledges are different widths you can get away without a mitre as it might look a bit odd anyway, it would be good to get some kind of tongue or biscuit in the joint though.

If it's tiled round it gives you a few extra mil to play with when fitting, I wouldn't try to glue it up and fit in one piece though, put one piece in place (but don't fix it) then slide the other piece in to it.

The worktop has quite a square edge, maybe you could match this on the window board then you could get away without the masons mitre.
 
Thanks to all for the great input.

I've just ordered 2*1m lengths (oversize) of 20mm pineboard from my local supplier. They're ripping each down to width from 220mm stock at £4.45/m.
My carer (ahem @Woody2Shoes) is letting me out alone to pick them up in 10 mins.
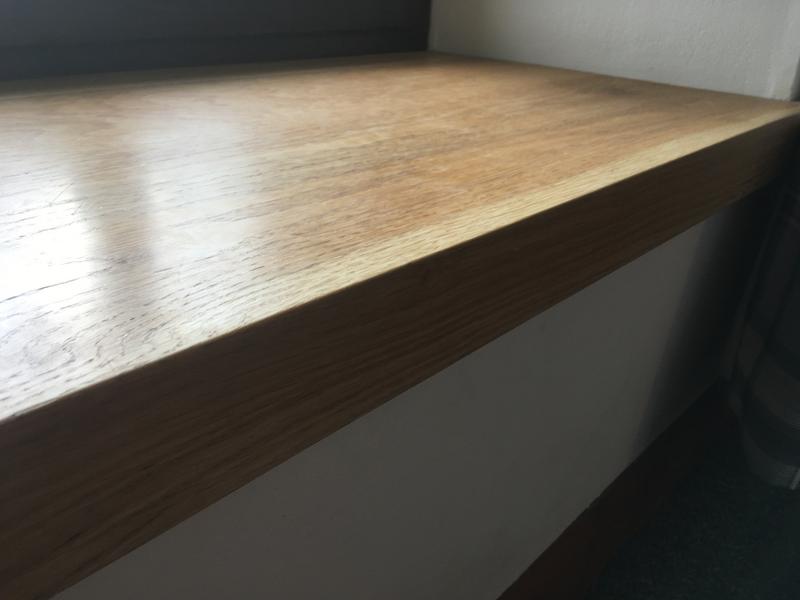
I'll look at the mason's mitre option as I found (below) but will probably end up doing a full mitre as I don't have a router.
I'm struggling to imagine any advantages of the mason's mitre over a full mitre in this scenario. I'm happy to be educated if anyone would care to offer an explanation.
Cheers.

masons%20mitre2.jpg
 
prophet":3p5u0owe said:
I'm struggling to imagine any advantages of the mason's mitre over a full mitre in this scenario. I'm happy to be educated if anyone would care to offer an explanation.
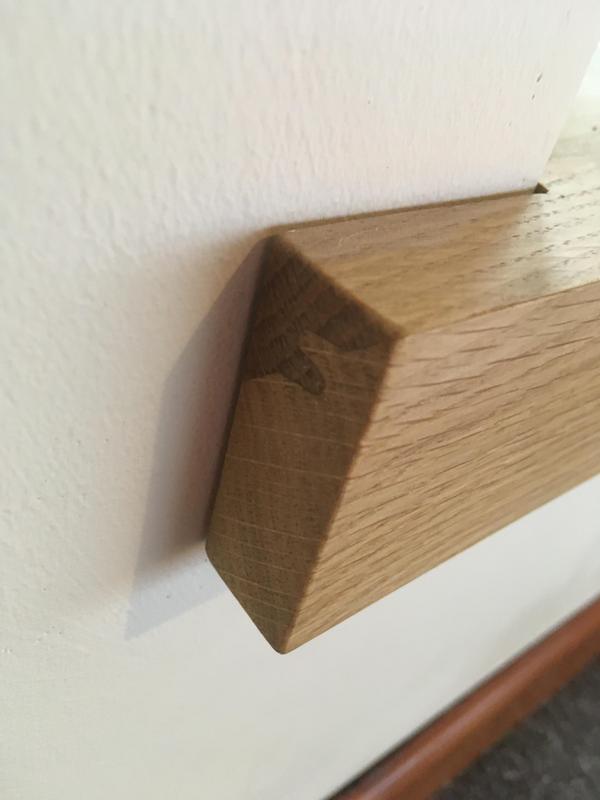
See below, i.e., the result in mitres, especially in longer ones, of shrinkage and expansion because of moisture gain or loss in the wood. Slainte.

PS. Edited to add the following. If you go the mason's mitre route you would still probably need a means to lock the end grain of the one piece to the long grain of the other where they meet: mason's mitres can be cut just with hand tools with a bit of care by the way. Something like a countertop connector, or maybe two, would do it, but how could be a bit tricky. It might be, for instance that after fitting the two pieces together and getting them into the location neatly, you'd then need to raise the two parts up high enough to get underneath, install the countertop connector and tighten the nuts that pull the joint tight, then drop the assembly back down into place. Obviously, you'd need a bit of wriggle room to be able to do this, and this might be where the suggestion below could help a bit.
If you're unable to fit the tongue that's a feature of a window board into the groove in the frame which is there to hide any shrinkage, shrinkage of the board where it meets the frame will result in a gap. If that's the case, you might consider adding a small moulding fixed to the window frame and tight above the window board to achieve the same shrinkage hiding ability.
 

Attachments

  • 122MitreFail.jpg
    122MitreFail.jpg
    40.1 KB
  • 121MitreFail.jpg
    121MitreFail.jpg
    45.3 KB
Got a bit sidetracked earlier and went AWOL after I picked up the timber.
Anyway, thanks for the info knifeman though, after doing a bit of browsing research, I thought better of considering the hand cut mason's mitre and shall stick with the straight mitre.

I've done all the easy prep and preliminary cutting & fitting. Decided to chop the boards into the plaster to give a little extra wiggle room in addition to the tile thickness to enable longitudinal movement by up to about 7mm if needed.

So tomorrow I intend to cut the diagonal mitre in one board and then use a foamboard template to transfer onto the other and see what happens. :shock:

temp%20fit.jpg
 
prophet":2s2z51x5 said:
I've done all the easy prep and preliminary cutting & fitting. Decided to chop the boards into the plaster to give a little extra wiggle room in addition to the tile thickness to enable longitudinal movement by up to about 7mm if needed.
Mitring into the corner would definitely not be my choice, for the reasons I thought I'd illustrated clearly in my earlier post. With the square edged boards you show in your last post I'd do a simple square ended butt joint of one piece (or as near to square as the corner allows) into the long grain edge of the other, which would extend all the way into the corner. With those square edged boards there's no need for either a mitre to make the join in the corner, nor for a mason's mitre. However, if your plan is to put something like a bullnose moulding on the front edge of the boards, then that would suggest to me that the mason's mitre would be the best option - it's not hard to do even with just a few hand tools.

I'm not sure what you're trying to achieve with the 7 mm longitudinal wiggle room, but I'm guessing you're thinking it will help you to get the boards to fit together neatly at the corner relatively easily, after which you'll fill in any gap in the plaster at the two ends furthest from the corner. It has to be something like that because there's no appreciable longitudinal expansion and contraction in a board's length in response to changes in moisture content to concern yourself with. Slainte.
 
I wasn't dismissing or ignoring your advice, I was dissuaded from attempting a mason's mitre by hand due to finding many instances on several forums stating how difficult it was to achieve an acceptable joint.
The "wiggle room" was just a little insurance in case I had to re-cut/trim the mitre through initial inaccuracy.

I'd like to attempt to do a mason's mitre by hand if you're ok with bullet pointing the steps. I do have an Elu crosscut sliding mitre saw if that might help matters. Is it simply a case of doing an initial mitre cut at 45 degs over, say, 40mm then a longitudinal cut from the end?
 
Unless you're going to put a moulding on the front edge, such as a bull moulding, I wouldn't do a mason's mitre. A simple butt joint of the end of one piece into the edge of the other would suffice, and would look fine, in my opinion. You showed an image of a mason's mitre in the previous page of posts, but I think that looks overly fussy because that is another example of boards with a square edge at the front, so the mason's mitre there is over-complicating something that doesn't need it.

I can talk you through doing a mason's mitre by hand if that's what you want to do. Let us know, and one or more of us will jump in. Slainte.
 
My intention is to pencil round finish the board edges by hand.
Although, as you say, the mason's mitre is overcomplicating matters it would make for a more intersting detail and it's something I've never done before so I'm inclined to take you up on your offer thank you very much.

Ready to receive instruction.
 

Latest posts

Back
Top