What is the best hand tool for rounding edges and creating long sliding dovetails?

UKworkshop.co.uk

Help Support UKworkshop.co.uk:

This site may earn a commission from merchant affiliate links, including eBay, Amazon, and others.

tibi

Established Member
Joined
27 Nov 2020
Messages
893
Reaction score
355
Location
Slovakia
Hello,

I would like to ask what is the most appropriate hand tool or a procedure with hand tools to round corners uniformly to get 2 - 3 mm radius (e.g. on table legs or tabletop edge)?
1607255448662.png


The second question is what hand tools can be used to create longer sliding dovetails ( e.g. 60 cm wide board that is dovetailed to the tabletop of the office desk like in the picture below). I cannot saw this width with a hand saw.
1607255367492.png


I would like to work with hand tools only and I do not want to buy a powered router to get those operations done due to the noise and dust. Is there any effective way how to do it with buying only a minimal number of additional handtools?

Thank you.
 
Last edited:
a handplane can be used to round off all corners and create bullnoses, simply draw on the curve you want, and plane away to your lines, it's quite simple, or just do it by eye.

For the sliding dovetails I would instead use a tapered housing joint but when it knocks all the way in it gets tighter, most of the time though I use a blind housing joint because it's easy and takes far less time to cut them, and if it's done right will never come apart once glued up.
 
The traditional way of cutting out the female part of sliding dovetails by hand is to use a special saw whose English name I cannot remember. It looks like this Kringla - gradsåg. I made mine from a blade from a Sandvik tenon saw fitted into a home made handle. Ulmia still make them and call them Grooving Saw in their catalogue.
You then use a chisel to remove the bulk of the waste and a router plane to smooth the bottom of the groove.

For the male part you use a dovetail plane. ECE still make good wooden dovetail planes. Making one at home is not too difficult either.
 
Hi Heimlaga, The only saw I can think of that does that is a Gents saw, it’s a tenon saw but with a different handle to allow you to cut down into the wood without the handle getting in the way. Ian
 
I've cut these using a carcase saw - really just a large tenon saw - with a block of wood cut at the correct angle as a guide, and then cleaning out the groove with a router plane and chisel. The dovetails were cut using the same saw.
 
I would like to ask what is the most appropriate hand tool or a procedure with hand tools to round corners uniformly to get 2 - 3 mm radius (e.g. on table legs or tabletop edge)?
How much of this do you have to do and how long are the individual pieces?
If you don't have miles of edges to do and the pieces are long enough for a #4 plane to register, I would use that, at least initially. A good block plane might be better but I don't have one. Maybe follow up with a scratch stock and/or abrasive paper.

If the pieces are short I might go straight to a scratch stock.

If you have a lot of this to do you might use it as an excuse to buy an old moulding plane, or maybe make something. I have no great experience of that though.

The second question is what hand tools can be used to create longer sliding dovetails ( e.g. 60 cm wide board that is dovetailed to the tabletop of the office desk like in the picture below). I cannot saw this width with a hand saw.
Why do you say you cannot saw this wide with a hand saw? What problems do you have? Is the problem with the groove or the tail that fits in the groove? I went through this learning curve a couple of years ago and I do this with a hand saw so I will describe how I do it. My process for the groove is:

1. Score the edge of the groove with a knife.
2. Emphasise this with a chisel to make a shallow knife wall. This can be at 90 degrees to the surface - I don't try to establish the angle for the side of the groove at this stage.
3. Clamp on a guide I made from a scrap of 4x2. The guide has a sloping side at the desired angle (1 in 6 in my case) which is easily created with a hand plane. I recessed some strong magnets in that sloping face and covered it with a thin plate of wood. (I was going to write "thin veneer" but that would imply something much thinner than I actually used. My magnets were string enough, and I used enough of them, that the plate did not have to be ultra thin.)
4. Saw the edge of the groove by running the saw against the guide. The magnets keep the saw in line. I typically use my cheap tennon saw but any saw would probably do.
5. Repeat this for the other side of the groove.
6. Remove the waste with a chisel. On a wide board you probably need to work bevel down.
7. Clean out & flatten the bottom of the groove with a hand router if you have one. I didn't have one for my first attempts. Now I have a router plane this job is much easier, but it is possible to use just a chisel if you are patient.

To cut the tail part on the edge of the other board I clamp a piece of scrap on the side of that board flush with the edge. This gives a platform to which I can clamp my saw guide. I can then cut the sides of the tail in basically the same was as I cut the sides of the groove, but usually I don't make a knife wall first. I find it hard to create a neat knife wall on end grain and anyway being neat there does not matter so much because that edge of the tail will never be seen, except at the very end. I would love to try a dovetail plane as suggested by heimlaga but I don't have one and have managed to get by without one so far so I will probably continue to do so.

Cutting the shoulders is straightforward but clamping a length of square stock in place to act as a saw guide makes it easier on a wide board.

Because the boards you are using are wide a tapered dovetail as suggested by thetyreman is a good approach. It makes assembly much easier.

Note that this describes how I do it. A professional would surely take a different approach but I don't have the skills of a pro.

Good luck!
 
Hi Heimlaga, The only saw I can think of that does that is a Gents saw, it’s a tenon saw but with a different handle to allow you to cut down into the wood without the handle getting in the way. Ian
Ah, you have just solved a mystery! I was recently looking at my tenon saw and trying to remember why I cut off the bottom of the handle. I remember doing it a couple of years ago but couldn't remember why. Now I know.
 
You can get a quarter round cutter in various sizes for the Stanley 55 plane. I'm not sure if the 45 has them. At least you'd be buying a multifunctional tool to do a lot of different edging tasks, although remember they're imperialnot metric.
 
For rounding - these are easy but not as good as a proper cutter in a moulding or multiplane.
Two tools as a set, two ends per tool give a selection of 4 radii
Wrap abrasive around the plastic thingy to resharpen.
They work OK but can quickly catch and cause tear out if the grain is uneven and turns against you.
cornering tool veritas.jpg
 
I have those veritas things pictured by Sideways, they are good but it is very important to pay attention to the grain direction, as mentioned they will make a mess if you get it wrong.
A scratch stock with a radius is good if your only doing a bit or a card scraper.
I have also used a spindle moulder knife for this too, just use it like a scraper.

Ollie
 
You can get a quarter round cutter in various sizes for the Stanley 55 plane. I'm not sure if the 45 has them. At least you'd be buying a multifunctional tool to do a lot of different edging tasks, although remember they're imperialnot metric.
There are half rounds too for the 55. A Bench plane is a good option though. A few passes at 45 degrees then a pass at 5, 10, 15 ... gets a pretty good profile.
 
Another vote for block or no.4 plane followed by a custom made cabinet scraper from an old saw blade. I used that method recently on some 30mm radius oak corner posts. Worked really well and was very enjoyable to make and use the scraper.
0CFE08FE-695B-4316-B8D1-3D4E25494970.jpeg
 
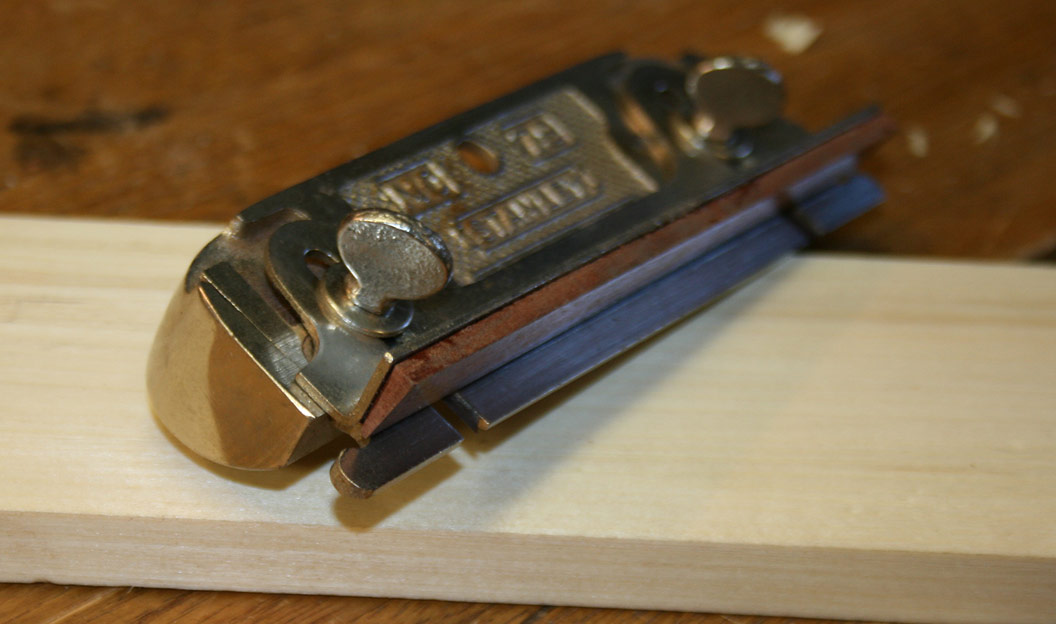
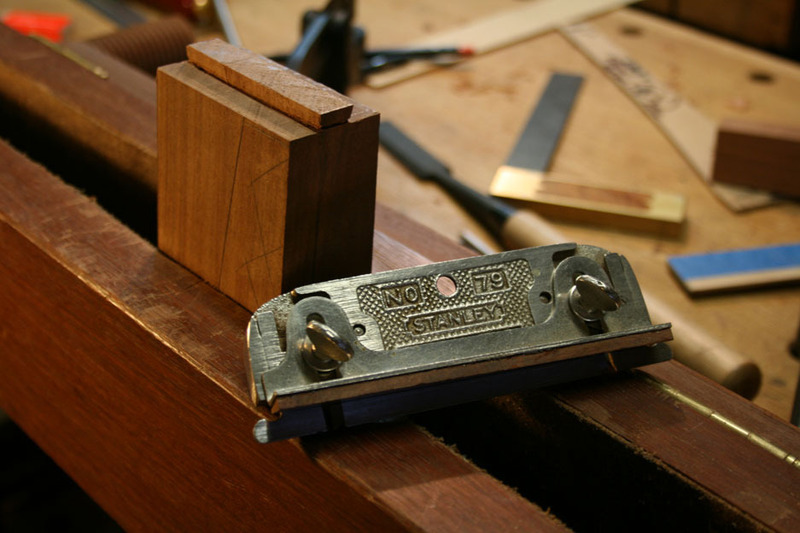
I've made many sliding dovetails, used several methods, and even made a number of sliding dovetail planes. But the one I now turn to, either to create the socket or fine tune it, is a modified Stanley #79 side rebate plane ...

Extract from an article on my website:

The weapon of choice for me was the Stanley #79, a double-ended side rebate plane. I liked this as it has a long depth stop and body, both which would provide more registration area than a singe-ended rebate plane. It also enables the plane to be double handed, that is, be altered to plane with the grain.

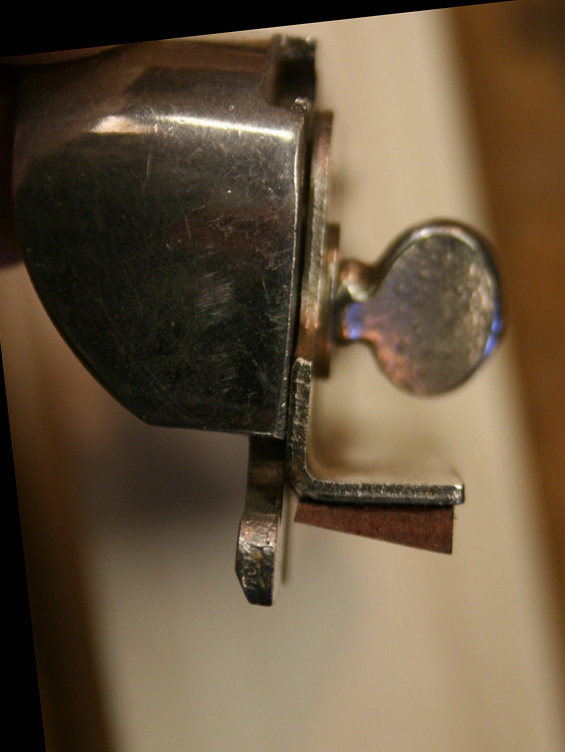
The only modification needed is to add a wedge under the depth stop to alter the cutting angle from 90 degrees to, in this case, a 1:7 ratio – this is the same as the other dovetail planes I built, and works well with the hardwoods I use. I have a second fence at 1:5 for shallower sliding dovetails.

SlidingDovetailsWithTheStanley79_html_680e7f25.jpg


SlidingDovetailsWithTheStanley79_html_99d553c.jpg


SlidingDovetailsWithTheStanley79_html_ea96043.jpg


You do not need to modify the blade or the skate. Just epoxy on a wedge to the depth stop, which will now double as a fence ...

This plane can be used for both male- and female joints.

http://www.inthewoodshop.com/ShopMadeTools/SlidingDovetailsWithTheStanley79.html
Here is an example of making a sliding dovetail with saw, chisel and router plane: http://www.inthewoodshop.com/Furniture/EntryHallTableForANiece8.html

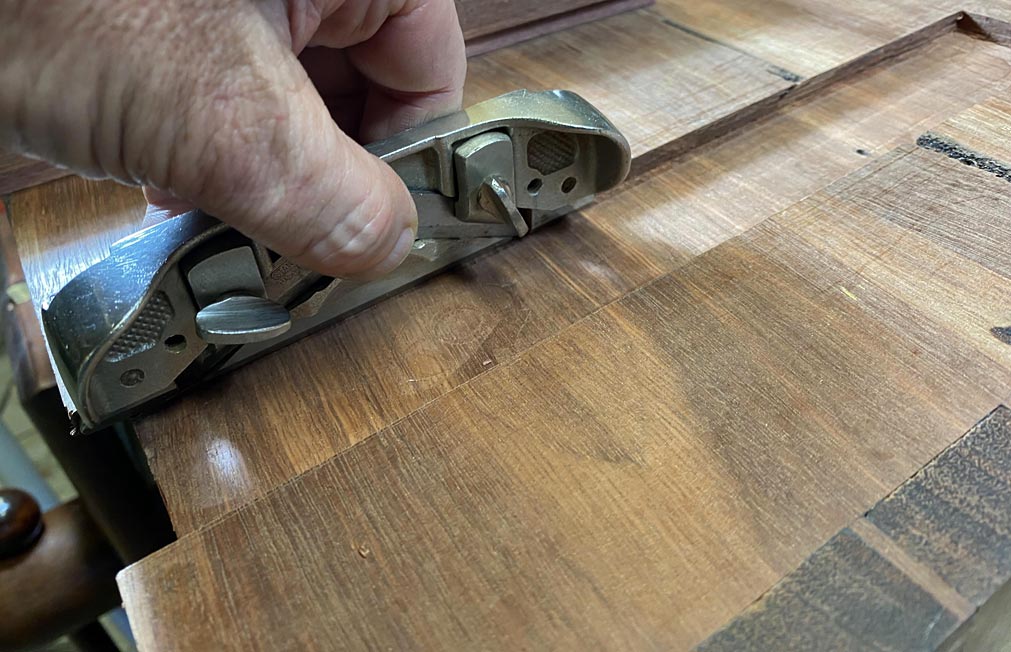
Then clean up with the #79 ...

EntryHallTableForANiece8_html_7f13090c.jpg


Regards from Perth

Derek
 
I'd be interested to hear whether people think hand tools offer a better result than a router for jobs like this? i appreciate it is not all about speed and effeciency, but my instinct is to say it isn't worth the time to do this by hand?
 
I'd be interested to hear whether people think hand tools offer a better result than a router for jobs like this? i appreciate it is not all about speed and effeciency, but my instinct is to say it isn't worth the time to do this by hand?

Good question.

One thing I've observed in furniture making workshops is that the foreman pushes for a softer round of say 2-3mm radius that emphasises the tactile experience the client will have with the piece. The craftsman or woman on the other hand tends to prefer a 0.5-1.0mm radius to make the piece look (no pun intended) "sharper" and more defined.

Now, making a 2-3mm round with a plane is a longer job than you might think, I'd estimate it's twenty plus strokes before you get past that "faceted" look. It's also worth remembering that working the arris can involve some odd grain directions so the risk of disastrous tear out is ever present.

If I'm making something like a jewellery box, a chair, or a music stand, something fairly small that invites a lot of handling, then I'll always cut the rounds with a hand plane or spokeshave. But imagine doing that on a ten metre run of bookcases? Life's too short and budgets are too tight. So then it's time to break out the small trim router.

Especially as Wealden now makes the most superb round over bits with a five degree lead-in and lead-out angle.

https://www.wealdentool.com/acatalog/Online_Catalogue_Arris_Rounding_964.html
In my opinion these new bits have revolutionised the practical reality of using a router for round overs. They reduce set up times to a fraction of what they were previously, and they remove the risk of those embarrassing "witness" lines. which then takes unbudgetted time to sand or plane out.
 
yes block plane and/or spokeshave for a 45º bevel. Then sand-paper half sheet in both hands pulled across the edge like you dry your back with a bath towel - working up and down to keep it moving. Small radius with sand paper alone.
Long time since I last did a sliding DT! Had to think about it. Cut all the lines with a knife for both the slot and the tail, pick out a saw guide groove with a chisel or knife, then saw with tenon or DT saw - keeping the edge in the slot all the time, lining it up with the marks for the angles and running it full length plus a bit to take out the saw dust. Then chisel out the wast from the slot. If you make the tail slightly over size you can easily trim it a bit to make a tight fit.
PS much the same as Just4Fun except without a guide - the knife wall is the guide but you keep the saw firmly in the slot all the time.
 
Last edited:
I've made many sliding dovetails, used several methods, and even made a number of sliding dovetail planes. But the one I now turn to, either to create the socket or fine tune it, is a modified Stanley #79 side rebate plane ...

Extract from an article on my website:

The weapon of choice for me was the Stanley #79, a double-ended side rebate plane. I liked this as it has a long depth stop and body, both which would provide more registration area than a singe-ended rebate plane. It also enables the plane to be double handed, that is, be altered to plane with the grain.

The only modification needed is to add a wedge under the depth stop to alter the cutting angle from 90 degrees to, in this case, a 1:7 ratio – this is the same as the other dovetail planes I built, and works well with the hardwoods I use. I have a second fence at 1:5 for shallower sliding dovetails.

SlidingDovetailsWithTheStanley79_html_680e7f25.jpg


SlidingDovetailsWithTheStanley79_html_99d553c.jpg


SlidingDovetailsWithTheStanley79_html_ea96043.jpg


You do not need to modify the blade or the skate. Just epoxy on a wedge to the depth stop, which will now double as a fence ...

This plane can be used for both male- and female joints.

http://www.inthewoodshop.com/ShopMadeTools/SlidingDovetailsWithTheStanley79.html
Here is an example of making a sliding dovetail with saw, chisel and router plane: http://www.inthewoodshop.com/Furniture/EntryHallTableForANiece8.html

Then clean up with the #79 ...

EntryHallTableForANiece8_html_7f13090c.jpg


Regards from Perth

Derek
Thank you very much Derek. This is a very interesting idea. I will try to find #79 plane somewhere on Ebay.
 
The sliding dovetail in your picture looks like it is made with a router. The housing beneath it also.
Just like the box/ finger joint, some things are easier if done by machine.
But, if you have your heart set on doing it by hand, as said above, a tapered dovetail would probably be easier.
(Often this was done as a half dovetail)
Wooden dovetail planes ( Joh. Weiss and others) are not that uncommon in the ex-Habsburg lands and they
work pretty well. A sharp blade and a bit of practice and all that...

As for the roundover, you might try a hollow profile moulding plane. You could even make an open-sided
one by yourself.

HTH
 

Latest posts

Back
Top