SkinnyB
Established Member
I have been using a 'temporary' setup for a while now... 5 years... However a few days ago I broke my quickly made under table dust extraction unit on my AGS 12. Dust has been spewing out a little more than I want so thought I should sort out the issue.
To start this is what I had made originally and worked semi well. It had a few issues though:
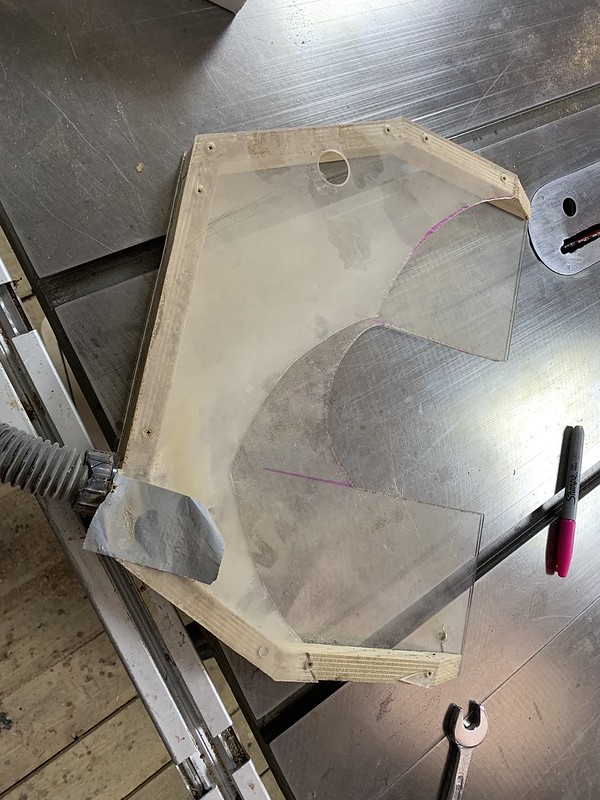 IMG_5300 by jamie skinner, on Flickr
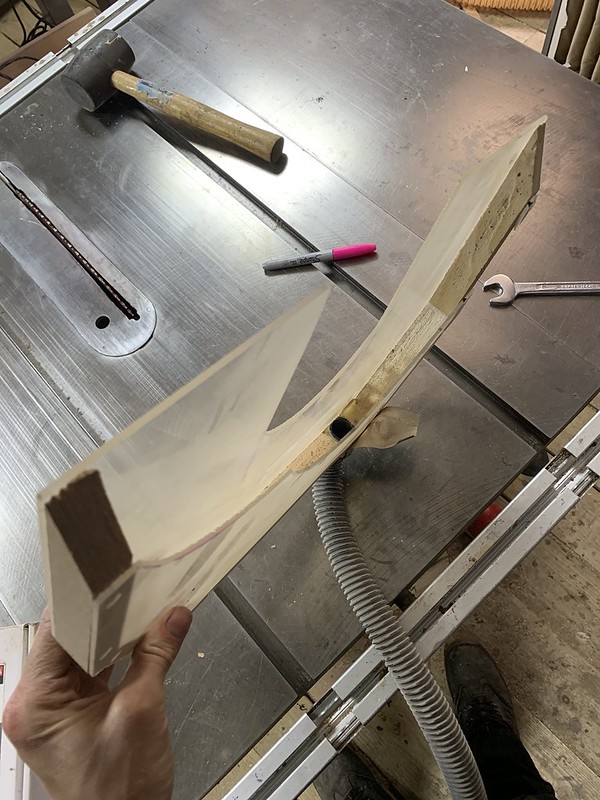 IMG_5301 by jamie skinner, on Flickr
But it sufficed till now.
On my quest to come up with a new design I really wanted:
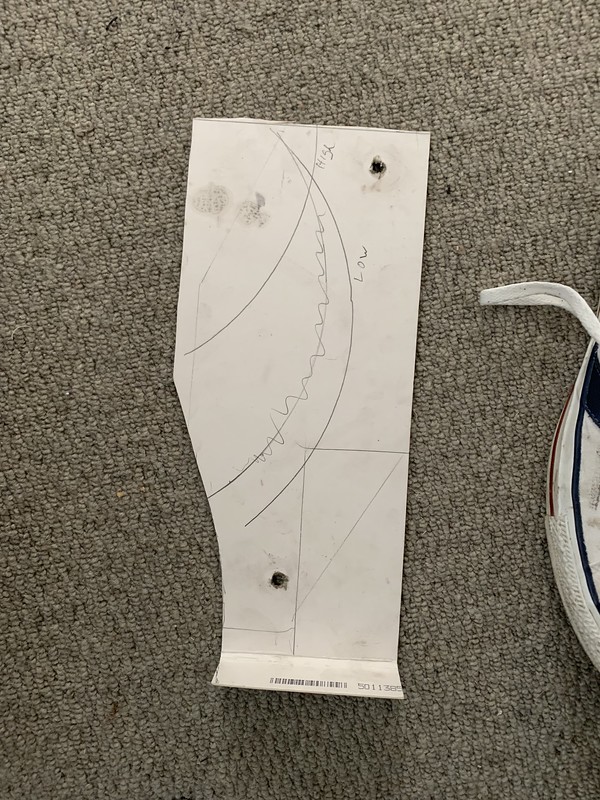
So started by removing the top and using some cardboard I worked out what size/shape I needed.
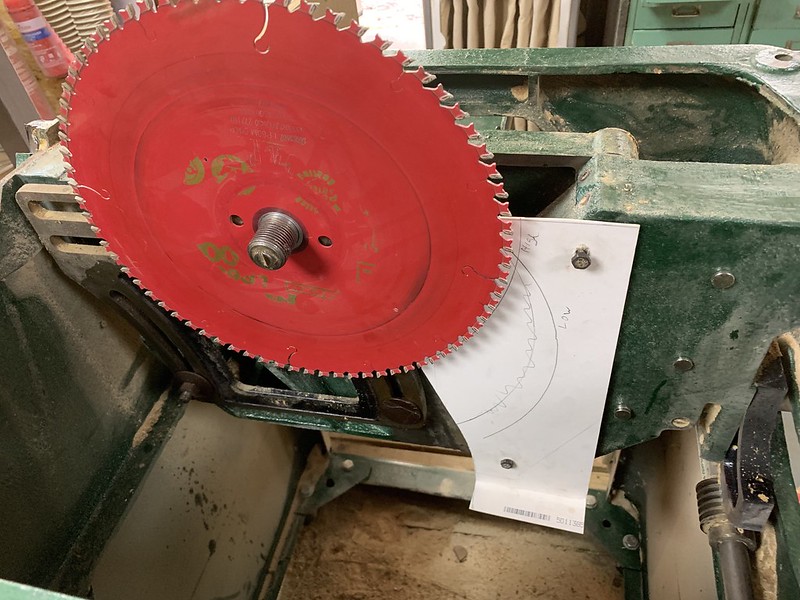 IMG_5274 by jamie skinner, on Flickr
Also testing at 45 degrees for fit:
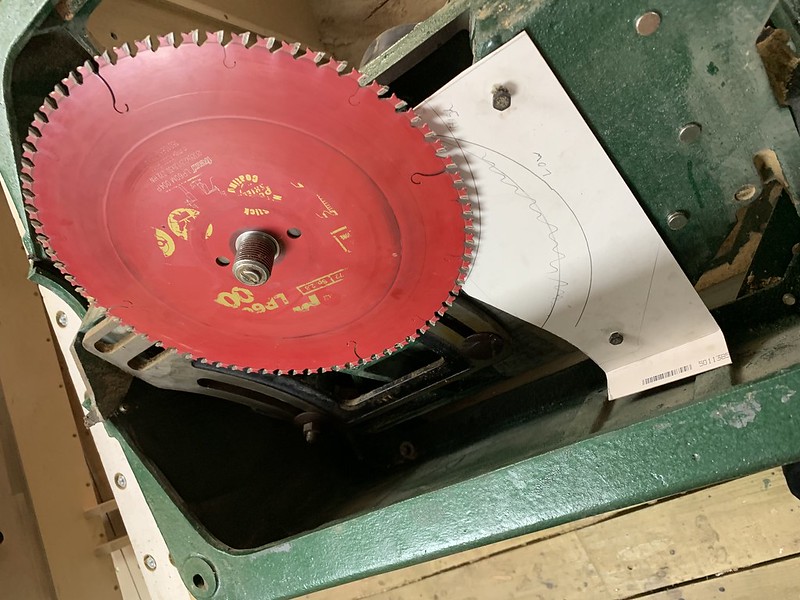 IMG_5276 by jamie skinner, on Flickr
I kept trimming the card until I had enough clearance for the rise and fall mechanism. I also tilted it to 45 to see what thickness of the whole unit should be.
This is what I came up with. I also marked out the blade location at its highest and lowest points.
 IMG_5278 2 by jamie skinner, on Flickr
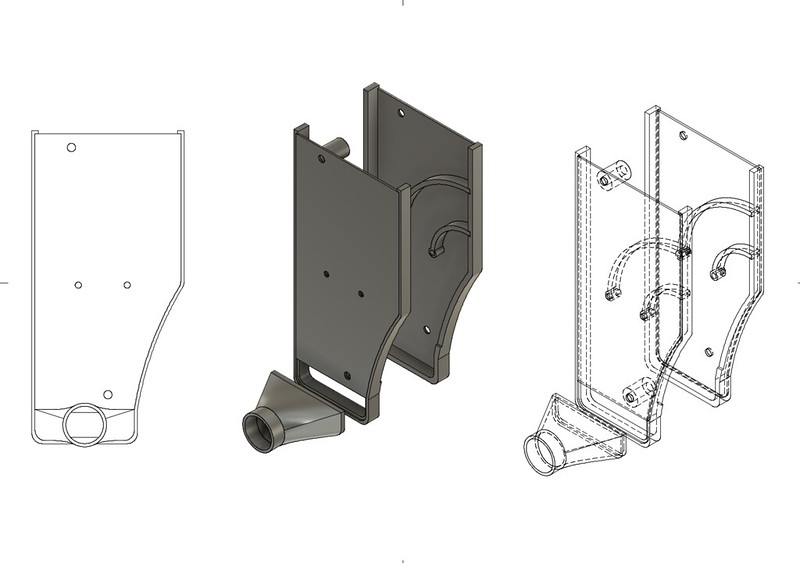
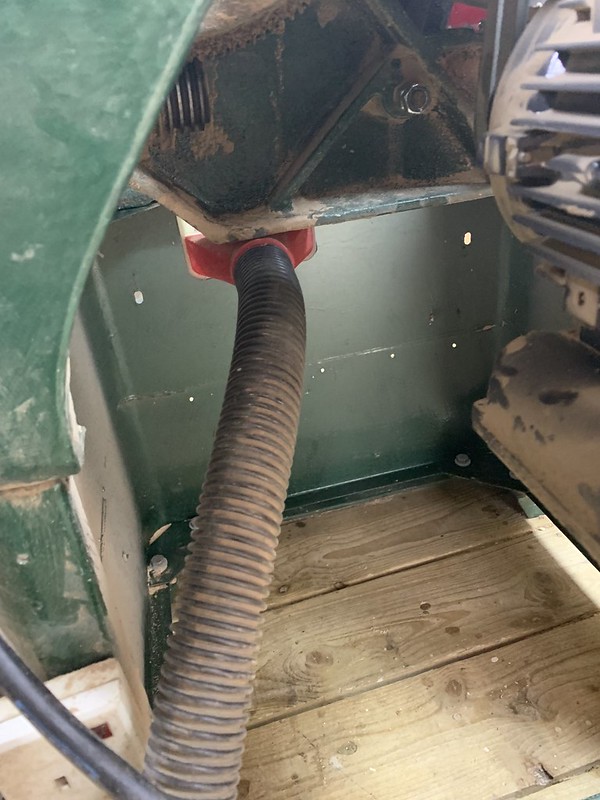
Next onto CAD. I decided on a split design using the mounting holes on the saw to hold the two halves together. There are 2 spacers (two cylinders in picture) which slide over the bolt and hold the two halves at the correct distance apart. The extract is 40mm and hooks under the main mechanism underneath. This then attaches to a hose and onto the vac.
I have played around with the idea of some hooked shapes to direct the dust towards the chute. Something I will play around with later.
 Screenshot 2019-07-07 at 23.01.03 by jamie skinner, on Flickr
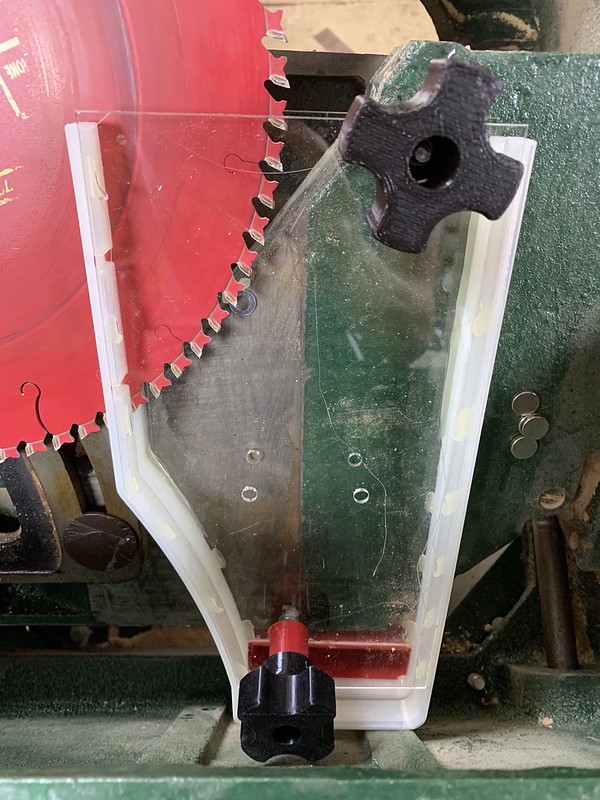
This is how the unit came out. Clear perspex for visibility. I have just hot glued this together for speed as I know there will be adjustments and improvements to be made.
 IMG_5292 by jamie skinner, on Flickr
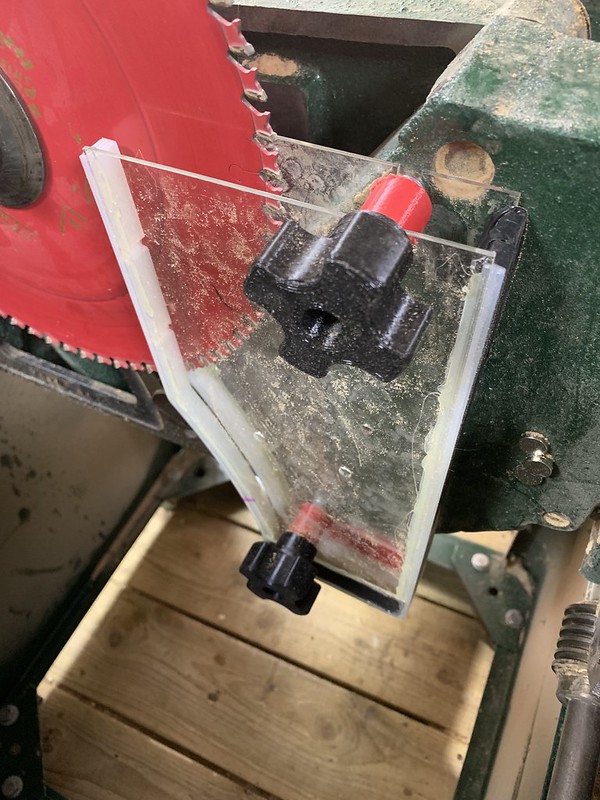
Used some card board to cover the gap where I will be able to retrieve debris in the future. Will have a clip on plastic cover in the future.
 IMG_5297 by jamie skinner, on Flickr
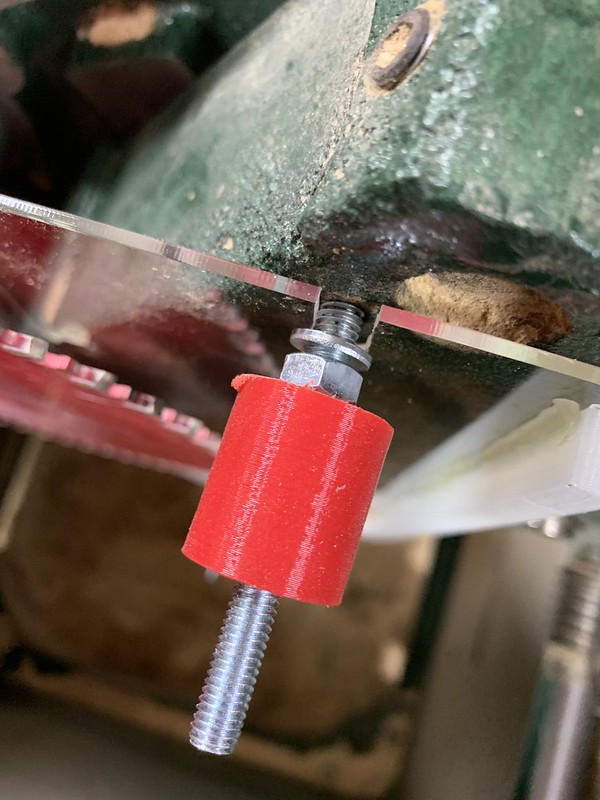
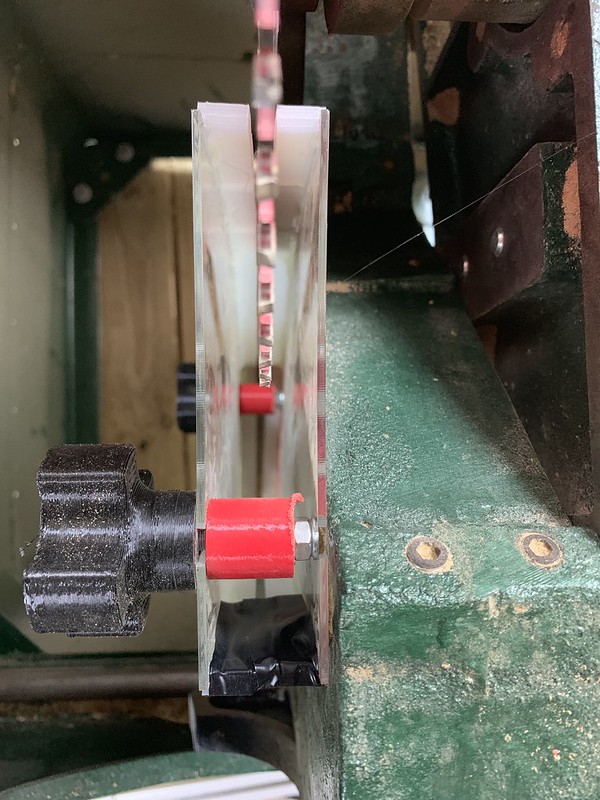
I used some m6 threaded rod bolted to the saw. Then the unit slides over this and two overly large knobs to hold it on.
 IMG_5295 by jamie skinner, on Flickr
Extract hose:
 IMG_5296 by jamie skinner, on Flickr
Attachment:
 IMG_5299 by jamie skinner, on Flickr
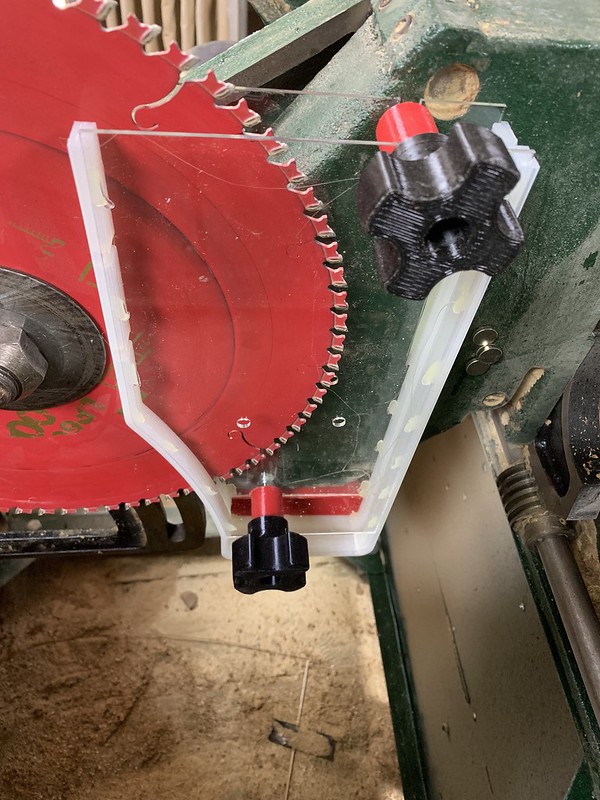
Blade at lowest point.
 IMG_5294 by jamie skinner, on Flickr
So.. How does it work?
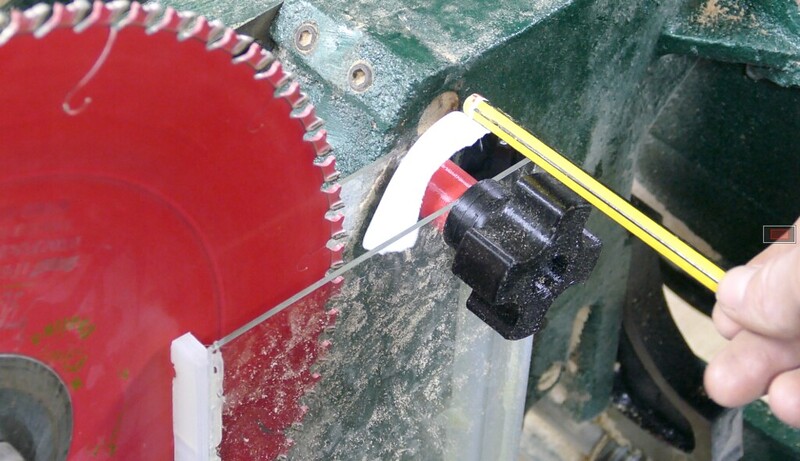
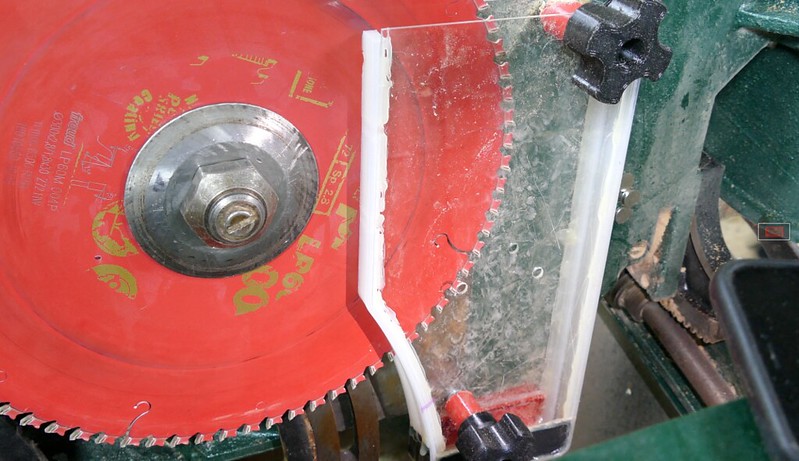
Very Well! I have not have enough time to use it properly but will see how it goes over the next few weeks and see if any more improvements can be made once I have tested it a bit.
I have sent a few bits though and have seen notable improvement do dust escaping from the side/bottom of the saw and also there is little dust coming up from below.I tested it with he top off and I could see a lot if not all the dust going straight down into the extract unit.
For blade changes I just loosen off the top knob a few turns. With the blade at full height I can easily slide the blade in and then onto the shaft.
Lots of suction to pull in the dust!
 Screenshot 2019-07-07 at 23.22.09 by jamie skinner, on Flickr
 Screenshot 2019-07-07 at 23.17.47 by jamie skinner, on Flickr
Improvements:
Currently I have used some tape to address the seam around the unit. I want to replace this with an overlapping join of some kind.
Where the blade enters the unit I want to add a rubber strip. The blade is the risen too full height and turned on. The blade is then lowered cutting the rubber. This way I get the smallest gap between blade and unit.
Add a funnel like top piece to gather even more dust on entry.
A short video of it in action.
https://www.youtube.com/watch?v=4QniGCyYGiY
To start this is what I had made originally and worked semi well. It had a few issues though:
- I could not use the riving knife.
Small diameter outlet tube.
If any small piece of wood fell in you had to remove the blade to get to them, usually they would also block the outlet stopping all suction.
Kinda ugly and bulky looking
 IMG_5300 by jamie skinner, on Flickr
 IMG_5301 by jamie skinner, on Flickr
But it sufficed till now.
On my quest to come up with a new design I really wanted:
- The riving knife back in action.
Wider outlet for vacuum.
Easy access to any small pieces of wood that could fall in.
To enclose the blade as mush as possible.
Use existing mounting options.
Still easy to change blades.
So started by removing the top and using some cardboard I worked out what size/shape I needed.
 IMG_5274 by jamie skinner, on Flickr
Also testing at 45 degrees for fit:
 IMG_5276 by jamie skinner, on Flickr
I kept trimming the card until I had enough clearance for the rise and fall mechanism. I also tilted it to 45 to see what thickness of the whole unit should be.
This is what I came up with. I also marked out the blade location at its highest and lowest points.
 IMG_5278 2 by jamie skinner, on Flickr
Next onto CAD. I decided on a split design using the mounting holes on the saw to hold the two halves together. There are 2 spacers (two cylinders in picture) which slide over the bolt and hold the two halves at the correct distance apart. The extract is 40mm and hooks under the main mechanism underneath. This then attaches to a hose and onto the vac.
I have played around with the idea of some hooked shapes to direct the dust towards the chute. Something I will play around with later.
 Screenshot 2019-07-07 at 23.01.03 by jamie skinner, on Flickr
This is how the unit came out. Clear perspex for visibility. I have just hot glued this together for speed as I know there will be adjustments and improvements to be made.
 IMG_5292 by jamie skinner, on Flickr
Used some card board to cover the gap where I will be able to retrieve debris in the future. Will have a clip on plastic cover in the future.
 IMG_5297 by jamie skinner, on Flickr
I used some m6 threaded rod bolted to the saw. Then the unit slides over this and two overly large knobs to hold it on.
 IMG_5295 by jamie skinner, on Flickr
Extract hose:
 IMG_5296 by jamie skinner, on Flickr
Attachment:
 IMG_5299 by jamie skinner, on Flickr
Blade at lowest point.
 IMG_5294 by jamie skinner, on Flickr
So.. How does it work?
Very Well! I have not have enough time to use it properly but will see how it goes over the next few weeks and see if any more improvements can be made once I have tested it a bit.
I have sent a few bits though and have seen notable improvement do dust escaping from the side/bottom of the saw and also there is little dust coming up from below.I tested it with he top off and I could see a lot if not all the dust going straight down into the extract unit.
For blade changes I just loosen off the top knob a few turns. With the blade at full height I can easily slide the blade in and then onto the shaft.
Lots of suction to pull in the dust!
 Screenshot 2019-07-07 at 23.22.09 by jamie skinner, on Flickr
 Screenshot 2019-07-07 at 23.17.47 by jamie skinner, on Flickr
Improvements:
Currently I have used some tape to address the seam around the unit. I want to replace this with an overlapping join of some kind.
Where the blade enters the unit I want to add a rubber strip. The blade is the risen too full height and turned on. The blade is then lowered cutting the rubber. This way I get the smallest gap between blade and unit.
Add a funnel like top piece to gather even more dust on entry.
A short video of it in action.
https://www.youtube.com/watch?v=4QniGCyYGiY


