big soft moose
Established Member
- Joined
- 22 May 2008
- Messages
- 5,079
- Reaction score
- 0
been building a trug this week for the MiLs birthday - this came as a suprise request from swimbo so as you can see no expense was spent on the design - all out off offcuts i got gratis from opener a while back.
Step one the sides

cut out on the bandsaw and mitre saw , the original plan was to grove them with the router - small problem , not enough thickness - solution - glue battens on to take the bottom.
also Drive by gloat no.1 in the background my "new" plane bought from benchwayze - stanley no.5 LE
Step 2 : The frame - no common dovetails for me, instead the highly technical "no nails" procedure :lol:

step 3: the base - more "no nails" Strips were cut out on the bandsaw and then planed smooth - i really need a bench hook as i wound up wedging them against the wall to plane

step 4: the first side More of the same , except that i'd ballsed up the measurement and had to cut the top strip in half on each side - bandsaw again.

step 5 tother side , more of the same , drive by gloat number two my baby plane bought from toolpost when i went in for some wax :roll: , pipper all use for planing but very good for cleaning up glue lines.

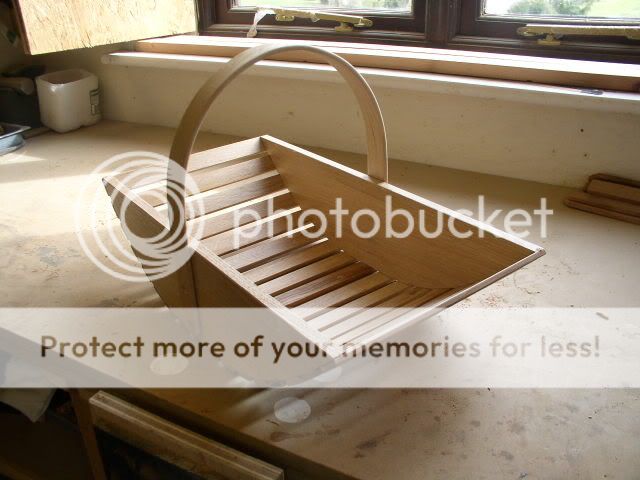
step 6: finishing - no wips for the handle , but it was basically cut out on the bandsaw using a pivot jig , then drilled , then rounded over on the grip using the dremel with a tiny sanding drum - seen here after receiving two coats of woodwax22.

step 7 finished - being held by a very happy swimbo - handle is suspended on cord bought from dunelm mills , but everything else is recycled.

now nicely wrapped together with a set of gardening tools ready for the big day.
Step one the sides

cut out on the bandsaw and mitre saw , the original plan was to grove them with the router - small problem , not enough thickness - solution - glue battens on to take the bottom.
also Drive by gloat no.1 in the background my "new" plane bought from benchwayze - stanley no.5 LE
Step 2 : The frame - no common dovetails for me, instead the highly technical "no nails" procedure :lol:

step 3: the base - more "no nails" Strips were cut out on the bandsaw and then planed smooth - i really need a bench hook as i wound up wedging them against the wall to plane

step 4: the first side More of the same , except that i'd ballsed up the measurement and had to cut the top strip in half on each side - bandsaw again.

step 5 tother side , more of the same , drive by gloat number two my baby plane bought from toolpost when i went in for some wax :roll: , pipper all use for planing but very good for cleaning up glue lines.

step 6: finishing - no wips for the handle , but it was basically cut out on the bandsaw using a pivot jig , then drilled , then rounded over on the grip using the dremel with a tiny sanding drum - seen here after receiving two coats of woodwax22.

step 7 finished - being held by a very happy swimbo - handle is suspended on cord bought from dunelm mills , but everything else is recycled.

now nicely wrapped together with a set of gardening tools ready for the big day.


