Tool restoration; how far should we go?

UKworkshop.co.uk

Help Support UKworkshop.co.uk:

This site may earn a commission from merchant affiliate links, including eBay, Amazon, and others.
bugbear":1bzck6xi said:
memzey":1bzck6xi said:
Oh and I had another pop at sharpening the iron again tonight and succeeded this time. Not sure what I was playing at the other night but this big old plane is now taking beautiful shavings. With all my other vintage tools right about here is where the restoration would stop but I feel like I'm going to go a bit further with this one. I'd like to see if I can "sympathetically" restore it to a condition that's like my No. 7.

The secret with a really blunt old iron is not to start with too fine an abrasive......
Fine abrasive and a jig :shock: come in handy with a really blunt old iron as with just a few passes they touch up the high points at a defined angle and show up what needs doing.
 
I just wanged it up and down my most abrasive old oil stone for a bit longer than I normally would have done (even longer than I have with with my boot fair finds) until I got quite a substantial burr, then the medium and fine oil stones followed by a strop. That's about as sharp as anything needs to be in my book (or should that be "in my shed")? Anyway I think the knack I picked up was more to do with skewing the angle of my strokes which was done more acutely than I was accustomed to. Previously my widest irons were on my 5 1/2, 6 and 7 and for some reason I managed ok on those first time but the added width on this No. 8 just took a little longer to get used to. As with most things I find once you've tried it a couple of times you discover ways of getting the results you are after - as long as you don't over complicate matters.
 
I can certainly recommend the benefits of 120 grit paper on a flat surface (glass or stone) for getting an old (and possibly chipped) blade back to something sensible. I have a grinder but it's cheap and nasty and doesn't have any good way of supporting an iron; hence a blade/sharpening guide on paper gets me back to a decent 25 degree bevel reasonably quickly, ready for whatever your chosen sharpening routine would be.
 
I'd like to suggest that anybody who needs to restore an old cutting tool like this tries a Pro-Edge.

I'm sure that any retailer offering these would be pleased to demonstrate its effectiveness by sharpening your blade.

MCB
 
memzey":1tz5v42r said:
I just wanged it up and down my most abrasive old oil stone for a bit longer than I normally would have done (even longer than I have with with my boot fair finds) until I got quite a substantial burr, then the medium and fine oil stones followed by a strop. That's about as sharp as anything needs to be in my book (or should that be "in my shed")?
Quite honestly that's as sharp as plane irons need to be for 99 out of 100 of us :)

sploo":1tz5v42r said:
I can certainly recommend the benefits of 120 grit paper on a flat surface (glass or stone) for getting an old (and possibly chipped) blade back to something sensible.
120 is a bit fine to be doing major removal. I'd use a coarse diamond plate by preference, but if I were using paper I'd start at 80 if I needed to remove a lot of material.
sploo":1tz5v42r said:
I have a grinder but it's cheap and nasty and doesn't have any good way of supporting an iron
So make a rest for it ;-)

MCB":1tz5v42r said:
I'd like to suggest that anybody who needs to restore an old cutting tool like this tries a Pro-Edge.
I think an expensive sharpening machine is hard to justify to the typical amateur who only needs to do major reprofiling once in a blue moon. As for normal sharpening tasks they replicate what any beginner can do just as well using a wooden jig they made themselves and a sheet of abrasive paper on a flat surface. Same result for literally a 100th of the price!
 
ED65":1qicos7a said:
120 is a bit fine to be doing major removal. I'd use a coarse diamond plate by preference, but if I were using paper I'd start at 80 if I needed to remove a lot of material.
I've found a good quality 120 grit paper to be more aggressive than even my coarsest diamond stone (which hasn't received much abuse). IRC The coarse side is 360 grit, so that may explain it.

ED65":1qicos7a said:
So make a rest for it ;-)
It's a classic "roundtuit" problem; I don't need it often enough to force me to find the time to make one. I had a crazy plan of gutting an old broken jigsaw I have and using the mechanism to make a vibrating plate (maybe for the diamond stone). Again... roundtuit!
 
sploo":39b0m2py said:
I've found a good quality 120 grit paper to be more aggressive than even my coarsest diamond stone (which hasn't received much abuse).
I shall do the comparison myself, I might be pleasantly surprised. My coarse plate is a little worn after years of use and 'abuse' (flattening stones and other things).

sploo":39b0m2py said:
It's a classic "roundtuit" problem...
Oh, you too? I thought that was just me :mrgreen:
 
ED65":1mnvxxwy said:
I shall do the comparison myself, I might be pleasantly surprised. My coarse plate is a little worn after years of use and 'abuse' (flattening stones and other things).
I did find a recent (badly chipped) iron heavy going, but didn't have any good 80 grit paper. I should get some in for next time, but the 120 grit usually works well.

ED65":1mnvxxwy said:
Oh, you too? I thought that was just me :mrgreen:
I have more roundtuits than completed projects :?
 
RogerP":688f19mc said:
Over the years I've tried most methods of rust removal. I now have a large plastic container permanently rigged up for electrolysis. Just connect up and hang the items in it, and come back a bit later to find all the rust completely removed. Quick wash and going over with a wire brush and ready for painting/finishing.

Roger, do you do this indoors/in garage/shed ? I am planning to set up similar but wonder how risky the electrolysis gases (mainly hydrogen) will be? If the process is very slow, then the risk should be minimal but I'd welcome your experience.

Keith
 
Hi again everyone,

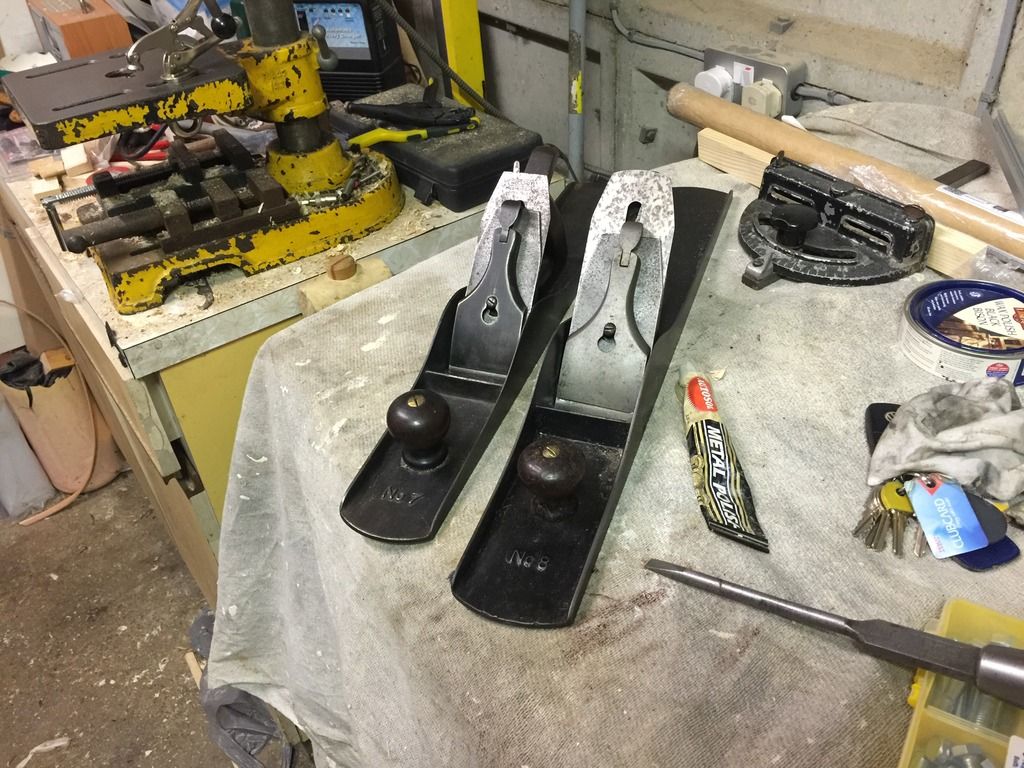
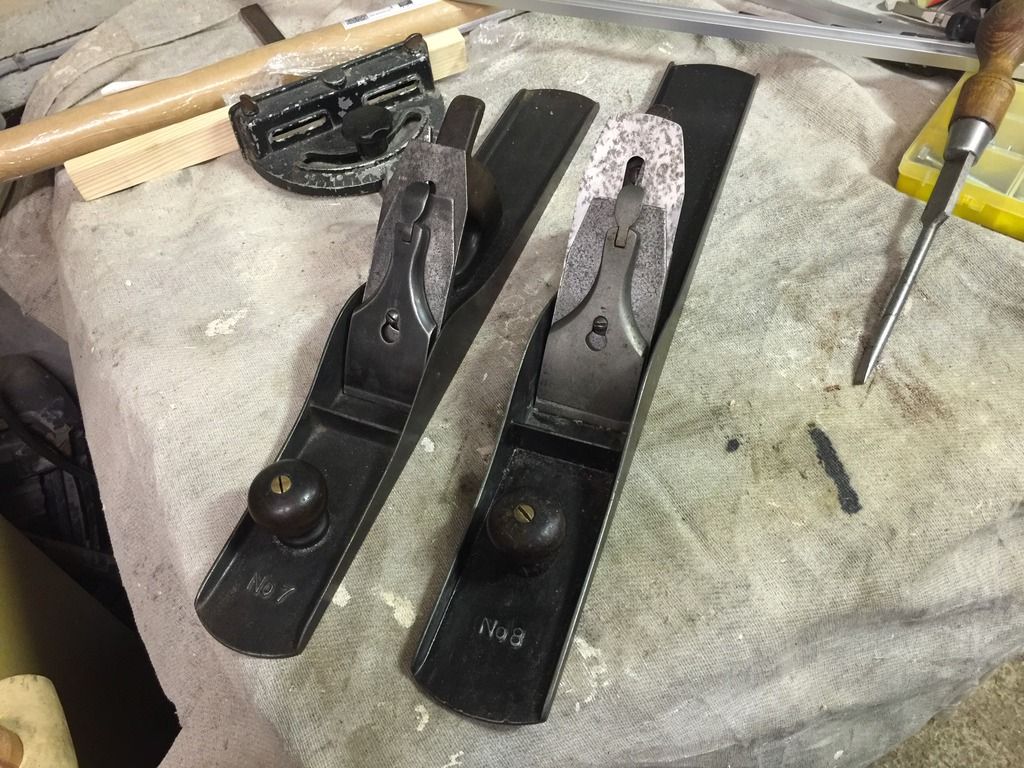
I just wanted to give an update on where I got to with this plane. The japaning was about 95% gone so after de-rusting there really wasn't very much left to save. I did get some satin finish straight to rust Hammerite paint which I thinned down 4:1 or thereabouts which seemed to give me the kind of finish I was looking for (old, looked after and worn looking as opposed to brand new). After fixing the tote and waxing the woodwork using microcrystalline wax I applied a coat of the thinned paint then lapped the sole flat. Here is how the plane looks now with my No. 7 next to it for comparison:


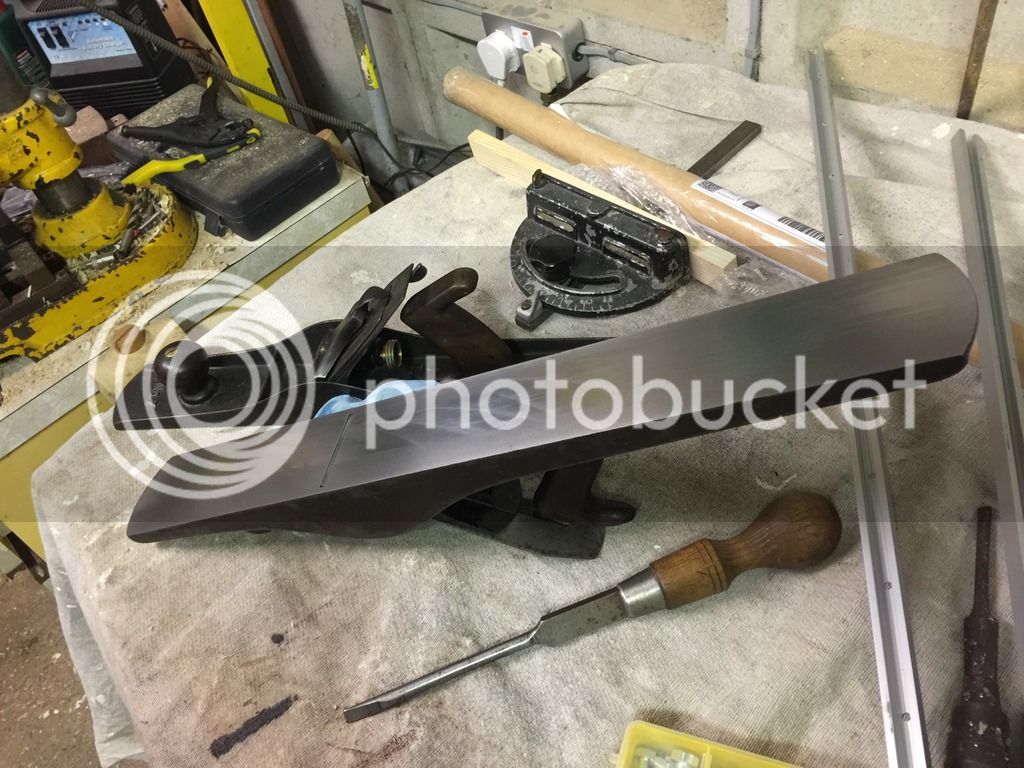
Here is a shot of the sole. The squiggly marks are from a candlestick which is how I lubricate the soles of my bench planes:


The plane now works a treat and I think does not look unloved or mistreated but at the same time not obviously over-restored. Just the outcome I was looking for. I'd welcome your thoughts.
 
I think you've done a lovely job and succeeded in your aim. It certainly doesn't scream 'repainted'. Good for another century of use!
 
memzey":3lc3up03 said:
The plane now works a treat and I think does not look unloved or mistreated but at the same time not obviously over-restored. Just the outcome I was looking for. I'd welcome your thoughts.

My normal goal is for a tool to look as if it has been owned and used by a thoughtful and conscientious craftsman all its life - even it hasn't. :D

BugBear
 
That's basically what I was going for BB; old and well looked after as opposed to new and shiny.

Having a No. 7 of the same vintage made things easier I must admit. Without that it would have been difficult to know what to aim for (actually most of my planes are of similar age but the point is the same).

When I pick up and use a 100+ year old tool, entirely aside from the excellent performance, I also get a sense of the times and many craftsmen that the tool has encountered and feel quite privileged to be using it today. I suppose some get the same feeling from a modern LN or Veritas which is totally understandable (perhaps more than my own position in fact) but my own tastes run a bit different. I was having a discussion with a girl that works for me about this sort of thing and we agreed that she was a "new and shiny" sort of person while I preferred "old and patinated" she couldn't figure out why and I'm not sure I can either but there you go!
 
Thanks biskit. Actually I just thinned it and brushed it on with a fine brush. I do have a compressor but didn't have the space or the patience to spray it on. I need to sort that out in my new workshop really as spraying can give a very fine finish.
 
Have just had a read through all of this and am just doing this to a similarly vintage no.6 having done a no.4. Great advice so thanks!
 
memzey":2o3hsbel said:
That's basically what I was going for BB; old and well looked after as opposed to new and shiny.

Having a No. 7 of the same vintage made things easier I must admit. Without that it would have been difficult to know what to aim for (actually most of my planes are of similar age but the point is the same).

When I pick up and use a 100+ year old tool, entirely aside from the excellent performance, I also get a sense of the times and many craftsmen that the tool has encountered and feel quite privileged to be using it today. I suppose some get the same feeling from a modern LN or Veritas which is totally understandable (perhaps more than my own position in fact) but my own tastes run a bit different. I was having a discussion with a girl that works for me about this sort of thing and we agreed that she was a "new and shiny" sort of person while I preferred "old and patinated" she couldn't figure out why and I'm not sure I can either but there you go!

I feel the same about old tools, it's not just the craftsmen who used them but the folk that made them in the first place. With new high quality or handmade tools I also enjoy the thought that it has been created by craftsmen - so in a way, continuing with that tradition - that is why I have rather a soft spot for the Clifton range... from some years ago...https://www.youtube.com/watch?v=MdH43wiB0IA

Nice job on the #8 as well.

Cheers
Richard
 
Wow this thread is a blast from the past and no mistake. I was using that No. 8 the other day for edge jointing as it happens and it still works like a dream. More to the point of this thread though - it doesn’t look restored at all, even when next to other planes of similar vintage. I’ve decided to quit painting planes while my luck is in though!
 
Back
Top