Table saw dust extraction

UKworkshop.co.uk

Help Support UKworkshop.co.uk:

This site may earn a commission from merchant affiliate links, including eBay, Amazon, and others.

Karl

Established Member
Joined
2 Jul 2007
Messages
3,481
Reaction score
1
Location
Workshop
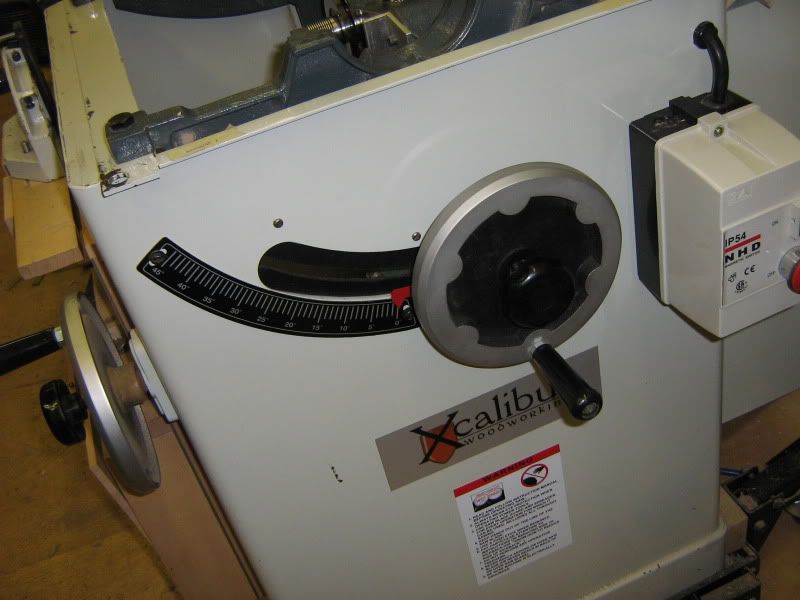
I've decided to try and do something about the dx on my Xcalibur ts.

First off, some pics
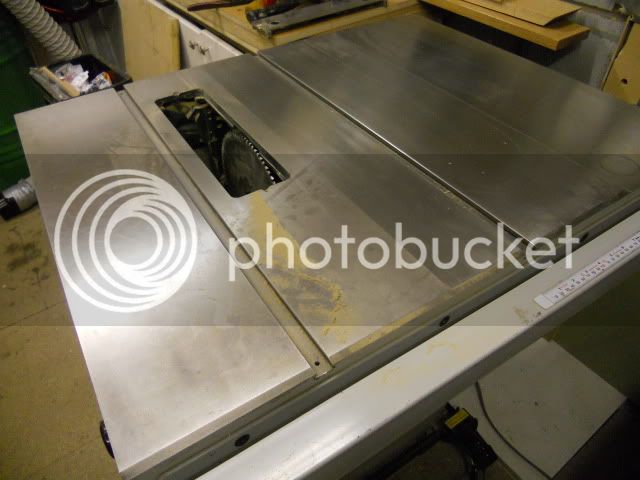
001-3.jpg


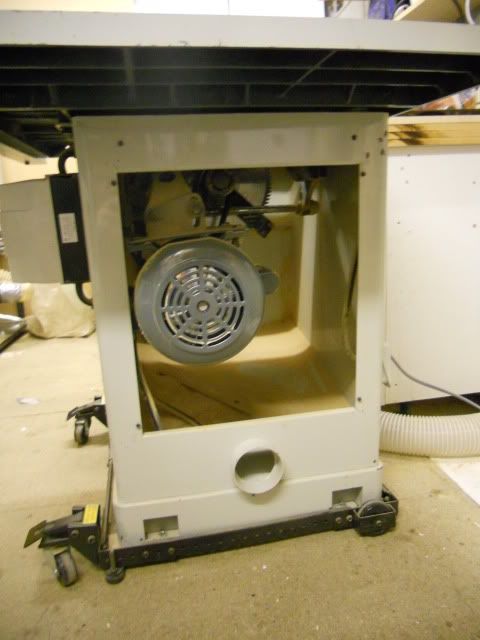
Dust is currently extracted via a 4" outlet at the very bottom of the machine
004-4.jpg


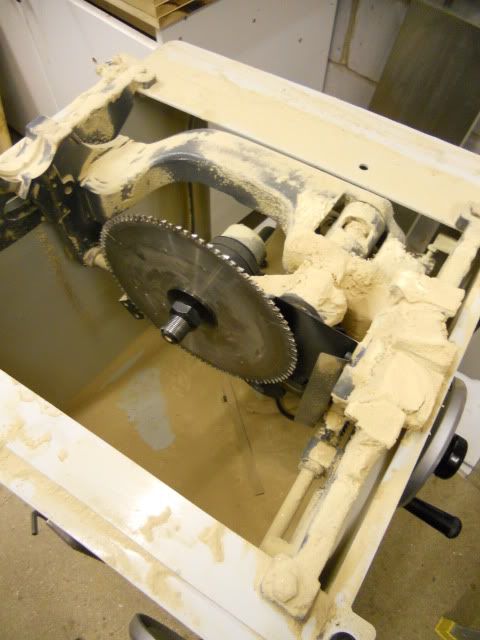
You can see the cavernous area around the motor and blade for dust to fly around before being extracted.
007-5.jpg


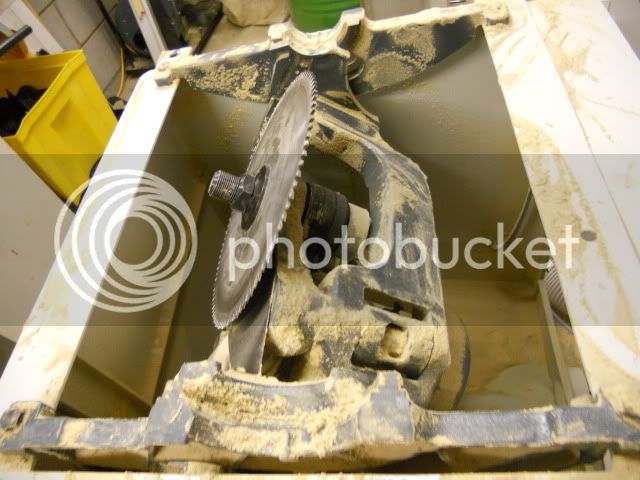
One problem comes when swinging the cradle for angled cuts.
009-1.jpg


My initial thought was to block up the existing d/x hole and put a new 5" one right behind the blade on the back of the machine

008-2.jpg


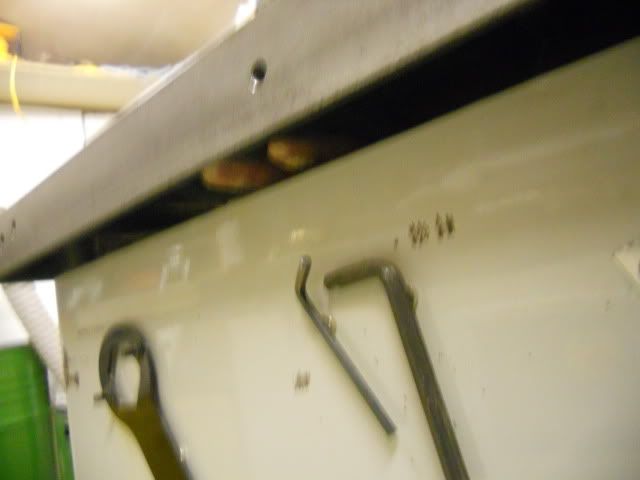
Also find some way of blocking up all the silly gaps between the cabinet and the cast iron top (those are my fingers in the pic).
006-3.jpg


Anybody got any good ideas on how to treat the swinging cradle - I want to reduce the internal volume of the cabinet by fitting a false floor/blade shroud.

Any comments welcome.

Cheers

Karl
 
I'd be inclined to make a Formica faced hopper reduce the internal volume of the cabinet and to direct dust to the port. My older style jet super saw has this and it works really well.
 
Hi Karl, the following are not my work, but I hope that they will help you.

First of all your silly gaps, well these could also be made to fit the upper ones
132972d1269389045t-saw-table-dust-extraction-improvement-dsc00706.jpg
These other ones could deal with the upper and lower dust
132974d1269389045t-saw-table-dust-extraction-improvement-dsc00708.jpg
132976d1269389045t-saw-table-dust-extraction-improvement-dsc00710.jpg
132973d1269389045t-saw-table-dust-extraction-improvement-dsc00707.jpg


Lord Nibbo also came up with a very good idea. viewtopic.php?t=20038

What about making a box that wraps around the blade and cradle but not the motor (over heating) and has a chute that points towards an internal extraction pipe.

HTH

Mike
 
I'm guessing the issue with allowing the dust to drop into the bottom of the cabinet has to be that it inevitably creates a situation where collection is going to be reliant on having some sort of hopper where gravity reliably drops the chips and dust into the duct - it would probably otherwise take an enormous airflow volume (cfm) to give enough airspeed to gather up the dust over such a large area. Air leakage into the cabinet in areas that don't help much will up the ante even more.

Many makers seem to go with a fairly close fitting hopper/chute under the blade - this should give decent air velocities at smaller volume flow rates due to the much smaller cross section, and as a result of both this and the layout more or less immediately capture dust thrown off the blade.

I'm looking forward to having a little play with my own set up when my Hammer saw is up and running in the coming months - a pet theory is that (a) it makes sense to clear the dust from the tooth gullets before its carried back up over the table surface at the backside and flung into your face or the blade guard, and (b) that if the air inlet into the chute was organised so that it directed the air it takes in at right angles across the teeth it might be very effective at clearing the dust from the gullets.

The game would then be to as far as possible seal the chute, and to size these inlet(s) so that they leave just enough negative pressure in the duct to give decent clearance down through the gaps around the blade - without so much suction that it causes problems in sliding the workpiece...
 
This is timely, Karl, I'm looking at exactly the same problem.
My saw has to be mobile, so permanent DX is not an option. I have a hole in my guard to take a hose, but I rarely use it, not because it doesn't work, it's quite good, but because the hose is a bit inconvenient. Laziness, if you like.
I like the shroud idea. I had thought of a piece of pipe which hugs the blade, but I don't see how I could mount it.

I might just not fight it at all, but make a liner that I can just lift out and tip into the bin.

I look forward to seeing your progress.
S
 
Thanks for all the input guys. This job would be a hell of a lot simpler if the blade didn't tilt :lol:

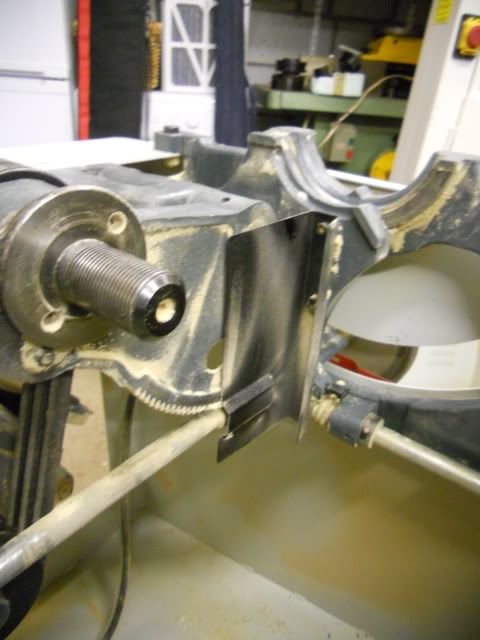
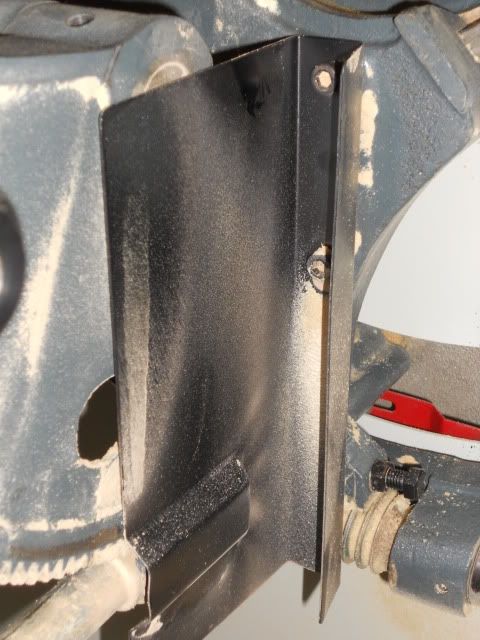
Anyway, a little more digging round this morning revealed a [black] metal channel mounted to the cradle in front of the blade - presumably to stop crud being ejected through the front of the machine where the winding handle is situated.

001-4.jpg


007-6.jpg


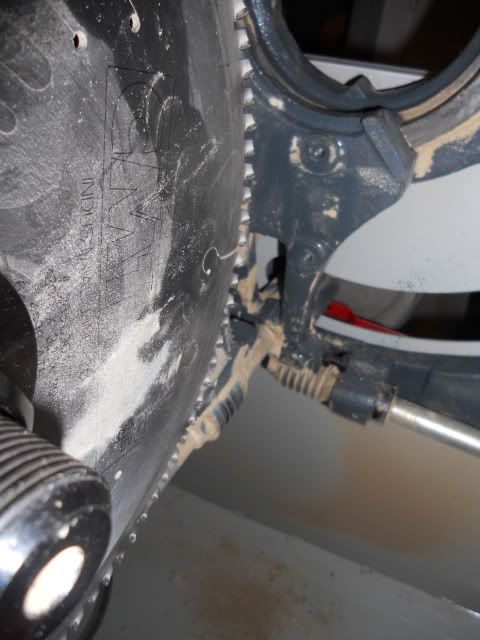
Remove this and you've got a pair of threaded mounting points

010.jpg


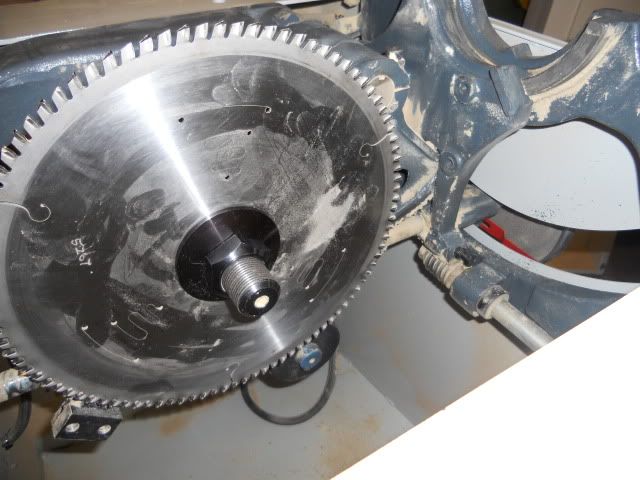
And with the blade back in-situ.

011.jpg


So my current thinking is that some kind of scoop could be connected to this mounting point, connected directly to the d/x port, perhaps by a flexi hose which would overcome the problem of flade tilt. This would capture the dust directly from the front of the blade. I've also found a guard for above the blade which will be mounted directly onto the riving knife. This has a d/x port on top.

Cheers

Karl
 
Those holes look promising provided the bracket they are in tips with the blade Karl.

Perhaps a fairly close fitting box/enclosure that tips with the blade rather than a scoop that may leak and not direct the airflow very well - here's how Felder do it on their 900 series saws: http://www.felder.ie/ie-en/products/pan ... &zoom=true (click on the picture of the saw spindle) Go to the Hammer product pages on the same site, look up the K3 Perform panel saw and check out the similar drawing for a simpler variant.

Getting the enclosure close to the blade will by upping the air speed up the effectiveness of the extraction, (but not such much that it chokes the air flow) while the shape and positioning of the inlet(s) and outlets will determine the direction of air movement and avoid dead spots.

Don't forget that the enclosure needs to let in/through enough air to give enough air flow in the duct to properly transport dust and chips back to the dust collector too. ( the 3,800 fpm in the duct I've been talking about in other posts)

As above positioning the inlets correctly may help clear dust from the blade gullets - and it seems to me that the one thing you don't want to do any more than can be helped is to allow the blade to carry dust back around and up over the table again as by definition you can't properly contain it/stop at least some of it being flung out once up there with any guard that you can also work around...

In an ideal world the top guard probably shouldn't have a lot of work to do...

PS It's just one of many options, but it's not too hard to make up a disposable one use mould from sheet metal, card or foam board and the like to make a housing like that in glass fibre if you are not too bothered about it being finely finished. Wax it well, and coat it with a PVA release agent, and use precisely the recommended amount of hardener if it's polyester resin as it can otherwise warp and distort. Fill any sharp corners (so they end up a decent radius) with a finger applied fillet of Isopon or something to ease the eventual lay up, and use several layers of a lightweight open weave (so it conforms easily) cloth or over a gel coat.
 
Hi Ian

Yes, it does tilt with the blade, although it doesn't rise and fall with the blade. #-o

Thanks for the Felder link - very interesting. For everyone else, here's what it shows

mdt_img_48_2_162.jpg


Cheers

Karl
 
That is also the way it workst on my EB PKF255

although mine is not build of that heavy cast iron, but from simple 3/4m stell plate
 
Karl,

I've got the table top off my Xcalibur at the moment to do a modification* (10" but I think yours is the 12") and I've got nothing like that amount of dust accumulating in mine. The biggest problem I find is slivers falling down and blocking or entering the DC port.

It also throws a fair amount out at groin level either from the gap betwixt table and casing or through the height adjustment hole.

I might try and block those gaps whilst I have it in pieces.

*I'm fitting a DRO to indicate the blade height as i do a lot of dado and joint cutting on my saw although I realise that is is not to everyones taste.

Bob
 
Probably not transferable, but I made a new under table guard for my Lurem (the blade originally only had the most vestigial guarding, and the side of the saw was completely open). This rises/falls and tilts with the blade. It then has a 2" exit on the bottom front corner, connected via a piece of flexible hose to an outlet on the side of the machine. Doesn't collect everything, but helps a lot as I realised this afternoon when the extractor hose had come disconnected from the outlet. Wondered why there was so much dust suddenly flying around.
Obviously not in the Felder league, as it was fabricated out of 1mm steel sheet, but it's do-able.
 
Not sure if it will be any help but to reduce the dust being thrown out and increase dust extraction at the same time, I read an article whereby the author had used a draught excluder type set up (the hairy brush type used behind letter boxes). He installed it behind the slot for the height and slide adjustment wheels. The adjustment bars of the wheels slide easilt along it's desired path with no or little resistance from the excluder. He seemed quite pleased with it.

Just a thought
 
Bluekingfisher":35fmgr2s said:
Not sure if it will be any help but to reduce the dust being thrown out and increase dust extraction at the same time, I read an article whereby the author had used a draught excluder type set up (the hairy brush type used behind letter boxes). He installed it behind the slot for the height and slide adjustment wheels. The adjustment bars of the wheels slide easilt along it's desired path with no or little resistance from the excluder. He seemed quite pleased with it.

Just a thought

Thanks - I had that one mentally stashed away and was planning on fitting something similair.

Cheers

Karl
 
We are thinking on similar lines. I have a length of the bristle draught excluder here in readiness for blocking the arc round the height adjuster shaft. That is the next job whilst I have the table off the saw.

Bob
 
I made good progress this afternoon. SWMBO went out for the afternoon - was there a connection I wonder????

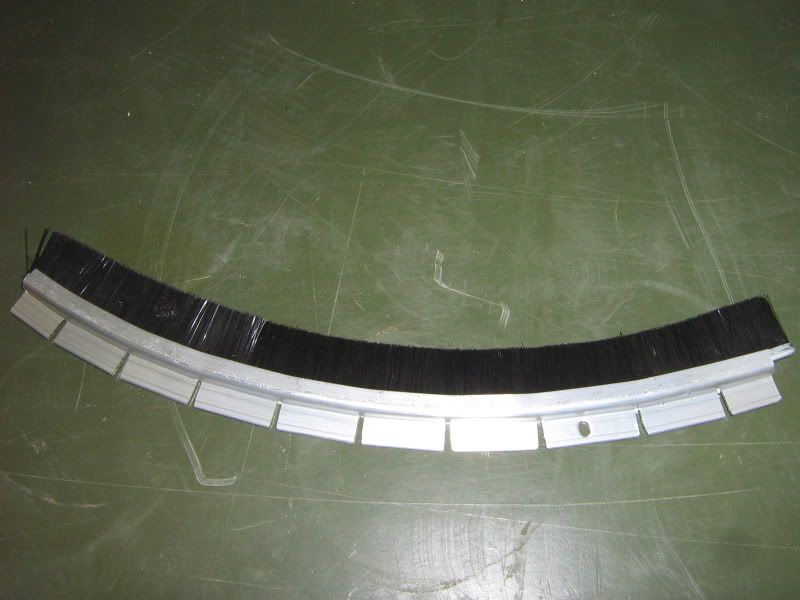
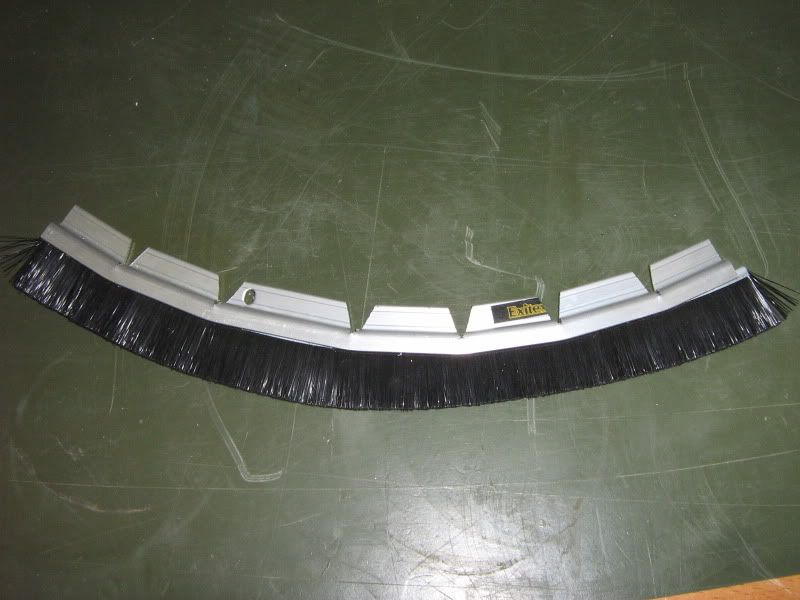
First off a couple of pieces of brush strip formed into arcs to suit the slot in the Xcalibur casing.

Notches cut about every inch to allow the strip to be bent to fit a couple of MDF templates of the the slot curves.

IMG_1493.jpg


IMG_1494.jpg


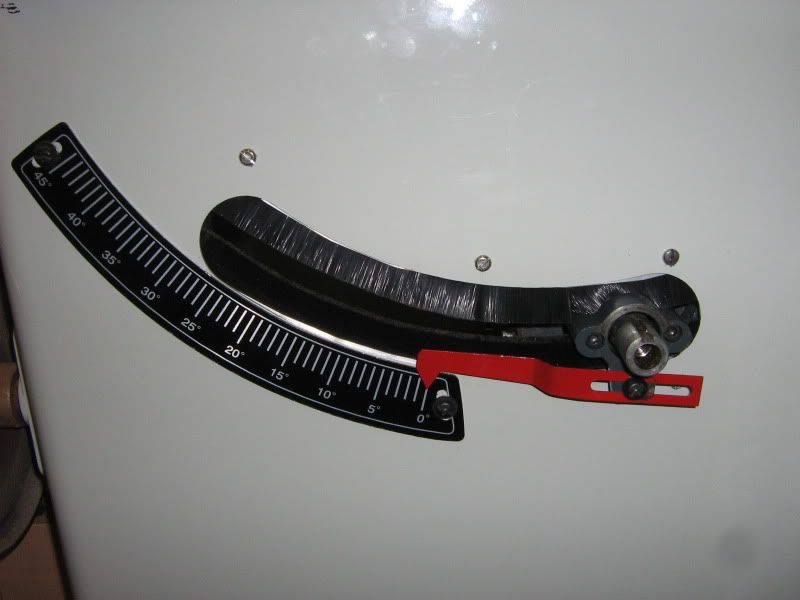
There is about 6mm clearance inside between the casing and the trunnion castings - just room for the strip to be screwed in place

IMG_1497.jpg


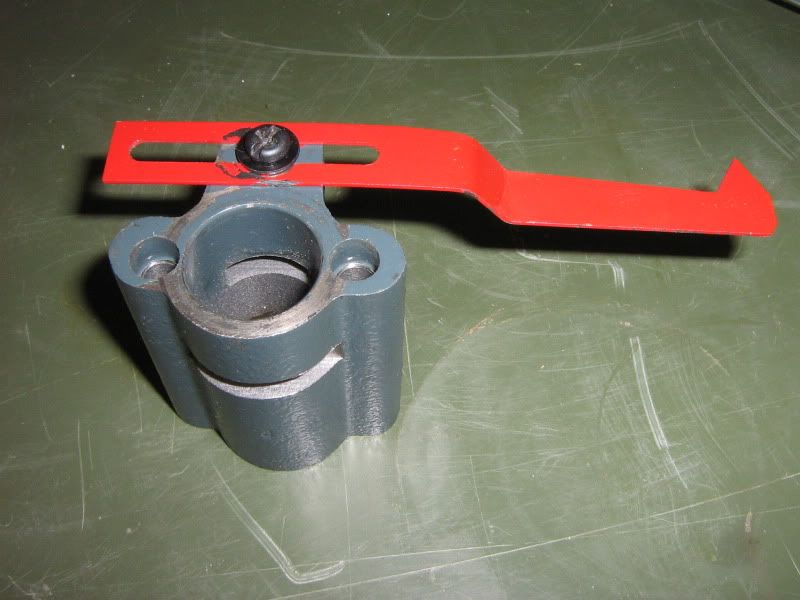
The casting that extends through the slot serves only to hold the pointer but is quite thick and will permanently distort the bristles so I machined in a pair of slots for the bristles to run in

IMG_1496.jpg


Handwheel refitted and all is back together

IMG_1498.jpg


Ideally I would have liked to have longer bristles to close the slot completely, however this was the only size strip I could get at the time which is 15mm.
However, Toolstation are now selling a 25mm strip item no 57368 which might be a better choice if you want to do the same modification.
I think that reducing the slot from 45mm down to about 10mm as well as other gaps I will block should increase the vacuum inside the cabinet sufficiently to prevent dust being thrown out of the slot.

I've still got to finish other mods to the saw before I can put the table back on and try it out in anger.

Hope this is of interest

Bob
 
Thanks Bob - very helpful. Although machining a coulpe of slots on the pointer casing may be more difficult for me than you :D

Cheers

Karl
 
Hi Karl,

Cast iron is quite soft stuff and you could cut the slots with the edge of a file. They do not have to be precise in any way.

Bob
 
Just a quick update. One thing I needed to sort out was above table guarding (and re-fit the riving knife). For those who don't know, my original guard was destroyed in my Brown Trouser Moment. It was rubbish anyway :lol:

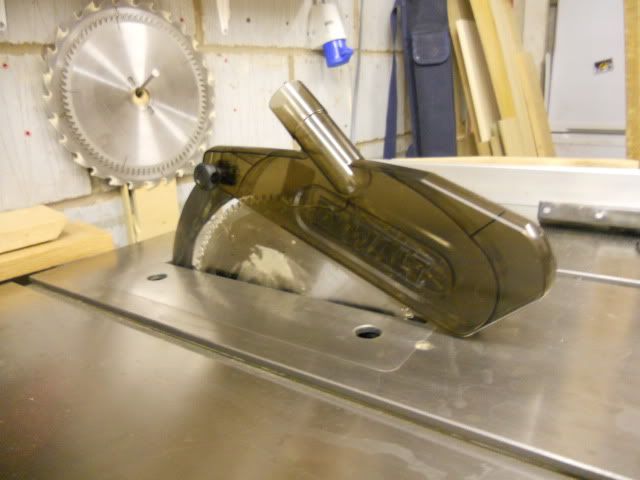
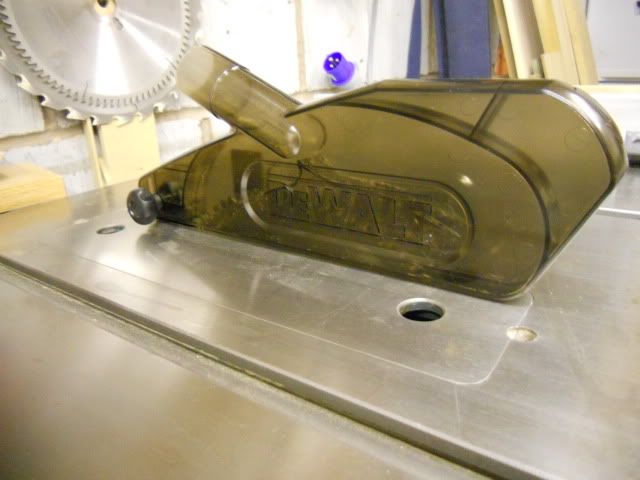
I saw a Dewalt blade guard on e-bay and bought it - £18 delivered. A bit of work with a hacksaw and re-position the mounting hole on the riving knife and i've now got a new blade guard fitted, complete with above the table dust extraction.

001-5.jpg


002-2.jpg


I drilled an elongated hole in the riving knife for the guard to slot into. As you can see, even at full depth of cut, the guard can't touch the blade (unlike the last one!).

Anyway, i'll be cracking on with the under table extraction in the next few days.

Cheers

Karl
 

Latest posts

Back
Top