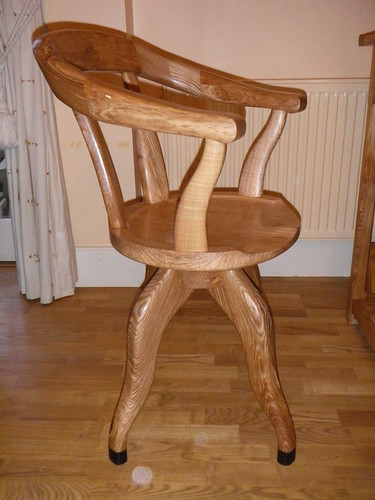
Swivelling Captain's chair finished

UKworkshop.co.uk

Help Support UKworkshop.co.uk:

This site may earn a commission from merchant affiliate links, including eBay, Amazon, and others.

gasman

Established Member
Joined
14 Nov 2006
Messages
1,011
Reaction score
337
Location
Near Oxford
I would like to make a swivelling captain's chair to go with the writing desk I have just finished. Does anyone know anything about the simple swivelling mechanisms used in such chairs? Would it be like the mechanism used on a lazy susan or is it simpler than that? I do not need the chair to tilt or gas elevators or anything fancy like you find on a office chair. Thanks
 
I have a chair at home from one of Norways large pine furniture factories, which has a very coarsely threaded steel rod which makes it possible to both adjust the height and swivel. I think it could very well be incorporated into a housing of sorts which don't leave it open as mine is.

But considering the quality of your desk i have a feeling you might be looking for something else.
 
Taking on from the screw idea, Axminster do a wooden screw threading kit cheaply that would allow the height to be adjusted, look traditional and also if well waxed give you a nice swivel motion.
 
Thanks Chems - I did think of those wood screws actually as well - as I have the 3/4" one. I know that Axi do a 1&1/2" one as well - so you think that would be the thing to use? The chair I am modelling this on is this one
4398233409_2823683a4d.jpg

and it has a dirty great big metal swivel bolted into it
4398233397_6fa1e3df5e.jpg
 
No Probs Gasman. 6" ish sounds about right, I couldn't tell you the exact dimensions to be honest. The customer would normally buy the parts for us to fit. There are lots of versions of the same thing so have a good look around at sizes and prices. ;)
 
It has taken me an age and been very tricky mostly because of trying to work out the 3D composition of the upper part of the chair - and apologies for the lack of pictures thus far.
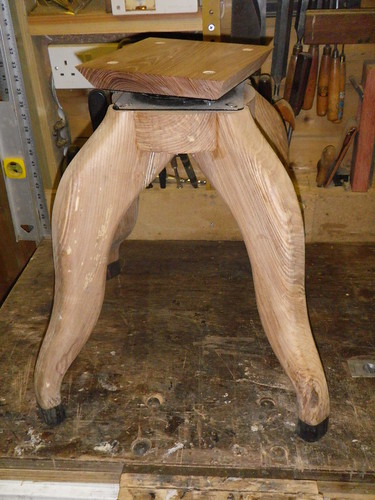
So here is the base... construction was, like the writing table legs, done with an MDF curved template cut to shape, then a bearing-guided flush trim bit, then a bearing guided thumb moulding bit to make the curves. Once the 4 legs were roughly finished, they were joined together with dominos, then the 4 quadrants added for strength. Finally I added a 4cm piece of ebony to the bottom of each leg, again domino'd in place. It seems quite strong
4459751180_b444925e87.jpg

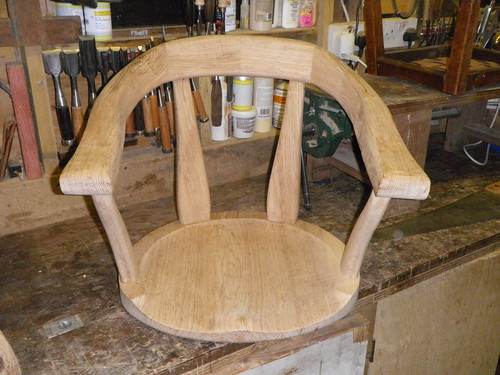
For the top, I joined 2 of 10 inch wide, 2 inch thick pieces of olive ash, then cut the circular base from that. I used the new proxxon long-neck grinder with mini Arbortech blade to cut out the seat, then used a Rotex sander to smooth it. The mini grinder is absolutely great and very easy to control although dust extraction is obviously very limited.
The top frame was done using the table saw to cut compound angles on paired pieces of 4x2 olive ash starting from the top middle. Each piece was joined to its neighbour using a single 10mm domino. This was complicated as I was going to remove a lot of waste once it was all glued up so that it all flowed together and I obviously did not want to expose a domino accidentally so I had to try and place them in the centre of where I thought the final shape of each piece would be.
Once the basic form was complete, I used the long-neck grinder again first with the mini Arbortech and then with the fan sanding attachment which were superb.
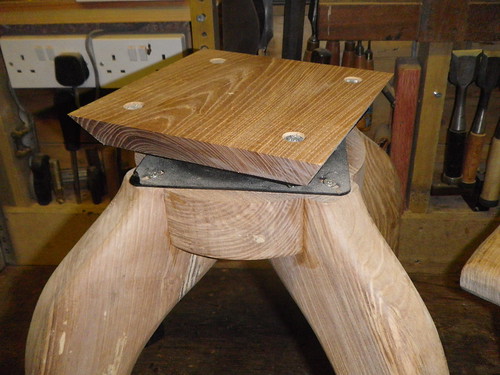
The 'supporting struts' of the top were easier and no problem joining them to the base. Then the only difficulty was joining the top frame to the tops of the legs - I ended up using an 8mm dowelling set - but then once the dowel was in place roughly, I drew round the top of the leg on the bottom of the frame and cut a 1/4" recess into which the legs fitted exactly.
4458970901_1b79935fbd.jpg

I was delighted with the swivel - only GBP10 from that marine store
4459751116_2b2567491b.jpg
 
I'm eager to see the finished article. My initial though was "Captain's Char? eugh!" but I'm liking it so far. Keep the pictures coming. We don't get enough WIP threads these days :(
 
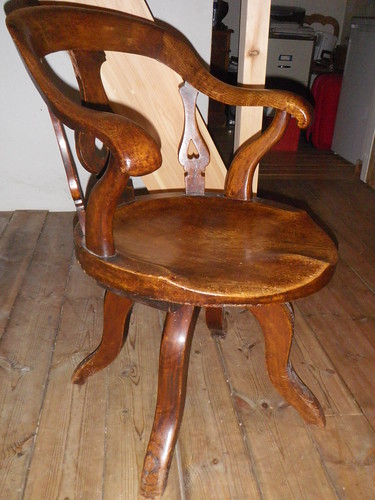
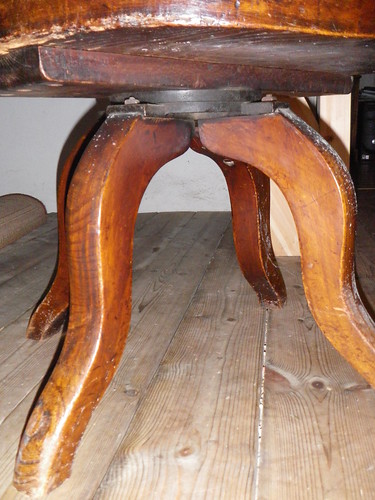
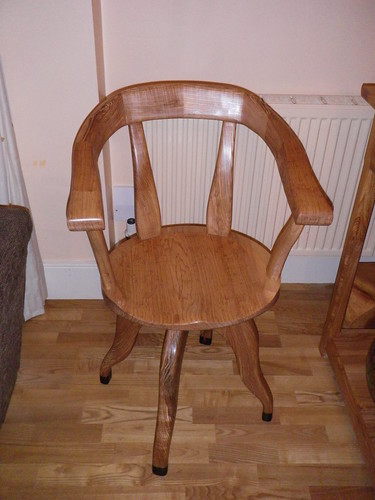
Finished it this weekend - lots of sanding down, then sanding selaer, then 2 coats of Fiddes Hardwaxoil, with wire wool 0000 grade between each coat, then Liberon Black Bison Fine paste wax to finish
4471026250_b0d0cbedc3.jpg

4471026242_504c787626.jpg
 
Back
Top