swiss joinery WIP

UKworkshop.co.uk

Help Support UKworkshop.co.uk:

This site may earn a commission from merchant affiliate links, including eBay, Amazon, and others.
Looks great, very interesting progress. Love seeing the awesome machinery you have. I feel quite fortunate to have the machinery I do, then I see your Watkin table saw with the stunning fences you've made and I get very envious.
I know it's off topic but any chance of some more pics of your table saw and its fences, machinery **** lol
 
Eric The Viking":1m8tjpbi said:
Your bench dog looks just fine to me.
In fact, I'd say it fits perfectly!

These things have been a bit of a trial it seems - far more complex than might first appear.

Please do keep the details coming - like Andy T, I'm really enjoying it too.

Me too. I find a lot of threads like this and the Wadkins restorations for example really fascinating and I learn a lot from them albeit second hand but I might not comment on them usually because I don't have much too add that's relevant or helpful. (Doesn't always stop me I'll admit that. :D ) It can be a bit daunting when you're starting out or just do it as a hobby to comment on professionals work. Now I've opened my trap I will say I knew the original was box section when you first posted and I was sadly quite proud of spotting it. :D Keep it up please, I reckon there's a lot more out there like me.
Cheers Adidat
Chris
 
If I were well fed and had a nice comfy bed like that I'd prolly be asleep in the workshop too :D

I do often marvel how well these multipart items/mouldings hold up to the weather, all the changing temperatures/moisture - you'd think they would pull themselves apart in no time.
 
Thanks for the link adidat, it certainly is a stunner.
It's always nice to use top quality machinery.
 
Well i have engineered it to stand up to the eliments well. Will be sanding filling and staining soon. I doubt the filler will last long, but they shouldnt do anything worse.

I'm trying to find a thick stain that would match and protect as well as the original gloop thats on there at the moment!

Any ideas?

Adidat
 
I can't recall ever seeing a wip on pattern making on this forum, but this job is coming close to it!
 
AndyT":26goof9c said:
Chris - please don't take the lack of comments to mean a lack of interest. I'm a non-commercial hobby woodworker with almost no machinery, but I find it fascinating to watch how you go about an unusual job like this in a professional setting. I've added to the number of views but not to the responses until now - just because I'm here to learn and didn't have any constructive comments!

Please do keep the pictures and notes coming.

Me too!

Jim
 
An update guys

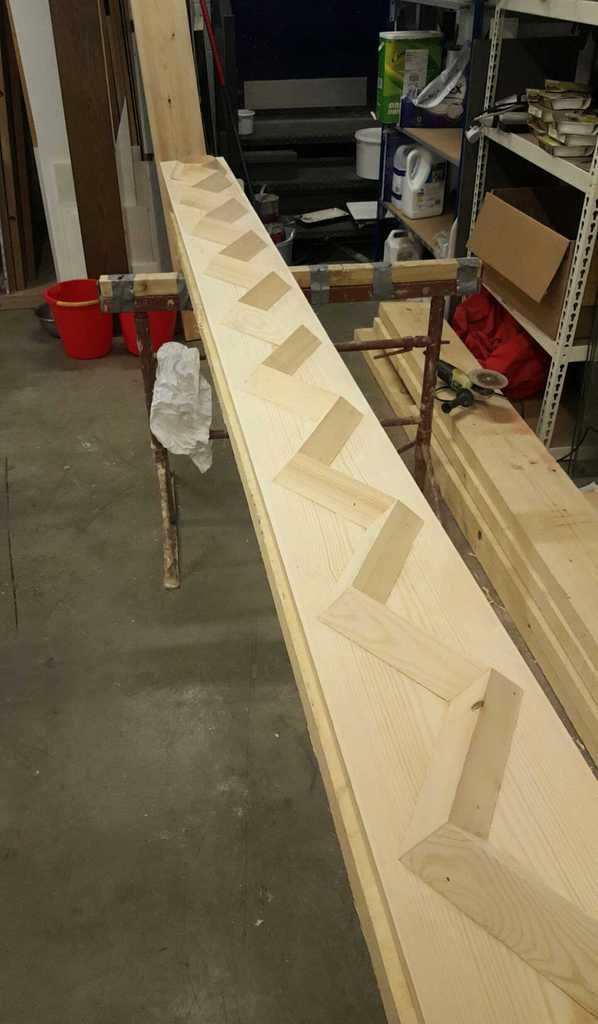
have been trying to get the barge boards bit finished up. I need 3 like this below 2 @ 1260 and 1 @ 4240 all needing mitred corners.
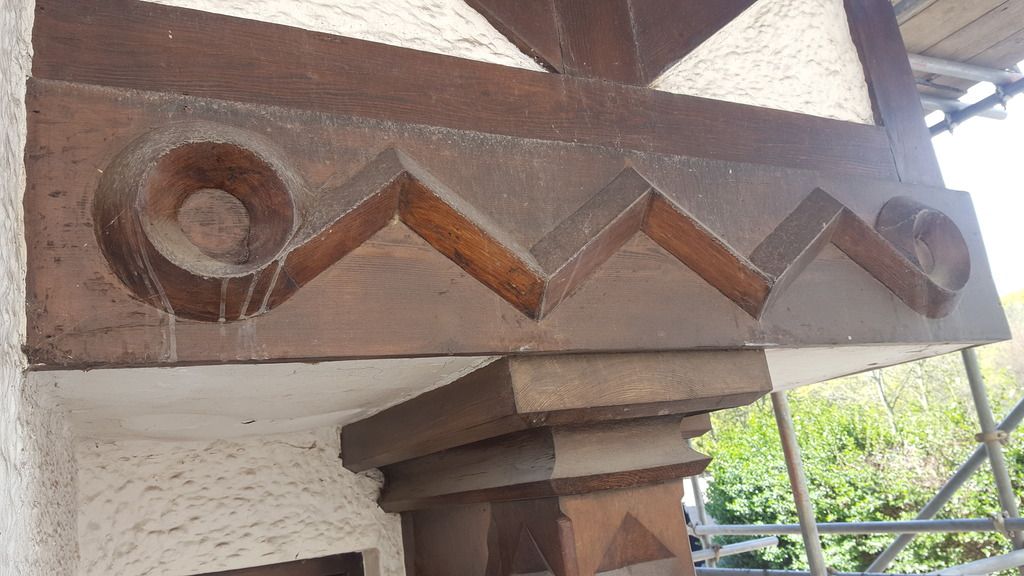


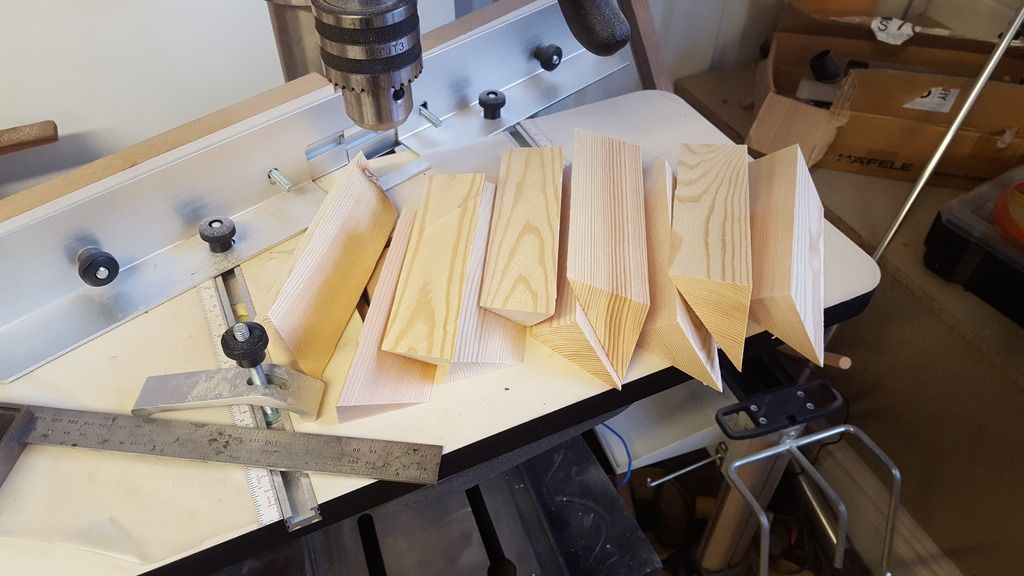
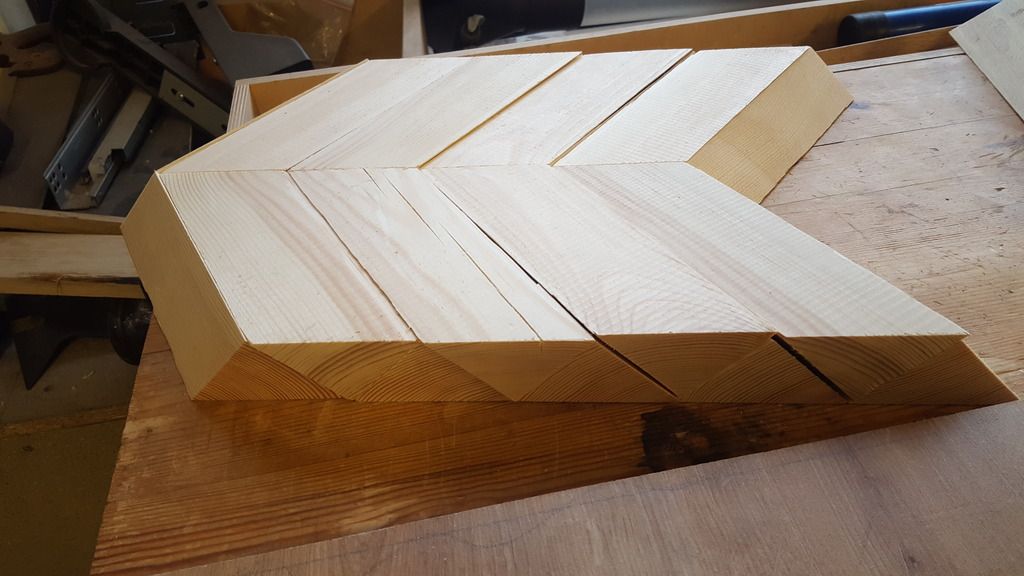
Managed to get some planed boards at 20x225 so that saved me lots of work making them, then I made 12 lengths of pine with the triangle profile I needed and cut them into the correct lengths with a 35 degree cut. Ended up needing about 25 of each piece.


Then joined up each pair with mitre adhesive to make the next process slightly easier.
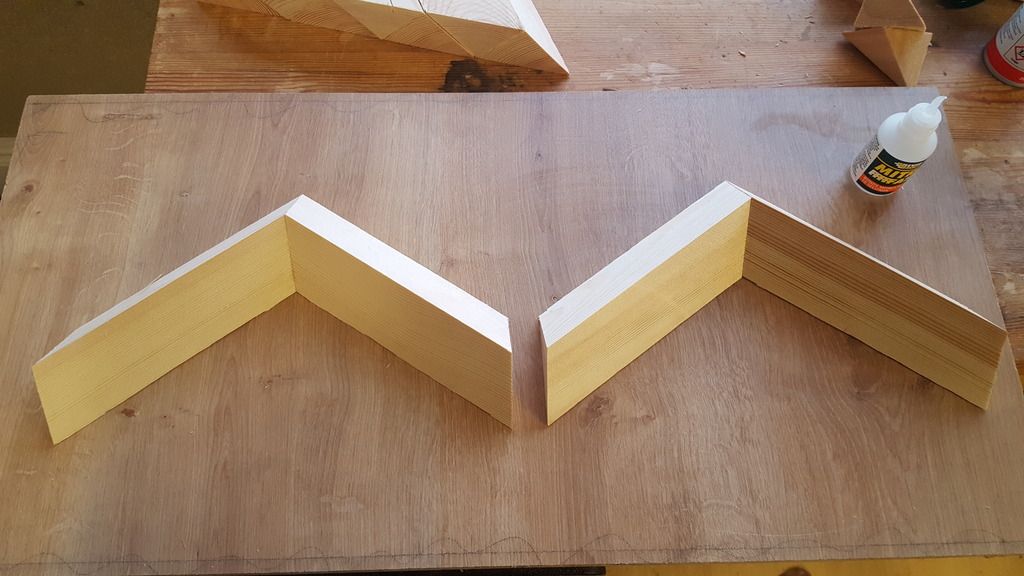


Don't know about you lot but I found this stack rather pleasing to the eye!


To attach them to the boards I used a healthy blob of PU glue to give the join some resistance to the liquid sunshine we seem to get a lot of! and then fired in a few pins to hold them in place


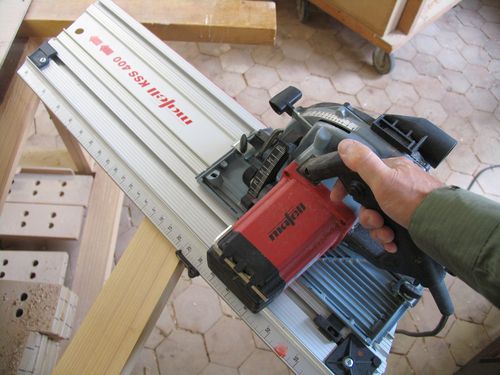
Used this badboy for chopping up the long boards and getting the mitres, its pricey but amazingly useful at times! Festool have recently released a version of it, probably made in the same factory! :twisted: :twisted:

mafell1.jpg


Next was the struggle of making the birds mouth join between the triangle section and disc parts, this was very tricky and I finally gave up on trying to make the joint look perfect so I just hacked away until it fitted correctly and filled any gaps with an epoxy sawdust mixture. After sanding they came out quite well and they are being stained with a rather dark finish!
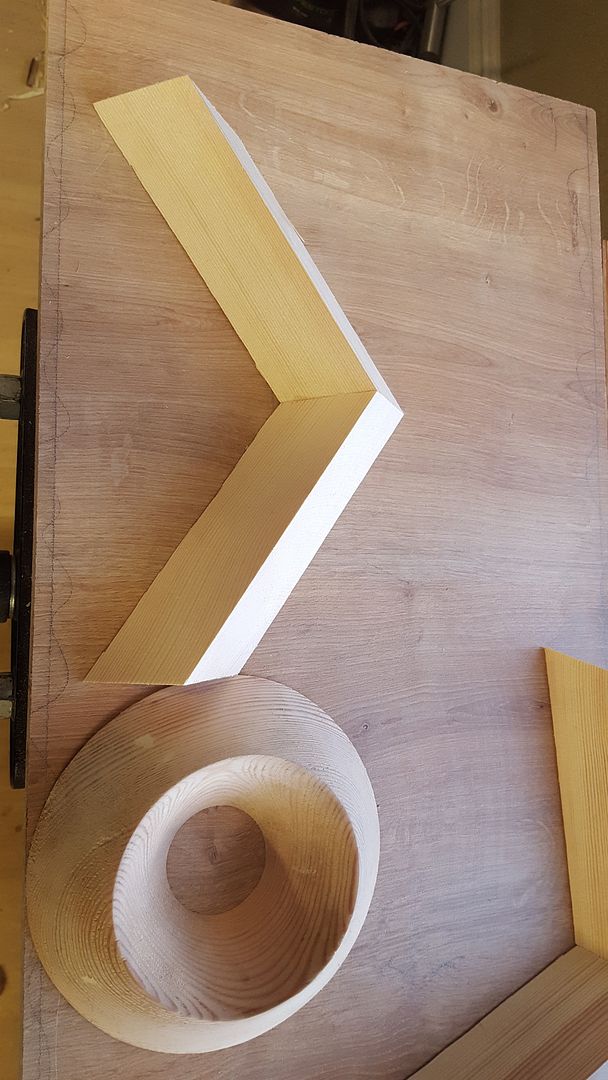
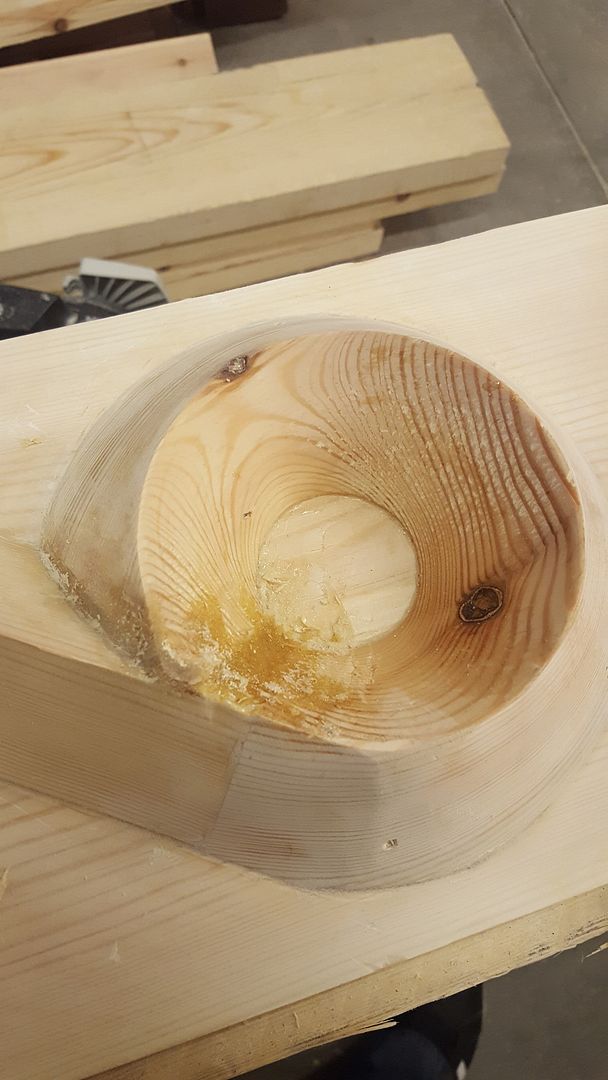


Then lots of cleaning up to remove all traces of the devils semen (as pu glue is fondly called in our workshop!) :lol: :lol: and epoxy. I used a combination of hand sanding, rotex 150, fein multi tool, power file and an angle grinder with a sanding disc on.
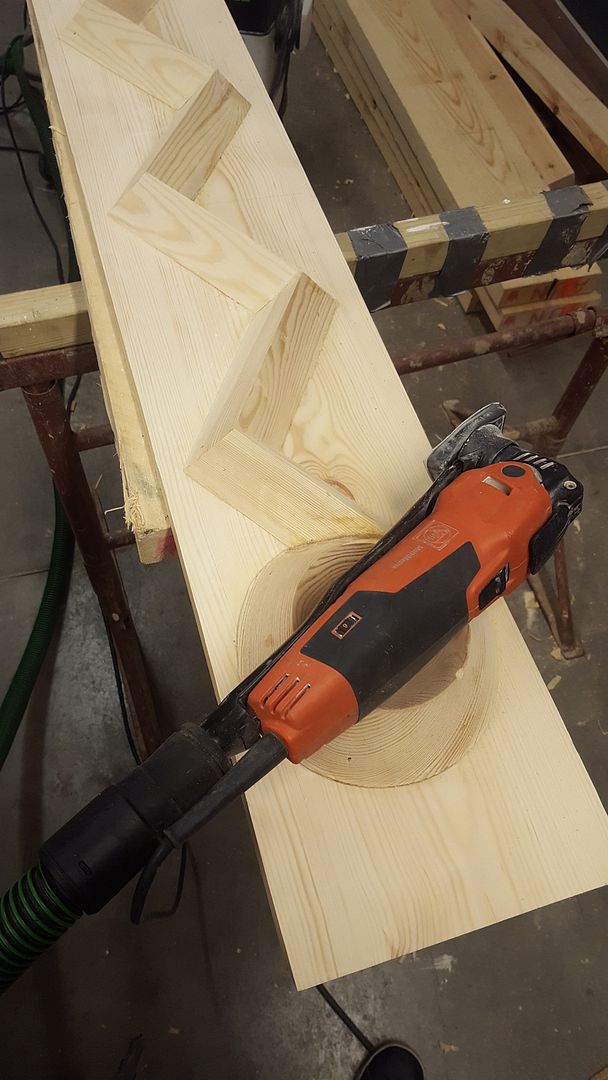


all items need to be finished and stained this week will try and get pictures of the final product!

Adidat
 
Thanks guys has been a struggle but the end is near! Think I understand how Frodo felt when he got to mount doom!


adidat
 
Been a long road but you had to actually walk it. Why didn't Frodo just use the Eagles at the start? Enjoyed this thread, thanks.

Chris
 
Just wanted to say I've enjoyed this thread too, it's nice to see something a bit different being made. Some nice toys too.
 
Great thread. While I don't disagree in any way with your use of power tools for this job, it does make it even more impressive to think that this is presumably modelled on a style from a pre-power tool time. At least you didn't have to drag it all up an Alp!
 

Latest posts

Back
Top