Nice challenge, this one took a bit longer to do. Anyhow this is the result:
This is how I did this one. Probably there a few steps that can be done faster, especially when using plugins.
From left to right:
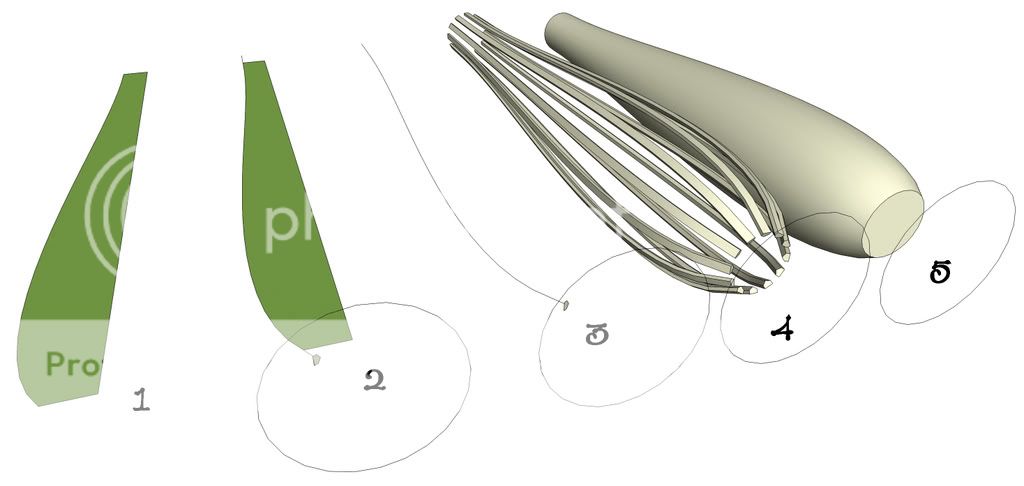
1 - I have drawn a profile (the bead diveres are all copy and pasted) and split it in three pieces. To get balnce in a profile I usually use 1:3 ratios between curve lengths.
2. Using the line tool convert the curves into surfaces.
3. Using the follow me tool the path of the circle is applied to both surfaces. The top and bottom of the two solids are removed since they will become insides.
4. With the line and arc tools I have drawn a flute profile. It's not very visible but the surface with the flute profile is a big arger than the outher diameter of the fluted portion of the leg.
5. With the follow me tool I have made a solid of the flute profile with the leg outside profile line as the path.
With the arc, line and follow me tool I have drawn one flute end and intersected it with the flute solid.
6. I removed the inside surfaces of the flute thingy. With the line tool I made the third (middle) leg section into a surface and used the follow me tool on it.
7. I cut and pasted part of the upper and lower leg solid. If I had made the middle profile to contain that section from the beginning I would have a lot to clean up when follow me-ing the flute. I intersected the middle leg solid and the flute section and removed some unnecessary lines and surfaces.
8. I deleted the rest of the middle solid to endup with a 30 degrees section of it. I made it into a component and copied it 30 degrees around with the rotate tool and typed in "10x".
9. I entered the flute component oriented the faces in the correct way and with the eraser tool in combination while holding down the shift key I have hidden the left and right edges. Exited the component, turned the leg parts into some groups and moved them together.
su_challenge_3.skp


