stair project - which book will help me?

UKworkshop.co.uk

Help Support UKworkshop.co.uk:

This site may earn a commission from merchant affiliate links, including eBay, Amazon, and others.
Constructing Staircases, Balustrades and Landings
William P. Spence
ISBN 13: 978-0-8069-8101-7
ISBN 10: 0-8069-8101-7

I found this useful for building theatrical sets.
Good diagrams but of course it depends on what yo uare aiming to do.

was available from APTC and I think Flint's in London.
 
Look at an existing staircase. If the rear is visible - you should see the wedges and the trenching in the stringers for the risers and treads. You should also see the triangular blocks.

image-3.jpg


Assuming that we aren't talking about a <£100 modern mass produced one.

What you won't see is the joints just behind the nosing - i.e. where the riser meets the front of the tread, nor the one where the bottom of the riser meets the back of the tread.

Hopefully this should explain what I mean,

image-1.jpg


I made 2 years ago for our loft conversion and relatively straightforward - chop saw and router along with a few homemade jigs.

HIH

Dibs

p.s. obviously assuming you read the relevant building regs documents about max rise and going, etc. and also ensure the spindle spacing ,etc. conforms to the regs.
 
The value of forums is the different views posted, so..............I would put the glue blocks in with rubbed joints, and then it sticks like glue. At the bottom edge of the riser I would screw the joint and so let you align everything up. You may find the rebated joint an added complication. Depends on the stair width but 3 x No 10's would be a consideration. A heavy gauge anyway. The British Standard used to note it that way at one time. This would help to cut down on the jointing variables if you are not spot on accurate (mm and mm). A MDF jig is not difficult to make either to work out with dovetail cutter and guided ring. A screwed batten 2x1 possibly so that it can be reversed to work along the top of both stringers lets you slide the jig along the stringer as you rout out. Clamped up and pencil in the treads and risers as a double check as you proceed. Check and doublle check every dimension and line before you proceed. Wedge up tight and make and sure you dont knock it off the skew by banging teh wedges inn too hard or spreading the stringers. Not to be feared at all. Working out how you 'fix' the ends of the stringers or fix to the wall, or sit down loose, and so on may take your attention. If you have a steel square you may find that useful way of setting out the risers and treads. As for wood.....Parana pine isnt too available now and Southern pine used as a replacement. Good luck.
 
many thanks for the replies, recomendations and the in depth technical advice. Looks like I might not need a book!!

Cheers, Andrew
 
are you looking at a straight flight or are you going round the bend ?

Regards 'Sue'

If you have any questions I can answer a few.
 
twothumbs":1j9z2v5z said:
Modern Practical Joinery by George Ellis is well recommended.

That's just the shallow end - Ellis was something of an expert in stairs, and published a book, on about the same scale as "Joinery" purely on stairs called "Modern Practical Stairbuilding and Handrailing".

Of course, if you don't want to build a sinuous, winding, tapering Stately Home "entrance" stairway, it might be overkill. :D

Oh, and despite the word "Modern" the books are circa 1900.

BugBear
 
A kite winder staircase was one of my first proper wood working projects for my house I'm rebuilding.
I think I have a copy of each of the books mentioned above but still ended up having to figure out the kite winder part myself, I made a couple of errors along the way but in the main it worked out fine.
I bought a router and jig that came with instructions for the straight portion and downloaded the building regs of the net to ensure the finished product ticked all the right boxes, scratched my head and worked out the twisty bit.

Like I said this was my first real wood working project and I managed so I'm sure you'll be fine.


Attachments

  • PIC01615.JPG
    PIC01615.JPG
    72.8 KB
  • PIC01613.JPG
    PIC01613.JPG
    60.8 KB
For the turning bit, set the whole thing out full size on hardboard. It will crystallise the whole thing in your mind and iron out the problems. Then use the drawing to set out the wood itself.
 
I drew it out full size on paper, hardboard would have been a better idea. I also bought a very acurate protractor for the job as the angles need to be spot on.
 
Nothings impossible if you put your mind to it!
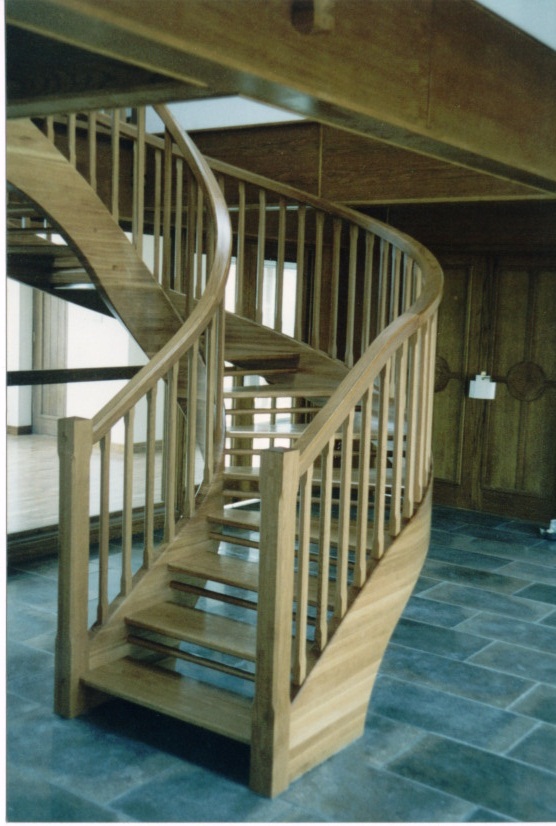
This was the first real staircase that I made.

Image15.jpg


Image11.jpg


Image10.jpg
 

Attachments

  • Image15.jpg
    Image15.jpg
    140.9 KB
  • Image11.jpg
    Image11.jpg
    132.1 KB
  • Image10.jpg
    Image10.jpg
    135.5 KB
Chrispy; respect!

Are the strings built up with blocks and veneered? Whatever method, cutting the housings must have been tricky?
 
Sawyer
No all solid Oak. the strings are made up in a stack four layers per tread, so every forth layer has a housing grove cut in on the spindle moulder (before assembly) same with mortices for the spindles.
What I find is often the most work goes into the hand rails!
I built this along time back if I can dig out all the pix I may do a post for you.
 
This is a nice one, revised reprint of something much older, but older books are generally better. This is one of a series published by M.A.P which Brian lent me recently.
 
Jesus, that's some stair case!

I'm at the beginning of my second year at college doing site carpentry and felt quite good about what I had learnt... until I saw your stairs!!! :oops:
 
Back
Top