You are using an out of date browser. It may not display this or other websites correctly.
You should upgrade or use an alternative browser.
You should upgrade or use an alternative browser.
Set of circular segmented steps - FINISHED!
- Thread starter RogerS
- Start date

Help Support UKworkshop.co.uk:
This site may earn a commission from merchant affiliate
links, including eBay, Amazon, and others.
RogerS
Established Member
Jacob":2jegff7r said:Oh is it finished? Well done.RogerS":2jegff7r said:Jacob":2jegff7r said:Reinvented the wheel "in the case of your progressive futuristic stair case. Good job it wasn't a whole flight!
You've got the right word...progress !!
Whatever, Jacob. Whatever.
RogerS
Established Member
ColeyS1":2xg5xnvc said:Crikey
Sent from my SM-G960F using Tapatalk
No, not yet....he's just doing his usual, Coley.
I kind of understand what you're saying but some of what he says rings true...to me anyway. If I were to have been given the job I would have most likely gone down the segmented routeRogerS":gl9wyhsi said:ColeyS1":gl9wyhsi said:Crikey
Sent from my SM-G960F using Tapatalk
No, not yet....he's just doing his usual, Coley.
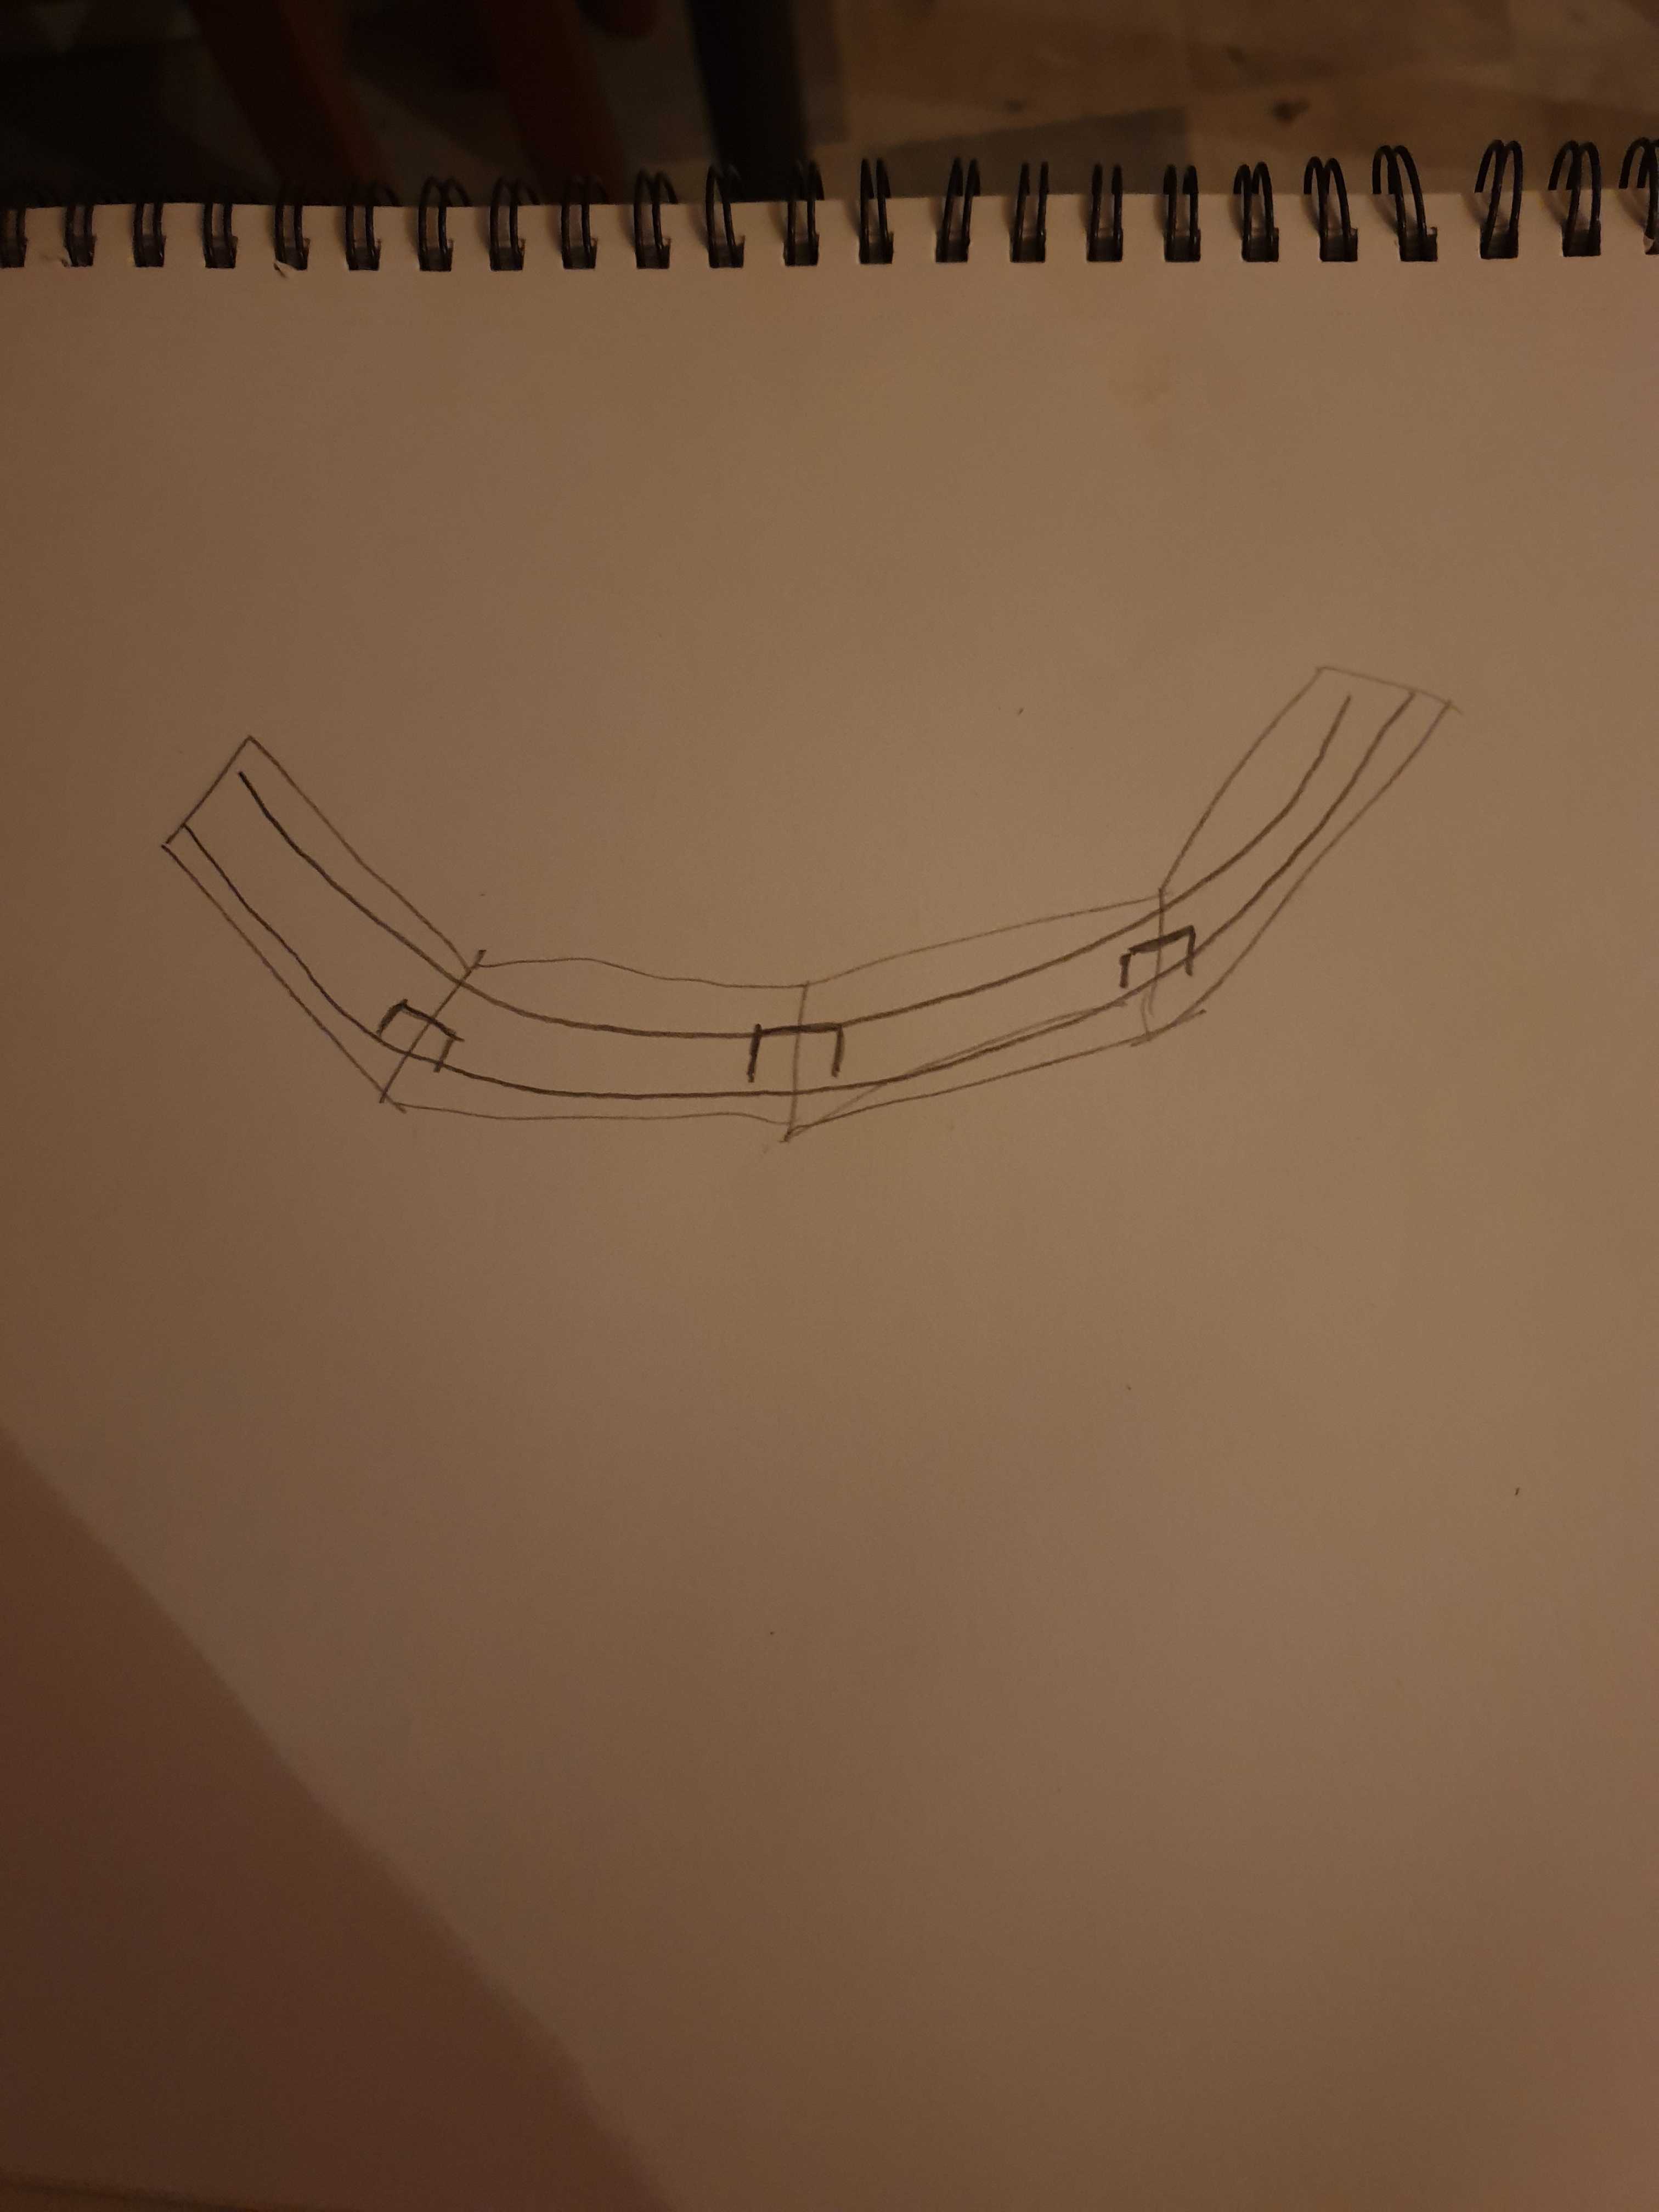
Perhaps draw a full scale rod and bisect some six inch wide off cuts and domino them but squeeze the joints together by hammering in dogs from underneath. Then leave it to settle in the room for a week or so before beginning the routing. You know what you want which makes it a hellova lot easier. If it were a case of needing some extra oak I'm sure I could have found some suitable [WINKING FACE]
Sent from my SM-G960F using Tapatalk
RogerS
Established Member
Now where were we ? Ah yes ...
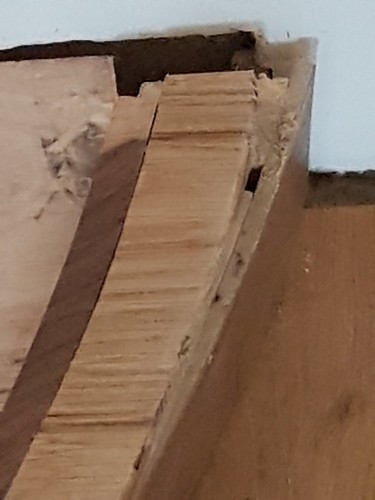
A suggestion by my wife prompted a bit of lateral thinking
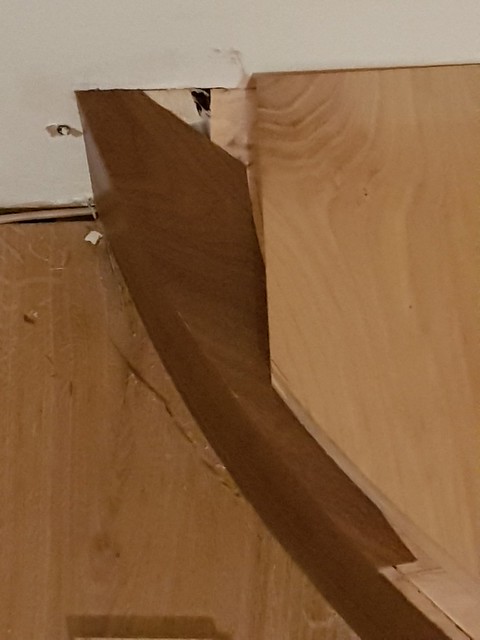
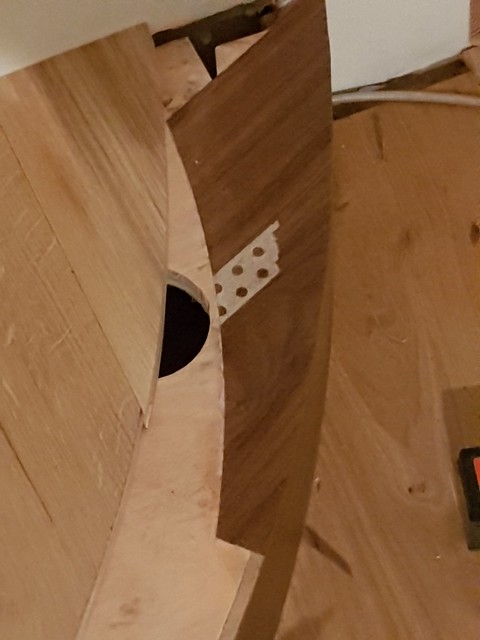
Turn it into a 'feature'... 8)
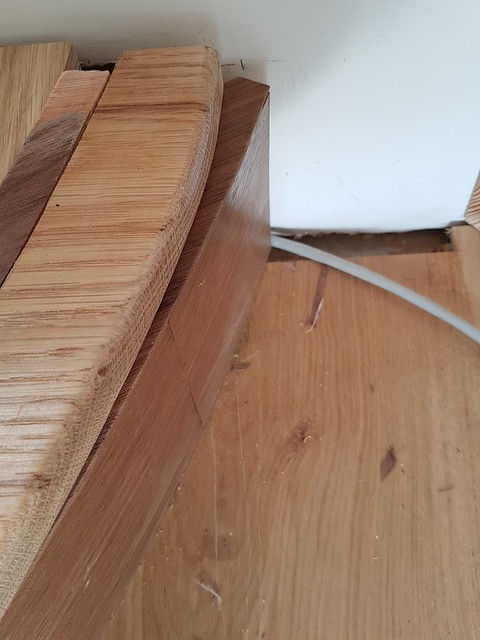
Don't look too closely at the duff join in the veneer. It's not really that noticeable in the flesh. Honest.
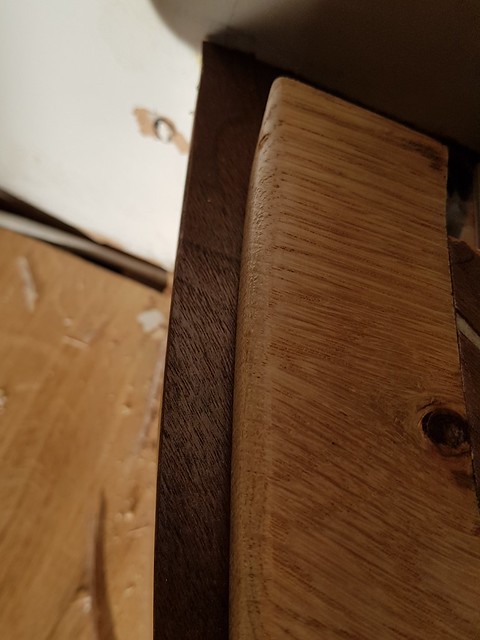
Well aware that the corner edge is vulnerable but can live with that.
Laid the floorboards for the bottom step in place, placed the nosing assembly on top and drew a pencil line between the two. Originally I'd planned to use the template I'd made/bodged ages ago...where we talked about bearings and offsets..but came to the conclusion that it would be better to go the pencil-round route.
The curves are cut close to the line on the bandsaw and then sanded on the linisher which makes short work provided you are careful not to go too gung-ho.
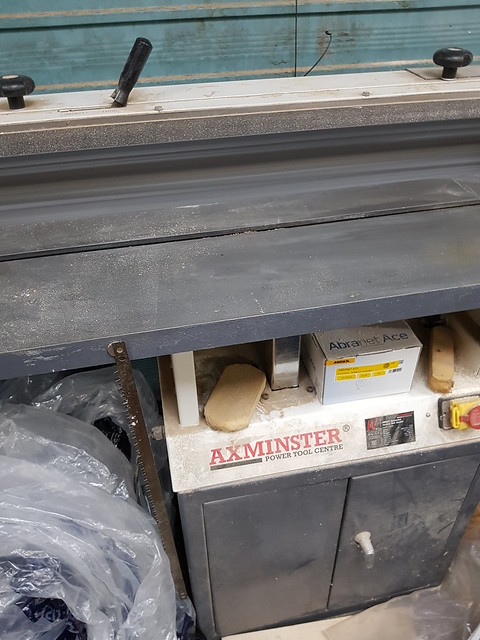
Then it's just a simple task of finely sanding to the required shape and offering each piece up to the nosing to check for a fit. Easy-peasy :eusa-whistle: ...not. Do I do it in the house with the nosing fixed (permanently or temporarily...both have their plus and minuses) - trekking back and forth between house and workshop? Or take the nosing out to the workbench, clamp it in place and finesse the curves on the floorboards there? The latter being very handy since the linisher is only feet away. I opted for the latter.
I used the central piece of floorboard as my reference
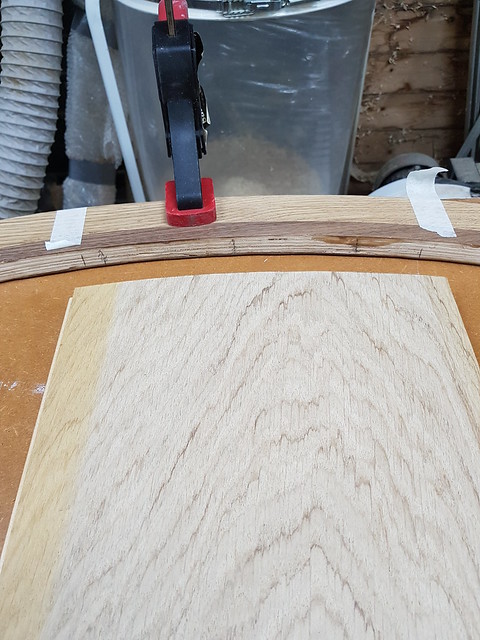
That piece went in very easily as did the next one a long but by the time I started on the third piece it all started getting very tricky as the individual pieces slipped and slid relative to each other. And relative to the nosing. But they all look OK-ish once in place. Eventually.
But now I’m in a quandary and a rod for my back of my own making. How the Hell do I fix them all down ?
I can glue and screw (using Tongue-Tite screws …ideal for this purpose) the nosing down first but how do I ensure that it’s in the right place relative to where the floorboards will be?
And if I do that then how do I get the floorboards into place as they are T&G
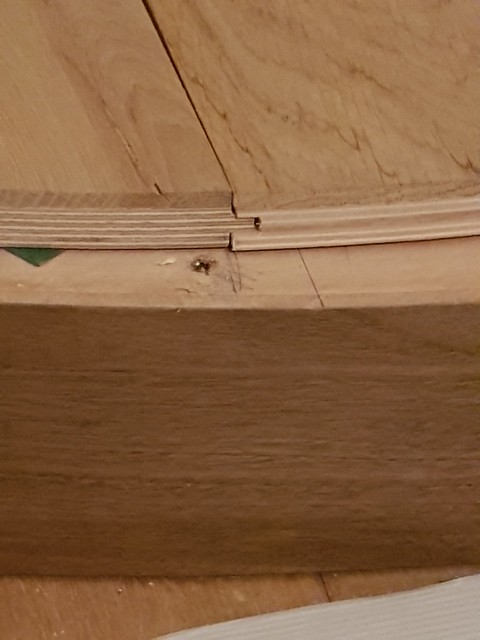
I can’t glue them up as a unit and then drop them into place after fitting the nosing because (a) the CH pipe makes that difficult and more importantly (b) I’ve found that their position relative to the nosing is critical if gaps here and there are not to appear. They shouldn’t do because it’s a nice perfect curve…not ! Think I might have had some play in my trammel when I made the original templates.
I can’t fit the floorboards down first ahead of the nosing as then I can’t get any screws into the nosing and neither can I clamp it down while the glue sets.
Current thoughts are to remove the bottom tongue of the groove of each piece so that they can drop down onto the adjacent floorboards tongue but I do know that the floorboards are not 100% flat and so I’m going to have to glue them in place with a damn heavy weight on each to keep them flat until the glue sets ….but even then I’m concerned that the glue could fail and let them pop back up, as it were. I’m reluctant to screw them down using those plug and dowel sets as they’d be too visible.
Also I noted that the nosing moves slightly as the Tongue-Tite screws are inserted.
So the current plan is to get my mate, Richard, up. We place the floorboards in position unfixed. Apply glue where the nosing will go. Offer up the nosing to get the best tightest fit to the floorboards. Then while he holds the nosing rigidly in place, I remove the floorboards which then allows us to screw the nosing down. Then starting at one side, apply glue for the first floorboard, screw it down through its tongue using Tongue-Tite screws. Drop the next one in place and repeat the fixing…all the while making sure that they are as snug a fit as possible to the nosing.
And hopefully the last one will drop precisely into position with nary a gap. But I don’t think I have anything heavy enough to keep any bent ones down until the glues has gone off.
Straws…clutching.
Any ideas, chaps ?

A suggestion by my wife prompted a bit of lateral thinking


Turn it into a 'feature'... 8)

Don't look too closely at the duff join in the veneer. It's not really that noticeable in the flesh. Honest.

Well aware that the corner edge is vulnerable but can live with that.
Laid the floorboards for the bottom step in place, placed the nosing assembly on top and drew a pencil line between the two. Originally I'd planned to use the template I'd made/bodged ages ago...where we talked about bearings and offsets..but came to the conclusion that it would be better to go the pencil-round route.
The curves are cut close to the line on the bandsaw and then sanded on the linisher which makes short work provided you are careful not to go too gung-ho.

Then it's just a simple task of finely sanding to the required shape and offering each piece up to the nosing to check for a fit. Easy-peasy :eusa-whistle: ...not. Do I do it in the house with the nosing fixed (permanently or temporarily...both have their plus and minuses) - trekking back and forth between house and workshop? Or take the nosing out to the workbench, clamp it in place and finesse the curves on the floorboards there? The latter being very handy since the linisher is only feet away. I opted for the latter.
I used the central piece of floorboard as my reference

That piece went in very easily as did the next one a long but by the time I started on the third piece it all started getting very tricky as the individual pieces slipped and slid relative to each other. And relative to the nosing. But they all look OK-ish once in place. Eventually.
But now I’m in a quandary and a rod for my back of my own making. How the Hell do I fix them all down ?
I can glue and screw (using Tongue-Tite screws …ideal for this purpose) the nosing down first but how do I ensure that it’s in the right place relative to where the floorboards will be?
And if I do that then how do I get the floorboards into place as they are T&G

I can’t glue them up as a unit and then drop them into place after fitting the nosing because (a) the CH pipe makes that difficult and more importantly (b) I’ve found that their position relative to the nosing is critical if gaps here and there are not to appear. They shouldn’t do because it’s a nice perfect curve…not ! Think I might have had some play in my trammel when I made the original templates.
I can’t fit the floorboards down first ahead of the nosing as then I can’t get any screws into the nosing and neither can I clamp it down while the glue sets.
Current thoughts are to remove the bottom tongue of the groove of each piece so that they can drop down onto the adjacent floorboards tongue but I do know that the floorboards are not 100% flat and so I’m going to have to glue them in place with a damn heavy weight on each to keep them flat until the glue sets ….but even then I’m concerned that the glue could fail and let them pop back up, as it were. I’m reluctant to screw them down using those plug and dowel sets as they’d be too visible.
Also I noted that the nosing moves slightly as the Tongue-Tite screws are inserted.
So the current plan is to get my mate, Richard, up. We place the floorboards in position unfixed. Apply glue where the nosing will go. Offer up the nosing to get the best tightest fit to the floorboards. Then while he holds the nosing rigidly in place, I remove the floorboards which then allows us to screw the nosing down. Then starting at one side, apply glue for the first floorboard, screw it down through its tongue using Tongue-Tite screws. Drop the next one in place and repeat the fixing…all the while making sure that they are as snug a fit as possible to the nosing.
And hopefully the last one will drop precisely into position with nary a gap. But I don’t think I have anything heavy enough to keep any bent ones down until the glues has gone off.
Straws…clutching.
Any ideas, chaps ?
RogerS
Established Member
The answers to a couple of my concerns have been staring me in the face !
Keeping the nosing assembly in place for gluing and screwing ...sorted !
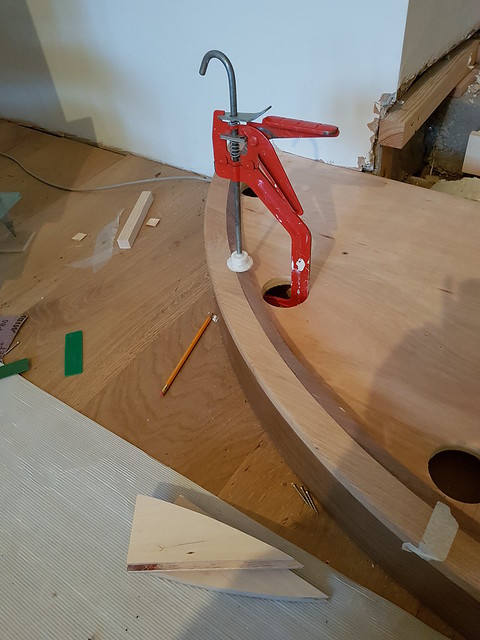
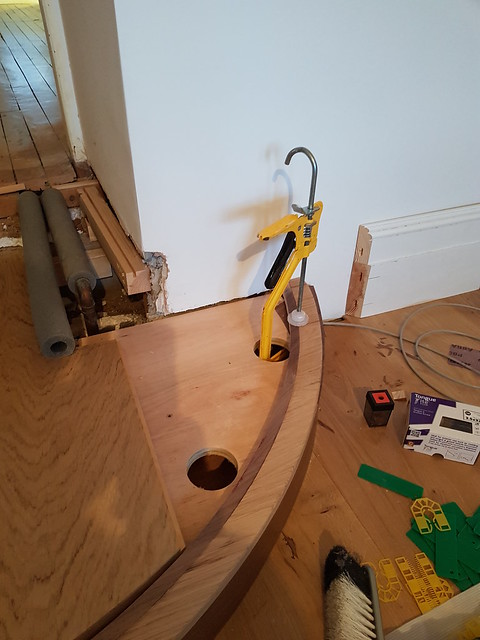
My concern about removing part of the T&G on the floorboards ? Only necessary on the last piece All the rest can be 'finessed' into place without removing anything. So I can use the T&G to keep it all level and secure.
Keeping the nosing assembly in place for gluing and screwing ...sorted !


My concern about removing part of the T&G on the floorboards ? Only necessary on the last piece

£10.19 (£0.39 / count)
£11.99 (£0.46 / count)
Nicpro Carpenter Pencil with Sharpener, Mechanical Carpenter Pencils Set with 26 Refills, Case, Deep Hole Marker Construction Pencils Heavy Duty Woodworking Pencils for Architect (Black, Red)
NicproShop EU

£9.99 (£1.00 / count)
£14.45 (£1.44 / count)
JSP M632 FFP3moulded Disposable Dustmask (Box of 10) One Size suitable for Construction, DIY, Industrial, Sanding, dust protection 99 Percent particle filtration Conforms and Complies to EN 149
Amazon.co.uk

£24.99
Facemoon Reusable Masks,Safety Masks,Dual Filter Masks, Paint, Dust, Epoxy Resin, Construction, Welding, Sanding, Woodworking, Chemical Reusable Gas Masks
ShenZHEN CIRY MINGYANG LITIAN ELECTRONIC ECOMMERCE

£16.99
£19.99
Respirator Mask,Safety Dust Face Cover,Dust Face Cover Paint Face Cover,Gas Mask With Filter,For Paint,Dust And Formaldehyde,Sanding,Polishing,Spraying And Other Work
ShenZHEN CIRY MINGYANG LITIAN ELECTRONIC ECOMMERCE

£10.10
£15.48
Portwest Browguard with Clear Visor, Size: One Size, Colour: Clear, PW91CLR
Amazon.co.uk

£199.00
£360.17
Trend Portable Benchtop Router Table with Robust Construction for Workshop & Site Use, 240V, CRT/MK3
Amazon.co.uk

£15.99 (£1.60 / count)
£27.44 (£2.74 / count)
3M 8822 Disposable-fine dust mask FFP2 (10-pack)
Amazon.co.uk

£34.99 (£3.50 / count)
£39.99 (£4.00 / count)
VonHaus Chisel Set - 10pcs Woodworking Tools Set - Wood Carving Tools, Wood Chisel Sets with Sharpening Stone, Honing Guide and Storage Case
VonHaus UK
RogerS
Established Member
While the nosing is being glued down (I used a version of No-Nails as it dries slightly flexible) attention turned to the top step.
Having learned a lot from making the bottom step and being a smaller step, it went together much quicker and slicker than the bottom step.
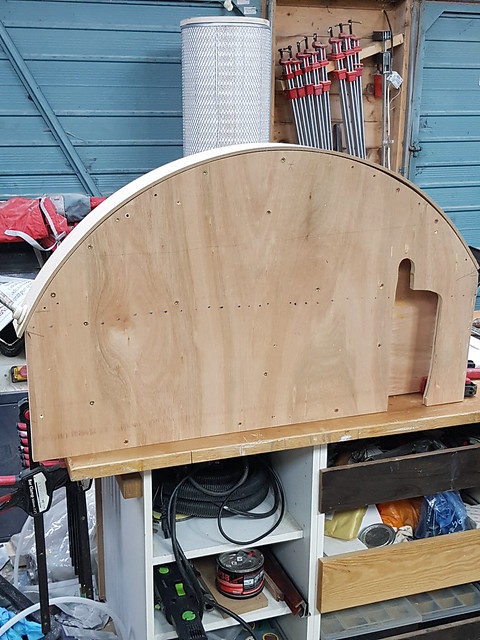
Create the subframe with suitable cutout for the CH pipes.
Bandsaw curved blocks to support the riser.
Glue and screw all together then ..
Glue the riser in place - pre-curving it using the hot-air gun technique…brilliant tip.
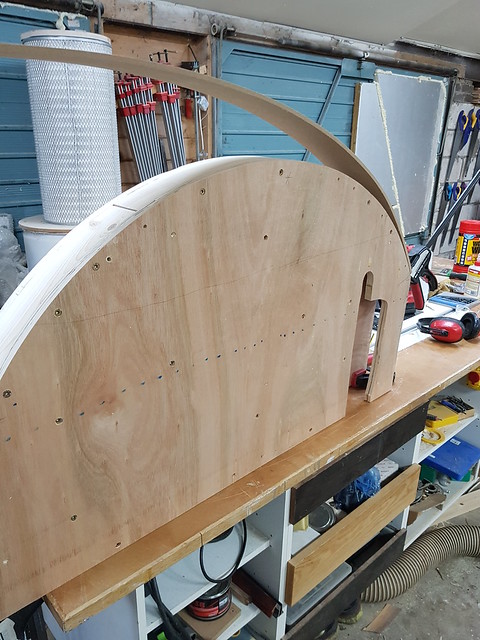
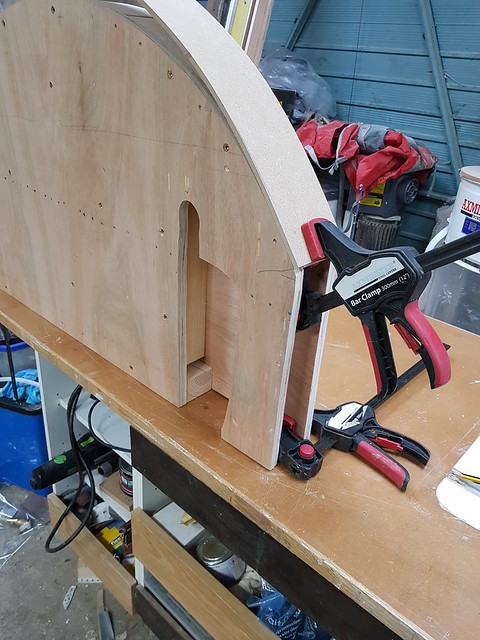
Add lots of screws to hold it down tight against the curved support blocks
 [
[
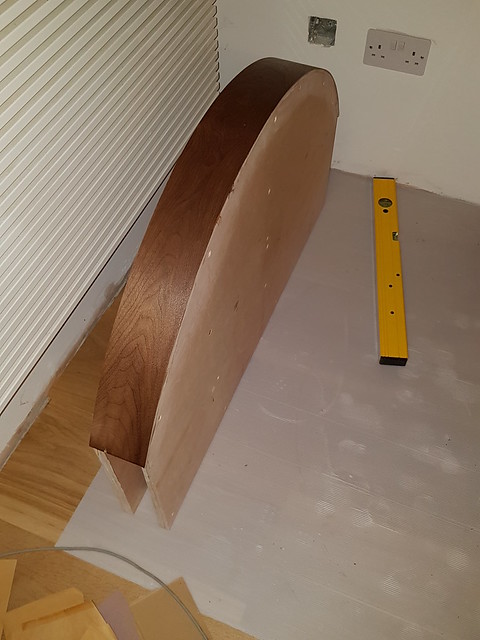
And when the glue went off, add the veneer, stick the whole lot in the vacuum press et voila
Having learned a lot from making the bottom step and being a smaller step, it went together much quicker and slicker than the bottom step.
Create the subframe with suitable cutout for the CH pipes.
Bandsaw curved blocks to support the riser.
Glue and screw all together then ..
Glue the riser in place - pre-curving it using the hot-air gun technique…brilliant tip.


Add lots of screws to hold it down tight against the curved support blocks
 [
[ And when the glue went off, add the veneer, stick the whole lot in the vacuum press et voila

Well that was quicker and easier!
I think this thread is a nice example of the pitfalls that await the ambitious amateur. You try to work out everything in advance, but nothing is as much use as real experience. And by the time you've got the experience, you've finished the project and will never need to build another. *
Far easier to be a professional and learn on other people's houses!
* Or if you do, it's such a long time later that you've forgotten how you made the first one.
RogerS
Established Member
RogerS":25rg8gmc said:
Sorry if that's not you Roger - but I'm sort of projecting your experience onto my own...
RogerS
Established Member
Glueing the nosing assembly for the top step was even trickier due to the tighter radius. Dominos are NOT the right thing to use...DAMHIKT. Bit stupid of me TBH. I'd thought 'more is best' and daily cut domino slots all the way round. But they are cut along radial lines. So as you go round the curve, the axes of the dominos means that you're trying to fit the two pieces together in conflicting directions. Even with wide domino slots in one of the pieces. If my explanation isn't that good I can make a sketch. It all got a bit frantic towards the end with dominos being pulled out, cut off, shavings mixed with glue wiped off, sweat, cussing. Obvious really in hindsight. 
One of those few occasions when a biscuit is the best option.
And so we're on the home straight and time for the floorboards to go on the top step. Originally I'd wanted them to follow on through in a seamless manner and segue into those that would be laid later in the hall. But then I realised that trying to manhandle and accurately sand the curves on the ends of 2.4m lengths of board just simply wasn't going to happen. So a traditional threshold strip was the way to go.
Not that many boards. I wanted to slot the two outer boards under the existing plasterboard to give me the option of not fitting any skirting board in the door opening if I or CD decided that that was the neater option. Enter the ever-brilliant Fein, slide along on top of the floorboard and trim away.
I'd thought that I'd taken a load of WIP photos but clearly didn't. My apologies. And so without further ado.
Ta da !
Finished ! (apart from making good)

Please ignore the colorimetry. It's my camera.
One of those few occasions when a biscuit is the best option.
And so we're on the home straight and time for the floorboards to go on the top step. Originally I'd wanted them to follow on through in a seamless manner and segue into those that would be laid later in the hall. But then I realised that trying to manhandle and accurately sand the curves on the ends of 2.4m lengths of board just simply wasn't going to happen. So a traditional threshold strip was the way to go.
Not that many boards. I wanted to slot the two outer boards under the existing plasterboard to give me the option of not fitting any skirting board in the door opening if I or CD decided that that was the neater option. Enter the ever-brilliant Fein, slide along on top of the floorboard and trim away.
I'd thought that I'd taken a load of WIP photos but clearly didn't. My apologies. And so without further ado.
Ta da !
Finished ! (apart from making good)

Please ignore the colorimetry. It's my camera.
Had to view this on a browser because last picture wasn't showing on Tapatalk. The treads with the contrasting banding look nothing short of stunning and then some !!!!!!

Whats the plan with the riser that's sticking out ?
Sent from my SM-G960F using Tapatalk

Whats the plan with the riser that's sticking out ?
Sent from my SM-G960F using Tapatalk
RogerS
Established Member
Thanks, Coley. That's a feature ! It looks much better in the flesh.
My bad for saying this but come on ! The top tread invites you down to the lovely riser, followed by the next lovely curved tread. The next riser sticks out ! My eye compares it to the top couple which is spot on on point !RogerS":17sxgqrq said:Thanks, Coley. That's a feature ! It looks much better in the flesh.
Sent from my SM-G960F using Tapatalk
RogerS
Established Member
ColeyS1":2r738u7c said:My bad for saying this but come on ! The top tread invites you down to the lovely riser, followed by the next lovely curved tread. The next riser sticks out ! My eye compares it to the top couple which is spot on on point !RogerS":2r738u7c said:Thanks, Coley. That's a feature ! It looks much better in the flesh.
Sent from my SM-G960F using Tapatalk
Fair point but I can live with it !


