SketchUp Guru
Established Member
Well, I've had my Router Boss for a few weeks now but with the holidays and all I haven't had much time to work with it and I haven't gotten very many photos taken.
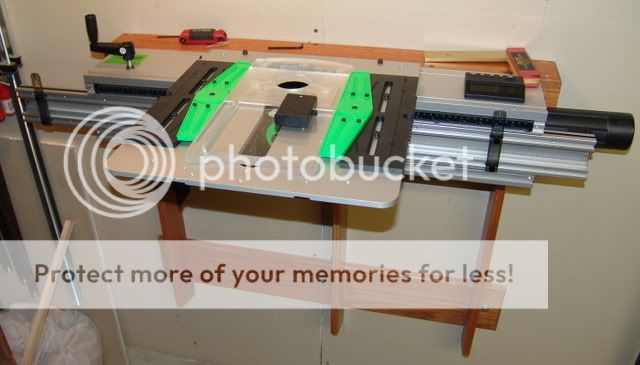
Here's a picture of the machine mounted on the new wall mount. I'm in the process of assembling it at this point.
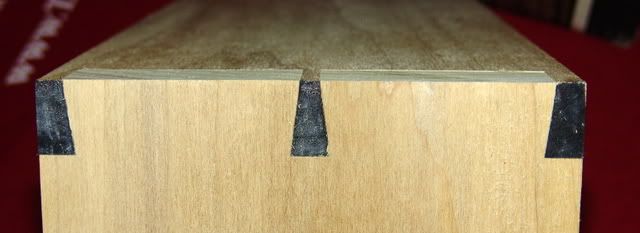
And here's a shot of the first dovetail joint. It was a test joint so the wood isn't very pretty. I colored the ends of the pins so they are easier to see. Evidently I hadn't cut the end of the tailboard square. Still, the joint is properly aligned. There's no joggle between the edges of the two pieces and no gaps. I used a 3/8", 8° HSS dovetail bit from The Craftsman Gallery for this. (You can use absolutely any dovetail router bit you want because there's no template to follow unlike every dovetail jig out there.) The stock is 3/4" thick.
No photos yet but the Mortise Rail is a great accessory for the Router Boss. It allows the you to hold the work horizontally for cutting things like mortises (no kidding) in stiles. There's a hole in the rail to allow the rail to be clamped up for cutting the tenon with essentially the same set up. You can use the same plunge depth setting for both mortise and tenon and use a simple stop set up to locate the router for both sides of the joint. Since the tenon is made using a climb cut, there's no breakout along the shoulder.
Since I don't have photos of that, here's a couple of sketches.


If you're thinking about getting a Router Boss, I can highly recommend the X-axis digital scale. Very handy. I would also suggest that you order the machine with it installed.
A few more photos.
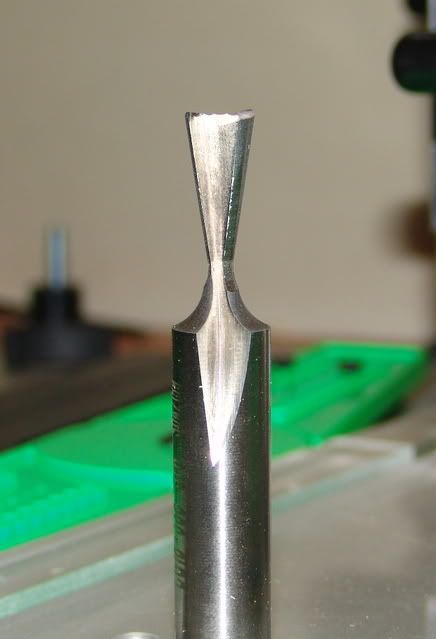
First, that skinny dovetail bit.
The Boss set up to cut dovetail pins.
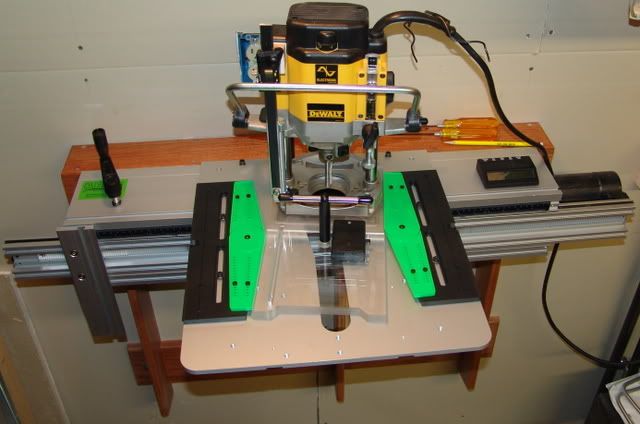
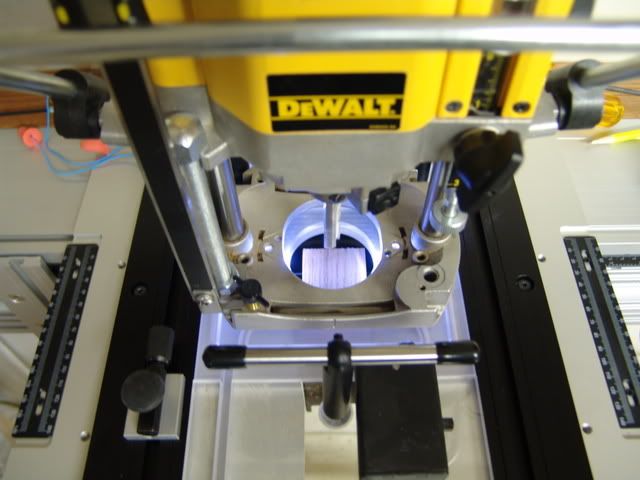
The lighted router plate makes it easier to see what you're doing. Sorry for the camera movement. I shut the flash off so you can see the LED light.
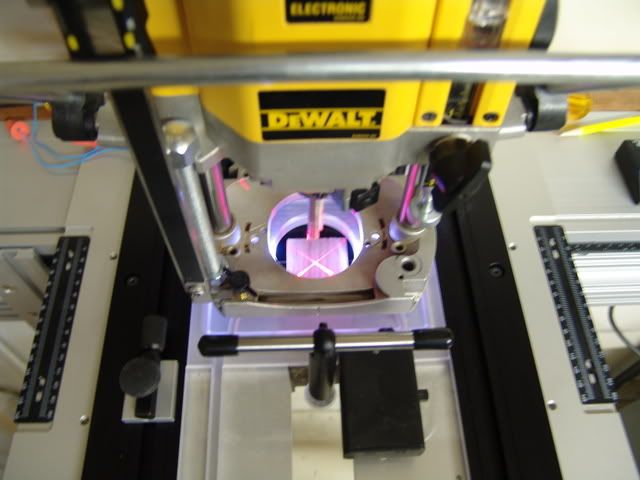
And with the crosshair turned on.
Here's a picture of the machine mounted on the new wall mount. I'm in the process of assembling it at this point.

And here's a shot of the first dovetail joint. It was a test joint so the wood isn't very pretty. I colored the ends of the pins so they are easier to see. Evidently I hadn't cut the end of the tailboard square. Still, the joint is properly aligned. There's no joggle between the edges of the two pieces and no gaps. I used a 3/8", 8° HSS dovetail bit from The Craftsman Gallery for this. (You can use absolutely any dovetail router bit you want because there's no template to follow unlike every dovetail jig out there.) The stock is 3/4" thick.

No photos yet but the Mortise Rail is a great accessory for the Router Boss. It allows the you to hold the work horizontally for cutting things like mortises (no kidding) in stiles. There's a hole in the rail to allow the rail to be clamped up for cutting the tenon with essentially the same set up. You can use the same plunge depth setting for both mortise and tenon and use a simple stop set up to locate the router for both sides of the joint. Since the tenon is made using a climb cut, there's no breakout along the shoulder.
Since I don't have photos of that, here's a couple of sketches.


If you're thinking about getting a Router Boss, I can highly recommend the X-axis digital scale. Very handy. I would also suggest that you order the machine with it installed.
A few more photos.
First, that skinny dovetail bit.

The Boss set up to cut dovetail pins.

The lighted router plate makes it easier to see what you're doing. Sorry for the camera movement. I shut the flash off so you can see the LED light.

And with the crosshair turned on.


