Quicky Router Table

UKworkshop.co.uk

Help Support UKworkshop.co.uk:

This site may earn a commission from merchant affiliate links, including eBay, Amazon, and others.

wizer

Established Member
Joined
3 Mar 2005
Messages
15,589
Reaction score
1
Hi Guys

I need a router table to make up my oak Dado Rail. I have the Triton WC but I thought it'd be best to have something dedicated. I snapped up Byron's Axminster table top

I have some rotten old WBP that I am salvaging the good sections from. I made a start today but forgot the camera. Here is the plan. It's a bit rough and ready. Dust extraction and drawers etc will be fitted at a later date

router+table.jpg


Any comments so far? I'm continuing work on it tomorrow.
 
Wizer

Design looks good, are you planning on having it on castors? the reason I ask is because if you are, then wouldn't 850mm as the height be a bit high, if not then its about correct.
 
yes I am putting it on a trolley base which I have (pics to follow).

As Mark suggests, I am 6'3" and have a herniated disc, so I need to cut down on stooping whilst working.

Actually I scratched my head for a while over height. I have worked it out to be the distance between my folded elbow and the sole of my feet. I have found that even having the work space a little to high is better than fractionally too low.

More work today
 
Right, bit more work on this over the weekend and tonight.

Let's have a peek at my new workspace:

DSCN0568.JPG


:D forget the cat, I can swing both dogs in there ;)

This is my high tech solution to holding all the parts together to mark for biscuits :oops: :roll:

DSCN0570.JPG


Lots of biscuit slots later and we have this

DSCN0583.JPG


It's bloody ugly, but it will do. The WBP is terrible, I think i'm going to skip the rest of it.

DSCN0587.JPG


Doh, forgot to measure the table top, it just fits

DSCN0593.JPG


I added some 18mm timber batons to beef up the top of the cabinet to take the top

DSCN0596.JPG


That is where I am at the moment.

BTW the whole thing will be mounted on a trolley I got from work. It comes with the very big HP Printers. Some customers don't want the trolley as it pushes the height up when adding extra paper trays.

DSCN0576.JPG

DSCN0577.JPG


Sadly I had to keep it outside over the winter and rust has formed.

DSCN0579.JPG


Even with this rust, the wheels spin and rotate freely so I think it will be ok?

Right so now i'm thinking about a fence. Any suggestions? How do I fix a fence to the table top?

Oh and what can I use to paint the WBP? Just normal emulsion or a oil based eggshell?
 
The guys on the router workshop just use C clamps.
Another design I have seen uses a pivot one end, simply a piece of dowel. The other end is then moved left or right to required distance and clamped
 
Nice work Tom - good to see the top and insert going to some use! You can see my alternative arrangement using the MFT in my table thread.

You also seem to have a nice workspace there now.

I would use eggshell personally, nicer finish. Nice use of the trolley that will make moving it about easier - and less stress on your back!
 
Tom,

I think I would of made the cabinet a bit smaller than the top to allow clamps to be used on the edge to hold a fence in place. The printer base looks good with the locking casters, it will be plenty strong enough for your router table.
 
DaveL":78vijzom said:
I think I would of made the cabinet a bit smaller than the top to allow clamps to be used on the edge to hold a fence in place.

In failing to prepare you are preparing to fail... :roll:

I have done a bit of research and I can see 2 options so far.

1. Use this side clamping fence system from Dakota/Rutlands


Not a bad solution at £17.95 (Infact I already have a clamp guide like that without the T-Track and fence)

2. I could route 2 slots in the table top to take a fence like this:


Bit more pricey at £32.95 This has the advantage of having a fence. I guess I could make my own fence similar, but for £33 quid? How easy would it be to rout the slots?
 
I made mine the other way round, slots in the fence base combined with a series of strategically placed holes in the table with "t" nuts underneath. Works very well. Probably slightly more faff to use since I occasionally need to remove the knobs completely to change holes.
One thing if you do it this way, make sure the distance between the mounting holes is smaller than the available movement in the slot otherwise you'll have "dead" areas where the fence can't be fixed DAMHIKT #-o
 
Do you mean something like this Mark? then drilling holes in the table to take a couple of bolts with knobs or wing nuts?


rt-fence.jpg
 
Yep that's it exactly. By having more than one set of holes in the table you can reduce the size of the fence base and length of slots. I used this method 'cos I'm too tight to buy t-track and I din't want the slots in the table - I felt it would weaken it.
 
yep I think that's the way to go, very simple.

Thanks very much.
 
MarkW":3seaqsfv said:
One thing if you do it this way, make sure the distance between the mounting holes is smaller than the available movement in the slot otherwise you'll have "dead" areas where the fence can't be fixed DAMHIKT #-o

Thinking about this further. I'm not sure I get this. Should there not just be 2 parallel holes at a point where the fence can be moved right up to the opposite side of the bit?
 
The extra hole sets are to allow for grooves (housings, dados - insert terminology of choice) to be cut further in from the board edge than the first 2 allow.

This would be sooo much easier if I had my picture uploading software installed on the workshop machine :roll: :roll:

I'm in the workshop till 3:00, feel free to pop over if you get back in time I'll show you what I mean.
 
WiZeR":2hpzbwnb said:
Thinking about this further. I'm not sure I get this. Should there not just be 2 parallel holes at a point where the fence can be moved right up to the opposite side of the bit?

If you're using a big fence with big slots, yes. Mark was saying that alternatively, you could use a smaller fence with smaller slots, but have multiple bolt positions on the table to allow you the same variety of positions.
 
Hi WiZeR

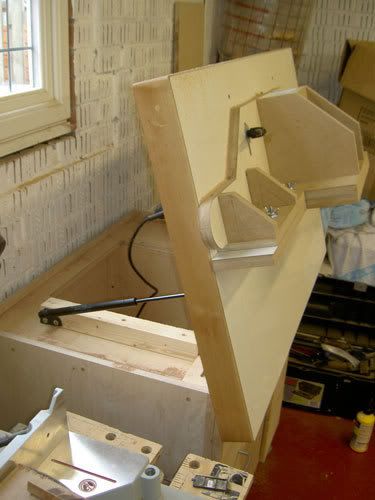
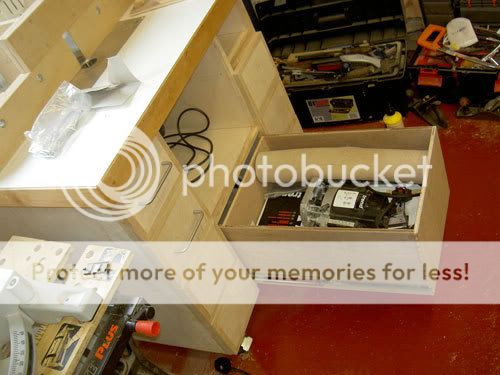
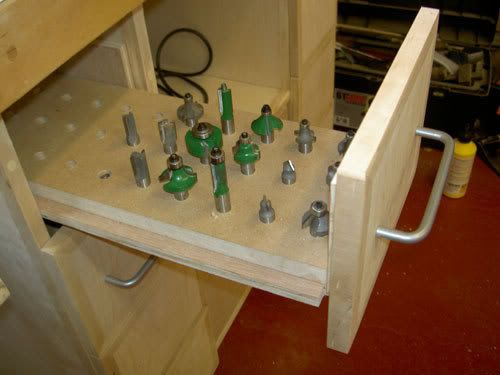
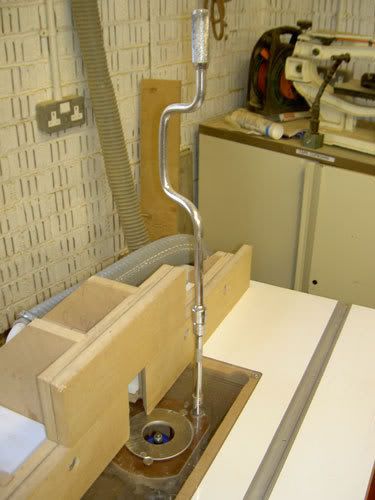
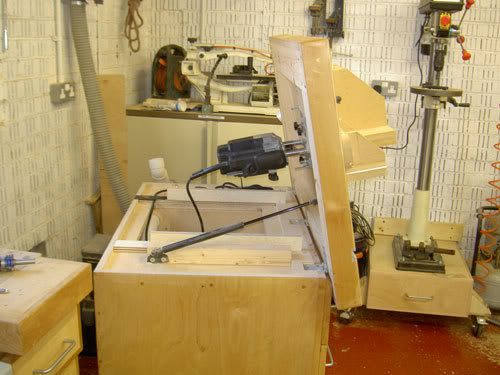
The stots are definatley the way to go I did it this way and used Trend T nuts from below the table and secured the fence with Trend bristol handels. It was expensive but worth it as a one off purchase. I also took the time to hinge the top to make bit changing easier. The gas strut is off a Fiat Punto.

routertop2.jpg

routertabledrawer.jpg

routerbitsdrawer.jpg

Routertop1.jpg

Routertoptilt.jpg
 

Latest posts

Back
Top