Quangsheng No.62 low angle vs No.5 vs No.5 1/2?

UKworkshop.co.uk

Help Support UKworkshop.co.uk:

This site may earn a commission from merchant affiliate links, including eBay, Amazon, and others.
Edge jointing by hand described by modern proponents if a steady sequence of stop and then through shavings. I adopted it and then learned I didn't need to do it.
Dave Charlesworth. He was just "simplifying" normal planing which can be hard to describe: the way you take more/less off as you go by varying pressure, keeping it forward at the start and back at the end, planing as if for a hollow...... etc
Traversing is a hipster name given to working across the grain as a first step when using a jack plane. It was being put forward as the way to work a sawn board. Working with the grain is more effective most of the time.
It is one way with very un flat (dished and twisted boards) or rough surfaces. Most effective when scrubbing old surfaces reclaimed timber etc which can be untouchable with a jack, unless it's very cambered. It's not unlike working with a gouge which is easier across the grain as the shavings tend to roll and break with less resistance.
Hey, I like your contrary take on stuff too. You did a sterling job on that chapel conversation. Hope you're enjoying your new home and the fruits of your labour.
Thanks for that! Not sold yet - looking at next spring.
 
Last edited:
David isn't a genius

I think the virtue is that you don't have to be. If you're working with sawn lumber, I think you end up doing work like Nicholson describes. It's just that there's a lack of people actually doing it to point out that "nicholson's discussion is the right one". Everything was mature by the time Nicholson wrote about it aside maybe from synthetic sharpening stones and grinding and the metal smoothing plane.

Steel has more abrasion resistance in some cases now, but people get less done with it because they think that's somehow important.
 
Here's an example of using the hand tools in work that's not really very nice. I took pictures for Bill T from another forum as Bill mentioned that you couldn't get anything made if you worked by hand. I think it's true if you want to make a batch of something, you'll get a lot less made, but if you are just working on one version of something, even if it's crude, it's a little longer to work by hand but a lot more pleasant.

It's a loft bed - as cheap as I can make it. Yellow pine, and son's request - painted. If either kid had wanted a nice bed, I'd have made them one of cherry and finished it clear or stained, but no - they demanded paint. White and gray.

I told Bill i'd time a few things. If I don't get this physical interaction with the wood, I resent it and would find the way a lot of people like to work kind of boring, and probably just resort to screwing things together and using biscuits and such.. and then I'd stop woodworking.

20221026_192608.jpg20221026_151414.jpg

These are 8 foot long 2Xs - this is the only time I ever use mill planed anything, but I'd use full 2x rough if anyone actually had it cheaper.

5 minutes to rip each. The real point of the pictures is the level of finish on the boards. These aren't overly carefully ripped, they're just ripped right to the marked line - it's where I'm at reflexively, and since I don't have a good tablesaw (just a bosch site saw), I can actually rip more accurately than the bosch saw, especially with anything that has tension.

One of the other things Bill gives me some static about is talking about how pointless shooting everything is if you can get past it. I mentioned that for drawer ends, I mark the ends off of an edge, and then mark the base lines, off of the edge and cut off the ends. There's no shooting anything. You plane what little fuzz there is off of the drawer ends after the drawer is assembled. There is no real error in this - the level of accuracy is a matter of several thousandths, it's more dependent on marking right.

Any significant use of the shooting board is more an invitation to figure out what's being done that could be taken up by more skill. Like sawing to a line and being able to get maybe better accuracy than you can get off of a site chop saw (I have an old USA dewalt chop saw. I can't saw the ends as smooth, but I can saw them more accurately if that makes sense - its only dependent on marking).

20221028_121649.jpg20221028_121951.jpg

The edges of those boards are sides or top rails on the bed, they ended up being mortise and tenon, but the boards have to be left long. There's one little teat left on the one board where the two saw cuts met from each end - other than that, there's only four or five plane shavings of material to remove, and since the dimensioning is accurate and I can feel square pretty well, the cuts are not out of square.

The things that start off needing a lot of checking suddenly go away by feel and what took 20 minutes to do in an iffy way soon takes 5.

But it doesn't take long to get there.

The cap iron is the missing link, because you can plane edges on even junky stuff like this with knots and have bright shiny wood without even actually smoothing (this will just be filled, sanded and painted, anyway, so it'll never get finish planed).

20221028_123209.jpg

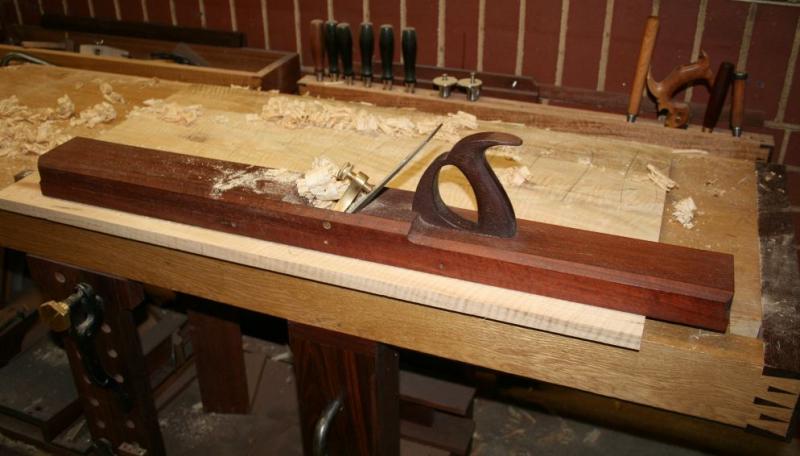
What's not obvious from the plane is that it's a coffin smoother, but it's set for a pretty healthy shaving. I figured a slightly heavier coffin smoother would be nice a long time ago and made this one (it's cocobolo - it wasn't as expensive back then). The iron that I used was a rare IH sorby that was a little too soft, and I ended up liking a stanley plane for smoothing better, so I relegated this plane to this kind of work - and then this past year, made a couple of tapered irons, so not it has a better iron in it.

I have a nifty marples 4 1/2 that would work for this, but on pine, which has a lot of friction like poplar would, it's just a lot less effort to use a wooden plane.

the last point in this is, I don't at this point have the power tools to do this kind of crude stuff quickly. My table saw isn't up to wood that needs to be constrained, and I don't have a power jointer. My thickness planer is a dewalt 734 - I use it every couple of years. I used it on this stuff after getting it from the store so as to whizz off all of the dents and scuzz, but I sure wasn't going to worry about jointing it. This wood moves too much to worry about that kind of accuracy, anyway - you need to be able to mark it where it needs to be accurate and then not be stuck needing it to be stable, which isn't much of an issue if you're using hand tools.

I'd rather have made a nice bed entirely out of cherry, but the kids like paint, and I really also like being able to make something quick for them, get it out, have the nice physically pleasant feel of woodworking - none of this is rushed, and none is slow, either - even if I don't care so much for this wood and its movement. And I like being able to make something they can beat on since they're young. The bottom part of my house is filthy - the top part is a museum. Wife and I are opposites. If I make something nice for the kids, she gets maniacal about how they have to "take care of it".

I made them beater guitars, too.
 
Last edited:
Trouble with these threads is what BucksDad earlier called the poor signal <> noise ratio, not to mention the "bloviation". :rolleyes: To which I'd add "over-thinking" o_O alternating with "under-thinking" and loads of pure BS.
Ending up being completely useless and uninformative.
Anyway the answer is 5 1/2! Which I said right at the beginning! :ROFLMAO:
Brilliant comment!

I’m new to forums and threads as well as woodworking, I’m really grateful to those who genuinely offered their advice as it has been very helpful. This thread has largely gone off topic as far as I am concerned. I’m going to stop reading from now on because I think I have my answer.
 
At any rate, the purpose of this thread for the OP - to find the next plane that would be a good fit - well taken care of. He got the right one and avoided the wrong one based on what he asked about.
That’s right, thank you
 
David wrote:
Not everyone wants to build flat furniture ….

David, you make statements which are patently invented to anyone who has read my contributions on the fori. The reason you are irked with me is simply because I was one of several who complained on WoodCentral forum that your lengthy and compulsive posts about steel have taken over the Handtool forum (any similarity to your style here?!). I suggested the start of a separate forum for metal work. You had a hissy fit, and left (later returned as you cannot stay away … which you have done on this forum at least once as well).

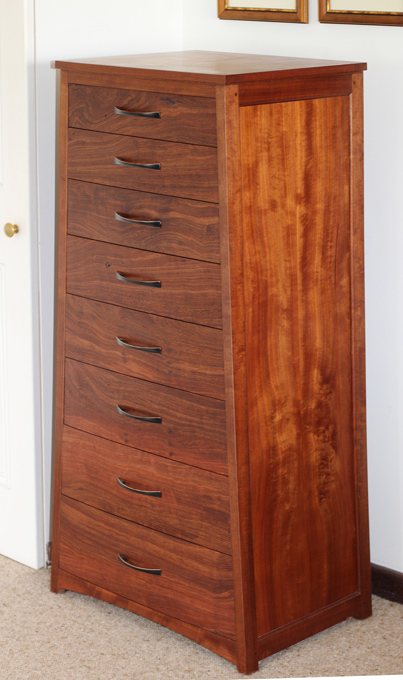
Now you say I only build flat furniture, which is intended as a derogatory remark (there is nothing wrong with flat work - most furniture is flat work). I build all sorts of furniture. Here are three pieces which are not flat. I challenge you to post any three pieces of furniture. Not solid body guitars, but furniture pieces that require concentration and dedication to build and complete - planing a few boards is not the same. I do not doubt that you have the hand skills to do so, but I have not seen any evidence of furniture making outside one bookcase and a kitchen (which I think took you 3 years). Talk to us about how to build furniture once you have spent the time do so for extended periods of time, with all the joint-making and myriad of components and tasks which are involved. These require frequent shifting of goals. I am not sure you are up to this.

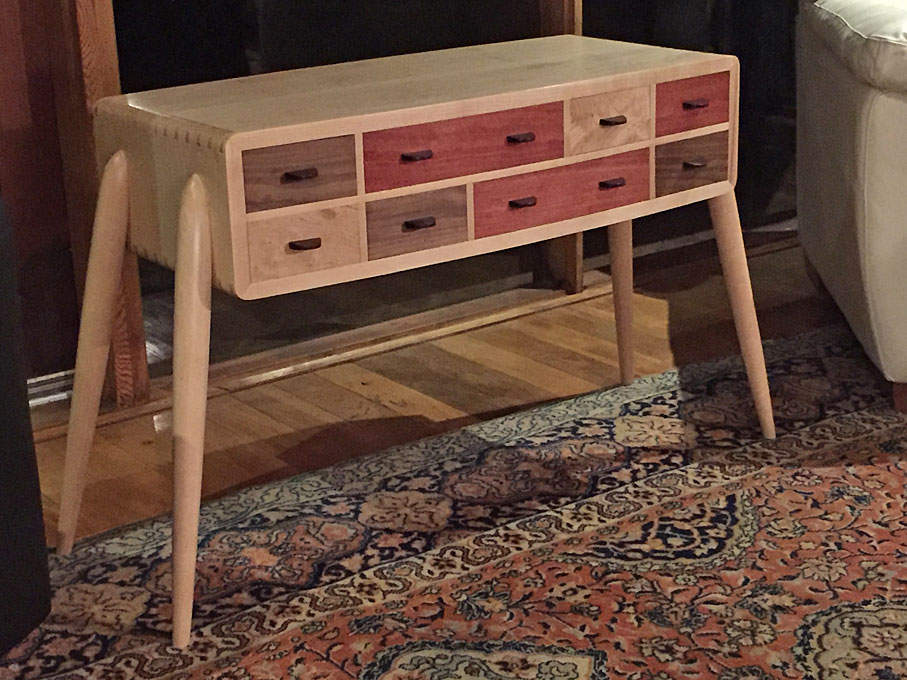
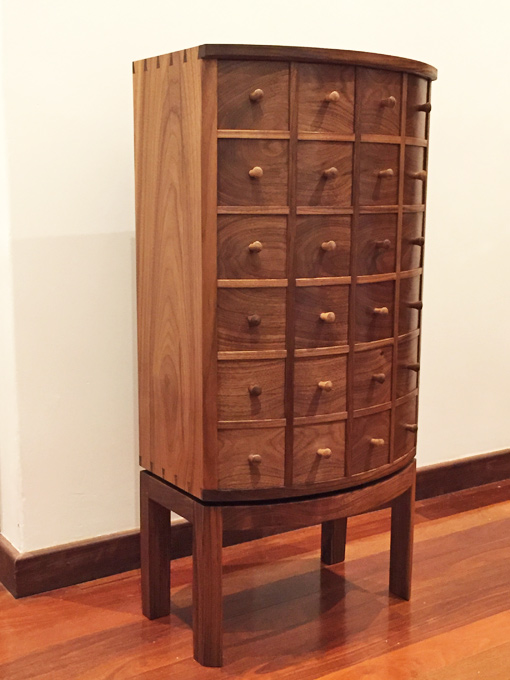
This chest features bow-front drawers and tapered sides ..

Lingerie_Chest.jpg


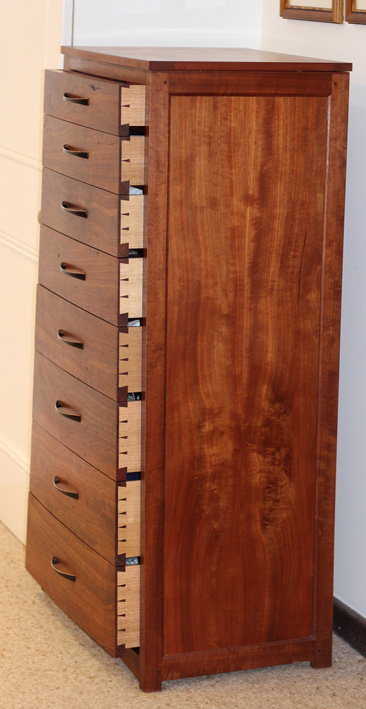
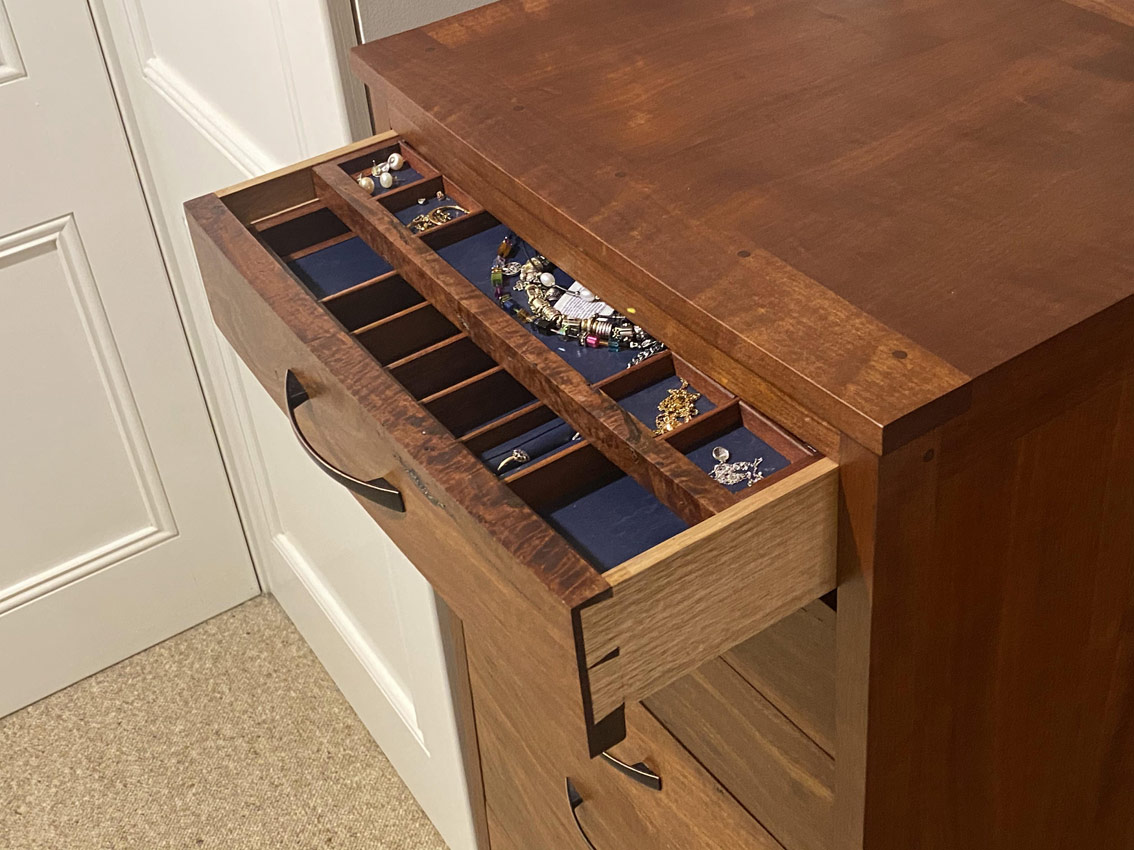
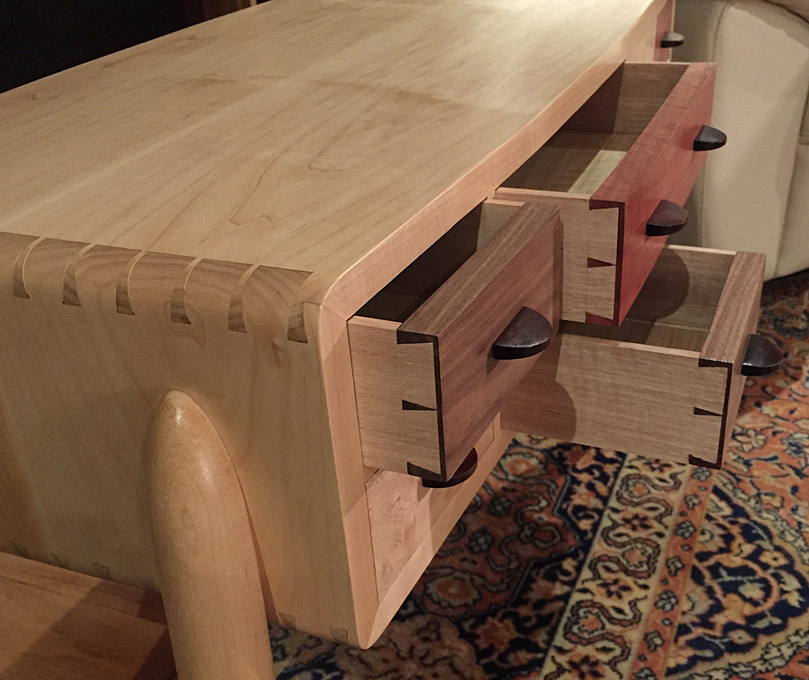
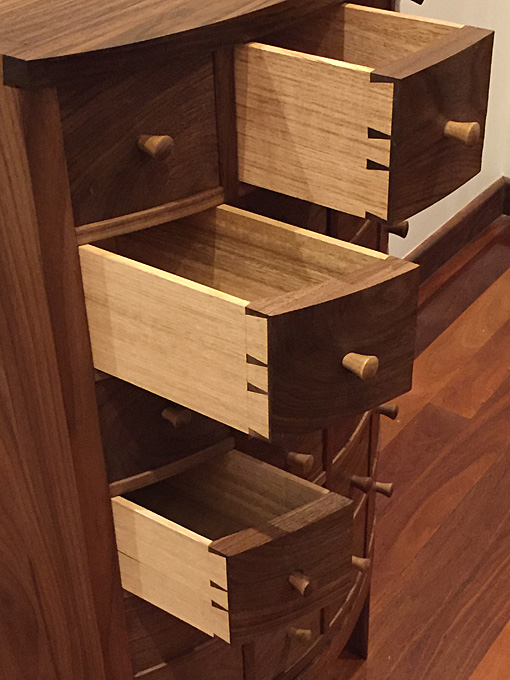
All the drawers feature compound dovetails …

Lingerie-Chest.jpg


Lingerie-Chest2L.jpg


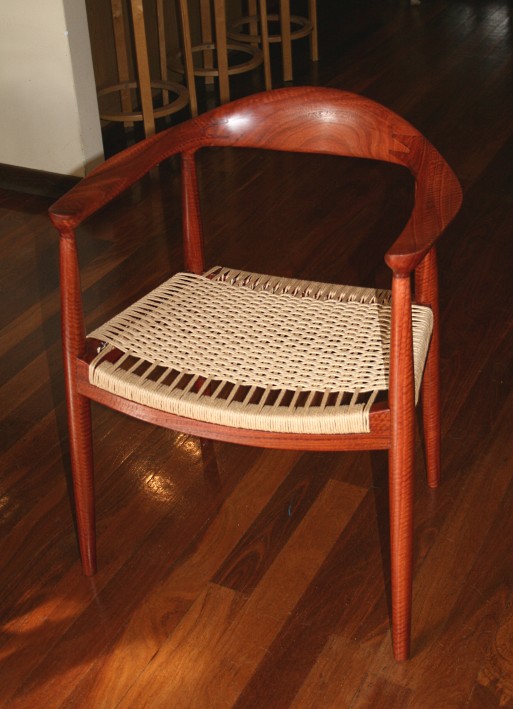
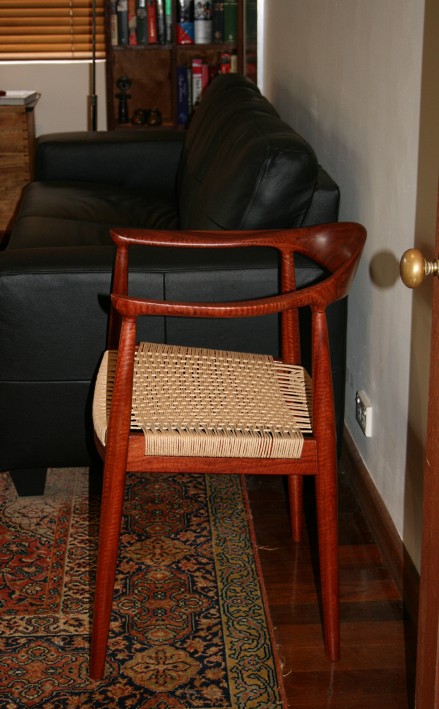
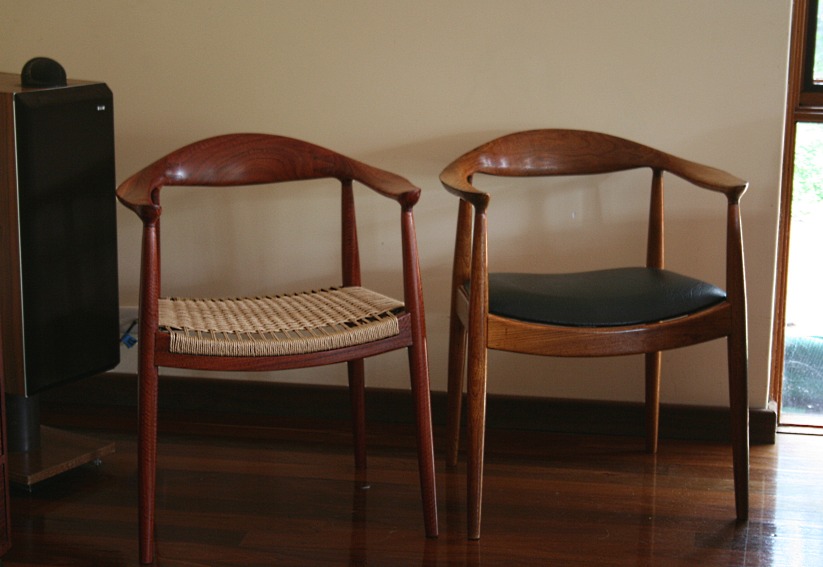
This is a hand built copy of Hans Wegner’s “The Chair” …

The-Chair.jpg


The-Chair.jpg


Alongside an original chair …

The-Chair.jpg


Bow-fronted side table with compound dovetail drawers set in a mitred- through dovetail case ….

Final11.jpg


Final8.jpg


All of these pieces won awards in competitions. I have a bunch more I can show. You can just produce three.

David wrote:
One of the other things Bill gives me some static about is talking about how pointless shooting everything is if you can get past it. I mentioned that for drawer ends, I mark the ends off of an edge, and then mark the base lines, off of the edge and cut off the ends. There's no shooting anything. You plane what little fuzz there is off of the drawer ends after the drawer is assembled. There is no real error in this - the level of accuracy is a matter of several thousandths, it's more dependent on marking right.

Lastly, your comments about a shooting board indicate that you do not make drawers, or that the drawers you make are not fitted with an attempt at precision.

I thank you for educating us on the chipbreaker (that is, explaining how it works), but do not tell me how to make furniture. I thank you for demonstrating your methods for planing, but don’t make derogatory remarks to those who may do it differently.

Regards from Perth

Derek
 
Last edited:
Might as well ask a related query here, since this thread has hinted strongly into some sort of thread regarding volume work.
Just wondering if the mouth on those premium ductile planes is rather tight with those thicker irons, compared a to say a Bailey pattern from the mid century (golden age to some)
Hard to get an impression as I don't see many folks plane thicker shavings with these planes, suppose most folk who can afford those, end up going a bit more professional than I could ever afford.
I try and steer clear from those universal motors if I can help it, well noisy ones anyway, and electrical plus other involved factors concerning not puttin up de rent,
constraints getting anything decent,
so my bench is treated as a surface planer bed for my own fussy work.
(fussy alter bench person talking here)
The 5 1/2 is unmatched for the task, and nearly too long, but not quite!
Just even holding the 5 seems like an ice skate by comparison to me,

Perhaps I should have taken that one from the folks aswell,
as it would stop my sleeve getting trapped under the heel of my cheapie no.4.
I never liked nor valued the four until I learned how to set a cap iron correctly,
which David has multiple threads from,

I learned this from his woodcentral article, although I don't think David was pleased about it, I found it quick and concise.
so I bought another nice vintage one for twenty quid after, for smoothing.
(Yet still only a handful of folks on YT giving you the whole picture regarding this)
I suggest seeing the proof of those straightened shavings if you wish to learn
It's an easy way for a newcomer to spot specifically this .
Should you not have any strong opinion of any folks on yt, (yet)
it would be a great start after a taste of the very seldom bit from Cosman's method that he will show ya, (one single video on YT has some good hints, that's it.
Then there's Charlesworth's videos, which is where the stopped shavings comments
have came from.
I strongly suggest watching some of those for some hints regarding precision,
not the plane setup, but the use of thereafter.
as it's the best information you might find regarding some techniques which you are bound to use.
the definition of a straight edge and getting there using stopped shavings,


Choose your poison after you've got more of an opinion,
which likely matches with what you're doing.

Good luck should you go shopping for vintage.
Tom
 
Last edited:
me work.
Just wondering if the mouth on those premium ductile planes is rather tight with those thicker irons, compared a to say a Bailey pattern from the mid century (golden age to some)

Quick answer, Tom:

The LN, Clifton, and Veritas planes are built around the blade thickness, as are the Stanley and Record. All have adjustable frogs, which means you can adjust the mouth size to be as wide or as tight as needed. As you likely are aware, closed up chipbreakers can block the escapement if the mouth is tight. Such planes need mouths wide enough to permit shavings to pass. Opening the mouth does not degrade the performance of the plane set up this way.

Regards from Perth

Derek
 
@Derek Cohen (Perth Oz) I never measured my Bailey's mouth, so am guilty of laziness, but do have a good piccy of a dense exampe of iroko with about the thickest shaving I can take, not the lighter examples of the stuff where one could get much thicker shavings using a different plane or whatever.
Just a guess on my part, but these denser examples seems to be a bit similar to some common found hardwoods over there.
I've seen you make some good articles on the subject of cap irons...
(one of the few good resourses BTW for Joe or whomever to study)
but what I can recall has been concerning smoothing difficult timbers,
and wondering if you've got a few shots of dimensioning stuff which was too short for the beds of the machines.
Just trying to get an idea whether this is all in my head, which is easy disproved with a side by side vintage vs (dare I say) premium, ductile iron Bailey plane,
with the evidence to see if one takes a heftier shaving with less effort.
not wanting to get into a weightlifting discussion as I've not held one,
nor weighed either of my no.5 1/2's.

Would be interesting to see if anyone else has done a side by side.

Thanks
Tom


SAM_3411.JPG
 
what I can recall has been concerning smoothing difficult timbers,
and wondering if you've got a few shots of dimensioning stuff which was too short for the beds of the machines.
Just trying to get an idea whether this is all in my head, which is easy disproved with a side by side vintage vs (dare I say) premium, ductile iron Bailey plane,
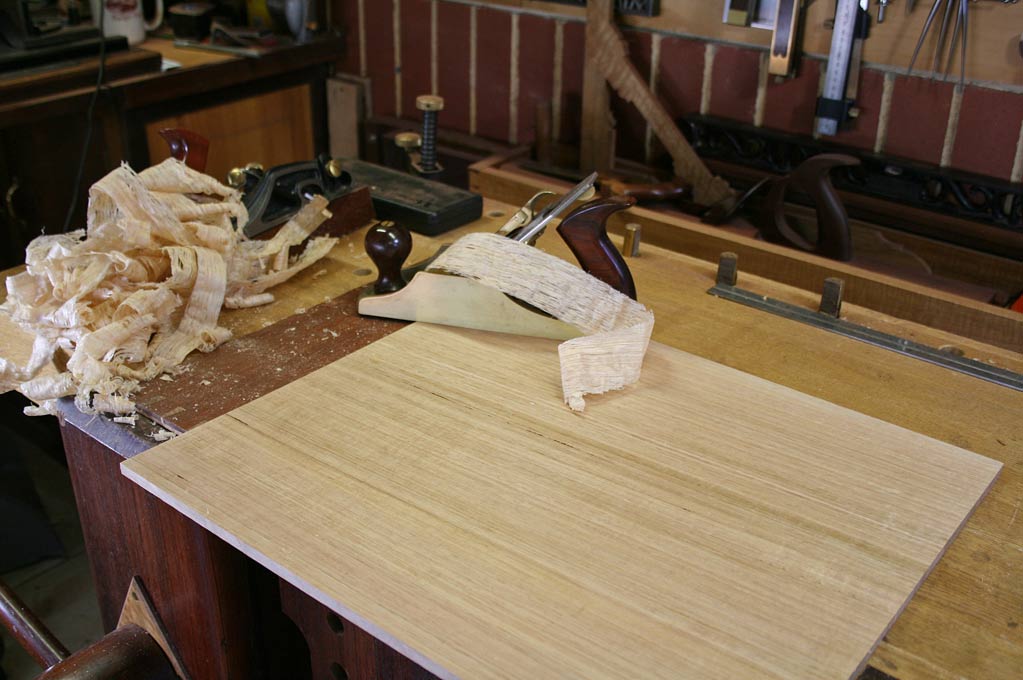
Smoothing Tasmanian Oak (a Eucalyptus) with a LN #4 1/2 and closed chipbreaker ...

1.jpg


Tom, it is not so much "dimensioning stuff too short for the beds of the machines", but dimensioning panels which are too wide. That is a common issue.

I have a Hammer A3-31 jointer/thicknesser, which was purchased around 2012 or 2013. Before then, I relied on a tablesaw, 14" bandsaw and hand planes for all dimensioning.

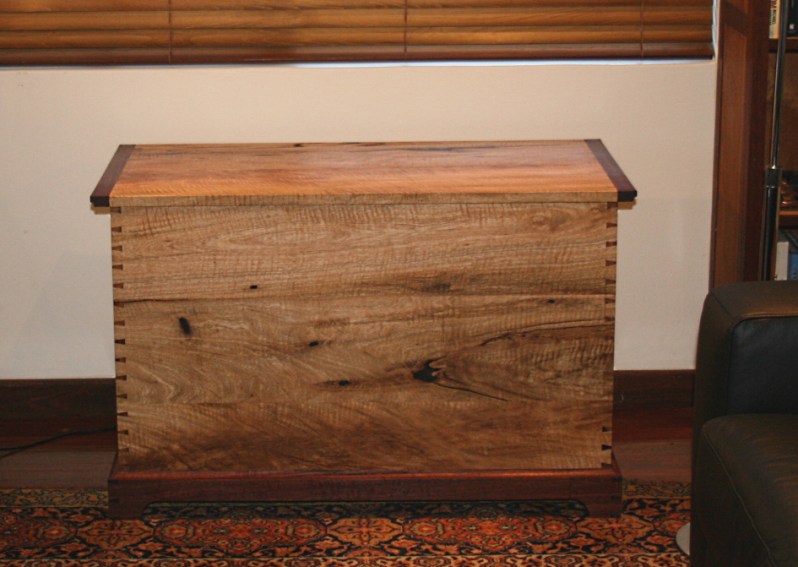
Here are a few photos from the build of a blanket box ("kist"). The wood used was Fiddleback Marri, a West Australian timber - VERY interlocked and tough wood! The full article is here http://www.inthewoodshop.com/Furniture/Kist.html

Note that this build was in 2013, just as we were exploring the use of a chipbreaker. A dreaded Veritas BU Smoother was used to finish the panels (and we all know that one does not work). The grunt work was with another dreaded plane, the Veritas LA Jack, used for traversing (!! we all have been told that this is a no-no), and flattening was done with a single iron high angle jointer I build (again, we know these do not work).

The point I wish to make is that, while a closed up chipbreaker is something I now prefer using, because it does control tearout better than high cutting angles, this is really only apparent on the more extreme examples of interlocked grain. The moderate - moderate-severe examples are worked pretty well with a high cutting angle (60 degrees).

Extract:

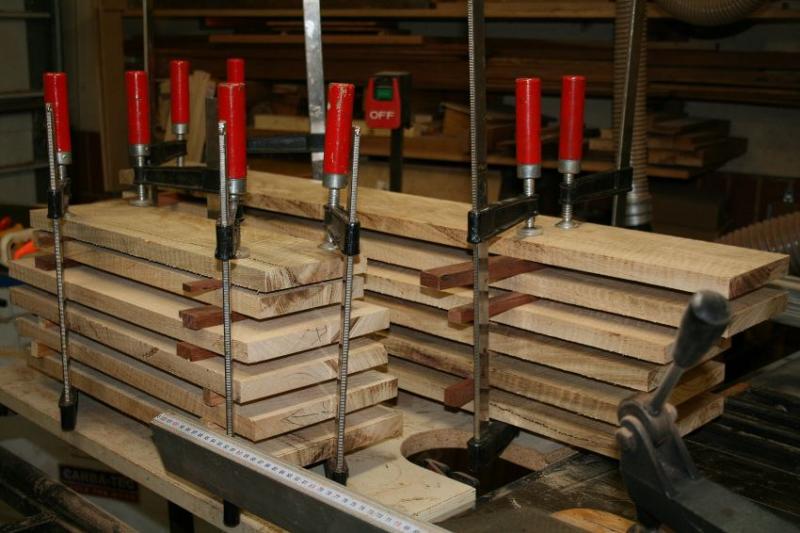
The boards all had significant cup and twist, and to retain the maximum thickness the boards were sawn into shorter and narrower lengths, jointed on one side, and then resawn and thicknessed to 3/4" (what is saved from this process runs from 1/4" - 1/2" and will be used for the lower shelf and, possibly, drawers).


Kist_html_m791cf238.jpg


This all sounds quite standard and, indeed, this preliminary work was done on machinery, however it was not straight forward. Curly Marri is very hard and the grain is extensively interlocked. My 8" jointer struggled, and stalled at times. The lunchbox thicknesser left noticeable tearout. And I began to ask myself whether I should just burn the boards instead of building with them.

“Ordinary” Marri is not as hard as Jarrah, and it is not as abrasive. However the colour can vary quite a bit, and there are pockets of resin that dry and fall out leaving voids. These voids are not attractive, and it is usual to fill them with black-tinted resin. This is “Curly” Marri. It is harder to match boards. Not only does one need to match for colour, but for figure and for curl direction. It is like working in 3-D rather than 2-D.


The sawing and jointing took one weekend. This past weekend I glued up panels on Saturday, and then began planing then to final thickness on Sunday. Here are a few photos ...

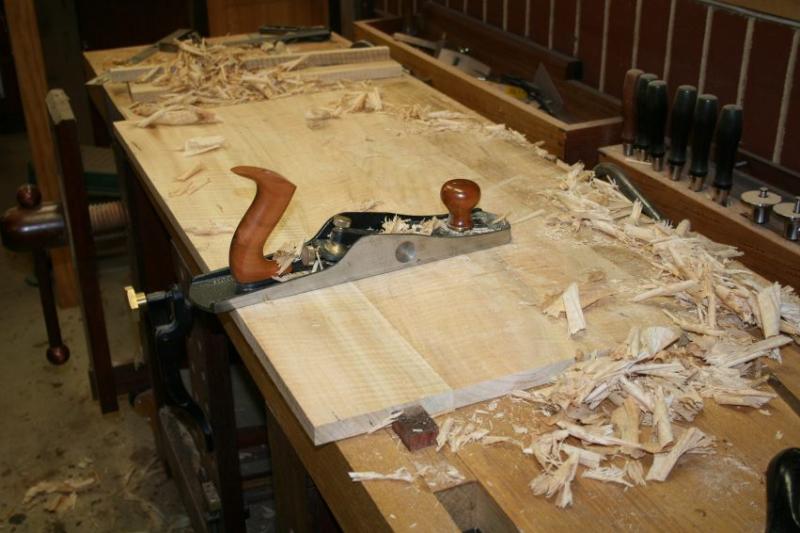
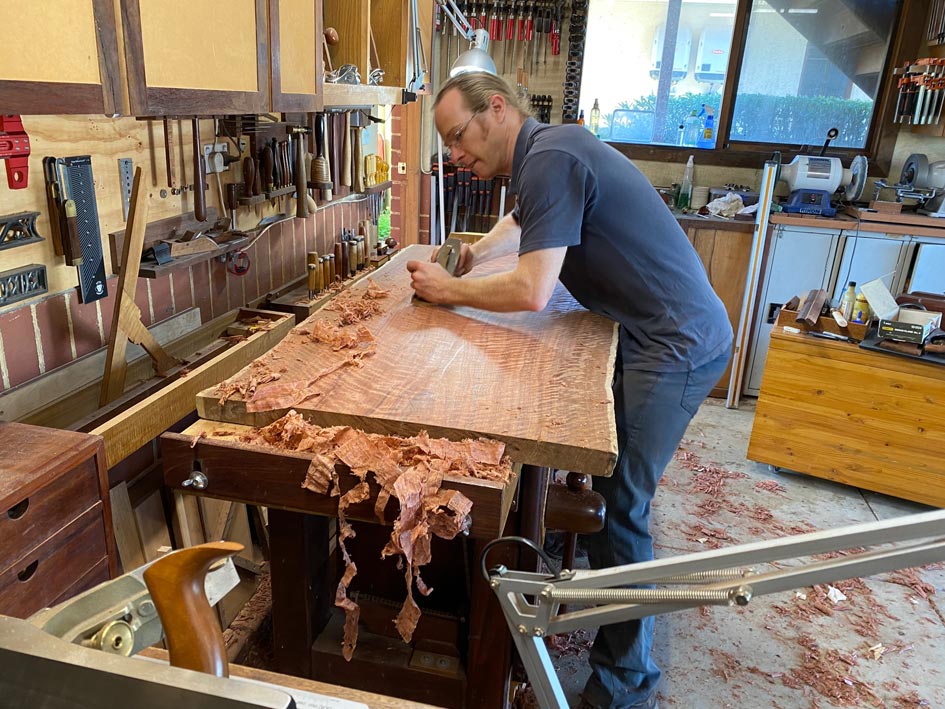
Traversing ..

Kist_html_m334d2216.jpg


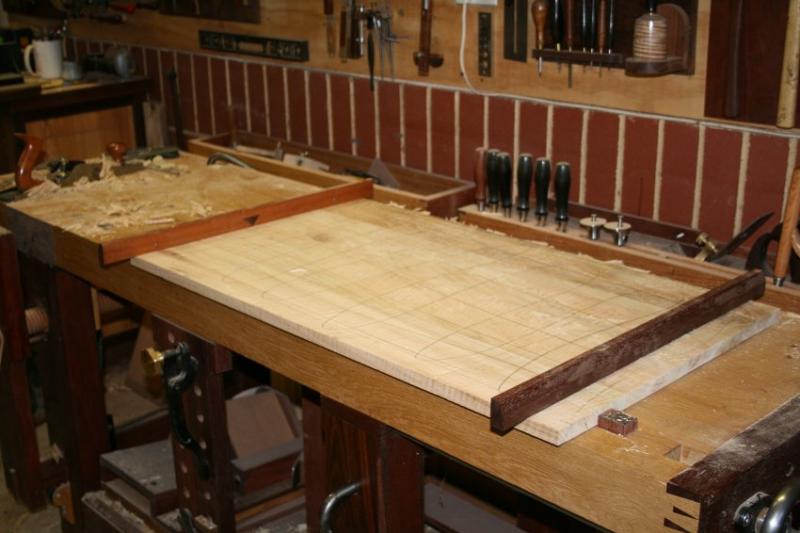
Checking for twist ...


Kist_html_m7c10e5d1.jpg


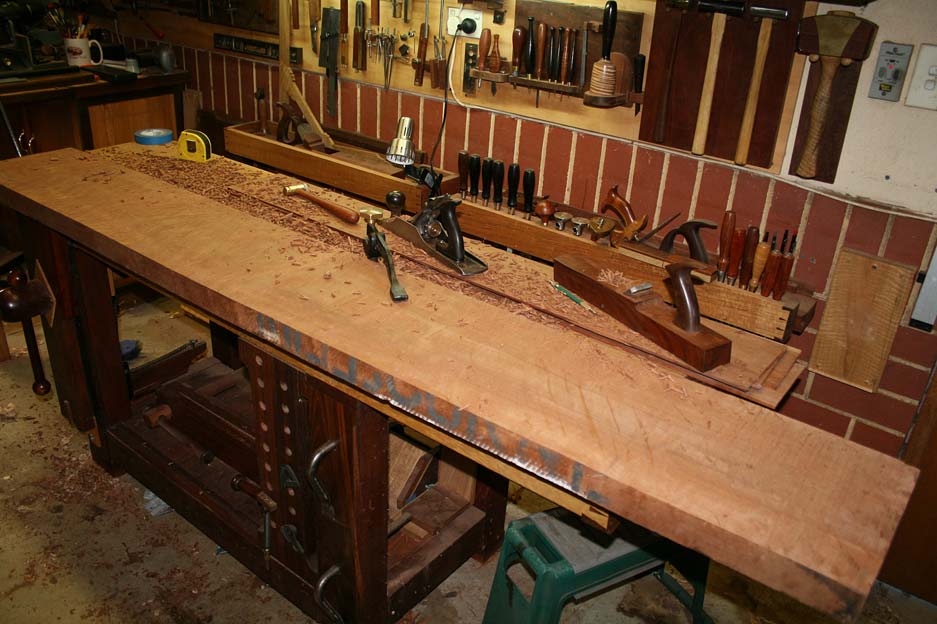
My secret weapon - flattening with a 36" heavy Jarrah jointer with a 3" wide Berg blade ...

Kist_html_5ff5ce57.jpg


Smoothing ... aaahhh, as the curl becomes clear we see what all the fuss was about ...


Kist_html_m408243f.jpg


The grain switches back-and-forth. Some tearout is inevitable.


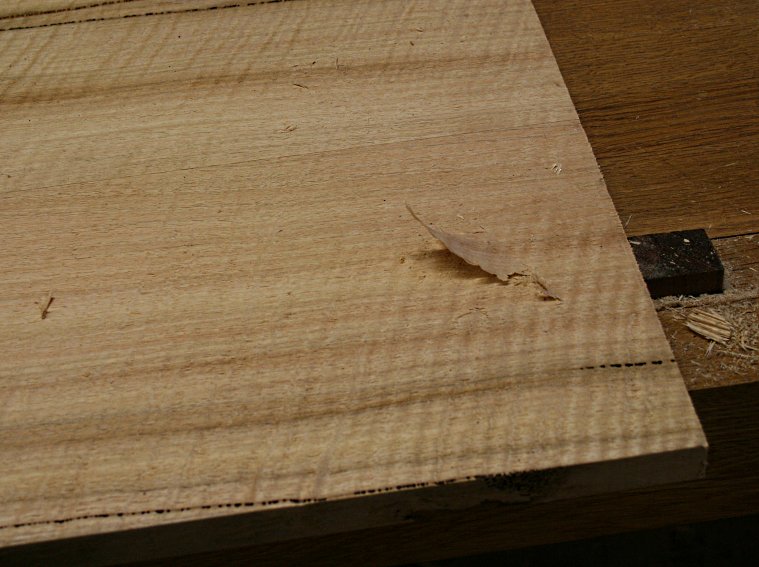
Here's an example of the tearout that occurs with little warning. The only possible (?) tell is that the grain changes direction in this area - but it changes direction like that elsewhere without similar results ...

Kist_html_m7da7cf9a.jpg


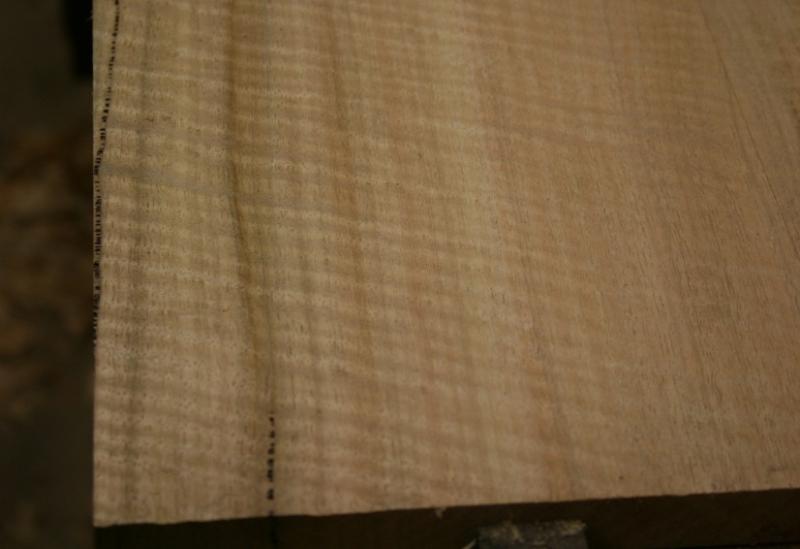
Here is closer look at some of the curl. Some of it, like this, is quite raised. And it makes it difficult to traverse across the grain as it can still tearout (picture taken after the above tearout was smoothed with a cabinet scraper) ...

Kist_html_m4550cfc9.jpg

Out come the cabinet scrapers ..

Kist_html_27db338f.jpg


Final piece ...

Kist.jpg


For fun, a recent example of working with a board that cannot fit on or in a machine: I was approached to teach a local woodworker how to plane down a Fiddleback Jarrah panel he planned to build into a table. The panel had a serious cup through the centre. This was removed traversing with a jack plane (Stanley #605) and then planing down the centre with my 36" wooden jointer (as above). Daniel had little experience with hand planes before this day. Here he is smoothing the panel with a LN #4 1/2 set with a closed chipbreaker ...

Daniel.jpg


Incidentally, the chest of drawers ("Lingerie Chest") in an earlier photo started life as a rough sawn board 11 1/2" wide and 2" thick. This was flattened with a jack plane ...

LingerieChest2_html_4e85f87a.jpg


... before re-sawing on a bandsaw ...

LingerieChest2_html_11098da9.jpg


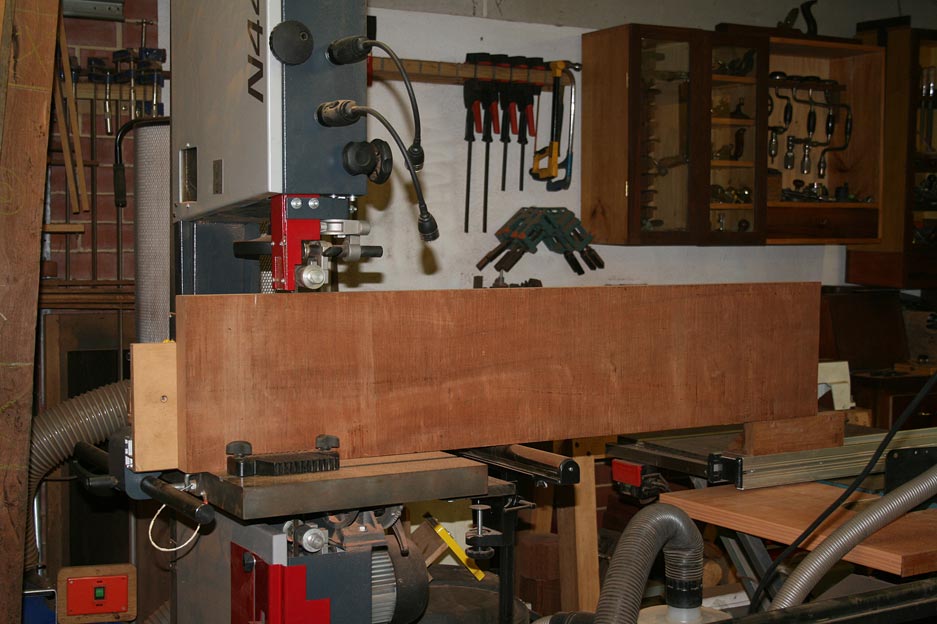
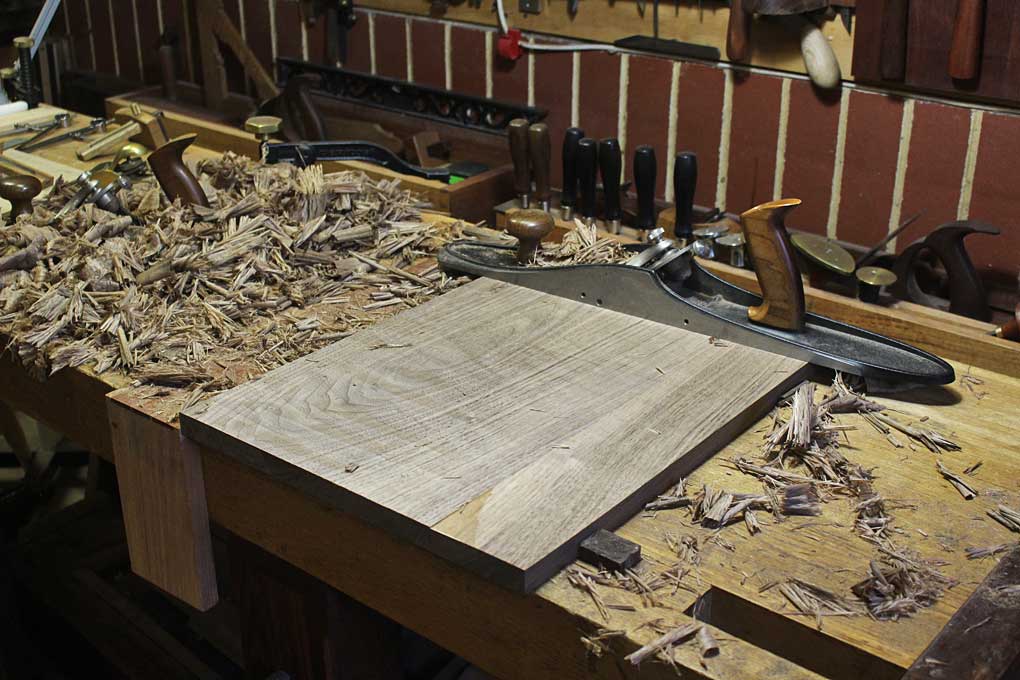
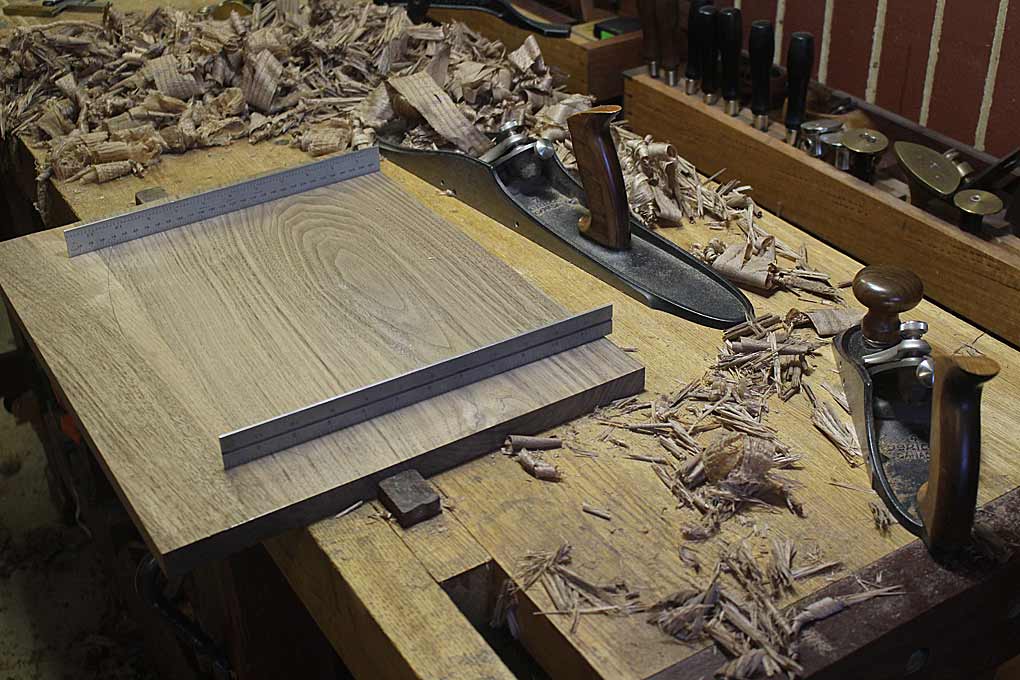
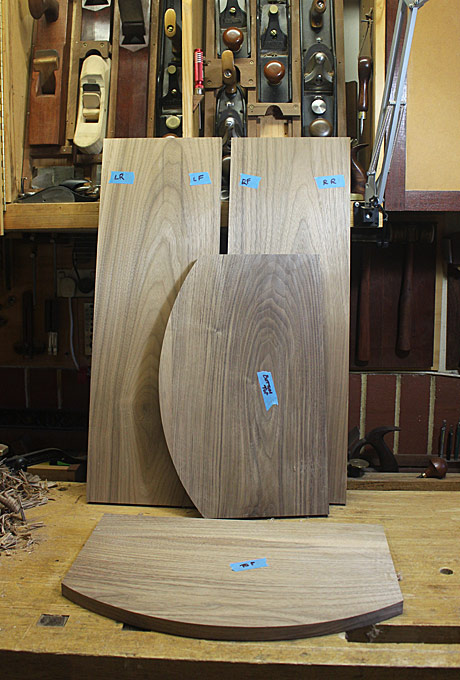
More traversing (the start of a bow-fronted apothecary chest, below). This time Black Walnut from the USA. This is so easy to work compared with Oz timbers ...

ApothecaryChestWeekendOne_html_m3f130627.jpg


ApothecaryChestWeekendOne_html_m41868155.jpg


ApothecaryChestWeekendOne_html_41f8b375.jpg


More of the "flat furniture" which David accuses me of ...

ApothecaryChestFinal_html_172dc901.jpg


ApothecaryChestFinal_html_23b3cc36.jpg


Again the point is that I really doubt that any woodworkers today would work with just hand planes if they are serious about building furniture in a reasonable period of time. A combination of power and hand is inevitable for hand tool-orientated furniture makers.

Regards from Perth

Derek
 
Last edited:
Smoothing Tasmanian Oak (a Eucalyptus) with a LN #4 1/2 and closed chipbreaker ...

1.jpg


Tom, it is not so much "dimensioning stuff too short for the beds of the machines", but dimensioning panels which are too wide. That is a common issue.

I have a Hammer A3-31 jointer/thicknesser, which was purchased around 2012 or 2013. Before then, I relied on a tablesaw, 14" bandsaw and hand planes for all dimensioning.

Here are a few photos from the build of a blanket box ("kist"). The wood used was Fiddleback Marri, a West Australian timber - VERY interlocked and tough wood! The full article is here http://www.inthewoodshop.com/Furniture/Kist.html

Note that this build was in 2013, just as we were exploring the use of a chipbreaker. A dreaded Veritas BU Smoother was used to finish the panels (and we all know that one does not work). The grunt work was with another dreaded plane, the Veritas LA Jack, used for traversing (!! we all have been told that this is a no-no), and flattening was done with a single iron high angle jointer I build (again, we know these do not work).

The point I wish to make is that, while a closed up chipbreaker is something I now prefer using, because it does control tearout better than high cutting angles, this is really only apparent on the more extreme examples of interlocked grain. The moderate - moderate-severe examples are worked pretty well with a high cutting angle (60 degrees).

Extract:

The boards all had significant cup and twist, and to retain the maximum thickness the boards were sawn into shorter and narrower lengths, jointed on one side, and then resawn and thicknessed to 3/4" (what is saved from this process runs from 1/4" - 1/2" and will be used for the lower shelf and, possibly, drawers).


Kist_html_m791cf238.jpg


This all sounds quite standard and, indeed, this preliminary work was done on machinery, however it was not straight forward. Curly Marri is very hard and the grain is extensively interlocked. My 8" jointer struggled, and stalled at times. The lunchbox thicknesser left noticeable tearout. And I began to ask myself whether I should just burn the boards instead of building with them.

“Ordinary” Marri is not as hard as Jarrah, and it is not as abrasive. However the colour can vary quite a bit, and there are pockets of resin that dry and fall out leaving voids. These voids are not attractive, and it is usual to fill them with black-tinted resin. This is “Curly” Marri. It is harder to match boards. Not only does one need to match for colour, but for figure and for curl direction. It is like working in 3-D rather than 2-D.


The sawing and jointing took one weekend. This past weekend I glued up panels on Saturday, and then began planing then to final thickness on Sunday. Here are a few photos ...

Traversing ..

Kist_html_m334d2216.jpg


Checking for twist ...


Kist_html_m7c10e5d1.jpg


My secret weapon - flattening with a 36" heavy Jarrah jointer with a 3" wide Berg blade ...

Kist_html_5ff5ce57.jpg


Smoothing ... aaahhh, as the curl becomes clear we see what all the fuss was about ...


Kist_html_m408243f.jpg


The grain switches back-and-forth. Some tearout is inevitable.


Here's an example of the tearout that occurs with little warning. The only possible (?) tell is that the grain changes direction in this area - but it changes direction like that elsewhere without similar results ...

Kist_html_m7da7cf9a.jpg


Here is closer look at some of the curl. Some of it, like this, is quite raised. And it makes it difficult to traverse across the grain as it can still tearout (picture taken after the above tearout was smoothed with a cabinet scraper) ...

Kist_html_m4550cfc9.jpg

Out come the cabinet scrapers ..

Kist_html_27db338f.jpg


Final piece ...

Kist.jpg


For fun, a recent example of working with a board that cannot fit on or in a machine: I was approached to teach a local woodworker how to plane down a Fiddleback Jarrah panel he planned to build into a table. The panel had a serious cup through the centre. This was removed traversing with a jack plane (Stanley #605) and then planing down the centre with my 36" wooden jointer (as above). Daniel had little experience with hand planes before this day. Here he is smoothing the panel with a LN #4 1/2 set with a closed chipbreaker ...

Daniel.jpg


Incidentally, the chest of drawers ("Lingerie Chest") in an earlier photo started life as a rough sawn board 11 1/2" wide and 2" thick. This was flattened with a jack plane ...

LingerieChest2_html_4e85f87a.jpg


... before re-sawing on a bandsaw ...

LingerieChest2_html_11098da9.jpg


More traversing (the start of a bow-fronted apothecary chest, below). This time Black Walnut from the USA. This is so easy to work compared with Oz timbers ...

ApothecaryChestWeekendOne_html_m3f130627.jpg


ApothecaryChestWeekendOne_html_m41868155.jpg


ApothecaryChestWeekendOne_html_41f8b375.jpg


More of the "flat furniture" which David accuses me of ...

ApothecaryChestFinal_html_172dc901.jpg


ApothecaryChestFinal_html_23b3cc36.jpg


Again the point is that I really doubt that any woodworkers today would work with just hand planes if they are serious about building furniture in a reasonable period of time. A combination of power and hand is inevitable for hand tool-orientated furniture makers.

Regards from Perth

Derek
Love the 36" heavy Jarrah jointer!

Amazing work!!
 
‘ve got a nice LN 5 1/2 but almost always grab my old Stanley #7. It’s about the same weight and seems to glide smoother. Works fine for smaller stuff too. If I could have just one it would be #7.

I do like Jacob’s comment about using whichever one is sharpest :)


Typical Sharpening of a Rip Saw

Here are a few of David's videos. I turn to him for advice on hand tools. Even after being a professional Joiner for over 25 years I find David's understanding of the nuances of hand tools well beyond mind.

That doesn't mean you have to copy and paste his methods, I don't. But he has significantly influenced my method.

Don't want to get dragged into the swamp of bloviation - once in it's difficult to get out!
But I did sneak a look at the first vid. Wife was watching cr*p on the telly so I thought I'd do similar with my laptop and earphones.
That's not how you join two boards to make one. At the very least you would plane best face and one square edge on each board, before attempting to join them, for a number of very good reasons.
Seems to struggle with the plane somewhat, maybe needs a squiggle of candle on the sole.
Also it's about 25 minutes too long.
I'll give it 3/10 for effort!
Trying to avoid the temptation of looking at the others - I sense a car crash. :unsure:
PS had a look at the "short" :rolleyes: dimensioning vid. About 30 minutes too long. Didn't have much to say of interest. 3/10 must try harder!
PS changed my mind. To be realistic there was absolutely nothing in the video worth watching. No help even for a total beginner. 0/10
 
Last edited:
.............


Again the point is that I really doubt that any woodworkers today would work with just hand planes if they are serious about building furniture in a reasonable period of time. A combination of power and hand is inevitable for hand tool-orientated furniture makers.

Regards from Perth

Derek
Actually a powerful combination - even for a committed machine user, having hand tool skills can save the day.
 
I make furniture and have a fully kitted out workshop, so my views are based on what I consider the most effective method to prepare rough sawn timber to finished dimensions. That does mean that I use a planer and thicknesser before hand planing. However some boards are too wide and occasionally have to be hand planed. Because I dont do this rough planing that often I am not as skilled in it as others might be
I find some peoples views fall into what I would term "tool afficionado" rather than practical making experience
I am not interested in whether I can get the last gnats bit of performance out of a hand tool. I just want to get it working well and practical
Some people are also much more physical than others, so a small lady would generally be better off with smaller handles and smaller tools such as a No. 5
I wish people would take a more pragmatic and less self rightous approach
It is clear from Dereks posts that he has outstanding skills in hand tool use and actually makes excellent furniture.
I agree entirely with this.
Most people, including me are trying to get the job done as efficiently as possible. Using every tool available to do it.

Ollie
 
..... However some boards are too wide and occasionally have to be hand planed. .....
Or too long to manhandle in a controlled way over a planer. In my case some 14ft 4x4" newel posts - hand plane and square two sides, through the thicknesser and over some rollers for the other two sides.
 
Please help me decide.

There’s not a huge difference in price between these planes, but I can only afford one. I will purchase a low angle block plane as well, and already have an old Stanley No.4. The three planes will have to do for now.

I have a bandsaw, but no other machines, so will need to use the plane for dimensioning and smoothing all stock. I also will use it for shooting end grain.

I am new to woodworking and am intending to build freestanding contemporary furniture like modern chairs, coffee tables, boxes etc.

Please comment if you have experience with these planes
Bailey 5 1/2 from eBay. Usually less than £50.

Thought I better check what the point of the thread was 😂
 
Don't want to get dragged into the swamp of bloviation - once in it's difficult to get out!
But I did sneak a look at the first vid. Wife was watching cr*p on the telly so I thought I'd do similar with my laptop and earphones.
That's not how you join two boards to make one. At the very least you would plane best face and one square edge on each board, before attempting to join them, for a number of very good reasons.
Seems to struggle with the plane somewhat, maybe needs a squiggle of candle on the sole.
Also it's about 25 minutes too long.
I'll give it 3/10 for effort!
Trying to avoid the temptation of looking at the others - I sense a car crash. :unsure:
PS had a look at the "short" :rolleyes: dimensioning vid. About 30 minutes too long. Didn't have much to say of interest. 3/10 must try harder!

All nonsense, Jacob. The more you mention what we would do with hand tools, the less I think you've done. The bit about having to square the edges individually and plane a face before joining is comedy club worthy.
 

Latest posts

Back
Top