Pekka Huhta
Established Member
First message, here it goes 
I had a problem: I needed a lathe for a couple of chisel handles but had no intention of buying one. My workshop is about 2,3 x 2,4 m big and already pretty full and I did not want to waste money for something that could be easily built anyway.
I have used my hand drill for all sorts of small turning tasks, modifying screw heads, polishing anything that could be gripped in the chuck and rotated etc. So the thought of using a hand drill as the motor for the drill was quite obvious.
Unfortunately I did not take photos during the building stage, but here is the finished lathe:
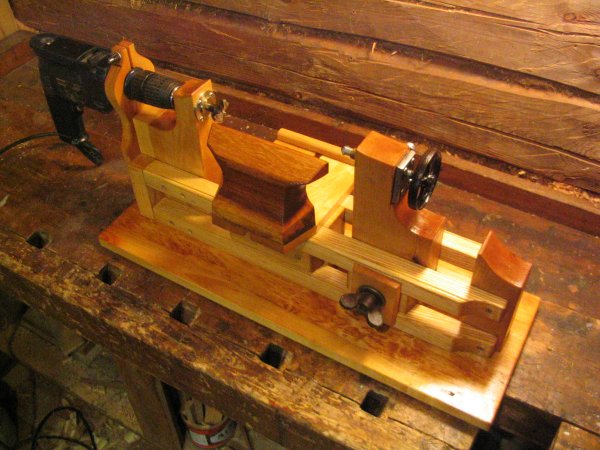
It’s made of an old, badly tarnished table top (which turned out to be masur birch after I planed it down a bit) and workshop scraps. The headstock, tailstock and toolrest base birch, and the rails (?) are ash. Tool rest itself was carved of a scrap of Iroko which had enough sapwood to prevent me from using it on my boat projects.

The first thing was to assemble the rails, headstock and end blocks on the other end together. The headstock bearing was a brass bushing with a flange in it. I have no idea what it has originally been for; it was just a discovery from my “box of surprises”. It had 10 mm hole through it. The spindle is just a knot bore re-ground so that it doesn’t drill into the workpiece.
Tailstock bearing was drilled by inserting a 10 mm drill bit through the headstock. This way I got them aligned properly. I did the same thing “backwards” when I aligned the center of the drill holder on the left end.
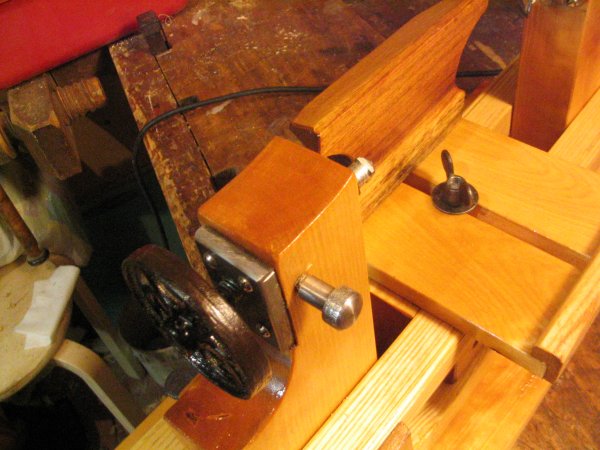
After drilling the hole for tailstock bearing I inserted a brass pipe over there, drilled and tapped a piece of 10 mm steel plate for the tailstock screw and added a locking screw. Here is the catch: there is a ball bearing (just one 10 mm ball) between the tailstock screw and (wassat sharp part that goes to the end of the workpiece). This way it rotates very lightly and the tailstock screw doesn’t unscrew easily.
After assembly I took everything apart again for finishing. First I used a quite thin mixture of turpentine, linseed oil and a tad of tar. Using pine tar for everything is a bad habit of mine, coming from fooling too much around in wooden boats. The final coatings were just shellac.
All the other parts were just leftovers from my endless boxes, jugs and tin cans full of screws. Total cost of building was zero, although it took about a week or two to make in the evenings.
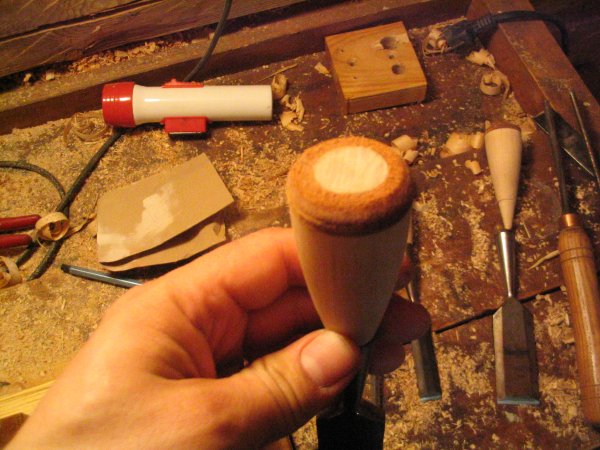
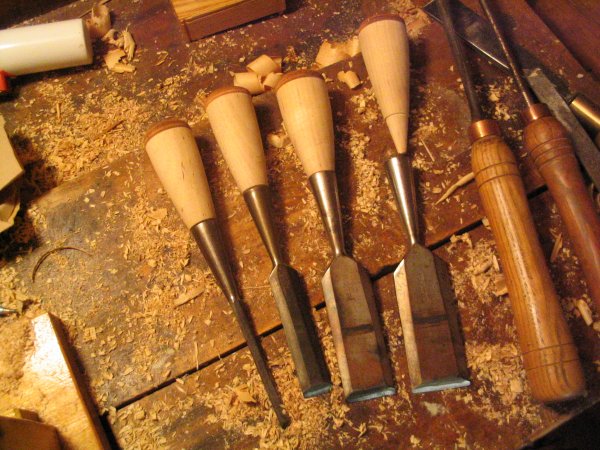
Here are the first leather capped chisel handles turned with the new lathe.
I hope you enjoyed the story, at least I had fun building that thing
Pekka
I had a problem: I needed a lathe for a couple of chisel handles but had no intention of buying one. My workshop is about 2,3 x 2,4 m big and already pretty full and I did not want to waste money for something that could be easily built anyway.
I have used my hand drill for all sorts of small turning tasks, modifying screw heads, polishing anything that could be gripped in the chuck and rotated etc. So the thought of using a hand drill as the motor for the drill was quite obvious.
Unfortunately I did not take photos during the building stage, but here is the finished lathe:

It’s made of an old, badly tarnished table top (which turned out to be masur birch after I planed it down a bit) and workshop scraps. The headstock, tailstock and toolrest base birch, and the rails (?) are ash. Tool rest itself was carved of a scrap of Iroko which had enough sapwood to prevent me from using it on my boat projects.

The first thing was to assemble the rails, headstock and end blocks on the other end together. The headstock bearing was a brass bushing with a flange in it. I have no idea what it has originally been for; it was just a discovery from my “box of surprises”. It had 10 mm hole through it. The spindle is just a knot bore re-ground so that it doesn’t drill into the workpiece.
Tailstock bearing was drilled by inserting a 10 mm drill bit through the headstock. This way I got them aligned properly. I did the same thing “backwards” when I aligned the center of the drill holder on the left end.

After drilling the hole for tailstock bearing I inserted a brass pipe over there, drilled and tapped a piece of 10 mm steel plate for the tailstock screw and added a locking screw. Here is the catch: there is a ball bearing (just one 10 mm ball) between the tailstock screw and (wassat sharp part that goes to the end of the workpiece). This way it rotates very lightly and the tailstock screw doesn’t unscrew easily.
After assembly I took everything apart again for finishing. First I used a quite thin mixture of turpentine, linseed oil and a tad of tar. Using pine tar for everything is a bad habit of mine, coming from fooling too much around in wooden boats. The final coatings were just shellac.
All the other parts were just leftovers from my endless boxes, jugs and tin cans full of screws. Total cost of building was zero, although it took about a week or two to make in the evenings.
Here are the first leather capped chisel handles turned with the new lathe.

I hope you enjoyed the story, at least I had fun building that thing
Pekka


