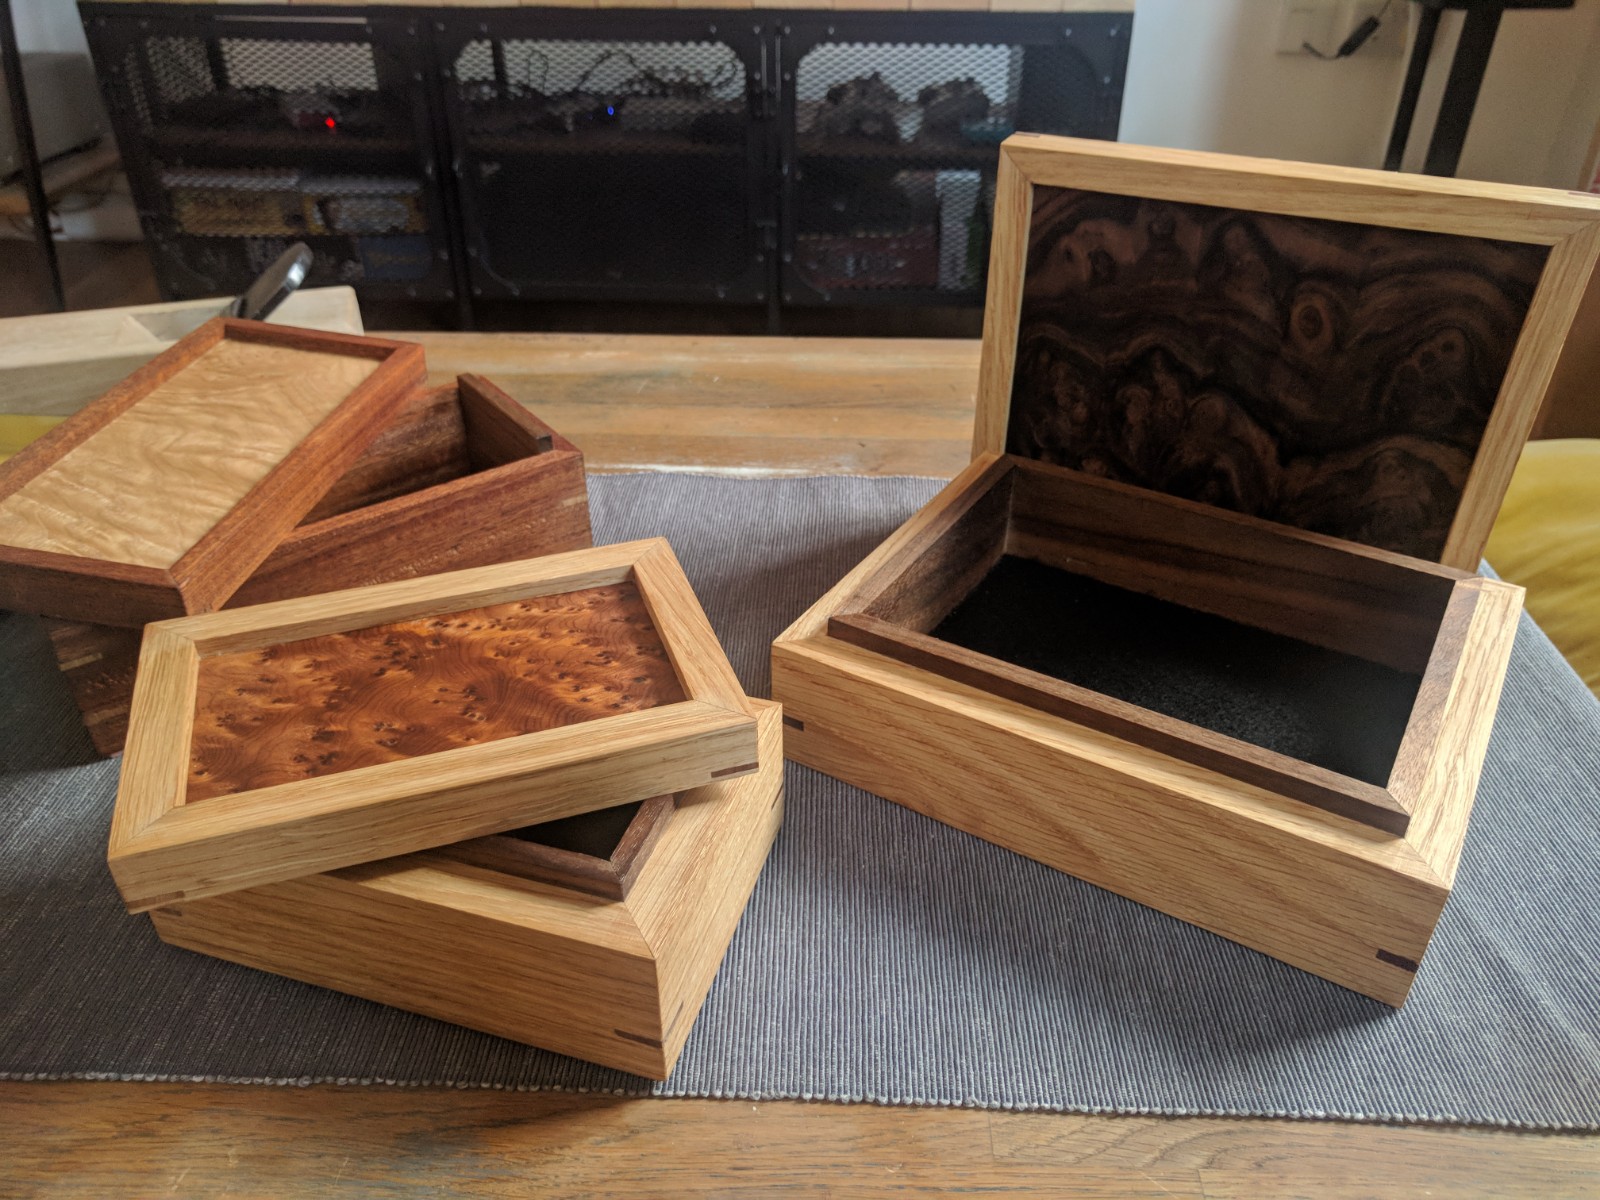
Phase 1 of my box project - mitred keepsake boxes

UKworkshop.co.uk

Help Support UKworkshop.co.uk:

This site may earn a commission from merchant affiliate links, including eBay, Amazon, and others.

maznaz

Is it safe?
Joined
15 May 2019
Messages
67
Reaction score
16
Location
Sheffield
IMG_20200622_175652.jpg
IMG_20200622_174947.jpg


I made these boxes by combining a bunch of youtube and forum techniques and advice I'd been given. I followed the advice of Sunnybob here and left dovetails alone for the moment. My first few attempts (albeit in softwood) would not have made the grade for the recipients.

I gave two to my mother for her 60th and one to my girlfriend for her birthday and they're all very happy. I resisted the urge to point out all the mistakes I'd made and just let them enjoy them as I also read on here somewhere.

Overall a great experience and I can't wait to do more, and improve on the parts I know I can do better at! In particular the splines showing end grain and the tearout on the sapele.

Cheers!
 

Attachments

  • IMG_20200622_174947.jpg
    IMG_20200622_174947.jpg
    472.1 KB
  • IMG_20200622_175652.jpg
    IMG_20200622_175652.jpg
    447.9 KB
Nice boxes. =D>
I think dovetails are over rated unless its a very old style and in keeping with the period. Doesnt look right to me on a light coloured wood.
Splined mitres are good, box joints can look good as well.
What is the darkwood top?
 
sunnybob":1luncub2 said:
Nice boxes. =D>
I think dovetails are over rated unless its a very old style and in keeping with the period. Doesnt look right to me on a light coloured wood.
Splined mitres are good, box joints can look good as well.
What is the darkwood top?

All the tops are made with a selection of veneers that I bought blind online. I picked out some nice ones and glued them to some thin ply. The other side is covered with felt.
 
transatlantic":1h3pvuqx said:
Very nice. How did you cut thr mitres?
lots of different attempts before I got it accurate enough to use. I cut them on my table saw (dw745), eventually using a crosscut sled that is also flush along one edge to the blade when I reverse it. I cut a bevel in that side and use the fence to support the pieces and a stop block. It's not great though and I'll be building a mitre shooting board for future ones, as that part of the process took me way longer than anything else trying to get them accurate!
 
Nice boxes and a nice finish. One point for future boxes is to consider the spacing of teh mitre keys. I think it looks best if the key in the lid is centred in the depth of the lid and the bottom key is set the same distance up. If you use a second key in the base of teh box I think it either has to be central in the overall height of the box and lid or set so it matches the top one around the opening. Just my personal views
Ian
 
I can see where you're coming from. I'm using a slot cutter router bit and struggled a bit to get the middle slot height safely at first but I think I have it now and will try it centrally in the lid next time.
 
I don't see anything wrong with those so be proud and enjoy.

A suggestion for cutting the key slots. Make a sled that registers against the fence with a big V in it to hold the box. Glue the box together, there is enough strength in the glued mitres to get to this point, then set the box in the V and pass it over the saw blade. Repeat on the other 3 corners. Shift the fence over to the next location and cut the 4 corners. Repeat for as many keys as you like. After glueing in all keys and flattening them cut the lid of the box off. For variety you can vary the height of the blade to make progressive sizes of slots or you can angle the blade and make a fan effect of the keys. If you play with varying cut heights the extra key material on the inside can be cut off. It is hidden by the inner pieces. The table saw opens far more possibilities than the router. Just make sure you are using a flat toped blade.

Pete
 
Inspector":3mfhyhg7 said:
I don't see anything wrong with those so be proud and enjoy.

A suggestion for cutting the key slots. Make a sled that registers against the fence with a big V in it to hold the box. Glue the box together, there is enough strength in the glued mitres to get to this point, then set the box in the V and pass it over the saw blade. Repeat on the other 3 corners. Shift the fence over to the next location and cut the 4 corners. Repeat for as many keys as you like. After glueing in all keys and flattening them cut the lid of the box off. For variety you can vary the height of the blade to make progressive sizes of slots or you can angle the blade and make a fan effect of the keys. If you play with varying cut heights the extra key material on the inside can be cut off. It is hidden by the inner pieces. The table saw opens far more possibilities than the router. Just make sure you are using a flat toped blade.

Pete

Thank you Pete. I had considered this approach originally but as I had a slot cutter and didn't have a flat blade I went with the router table. Having a think about your described process it does seem somewhat more controlled and easier to align the keys with the table saw. I'll take another look at those blades and look to get one before the next build. I'm particularly intrigued by the angled keys option!
 
Back
Top