Old tool cleaning part 2 - rust removal with abrasives

UKworkshop.co.uk

Help Support UKworkshop.co.uk:

This site may earn a commission from merchant affiliate links, including eBay, Amazon, and others.

AndyT

Established Member
Joined
24 Jul 2007
Messages
12,030
Reaction score
543
Location
Bristol
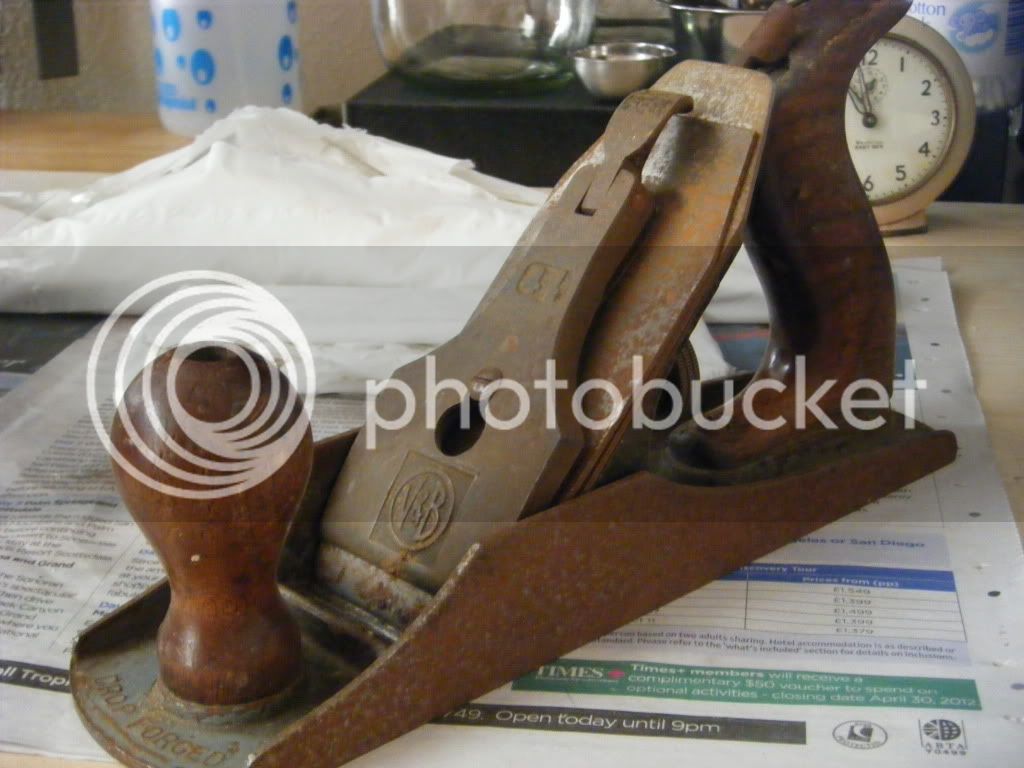
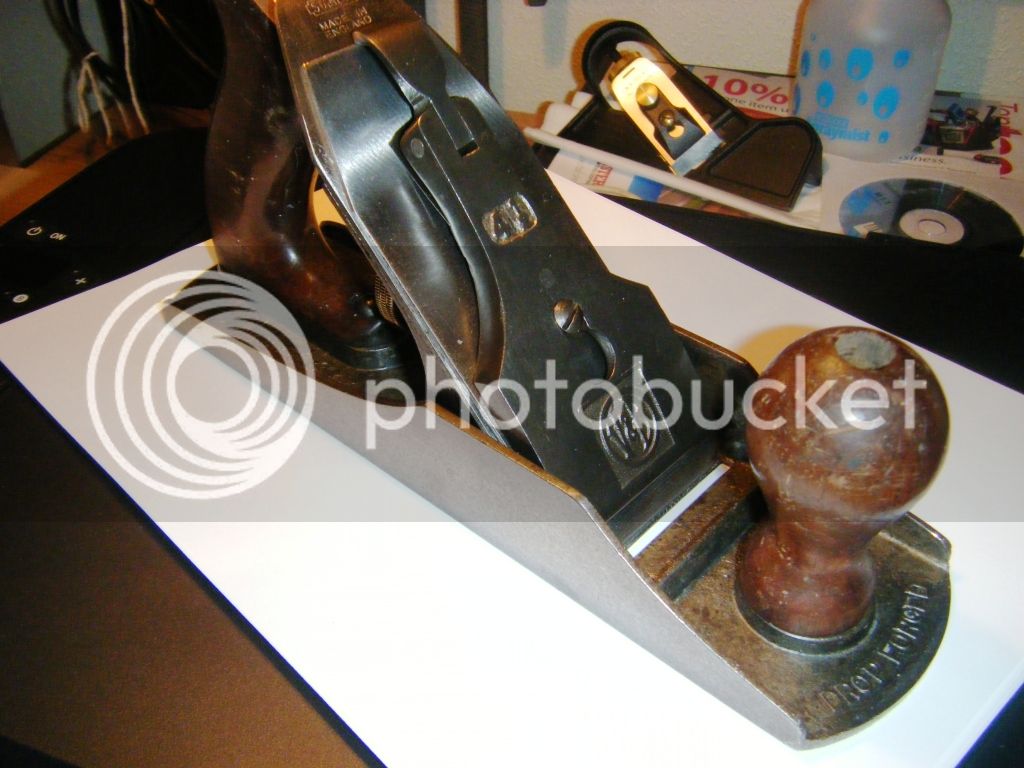
Next up out of the goody box is this nice little bullnose plane - well, it was nice once, and it could be again - but hardly inspiring here:

IMG_1334.jpg


IMG_1335.jpg


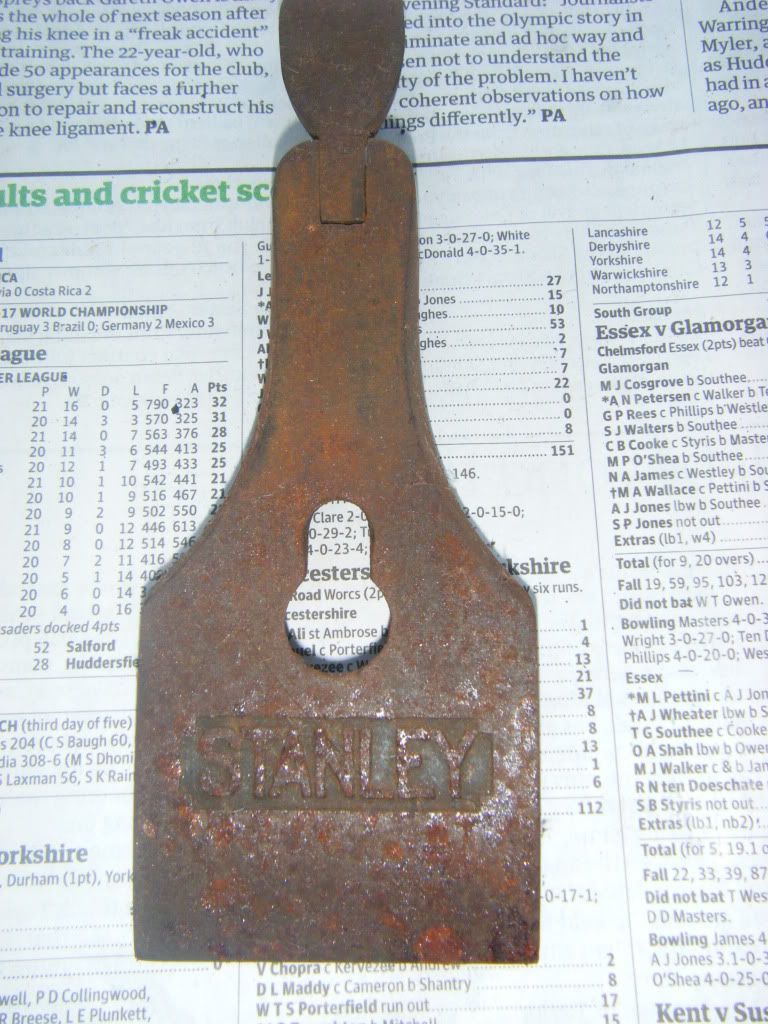
but at least there seem to be no cracks or chips around the mouth:

IMG_1337.jpg


For this job, I used Micromesh - another tip from Jim. Apparently it was developed for grinding optics and suchlike; for me, the key features are that it seems to be everlasting, and the amount you remove is easily controlled. I bought an assorted pack of small sheets on eBay, and so far I have only used two sheets - one fairly coarse and the other one fine.
It's washable - under the tap, or leave it in your pocket and put it through the machine.

Here is the plane dismantled; I've rubbed it hard with a coarse rag, but it's going to need a bit more than that.

IMG_1354.jpg


Here I've used the coarser grade, wrapped around a cork block and lubricated with a quick squirt of WD40:

IMG_1355.jpg


I then wiped the slurry of rust and WD40 off with a rag:

IMG_1356.jpg


It's then just a question of doing this all over. To get in the nooks and crannies, I just wrapped the micromesh around a stick or my finger. Having gone over the plane once, I switched to the finer grade and repeated.

This got it nice and rust free and smooth on the working surfaces but took off almost no steel. The difference with this abrasive is that it seems to give you lots of control over how much you remove; you can just stop when you like the look of it, without leaving scratches.

As an experiment at this stage, I used a smear of MAAS polish (available on-line or from Lakeland kitchen shops) - this did darken the cloth so must have removed something; I think it probably helped in getting the rust out of the bit of pitting on the side.

IMG_1361.jpg


To finish off, I gave the plane a quick once-over with the Renaissance Wax to prevent any further rusting (and make it nice to handle) and to buff up the rosewood wedge. I also sharpened the iron, which looks as if it has been cut down from a bigger one, but quite neatly.

Here's the finished article, complete with shavings - I hope you'll agree that it now looks like a tool which has been properly looked after, not one that has been neglected.

IMG_1366.jpg


and as a bonus the maker's name is revealed (alongside some old hammer marks!)

IMG_1365.jpg
 
WOW...someone really bashed that old Slater bullnose about in the past!

I have one of those...or rather Douglas now has it...

Slater made a lot of castings for other "makers" like Tyzack...and rebadged them...great old company!

One tip with the MicroMesh...go up through the mesh if you can...1500M (coarse) to 12000 (ultra fine) leaving no grade out and do less each time and you will get the same result only smoother.

You don't feel that you are doing anything with the intermediate meshes but you are.

Jim
 
Hi, Andy

Looks like you have added to my shopping list again! :lol:

I have been using wax on a scotch brite pad for most of my cleaning, but that micro mesh look like it is milder and more controllable.

Pete
 
I use wire wool and linseed oil. I know it sounds a bit pathetically low-tech compared to "'micro" this that and the other but it works really well. What is "micro crystalline" wax BTW and how is it different from (superior to?) other waxes?
It has to be said - woodworkers are suckers for technical sounding names, particularly if "micro" is involved
 
Pete Maddex":l2v1l9vw said:
Hi, Andy

Looks like you have added to my shopping list again! :lol:

I have been using wax on a scotch brite pad for most of my cleaning, but that micro mesh look like it is milder and more controllable.

Pete

I've had good results using 600-800 grit SiC and diesel (which is just a cheap super-light oil)

For irregular shapes, or super delicate stuff, I revert to 0000 wire wool, possibly augmented by Solvol Autosol.

http://cornishworkshop.blogspot.co.uk/2 ... hings.html

BugBear
 
Hi, BB

Diesel? I am more of a petrol man my self, but if it can be used for tool cleaning then I supose it has a use :wink:


Pete
 
Jacob":pn314vbh said:
I use wire wool and linseed oil. I know it sounds a bit pathetically low-tech compared to "'micro" this that and the other but it works really well. What is "micro crystalline" wax BTW and how is it different from (superior to?) other waxes?
It has to be said - woodworkers are suckers for technical sounding names, particularly if "micro" is involved

I know Jacob! I too have always favoured anything low-tech and cheap, and have also had good results on other tools using wire wool and linseed oil - especially on ordinary, common wooden planes which have lain neglected in a shed for fifty years.

This wax is not a new thing - it's been in use since the 1950s. I'm not a chemist and don't know why the crystal size is so important. According to the makers (http://www.picreator.co.uk/articles/3_renaissance_wax.htm) the essential difference is that other waxes can darken over time. That's fine if you've made some new oak furniture which you want to look aged - a bit of good darkening is very welcome (though I suspect that if you want C17th levels, it will take about four hundred years to achieve!) But there is a school of thought - following practice in the museum world - that has the objective of doing what you can to arrest decay, and keep objects in their current state. I am quite sure this will have had as much heated debate in museum circles as our sharpening discussions do, so let's not get sidetracked. It's a line promoted (quite loosely and openly) by the Tools and Trades History Society, TATHS and seems sensible to me.
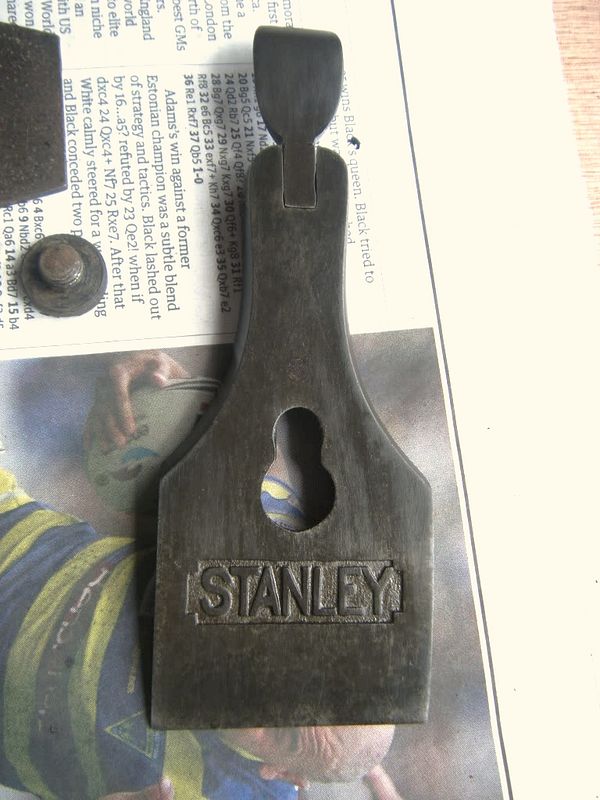
What I am impressed by is that this wax seems to be extremely economical in use - I've been using tiny smears on a cloth on the end of my finger. Also, it can be used on a wide range of materials. And it is tough in use - ideal for objects which will be handled frequently.

In the end, we all have to buy some consumables, so it makes sense to buy those that work well.
 
bugbear":96l4n3od said:
Pete Maddex":96l4n3od said:
Hi, Andy

Looks like you have added to my shopping list again! :lol:

I have been using wax on a scotch brite pad for most of my cleaning, but that micro mesh look like it is milder and more controllable.

Pete

I've had good results using 600-800 grit SiC and diesel (which is just a cheap super-light oil)

For irregular shapes, or super delicate stuff, I revert to 0000 wire wool, possibly augmented by Solvol Autosol.

http://cornishworkshop.blogspot.co.uk/2 ... hings.html

BugBear


BB, the finish on those engineering tools in your link to Alf's site looks really nice - just the right line between looking old and being usable. I'm not saying that wire-wool and Autosol don't work - they clearly do.

But this Micromesh stuff seems to be amazingly economical - I have used the two sheets shown for quite a few other jobs, and they are still performing just fine. The cloth backing stays intact and the abrasive stays stuck to it.

Way cheaper in use than nasty wet and dry from a pound shop or market stall, and no risk of leaving fragments of steel behind on the work.
 
Hi everyone,
regarding rust removal, I recently tried cleaning some steel electrolytically. There's plenty of info on the web about this so I won't go into any detail, but it did work. The steel comes out of the washing soda solution with a black coating which wipes off with a cloth. One advantage of de-rusting this way is that it works on areas you often can't get at with a wire brush etc. All you need is a DC power source (car battery?), plastic bucket, some old unwanted iron as an electrode, and some washing soda.

Worth investigating?

K
 
Hi

I've used electrolysis to de-rust a lot of iron / steel items - the rust removal is effortless and no base metal is removed.

Regards Mick
 
Thanks guys - electrolysis is one method I have never got round to trying. Most of the stuff I've read on-line about it has been about de-rusting damaged modern tools where the objective was to get back to as-new condition, not old tools where the intention was for them to look old, but I'd be interested to see otherwise. Anyone fancy doing a fresh thread to show us how controllable it is?

There is of course another issue in the case of this bullnose plane - it has a wedge of wood as infill below the blade which I would not want to immerse in water!
 
Hi, Andy

I did a Preston Smothing plane No4 size electrolyticly it works very well and not to severely, it leaves the paternation.

My bullnose has a screw that holds the wood under the blade in, I thought they all did, saying that mine is a no name one.
Possibly user made bur the wedge is very well shaped.

Pete
 
Andy, here's a couple of before and afters using electrolysis

005-9.jpg


011-3.jpg


002-5.jpg


014-1.jpg


It's a good way to remove rust, but it is a bit of a faff; I save up bits and do them all at once rather than setting it up for a small piece. It's also no good if there is an attendant bit of wood! Does maintain some patina though.

There's no real control as such, just dunk it in and turn it on, come back 6 hours later and give it a scrub and rinse. I believe that a higher output ampage will shorten the time it takes but may also damage the underlying metal in the removal process, but I only use a 1 amp train set controller so no worries there and more than enough to do plane bodies, saw plates etc.
 
Out here in the colonies (canada) one of my favorite methods is to use is a "grey wheel" aka deburring wheel, and the carving afficainados may think of the much narrower cratex wheels.

This video shows a plane rehab.


The wheels are expensive to purchase new, but I've picked all the various grits from garage (boot) sales . While the tried and true method of tappbing a grinding wheel to see if it rings or not (apparrently disclosing fractuures) these deburring wheels just go "thud" and do have a rubberry feel to them.Cratex mini grinder (dremel/foredom size) are also available.in smaller sizes for more detail work.

As for destroying patina, I totally respect that, but often oldtools are just too far gone and need some more agressive type of gentle rehabilitation to bring them back to life.

I continue to use this method and have used it to restore a polished surface to planishig hammers, metalworking/jewelers stakes and a plethora of other tools.

Eric
 
anyone use those rubber blocks loaded with abrasive?

I usually use a scraper first, especially on flat surfaces (not turned edge, just a good narrow old Sheffield decorator's scraper) - doesn't dig in, scratch or cut metal if the angle's right, but does take off surface rust fast.
Then hand wire brush - and abrasives if really necessary.
I finish with the rubber block (name's long gone - Garryflex?) which gives a nice look - not too shiny, but no scratch marks visible to naked eye - that 'used, but looked after' look.
Then a touch of oil, grease, wax, camelia or similar.

There's no perfect way to deal with pitting - I think electrolysis or chemical de-rust gives a strange look, although it can remove all rust.
 
Yes another vote Garryflex is great has several grades the finest will finish as dannyr says. Likewise as he says its surprising how a decorator's scraper or a sharp plane iron will take the worst off without digs into the rusty item.
Perhaps a copper wire brush or wet/dry with oil somewhere along the line.
I tend to go with a light oil or Renaissance wax to finish.
By the time you've fiddled around with a few items you find your own best way
 
I'll just chip in the comment that micromesh doesn't last forever.
Used wet and working up through a dozen grits, it is fabulous stuff for polishing acrylics in pen turning.
After a dozen or so pens over about a year, my foam backed micromesh pads started to crumble and a few of them failed. For the finish they achieve, totally worth £12+ for a set of 30mm square pads
I'd expect them to die faster used on metal and on shapes with corners and edges though.
 
I use a wire brush fitted on the 6” bench grinder works really well. Using flat abrasives alone doesn’t remove rust from inside the small pits. depending on the severity of the rust, I use emery first to remove any heavy rust then the wire brush to get in all the nooks and crannies, excellent for cleaning threads etc
 
lookslike a recentlyrestored Badger shoulder plane
1646365148209.png

and it's box

It had taken a nose-dive somewhere in it's previous life, so had to gently bend the mouth wider so it actually worked....
 
@AndyT Sideways and I use electrolysis all the time for derusting stuff. We typically use an old PC battery charger. The beauty of the method is that it’s not user controlled, you literally dump your items in the bath turn it on and let it cook. You cannot leave it in too long, as the process stops when the rust is gone. Items will keep in the bath for over a month or more with the juice turned on. It removes rust from everywhere and does a far more thorough and less destructive job than mechanical cleaning. For restoration it’s a far better method to preserve detail.
 

Latest posts

Back
Top