Oak Panelling WIP

UKworkshop.co.uk

Help Support UKworkshop.co.uk:

This site may earn a commission from merchant affiliate links, including eBay, Amazon, and others.

BradNaylor

Established Member
Joined
17 Oct 2007
Messages
2,311
Reaction score
2
Location
Turning MDF into gold in a northern town
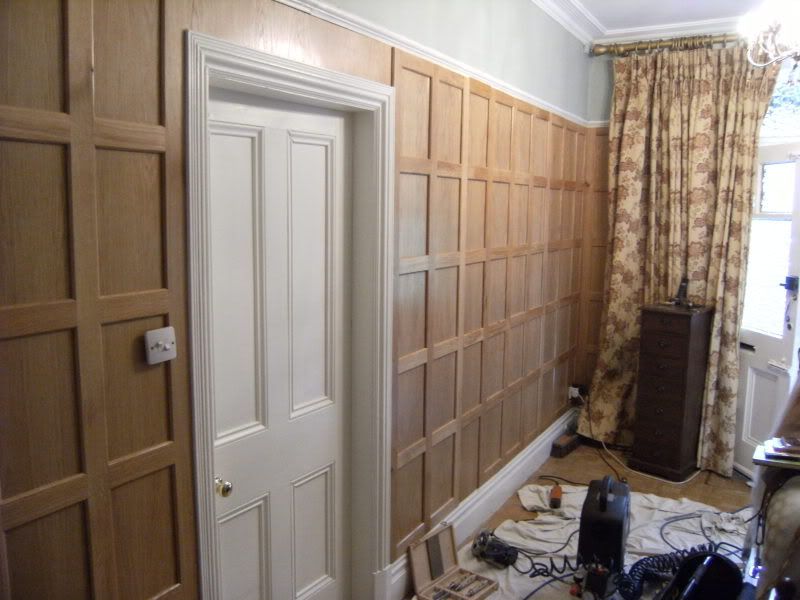
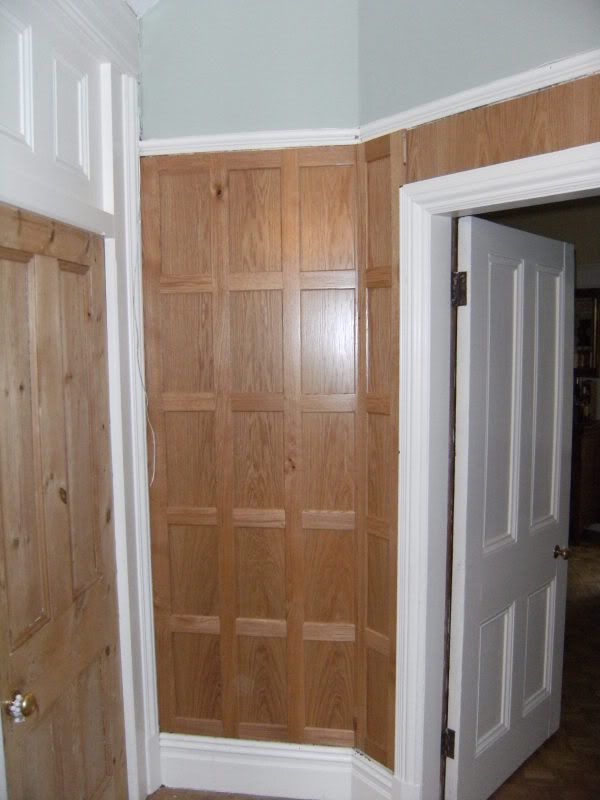
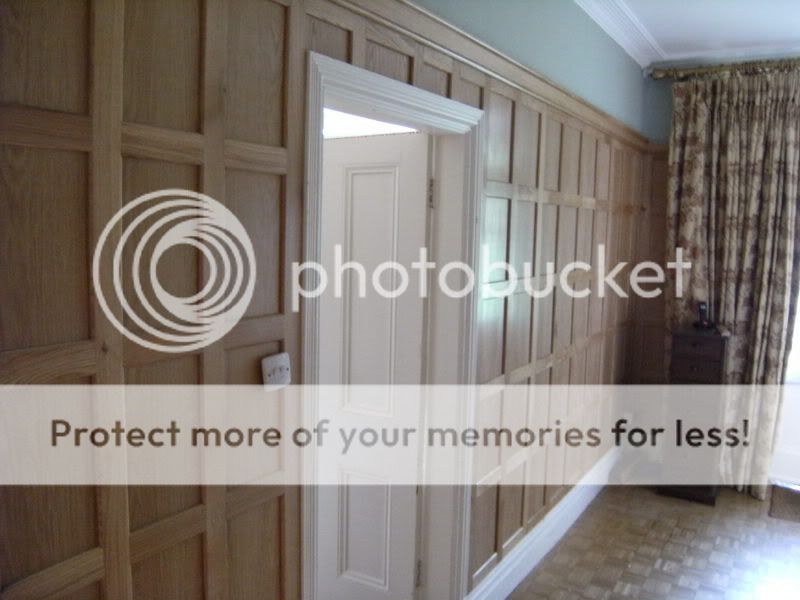
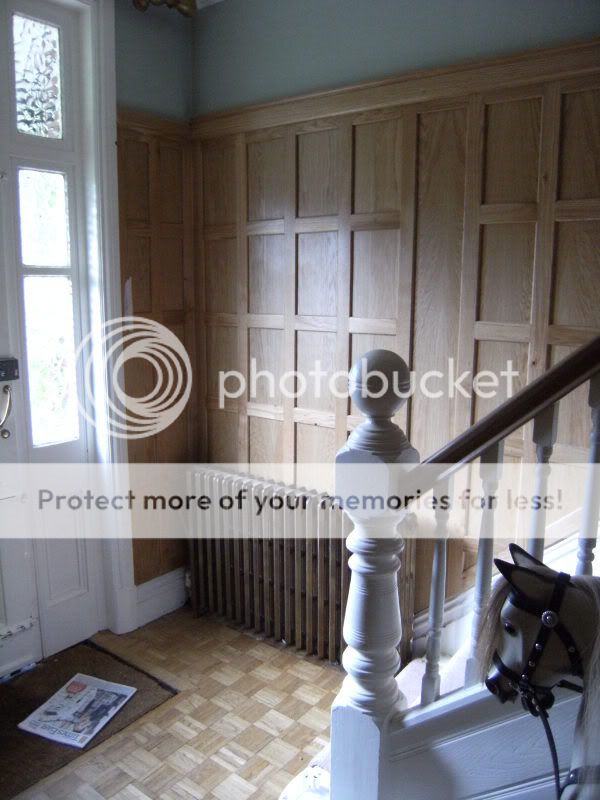
We've been fitting oak panelling this week in the hall of a big Edwardian house round the corner from the workshop. Here's a few WIP photos;

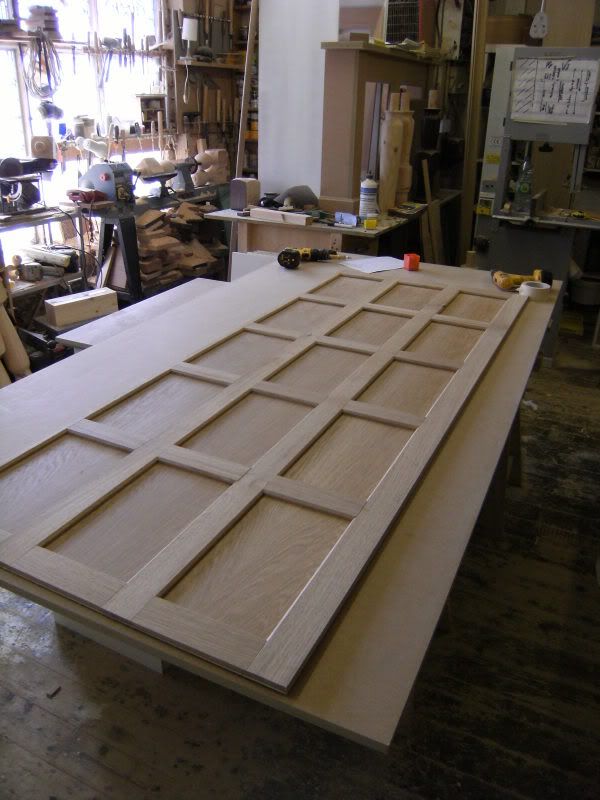
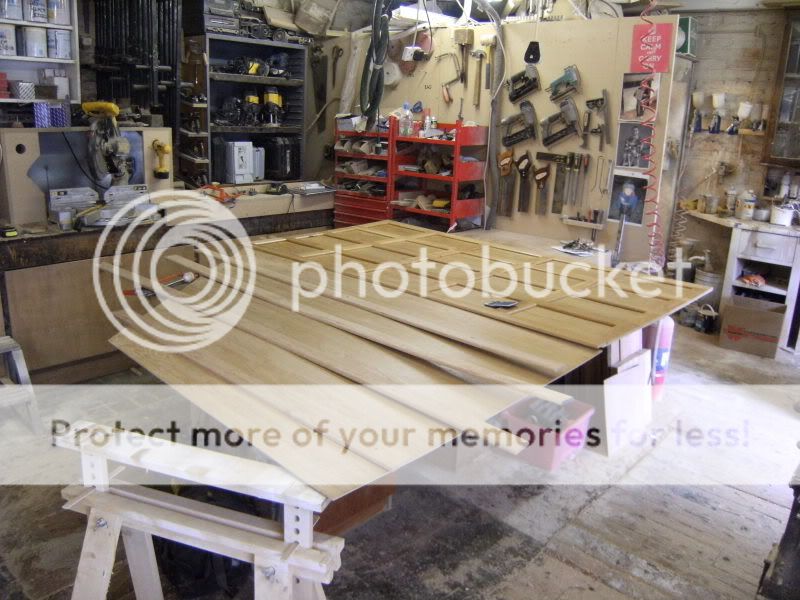
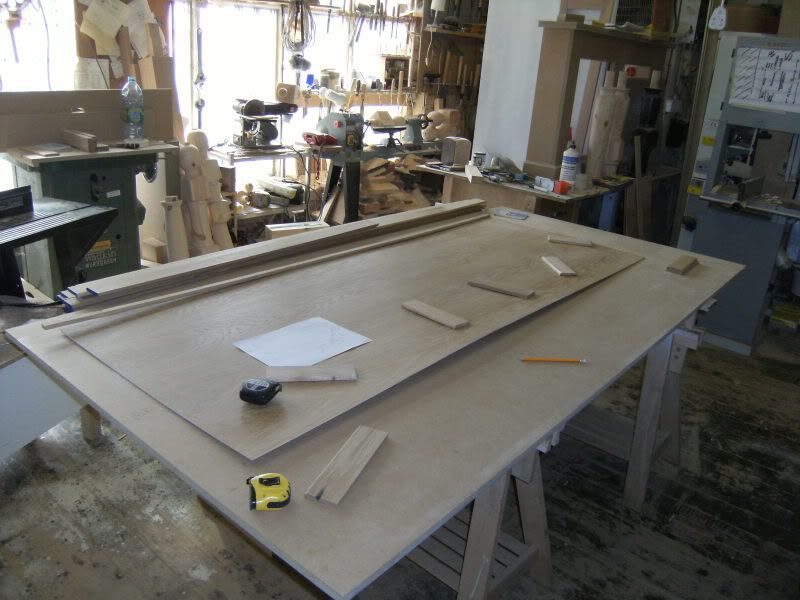
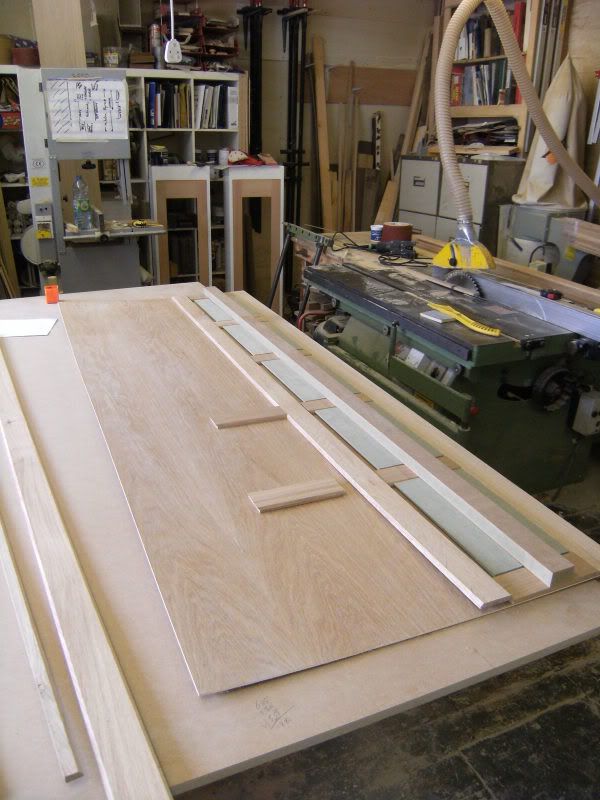
We used 3mm oak ply with 10mm 'stiles' and 'rails' planted on. I think we spent longer templating and working things out than actually making it all!
PanellingWIP001.jpg


PanellingWIP003.jpg


PanellingWIP004.jpg


PanellingWIP014.jpg


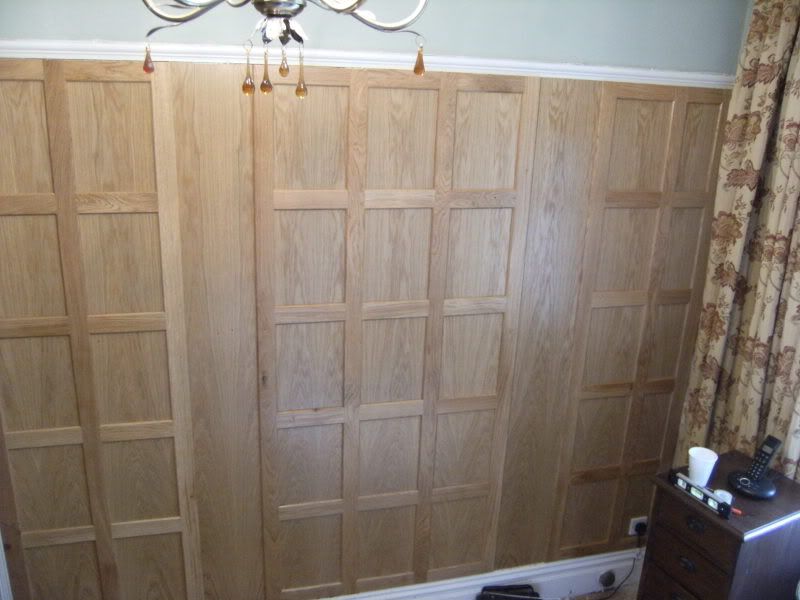
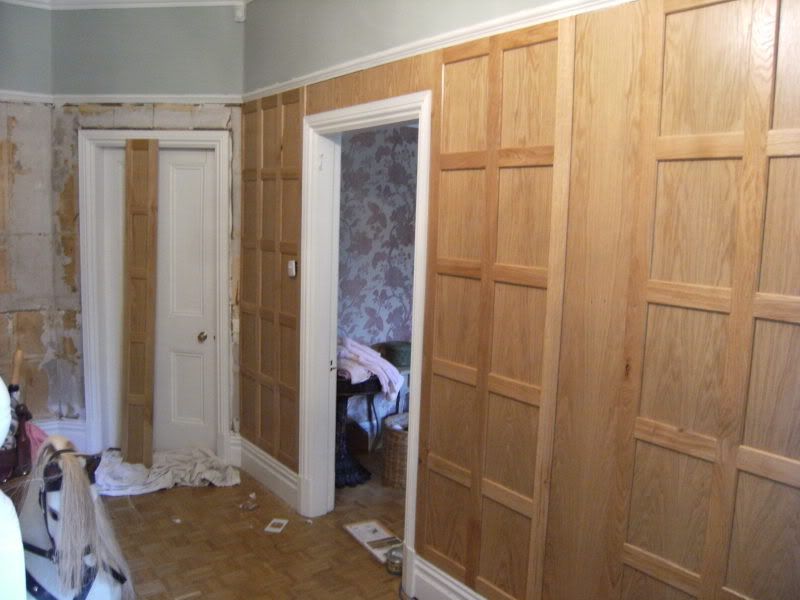
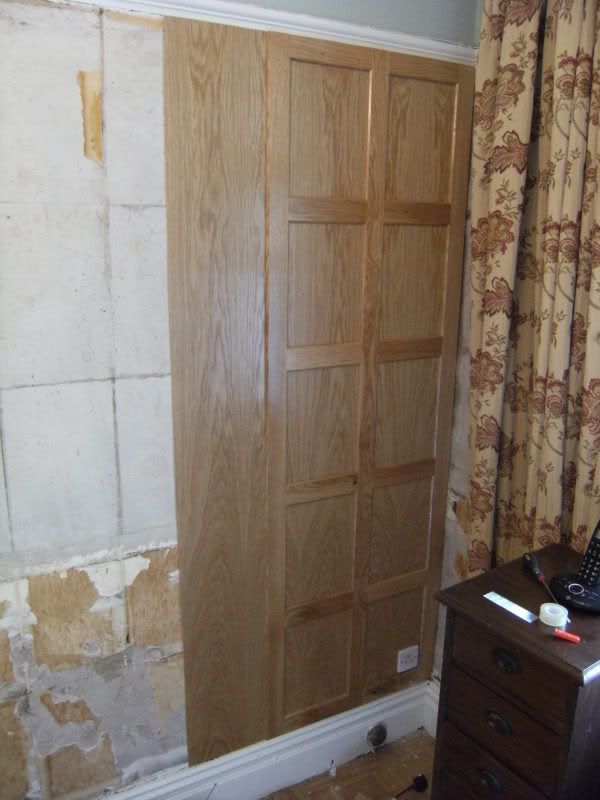
Then yesterday we started fitting;
PanellingWIP015.jpg


PanellingWIP019.jpg


PanellingWIP022.jpg


PanellingWIP024.jpg


PanellingWIP028.jpg


Tomorrow we've got to finish the fiddly bits and make and fit new picture rails.

Neither of us has ever done panelling before so it has been a case of the blind leading the blind but it has proved a lot more straightforward than we imagined. Best of all the customer loves it. :D

Cheers
Brad
 
Nice looking job mate.

Have you fixed the planted timbers on on site or in the workshop? Maybe a combination of both? I assume you have glued and pinned them or maybe screwed from the back?
 
Nice looking job Brad

This is exactly the kind of thing I want to do in my study (maybe slightly larger panels) so this is very helpful indeed. I might just tap you up for some tips and help when I come to do it if that's okay... ;)

What kind of profile did you put on the rail/stiles, and how did you machine it? Router table?

I am considering the same kind of thing, up to picture rail height with a nice deep drawing room red above. With a few hidden secret compartments involved too... :)
 
Mark you bloody copy cat, this is what I wanted to do in MY study, with deep red at the top.... (serious). :lol:

Looks really good Dunc.

thumbs-up.jpg
 
Agreed, looks great. The only thing that doesn't look quite right is the piece above the door, needs some verticals in to break up the space - though this may be in your finishing list.

Do they ever let you go back and take pictures once they've finished the decorating? You always seem to be in there at the bombsite stage
 
TrimTheKing":qb90hezn said:
What kind of profile did you put on the rail/stiles, and how did you machine it? Router table?

The 'stiles' and 'rails' are strips of oak 11mm thick x 65mm wide. We sliced up 1" boards down the middle on the bandsaw.

We then put a 45 degree chamfer on each front edge on the router table. Joints were made simply by setting up a 45 degree cutter on the spindle moulder to machine a corresponding scribe. It could be done just as easily on a second router table using a bearing guided cutter. It is vital though, to use two machines in tandem to acheive absolute consistancy and to avoid setting up errors. It's also a lot quicker!

The strips were glued at the joints and held in place on the ply backing with double-sided tape before turning the whole thing over and screwing them down from the back. Joins between panels were hidden by overlapping the outside 'stiles' and then filling in the missing rails on site using glue and the odd brad.

I got a bit distracted yesterday by another job (clinching a kitchen order :lol:) but we will finishing off today. I'll take some more piccies and post them later.

Cheers
Brad
 
BradNaylor":3jphuy9m said:
TrimTheKing":3jphuy9m said:
What kind of profile did you put on the rail/stiles, and how did you machine it? Router table?

The 'stiles' and 'rails' are strips of oak 11mm thick x 65mm wide. We sliced up 1" boards down the middle on the bandsaw.

We then put a 45 degree chamfer on each front edge on the router table. Joints were made simply by setting up a 45 degree cutter on the spindle moulder to machine a corresponding scribe. It could be done just as easily on a second router table using a bearing guided cutter. It is vital though, to use two machines in tandem to acheive absolute consistancy and to avoid setting up errors. It's also a lot quicker!

The strips were glued at the joints and held in place on the ply backing with double-sided tape before turning the whole thing over and screwing them down from the back. Joins between panels were hidden by overlapping the outside 'stiles' and then filling in the missing rails on site using glue and the odd brad.

I got a bit distracted yesterday by another job (clinching a kitchen order :lol:) but we will finishing off today. I'll take some more piccies and post them later.

Cheers
Brad
Excellent, look forward to the new pics.

Cheers for this Mr Naylor. I was thinking of doing my detailing slightly differently in having a stopped chamfer about an inch or so from each corner join of the rails & stiles ( picking o ut a detail in the existing French doors). This would mean having the rails joined with nothing but a butt joint though, do you think this would be good enough or is it risking the joint opening up over time?

I would think that with the small width of the stiles and being on a ply backer it shouldn't be an issue, but any comments welcomed.

And sorry if this counts as a hijack, will start another thread about this when I get round to starting.
 
Mark,

what you are proposing is the traditional way, and should be fine. It just takes a bit more time and thought to get all the chamfers to stop and start in the right place. It will look best if you clean up the machined chamfer with a chisel, flattening out the curve left by the cutter.

Mike
 
Mike Garnham":sb2oh0mm said:
Mark,

what you are proposing is the traditional way, and should be fine. It just takes a bit more time and thought to get all the chamfers to stop and start in the right place. It will look best if you clean up the machined chamfer with a chisel, flattening out the curve left by the cutter.

Mike
Thanks Mike.

I agree, it was my plan to clean up the routed chamfers this way to give that 'hand made' fake look ;)
 
Brad,

Nice work and a good economical use of timber. :wink:

Mark,

I agree with Mike's comments on finishing off the ends of each chamfer with a chisel (although, that's an awful lot of work on a job of this size! :?) but, for what it's worth, I think the best way to rout them on the router table would be with a couple of stops fitted to either end of your fence. One for the start of the cut, the other for the finishing. :)
 
Nice work Brad.

It seems like an ideal combination of an impressive looking end product for your client and a relatively straightforward process for you. Everyones happy.

Ed
 

Latest posts

Back
Top