Dominik Pierog
Established Member
Hi.
Half year ago i start makings plans for this project... Or maybe learning how to makie this.
Project belongs to > http://www.instructables.com/id/Fine-Ar ... Cardboard/
http://www.instructables.com/member/jwilliamsen/
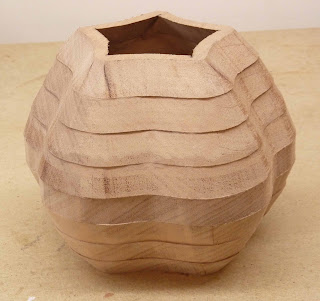
After cut crossections from 3mm ply wood and glued it i stard caving/sanding using dril and flex-shaft.
It takes few weeks of sanding...
Basic tools and materials.

Basic/first tool green Saburr Tooth coarse bit and last wet car sandpaper 2000 for lacquer.

Plywood, ready sanded sculpture. Immersed in the stain dries now.

Several layers of lacquer. Then sanding, lacquering, sanding, lacquering, sanding and lacquering the final.

Sanding > sand foams 150 i 200 next wet sandpaper 500, 800 and 2000.

Sculpture after sanding, velvet lacquer finish. Prepared to lacquering finish coat.

Final


Inspiration scroll saw bowls

http://scrollsawbowls.blogspot.com/2013 ... chive.html
And some of this type works from internet

http://www.bodyscape.net.nz/wood-karo.htm
Half year ago i start makings plans for this project... Or maybe learning how to makie this.
Project belongs to > http://www.instructables.com/id/Fine-Ar ... Cardboard/
http://www.instructables.com/member/jwilliamsen/
After cut crossections from 3mm ply wood and glued it i stard caving/sanding using dril and flex-shaft.
It takes few weeks of sanding...
Basic tools and materials.

Basic/first tool green Saburr Tooth coarse bit and last wet car sandpaper 2000 for lacquer.

Plywood, ready sanded sculpture. Immersed in the stain dries now.

Several layers of lacquer. Then sanding, lacquering, sanding, lacquering, sanding and lacquering the final.

Sanding > sand foams 150 i 200 next wet sandpaper 500, 800 and 2000.

Sculpture after sanding, velvet lacquer finish. Prepared to lacquering finish coat.

Final


Inspiration scroll saw bowls

http://scrollsawbowls.blogspot.com/2013 ... chive.html
And some of this type works from internet

http://www.bodyscape.net.nz/wood-karo.htm


