Making a brass infill plane (Hattori Hanzo, DP)

UKworkshop.co.uk

Help Support UKworkshop.co.uk:

This site may earn a commission from merchant affiliate links, including eBay, Amazon, and others.
Thanks Trees :D

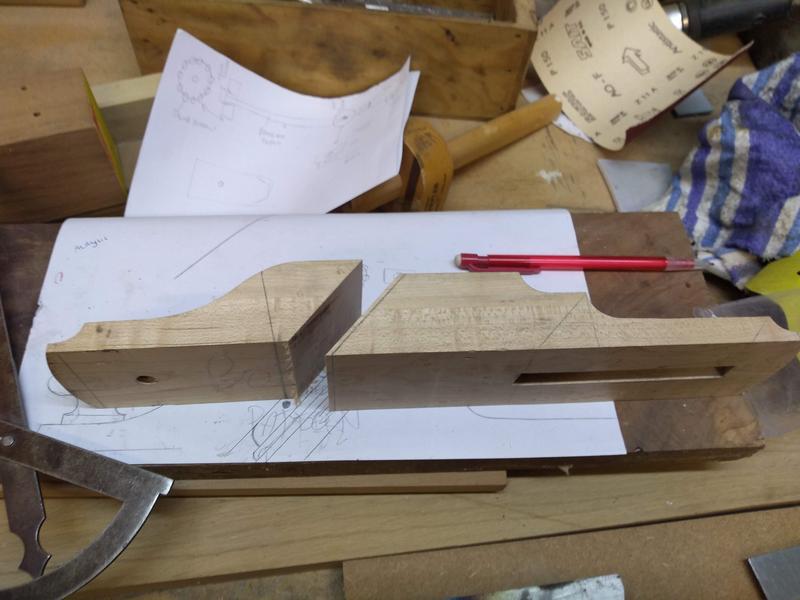
The former is nothing elaborate just a lump of Iroko machined square.
I'm going for a lever cap design but with a single iron instead of a bridge and wedge.

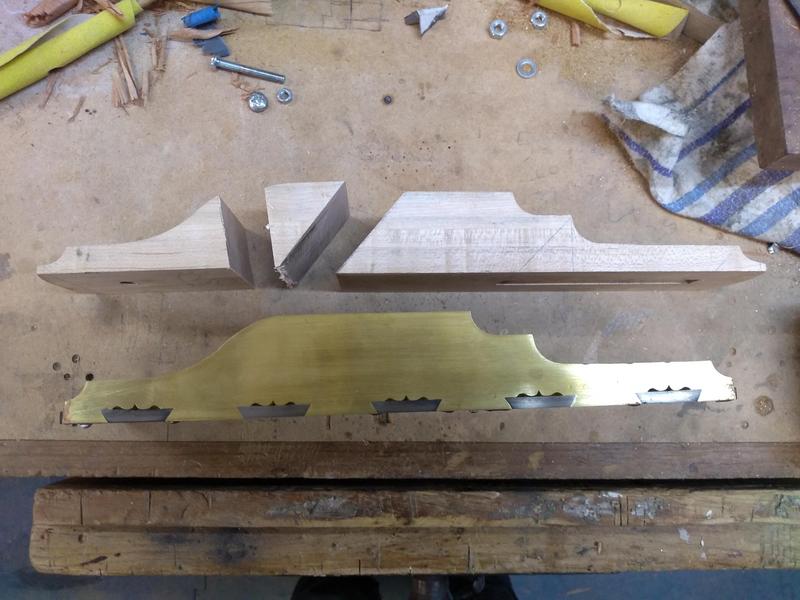
Now that the plane sides have been cut to shape I can permanently fix them to the sole.

This is done by peining the metal surfaces together to create a tight fit that will not come apart.

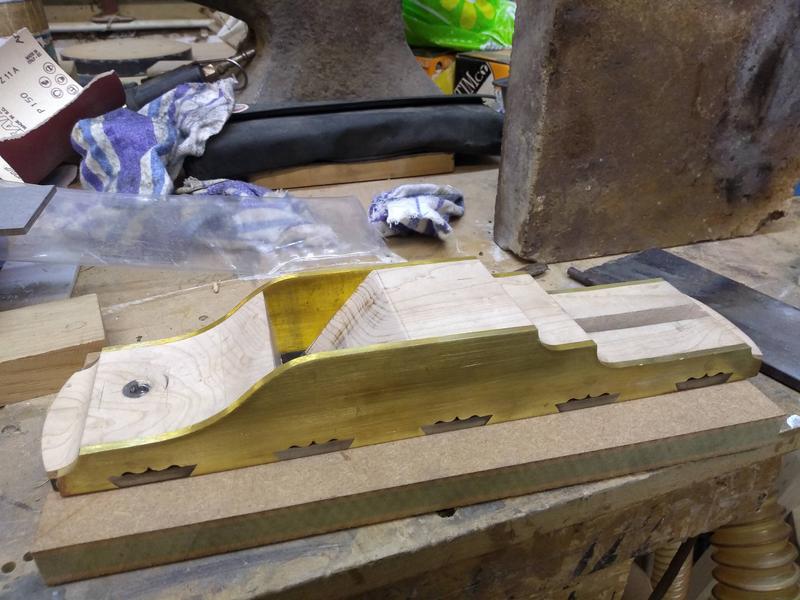
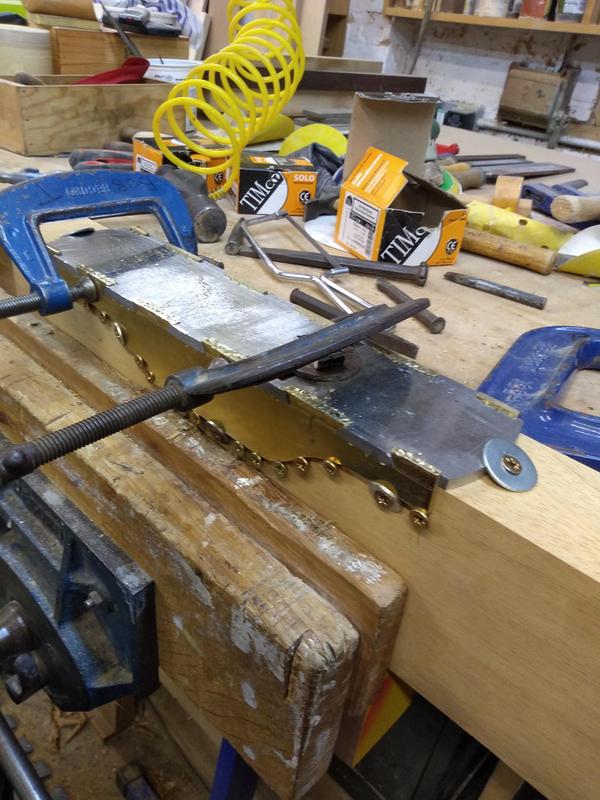
I started by machining a piece of wood to the exact internal dimension of the sole. I made sure it was straight and square as this will help to hold the sides of the plane square when i peen them.
I fixed the piece of wood inside of the plane body and secured it in place with G cramps and screws.
8Z3r9YG.jpg


It's make or break time, this is either going to go well or totally ruin all of the work so far leaving me with no choice but to scrap what I've done and start again.

I needed to peen the side dovetails first as this will drive the sole of the plane tight onto the sides.

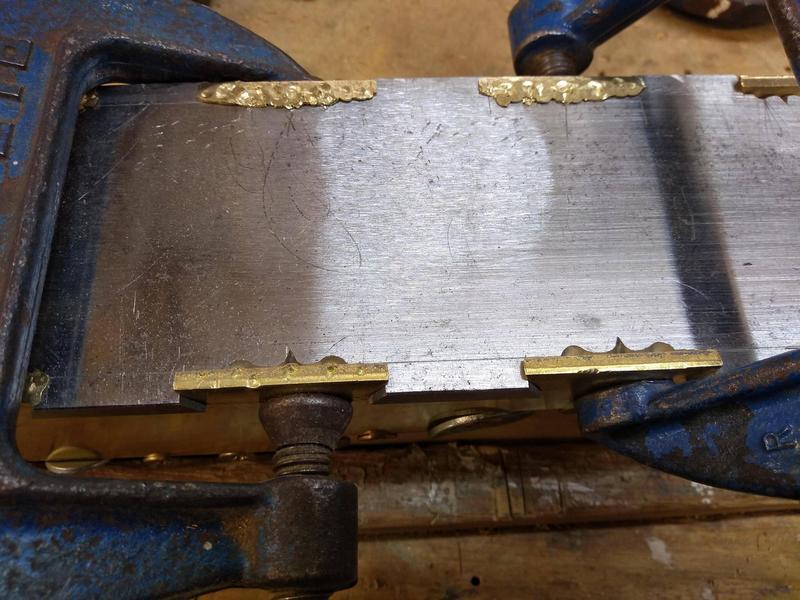
I secured the plane into my bench vice and fixed a G-cramp around the dovetail I was working on. This was to help keep the metal from spreading outwards.
I then used a combination of metal punches to try and drive the metal into the cupid bows.

I found that working from the outer edge towards the centre helped to get the brass where it needed to go.
QS5wiOm.jpg


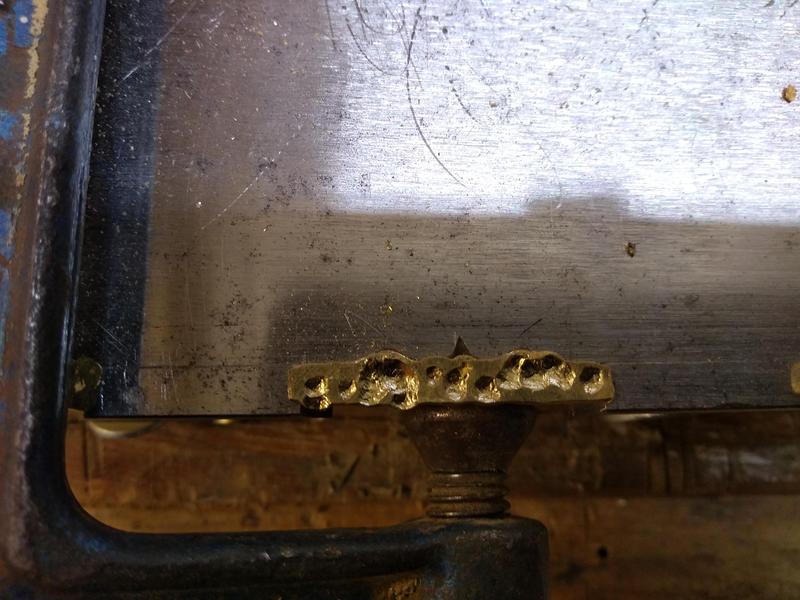
Filling the bow part was hard enough but trying to drive the brass all the way to the point of the cupid bow was incredibly difficult.

I found the hammering force needed was far greater than I had imagined and I was getting a lot of bounce from my bench vice making it even harder work.
I tried hammering on top of an anvil but found the plane would bounce even worse. At least with it held in a vice it left both hands free to work.

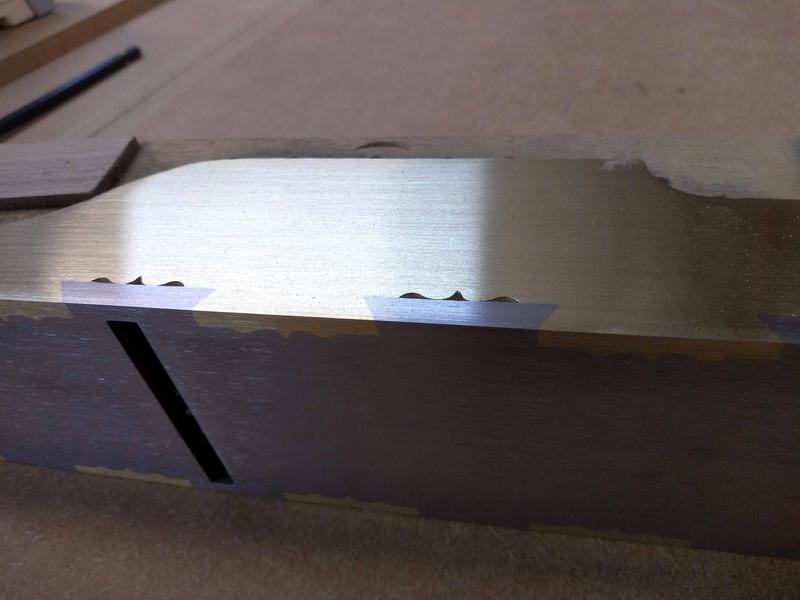
Here you can see that the bows are filled but I still need to drive the brass in to the point.
WtVhmlD.jpg


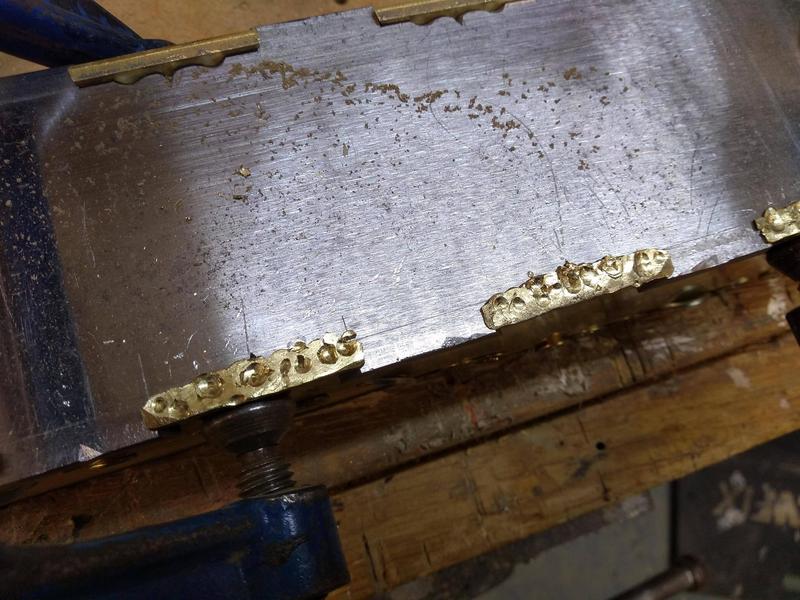
I also found that while brass is quite soft it's also brittle. On a few occasions small pieces would crack and break off as can be seen on the right of the first dovetail.
HukmzWF.jpg


I knew this stage was going to be tough but it was much more difficult than I had anticipated. The bounce from my vice was hindering progress and my poor technique certainly wasn't helping either.
But I persevered, wedging a large bit of wood under my vice as a leg helped to take some of the bounce away and with each dovetail my technique was improving until they where all done.
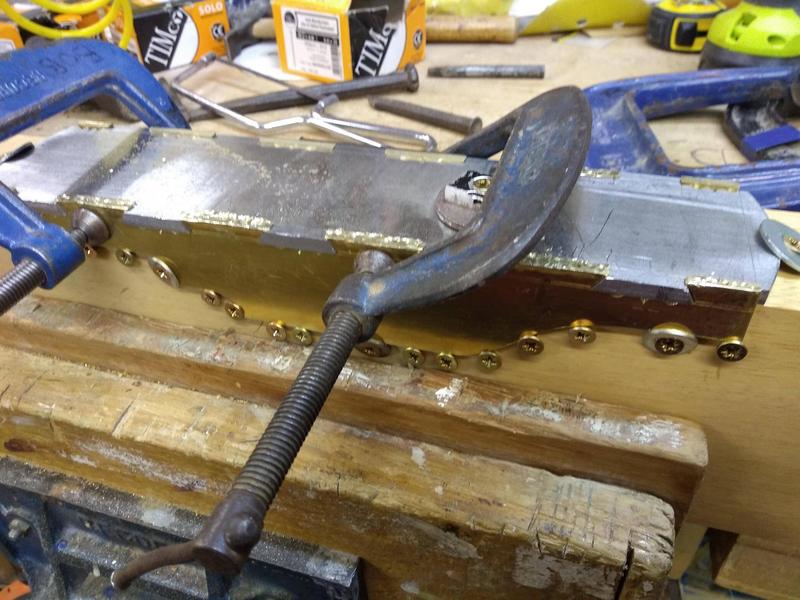
IRXxEt8.jpg


All I had to do now was peen the steel dovetails on the side of the plane.

I thought I'd have no chance of getting it done, brass is softer than steel and that's been a nightmare but to my surprise the steel seemed easier to peen than the brass.
I used the same technique of clamping the plane in the vice and working from the outside in to drive the dovetail up tight.

With all of the peining done it was time to file away the surplus metal and flatten the sides to reveal the results.
I used a mixture of files to remove the bulk of the waste then fixed 60 grit sand paper to the bed of an over hand planer,
It has a solid cast iron bed which is very sturdy and nice and flat. I used that to flatten the sides and sole.

thankfully the side dovetails where looking good
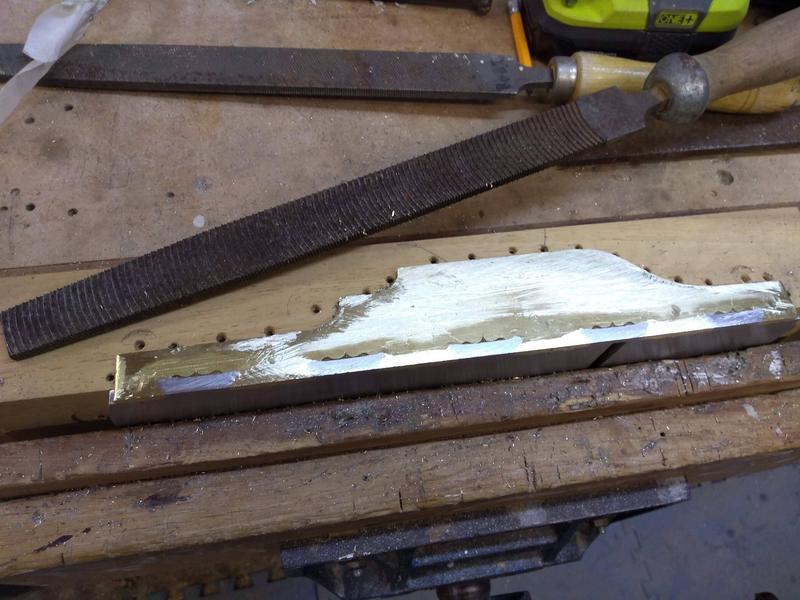
P5xzWnR.jpg


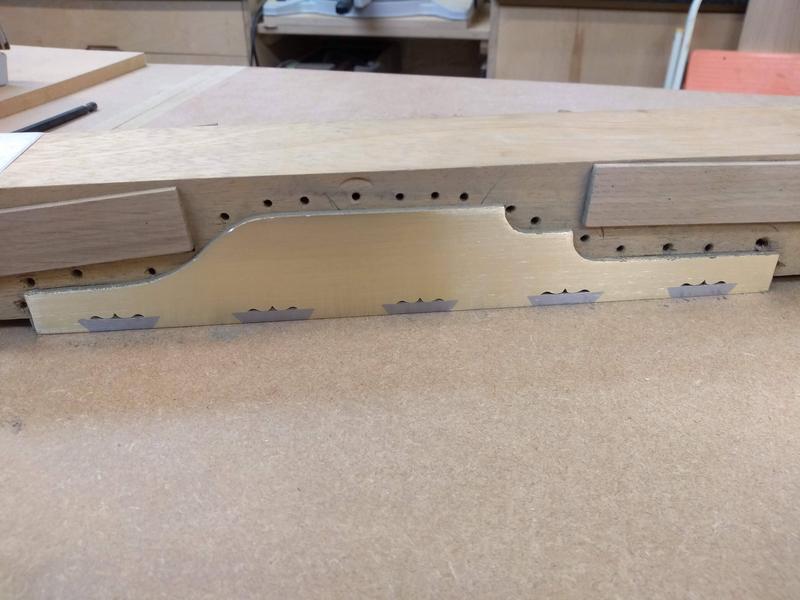
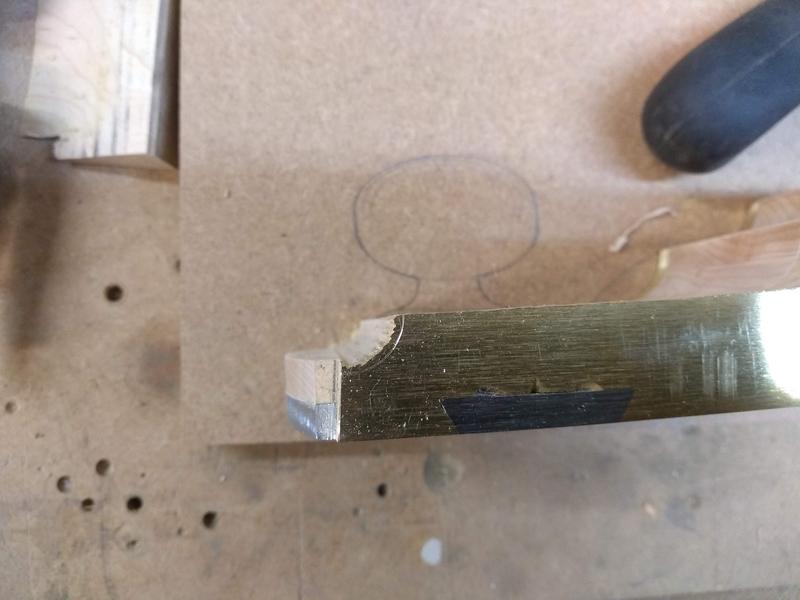
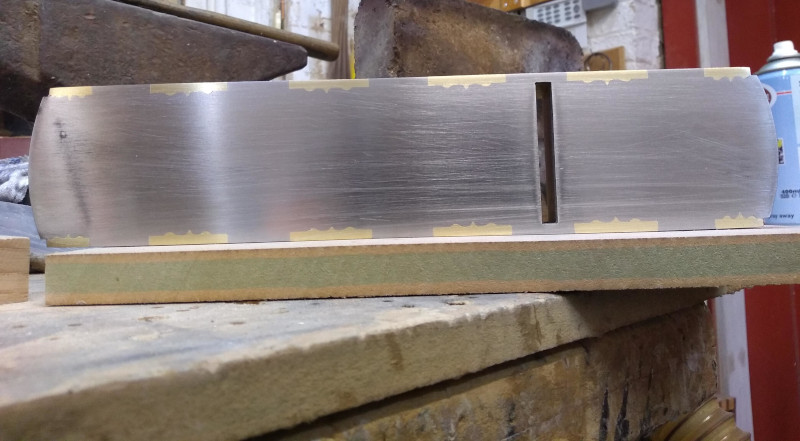
And after a lot of filing and sanding the sole dovetails could be seen.
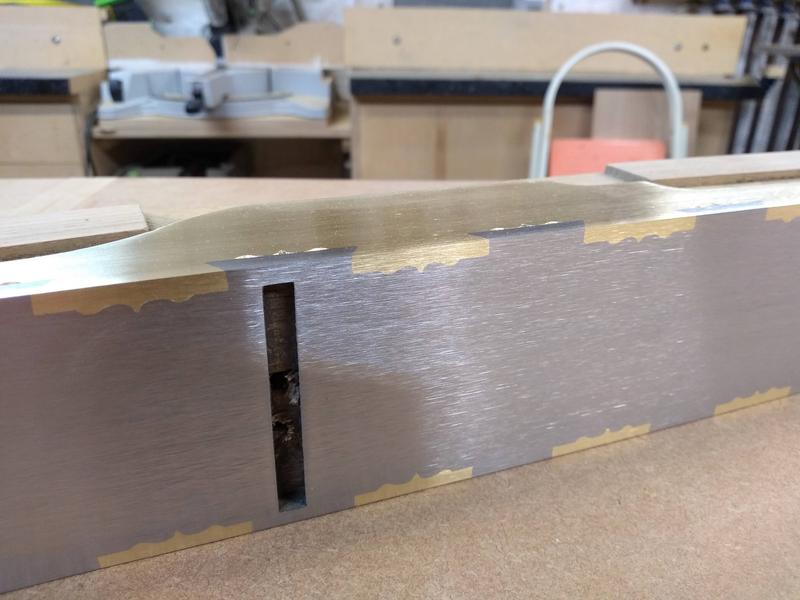
inPEHp6.jpg


i1XHqqU.jpg


ZVqXnh8.jpg


In total with filing and sanding this stage alone took around 5 hours and while they are not perfect I'm pretty happy with the results for my first attempt.
There are some gaps that I'm not happy with but the majority of them came up well.

The project still has a long way to go but I've learnt so much already from it. It's been hard work but rewarding too. I was most apprehensive of this stage and I'm glad its done, I don't think my arms could have taken much more hammering :)
 
Wow! That's looking worth the effort. (Easy to say when it's someone else's effort, but I think I can hear the relief in your voice.)

From a tiny bit of experience working on brass some years ago, I think the problem is that although it starts out soft, it very quickly work hardens and becomes brittle. On some work you can heat it up with a torch to regain malleability, but I suspect on a plane like yours, doing so would just introduce a set of new problems with the steel and brass expanding at different rates.
 
Thanks Andy, massive relief for sure I'm just glad it worked out.

Work hardening is a phrase I've not heard of before and from a quick google search it seems that is exactly what was happening.
Interesting to know heating the brass can help to soften it again I'll have to remember that.
It might have even been worth gently heating the brass before peining each dovetail.
 
You are doing a really good job - I am following your progress with great interest.
 
Thanks for the comments guys :)

Chris, I'm leaving the side cupid bows exposed (unfilled) I had decided to do this from the beginning as mentioned earlier I wasn't sure if the softer brass would deform when trying to peen the steel into it.
In the future I'd like to have another go at making another plane and filling all of the cupid bows but I think I'd want to use bronze for the sides as I understand its much harder than brass and should hold up to the peining process a lot better.

Finally with the sides and sole secured I can move onto the wooden in fill.

As I understand Box wood, Rosewood and Ebony where popular choices for metal infill planes.
Unfortunately these woods are hard to come by now and if you do find a piece there is a high price tag to go along with it.
Wooden moulding planes where normally made from Oak, Beech and Ash.
Many different woods have been used for plane making but these where the most popular.

The main criteria for the infill is that its strong, Tight grained straight timber that's been seasoned well.

We have a nice variety of woods at work but one of my favourites is Hard Maple.
Beautifully white in colour with dark cathedrals. Its very tight grained and strong, just right for an infill.
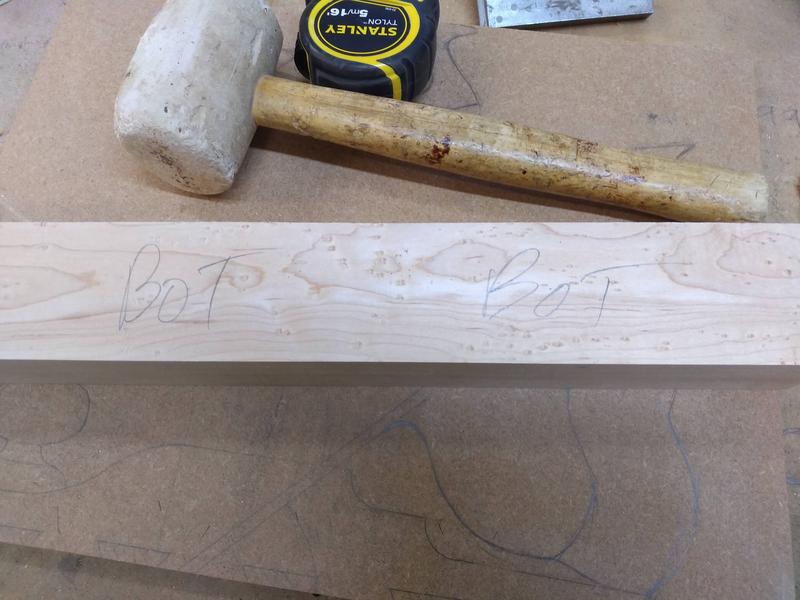
I was even luckier that we had a piece with some "birds eye" in which is stunning when polished.

Only down side is it wasn't thick enough so I had to glue two bits together.

7XKyZMl.jpg


Here you can see some of the "birds eye" figuring in the grain.

2KGaDes.jpg


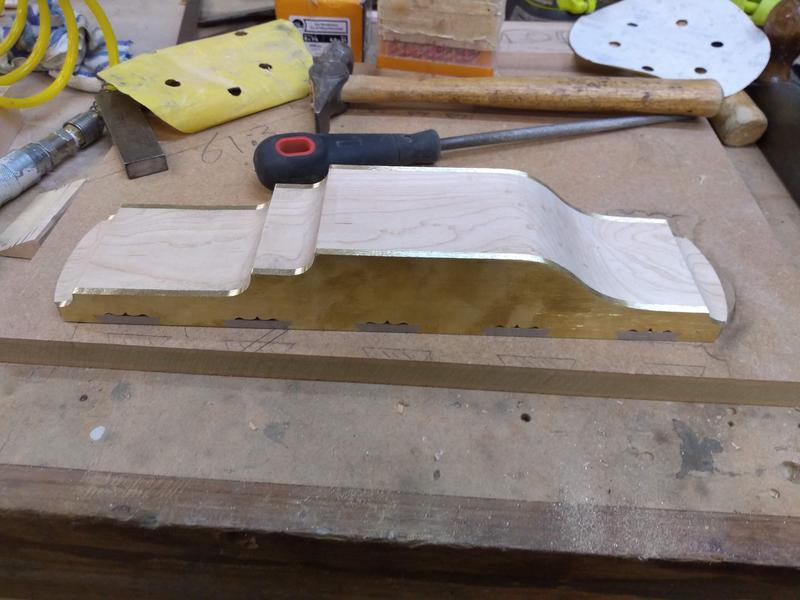
Once the glue had set I planed the Maple so it was a tight fit into the plane body.

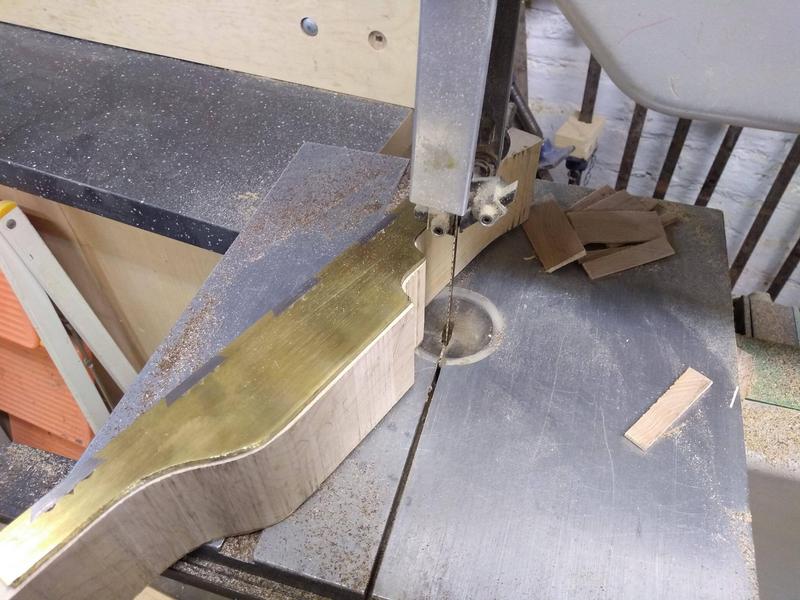
Then cut away the excess on the band saw. Hard Maple living up to its name is tough to cut even with a band saw. Though the blade was a bit dull after cutting all the brass.

MX6foky.jpg


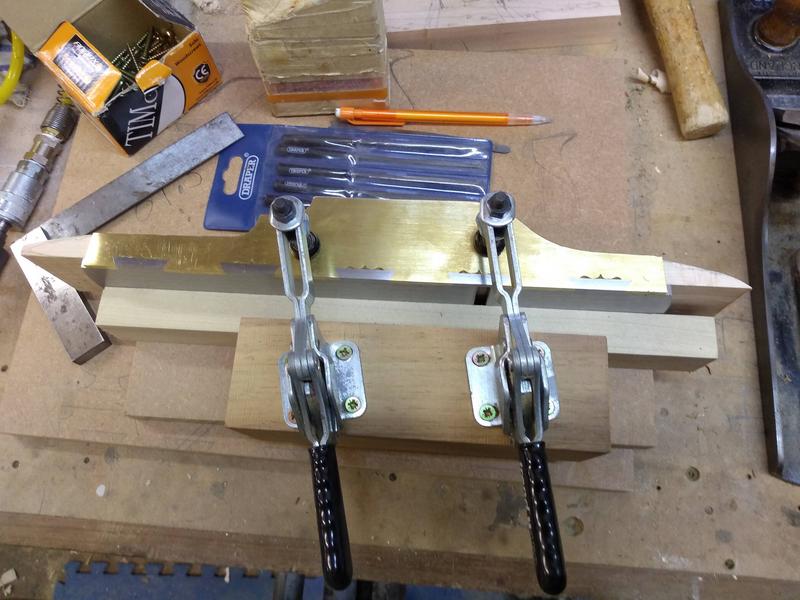
With the waste taken away I made a simple jig to hold the plane and infill so I could machine it.

TdeoPHt.jpg


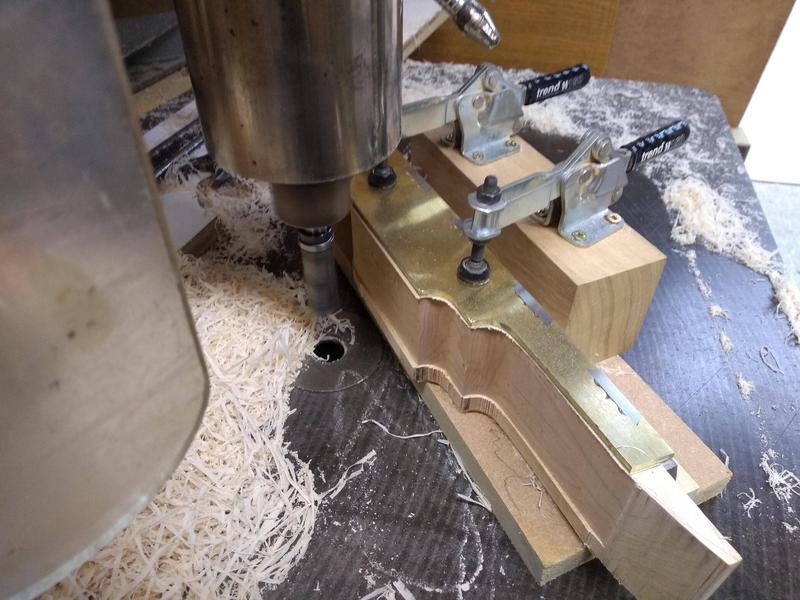
On the over head router I used a twin flute bearing cutting to trim the Maple down flush with the brass sides.
I had to take a cut from each side as the cutter wasn't long enough to do it in one pass.

gBZpnZN.jpg


Maple machines beautifully and I was left with a clean, crisp cut.

I was unsure how I wanted to finish the ends of the plane but in the end settled with a round which I again cut on the band saw.

BvRJoFz.jpg


After some more filing and sanding the profile is complete. Hurrah!

Hp1MIpp.jpg
 
Crikey. =D>
Great work and a real pleasure to read about and see your progress.
 
That looks magnificent.
I didn't realise how interesting I would find something like this but I find myself eagerly awaiting the next update, thanks.
 
Beautiful work! You have sure set the bar extremely high for anyone that mat want to try their hand at an infill (even one with metal working machines!).
 
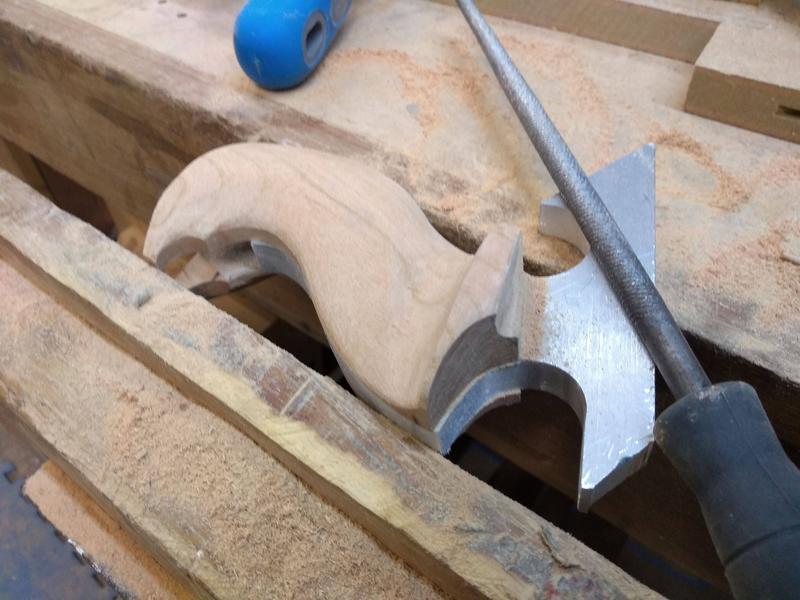
Next up is the Tote.

Lazarus planes incorporate metal into the tote, something I've not seen before. I like them so much I wanted to add something similar to my plane.

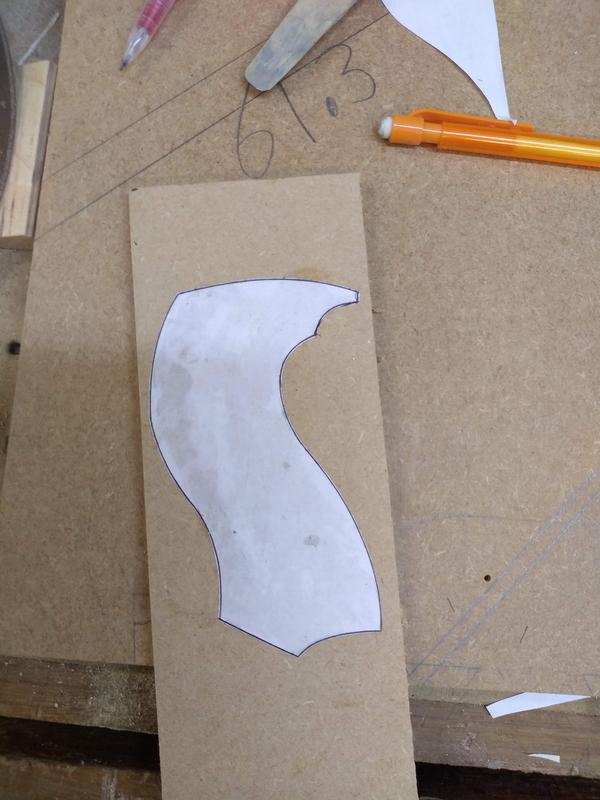
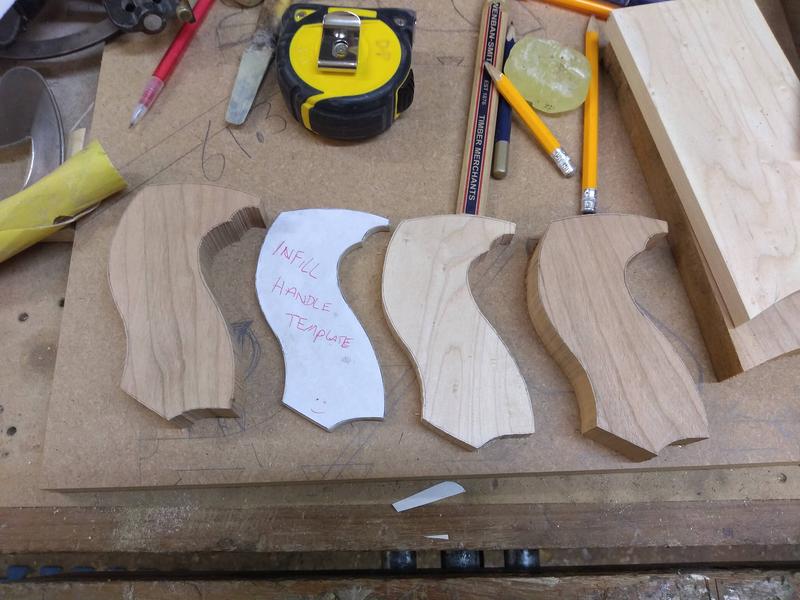
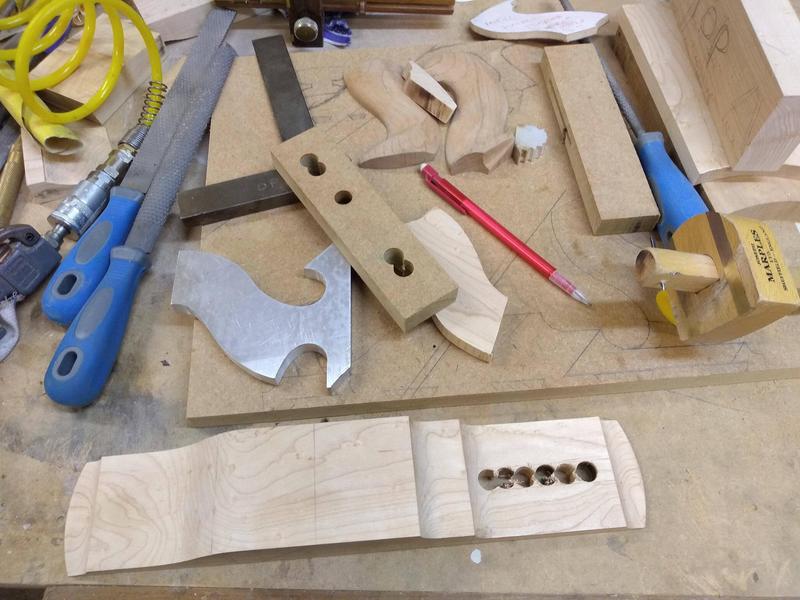
After much deliberation I settled on a design I liked then made a paper/MDF template.
I wanted some thing that looked traditional but with a modern twist.

2e1Bdhy.jpg


From there I used the template to cut out two pieces in Cherry wood (another favourite of mine) and one in Maple.

Y5bvhO3.jpg


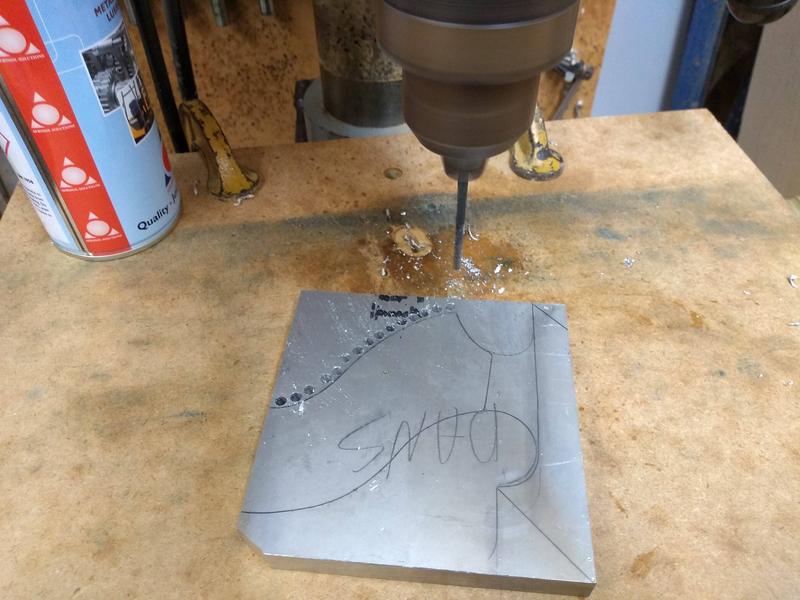
Then I used the template to mark out the rest of the tote onto a piece of 12mm aluminium.
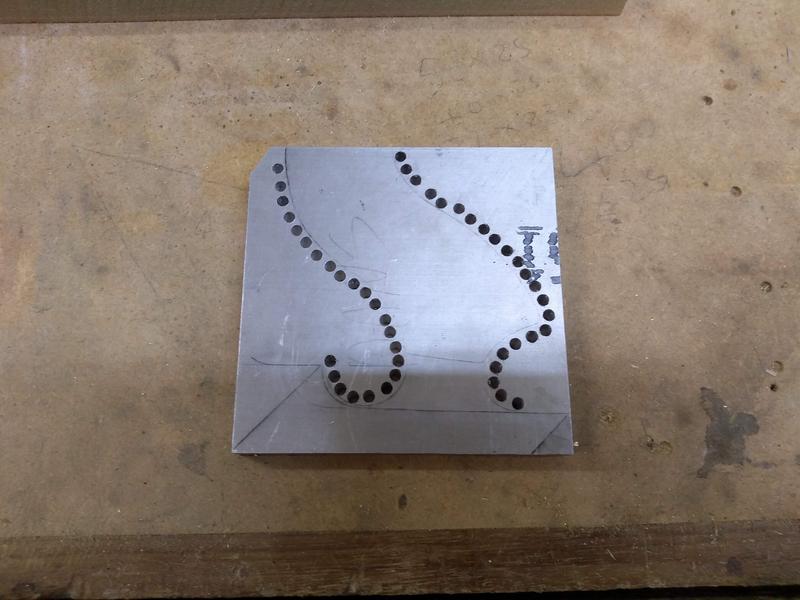
I used the pillar drill to make a series of holes around the lines.

XcxMNJH.jpg


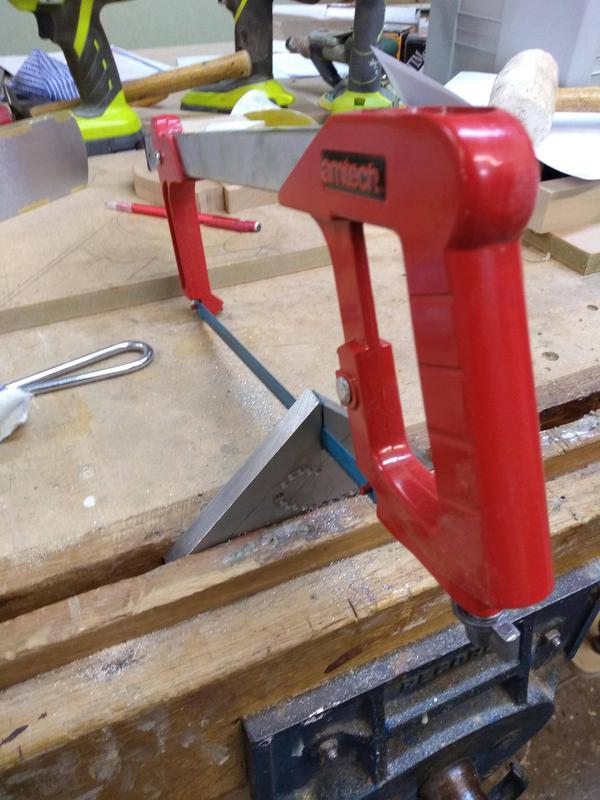
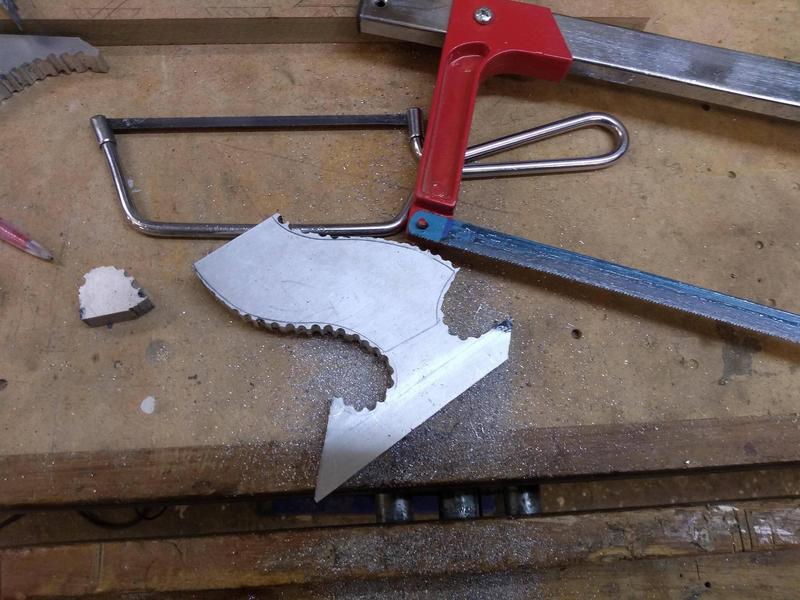
With all the holes drilled all I had to do was cut it out.

L0NbN7Q.jpg


Which I did with a hacksaw.

wjV64ng.jpg


It took a little while, I had to use a junior hacksaw to get round the tighter curves.

R2JMQ4b.jpg


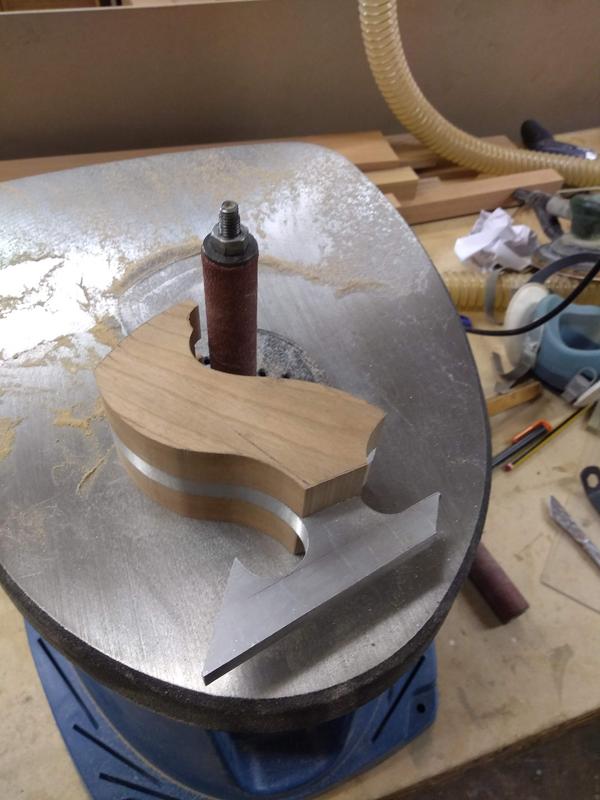
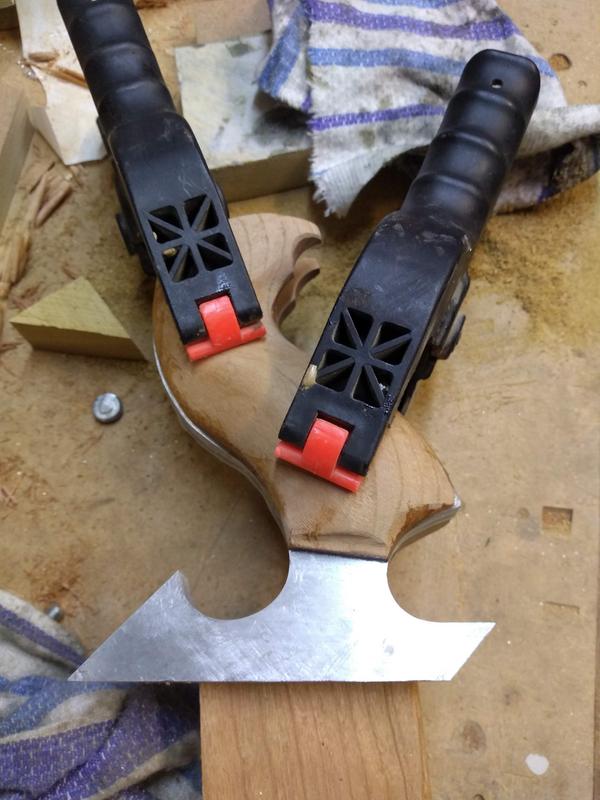
From there I fixed the two Cherry wood pieces to the aluminium with double sided tape. Because the aluminium is soft I could use a oscillating bobbin sander to clean up the outside of the tote in one go. This saved a lot of work sanding a filing by hand.

5G2AlOH.jpg


I want the tote to be a stand out feature of the plane so wanted something bold looking.
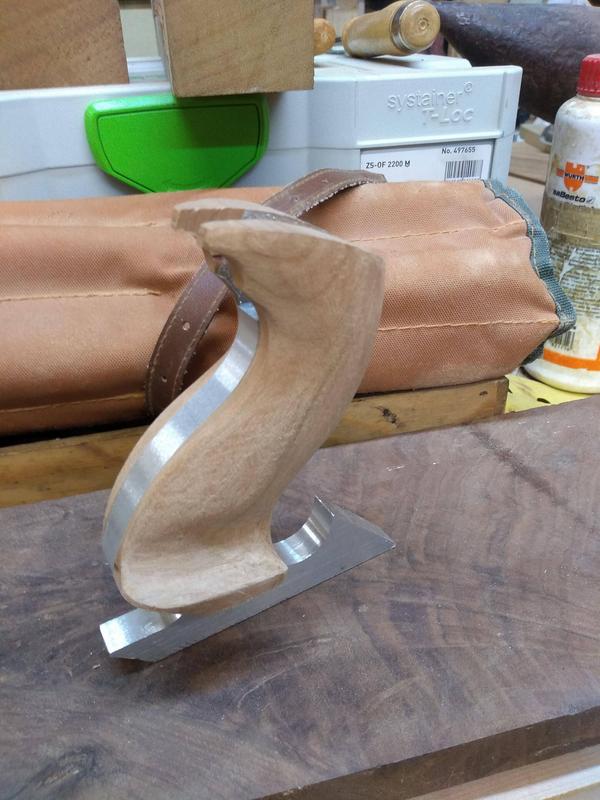
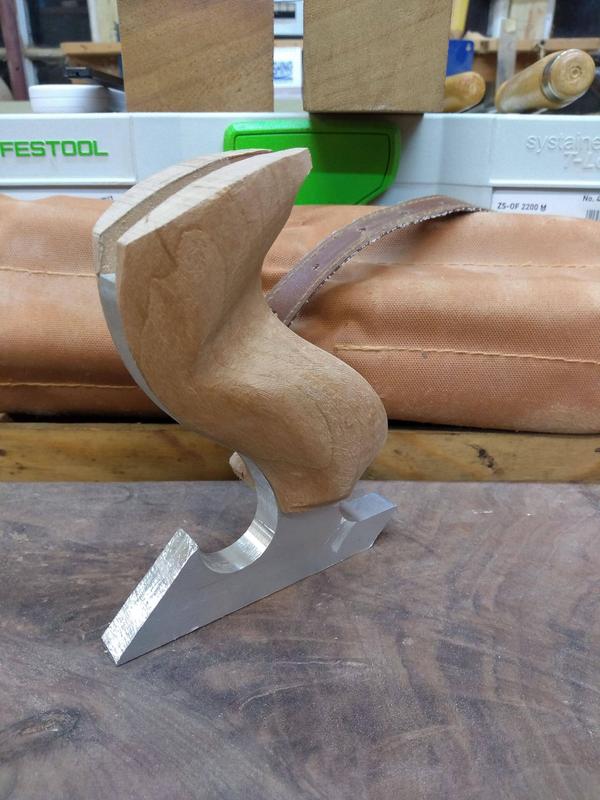
I also wanted to shape the tote to fit my hand perfectly and include a palm rest, this is something you don't often see on production planes as they have to cater for many different hand shapes and sizes.

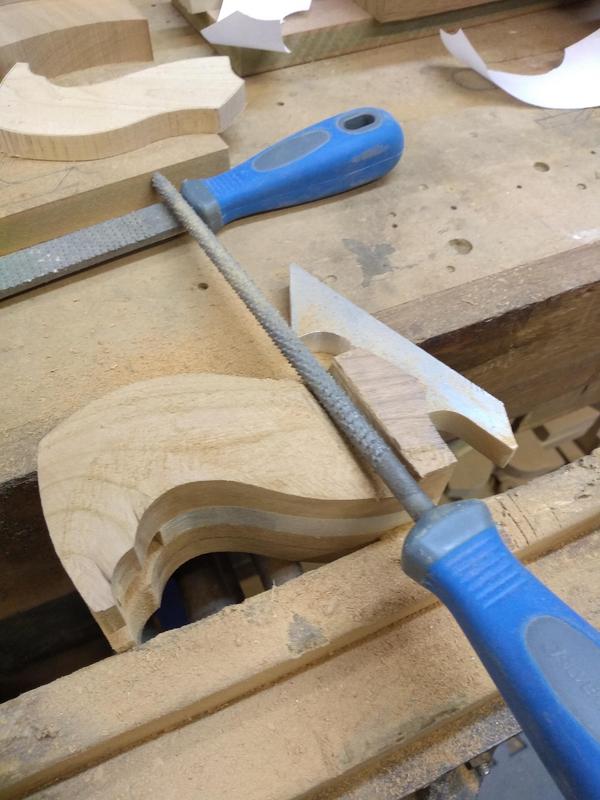
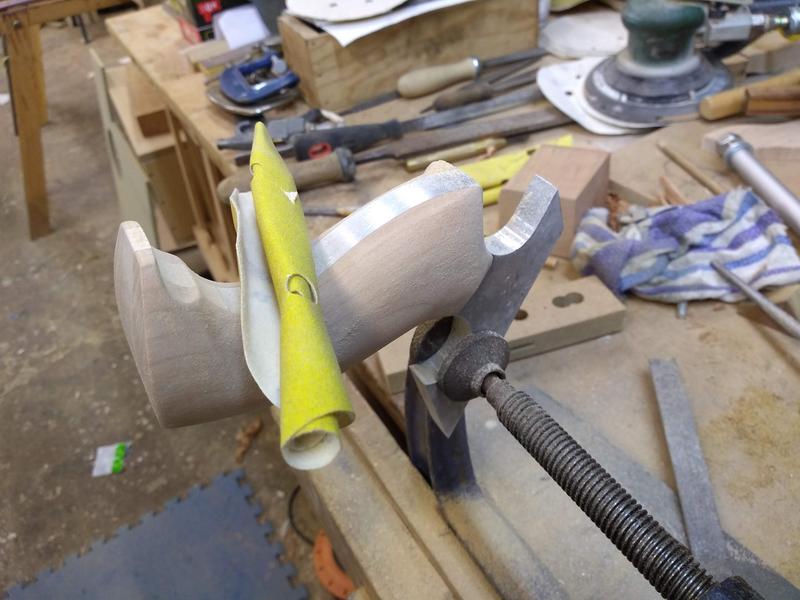
I used a mixture of rasps and files to start shaping the tote.

ejmidNx.jpg


Adding in the palm rest first. I was constantly checking the tote in my hand to make sure it was a comfortable fit and adjusting where needed.

SORmJC9.jpg


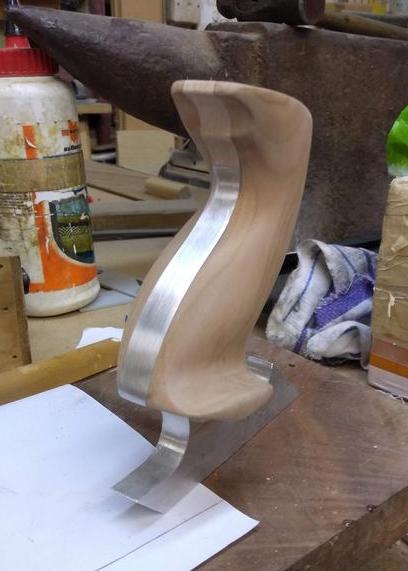
The right hand side was getting there, just needs to be sanded through the grits.

dqgnEHR.jpg


I also added a thumb indentation on the left side.

5g3yPvx.jpg


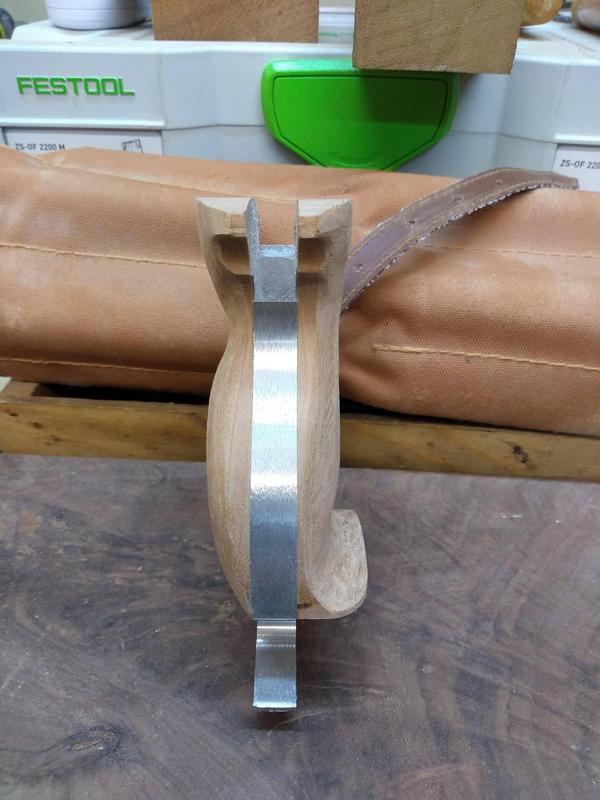
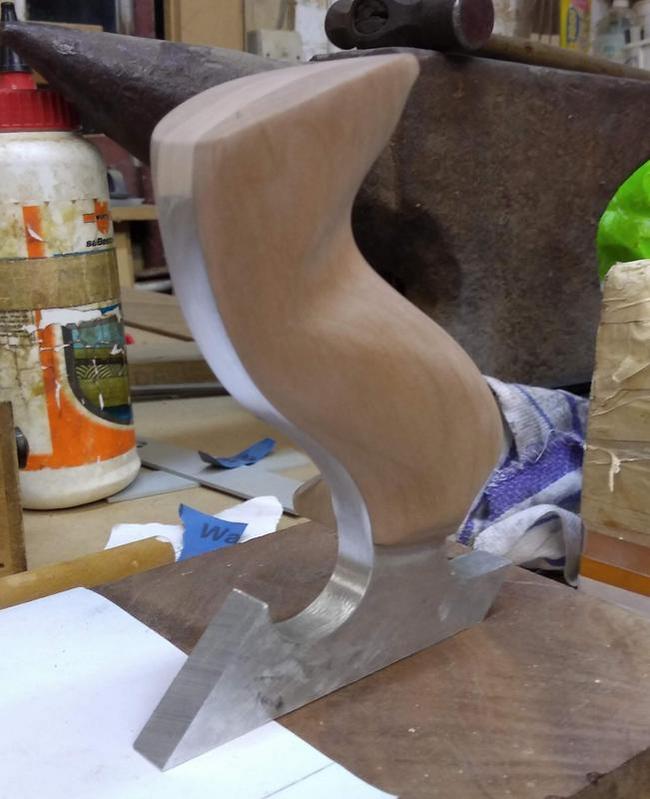
The rear view shows the contours of the tote well. I'm pleased with how it turn out, it fits my hand perfect and is very comfortable.

6RNu8SF.jpg


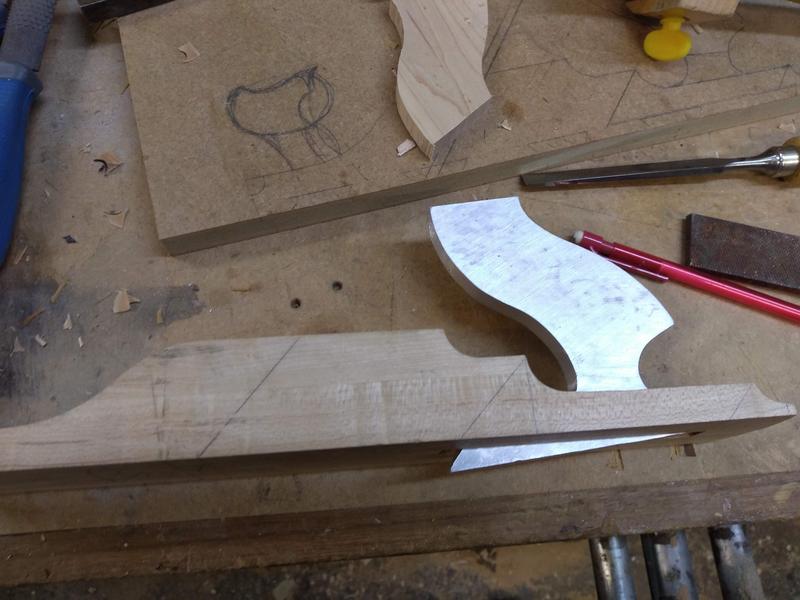
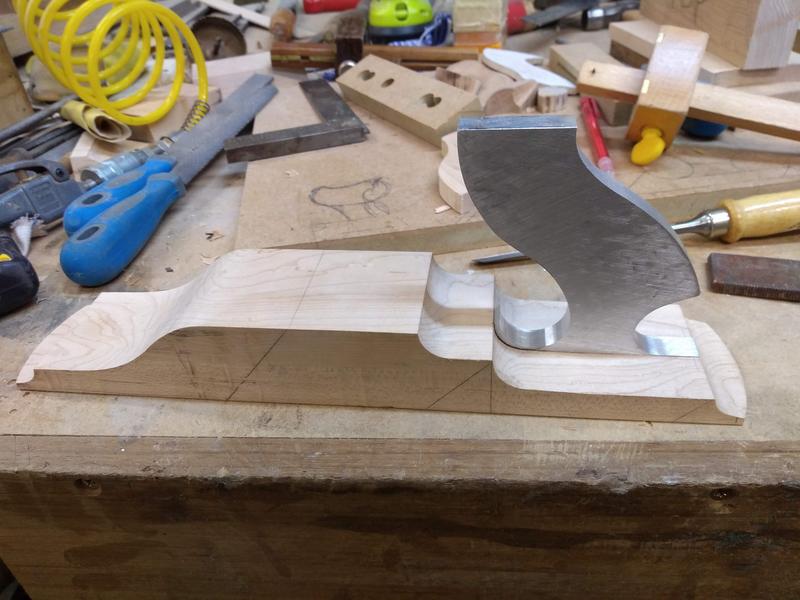
Next I could fit the aluminium part of the tote to the maple infill.

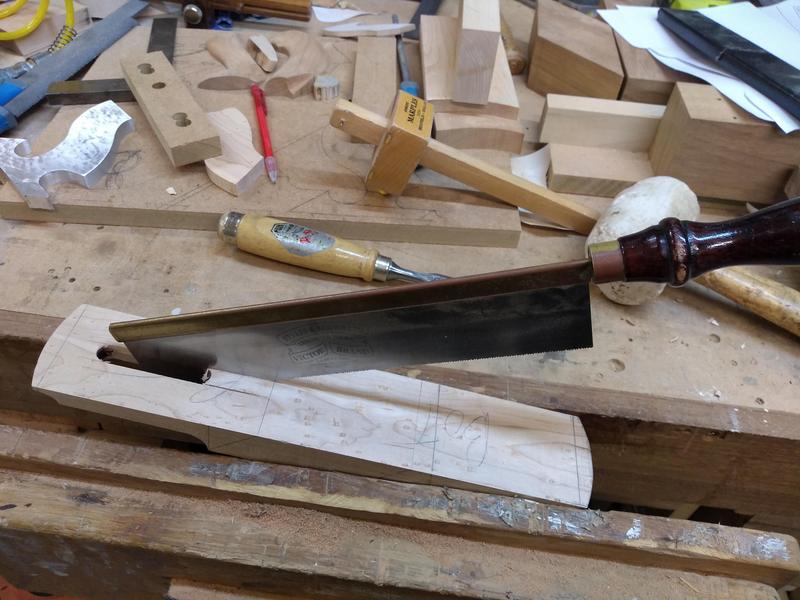
I marked it out and drilled a series of holes in the maple.

2yn963P.jpg


I then used a gents saw to cut out the remaining waste.

STzFueo.jpg


And finally chisels to get a tight fit

NARvt7J.jpg


The aluminium is sitting proud of the maple at the moment but this will get filed flush once the tote is fitted to the infill.

kQPORW6.jpg


Next I used epoxy to glue the cherry sides and maple top to the aluminium.

9mmMVdY.jpg


Once the epoxy had cured I sanded the tote up to an initial 240 grit.

BZOsPCP.jpg


With that the tote is pretty much complete and ready to be fitted to the infill but there is a lot more to do before that.

f2TKuJy.jpg


IOSnjK2.jpg


I'm pretty happy with how the tote turned out. I like the balance of metal and wood, it's comfortable and its a large feature of the plane almost to the point of being over powering but that's what I was aiming for.
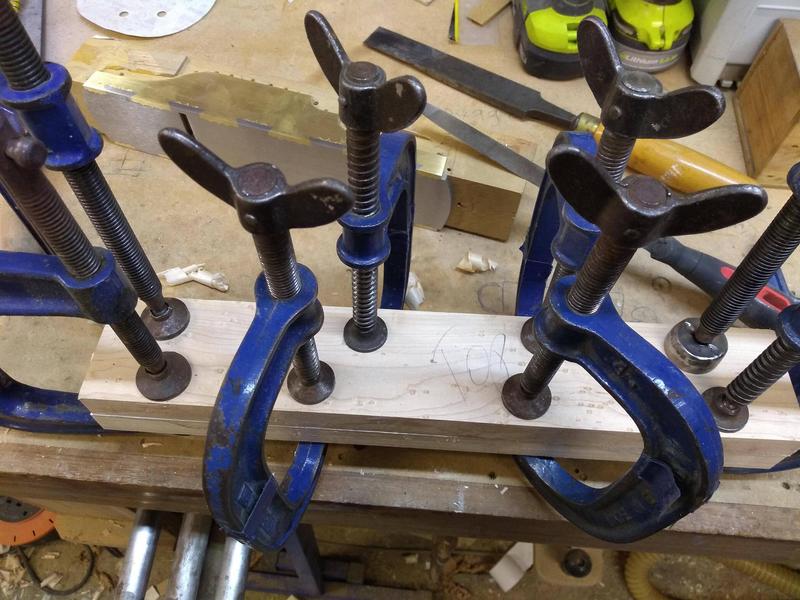
Next up is the front knob.
 
This is getting to be a really distinctive plane! Looking forward to seeing the finished product.
 
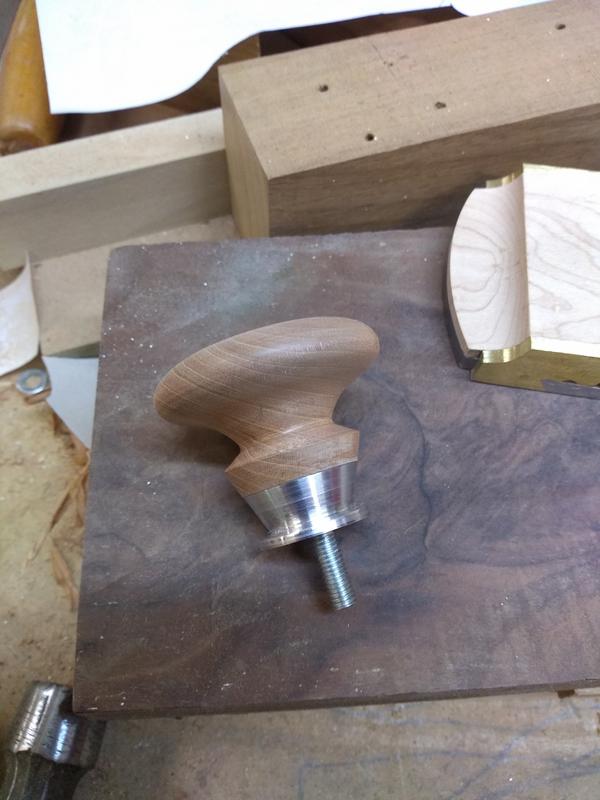
For the front knob I'm keeping with the theme of wood and metal.

I planed a straight edge on a piece of cherry wood, our over hand planer decided to break this morning so I pulled out an old jointer plane I made.

6FtVGba.jpg


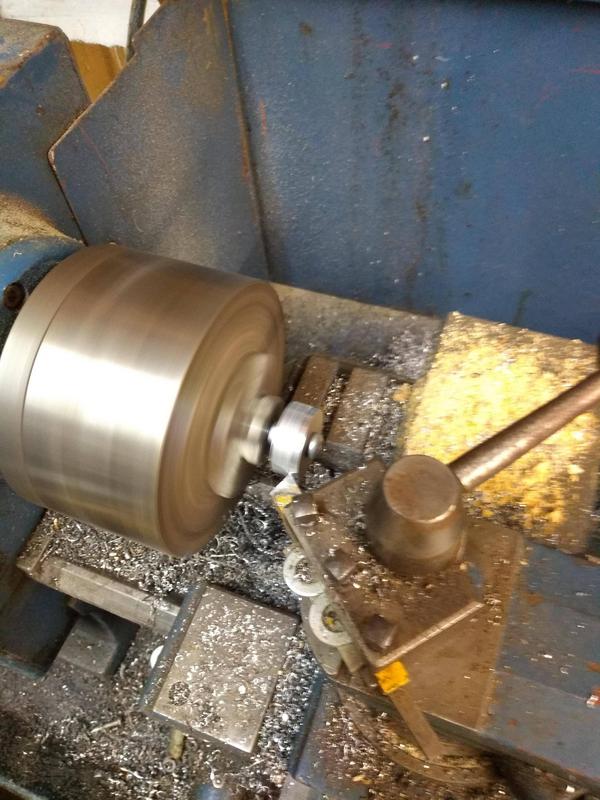
Next I went over to the engineering lathe. It doesn't get used much any more and tooling is sparse.
While I've done a fair amount of turning on our wood lathe I've only used this engineering lathe a hand full of times over the years and am only self taught (which equates to me probably doing every thing wrong)
I'm turning soft aluminium so it's not to bad. Here I'm machining the bottom part of the front knob.

mU2bEDi.jpg


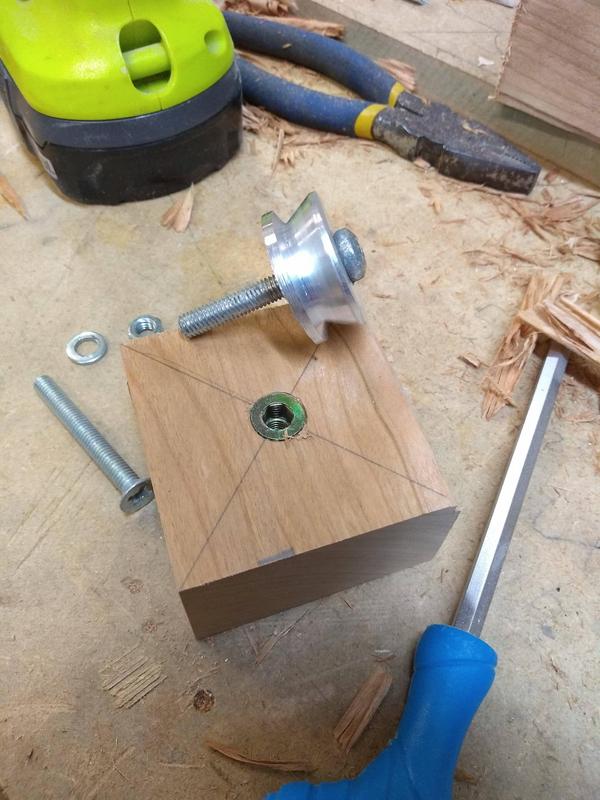
From there I cut a piece of the cherry wood and fitted a threaded insert into the centre.

WwqgyYg.jpg


I then used epoxy to glue the aluminium to the cherry wood, using the bolt to pull them tight together.

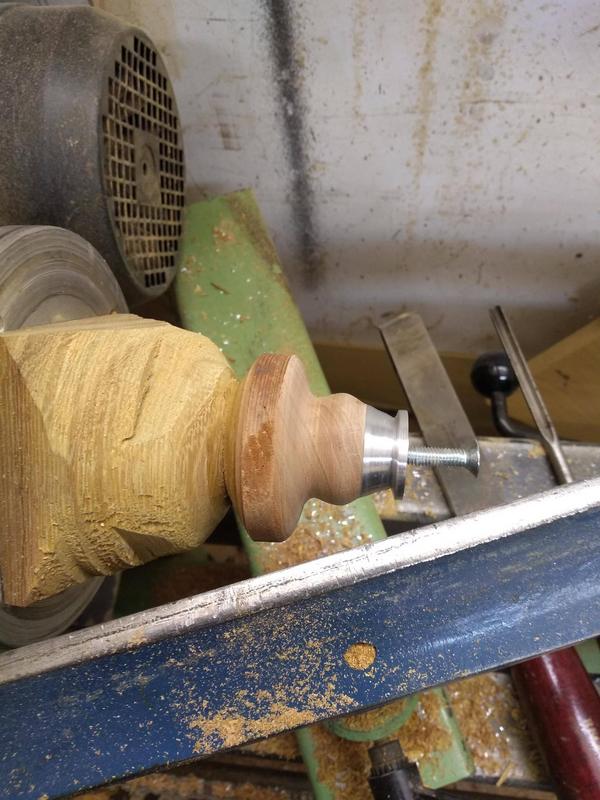
Once the epoxy had cured I Glued the cherry to a sacrificial piece of wood that I could secure in the wood lathe.

E7rBi62.jpg


Back to the familiarity of the wood lathe I turned the front knob to size.

Zc9rjFP.jpg


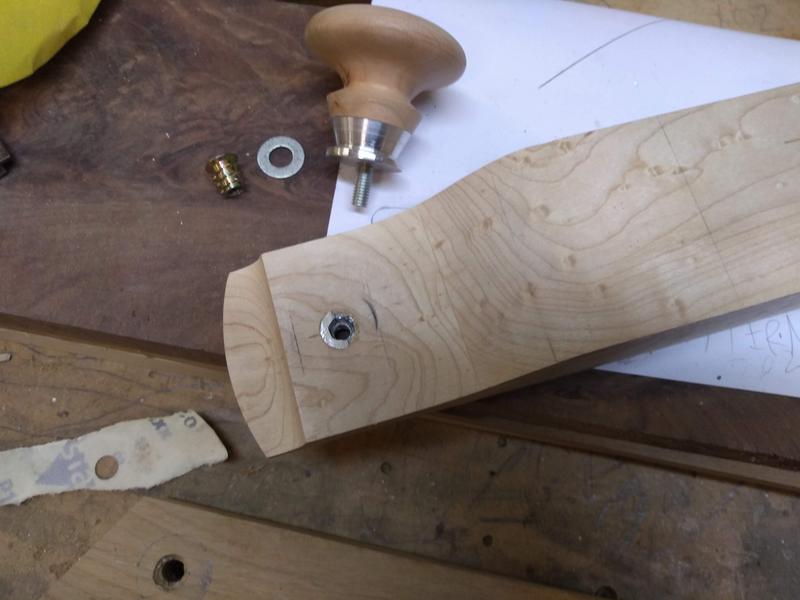
Next I marked out and fitted another threaded insert into the maple infill.

we2vPh0.jpg


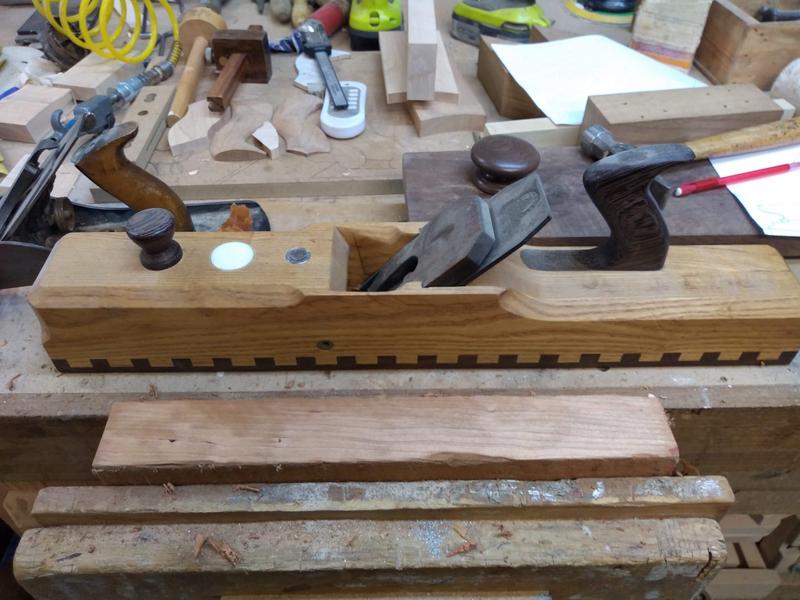
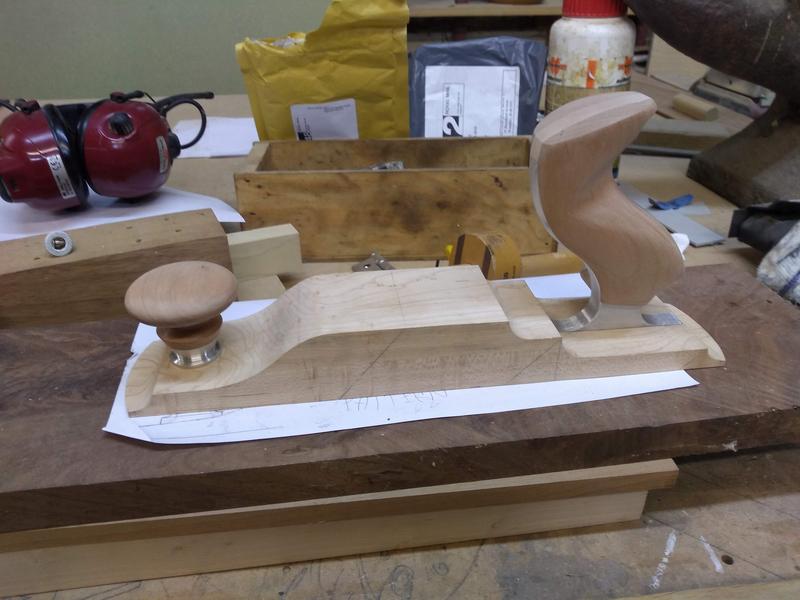
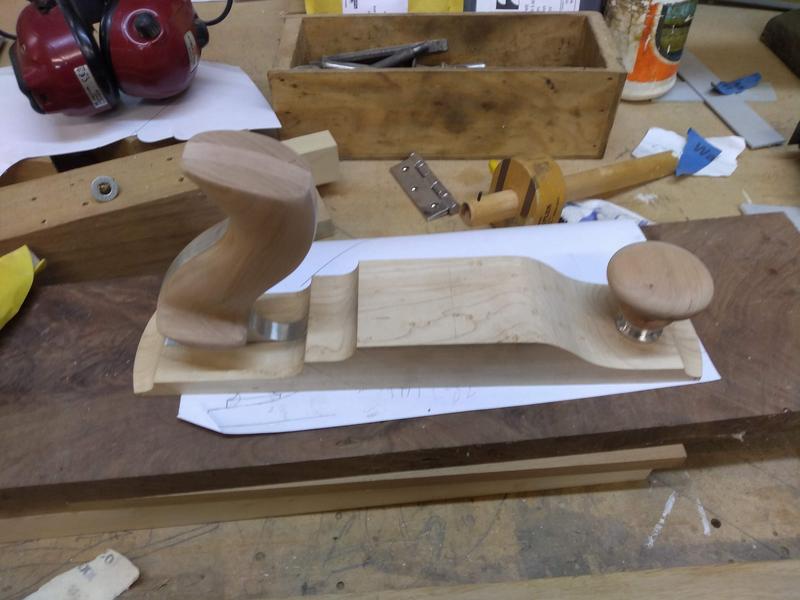
And finally it's starting to resemble a plane.

4P2uLsR.jpg


zJ5TF5S.jpg


With all of my fumbling with the engineering lathe that was time for another evening.
 
With the tote and front knob nearly complete I turned my attention back to the small gaps in some of the sole dovetails.

While they where only hairline gaps and maybe acceptable they would play on my mind if I didn't at least try to rectify them.
As the gaps where so fine the only solution I could come up with was to try and fill them with silver solder. This would fill any gaps and be as strong as the base metal.
Silver solder unlike its name is actually a good colour match to brass.

The main concern is the heat involved with silver soldering. the base metal has to be brought up to cherry red and the silver solder will flow into the joint by capillary action.
It's a difficult process on thick metals normally done with an oxy acetylene torch which has greater control over heat and flame.

I don't have an oxy acetylene torch but do have a mapp gas blow torch which gets slightly hotter than a propane torch.

With the heat needed there is a high risk the sole of the plane will be distorted which could potentially ruin the plane.
There is also the chance that the brass and steel will expand and contract at different rates causing the gaps to enlarge even worse.

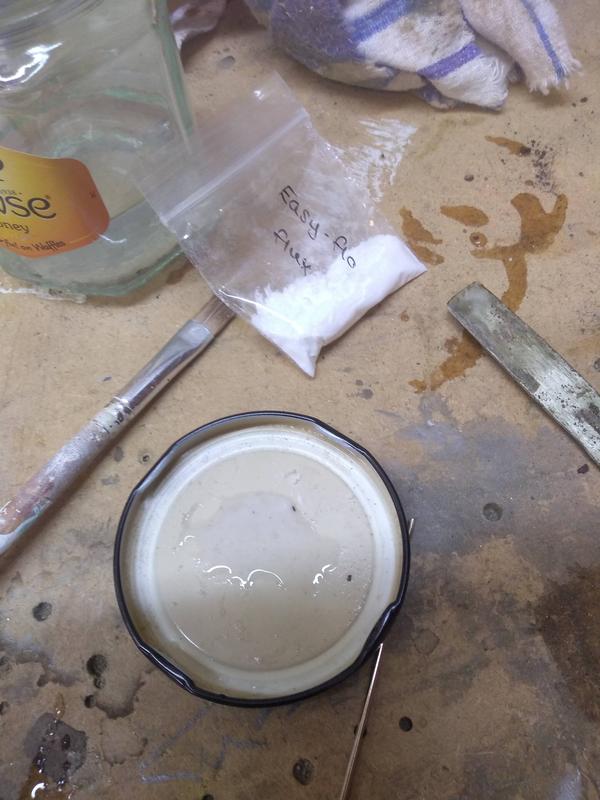
After much deliberation and research I decided to try so ordered some easy flo flux and silver solder.

The flux is essential to draw the silver solder where you want it and protect the metal from oxidisation. It's mixed with water to form a paste.

SIRUROp.jpg


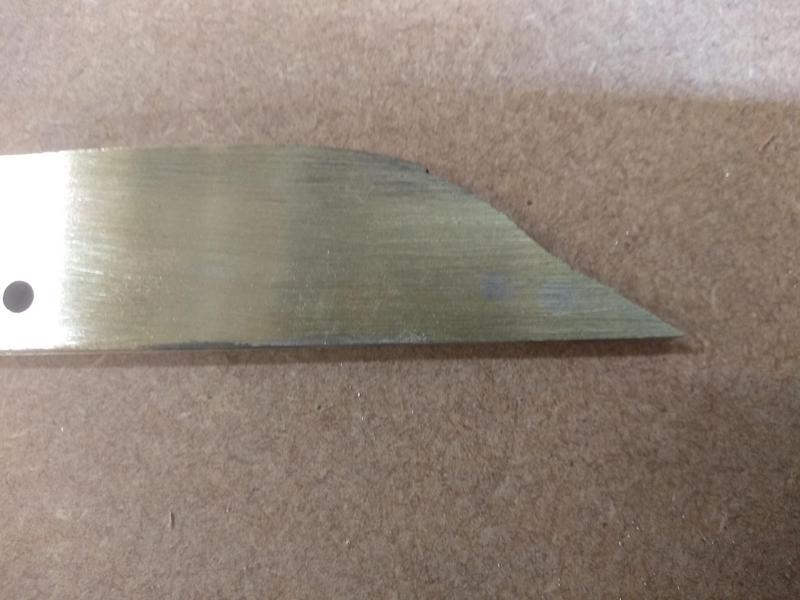
I tested on some brass off cuts first. The brass heated up quickly and the solder flowed well.

MJrGn7Y.jpg


After filing off the surplus solder you can just about see two round punch marks filled with silver solder on the right.
The colour match with the brass is good.

bKLUF4L.jpg


Happy with the results I moved over to the real thing.

I used fire bricks under the plane to help hold in the heat.
The steel was much more difficult to get up to temperature than the brass. I was trying not to apply direct heat to any part of the sole that didn't need it.
After several nervous minutes the solder finally started to flow.

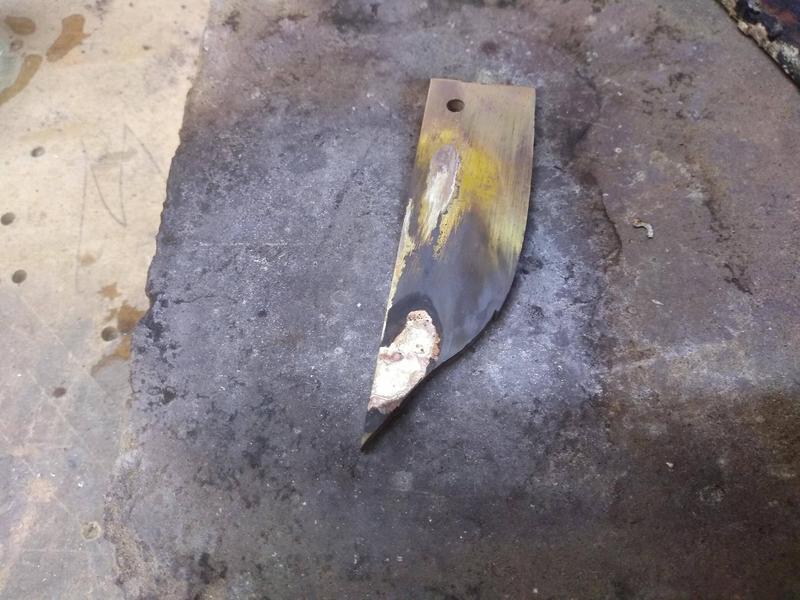
KFWBff2.jpg


No way to do this neatly, the solder will flow where ever there is flux.
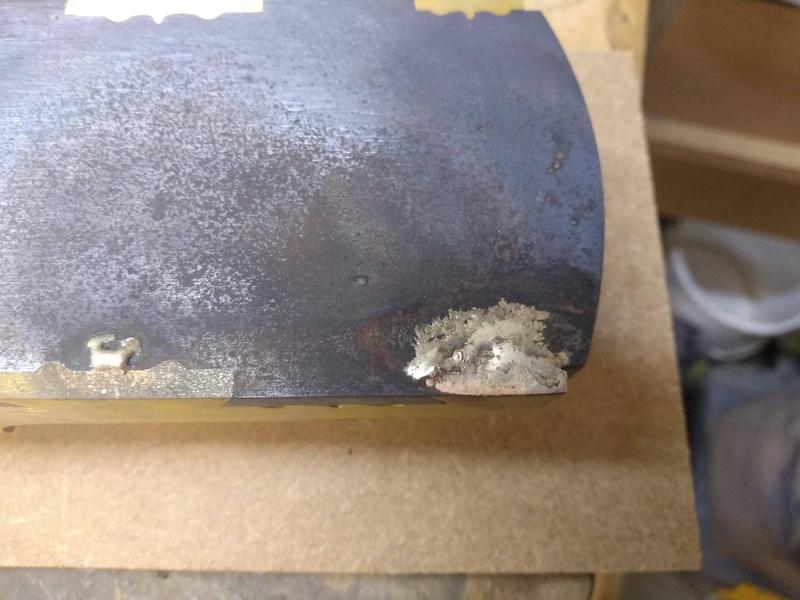
The sole of the plane did oxidise and blacken by the process but thankfully it went well and importantly there was no major distortion of the sole.

After a lot of sanding with 60 grit to remove the surplus silver solder I was happy with the results. They should come up better when I sand through higher grits.

ro3A05Y.jpg


It was another difficult process and one I'm glad is finished. I'm thankful it went well as there was a high potential that things could have gone wrong and I'm glad I decided to try it as it's another thing I've learnt about along the way.

That should be it for the dovetails, all that's left to do is sand them to a higher finish while flattening the sole.

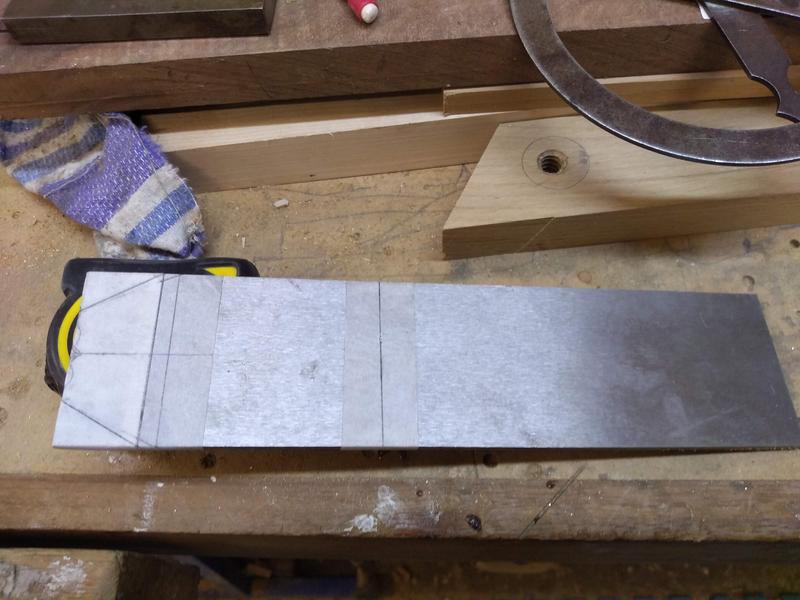
With the solder order I also bought some 4mm thick 01 tool steel for the blade.

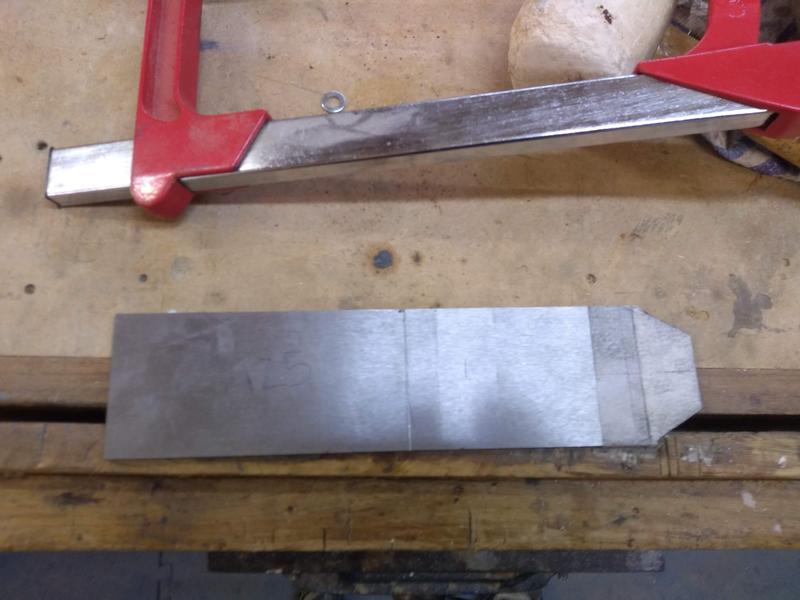
I marked out and started to cut the blade.

zX5VZ4k.jpg


I'm leaving it long for the time being as I'm not sure how long I need to make it in conjunction with the lateral adjuster I've yet to make.
The tool steel cut well, I was expecting it to be difficult to cut but it was similar to mild steel, I've not tried filing it yet though. Much easier to cut than stainless steel though!

W3FA4RY.jpg


The bevelled top of the blade is a traditional style found on early planes with wooden blade wedges.
That's as far as I can go with the blade for the minute so next I can cut the bed of the infill.

The surface that the blade sits against is called the bed. I know I want the bedding angle at 55 degrees.
Slightly higher than the normal 45 degrees found on most modern planes.
Having a higher angle should give a better finish to "wild grain" timbers at the cost of being slightly harder to push through the timber.

First I cut the bedding angle. This cut has to align with the mouth cut out in the sole of the plane I made earlier in the project.
Any misalignment here will result in the blade not bedding correctly which could cause chatter when using the plane.

n7ZvJks.jpg


and the second cut opens the throat of the plane where the shavings will eject.

lSOYerd.jpg


The throat and mouth will need to be adjusted later once the blade is fitted and the plane is tested. If the throat or mouth is too small the shavings with jam and stop the blade from cutting.

227EyLA.jpg


And that was time for another evening.
 
Next on the to do list is the blade adjustment mechanism.

Keeping to the traditional theme (with modern twist) I wanted to do something similar to the Norris adjuster.

I started by making the pivot pin.
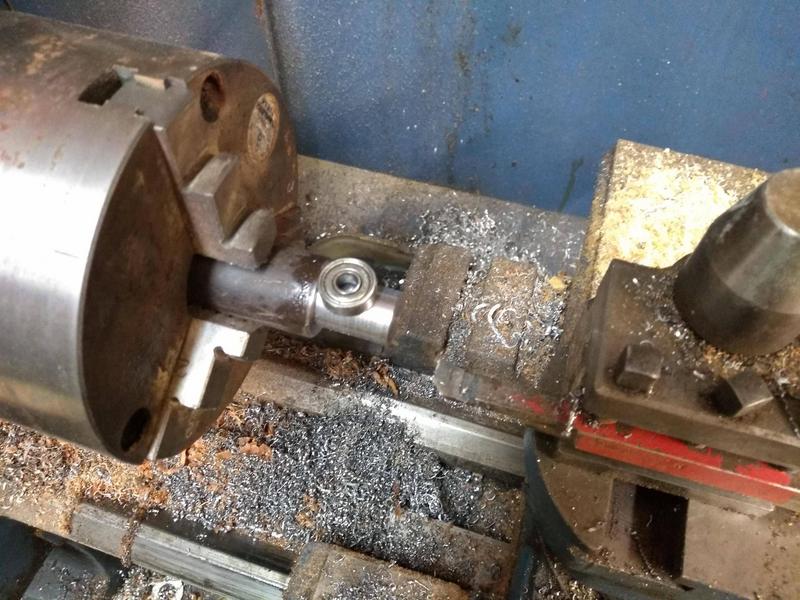
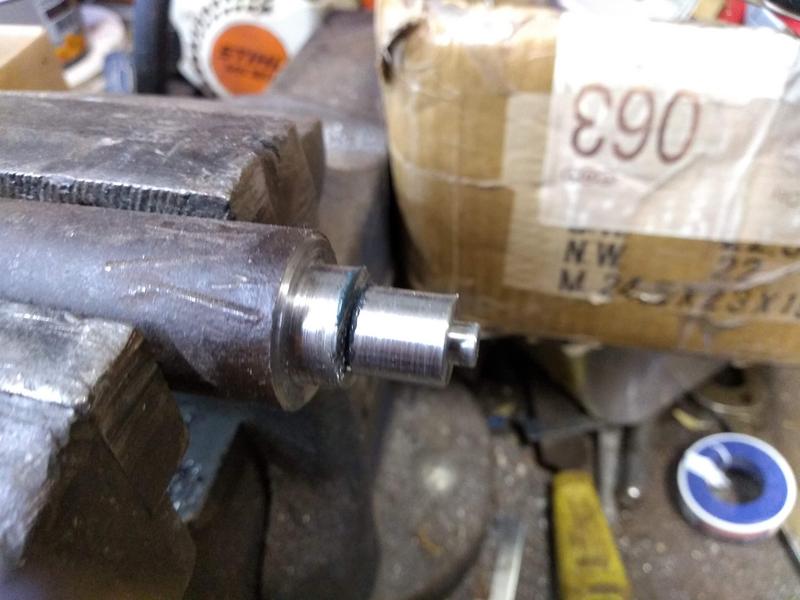
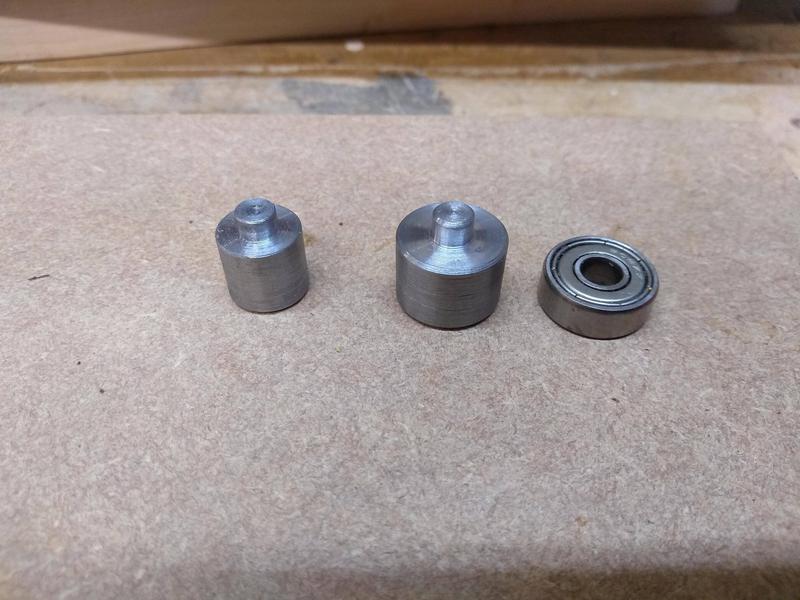
I machined some steel round bar down to match the out side diameter of a 16mm ball bearing. I then machined a nipple on the end that was a friction fit inside the bearing.
I had to get the fit perfect on this part or it wouldn't secure itself in place.

yuNNGTO.jpg


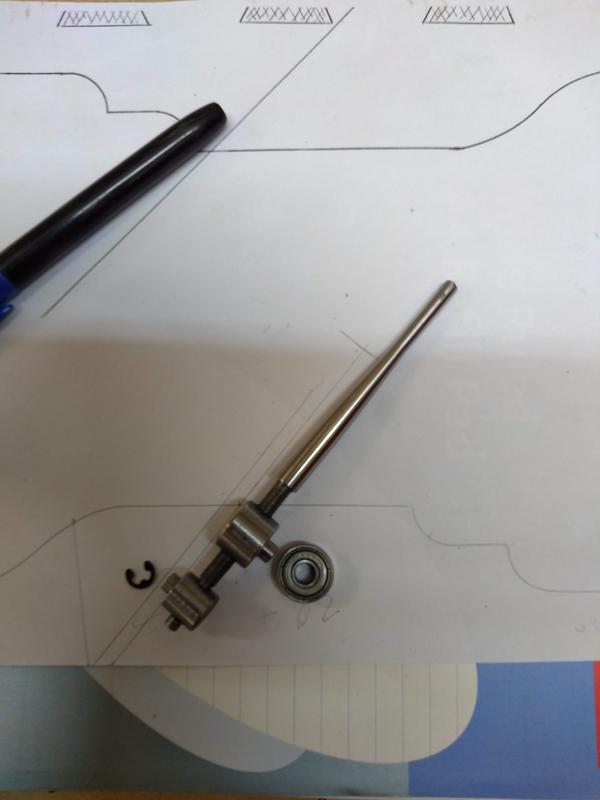
Next I made the blade pin which is the same as the pivot pin only slightly smaller.

S9fBJAD.jpg


Blade pin on the left, pivot pin in the centre and 16mm bearing on the right.
The blade pin locates in a hole in the blade, this will adjust the depth of cut.
the bearing gets fixed into the maple infill and the pivot pin fastens to it, this will give lateral adjustment to the blade.

mQtROTG.jpg


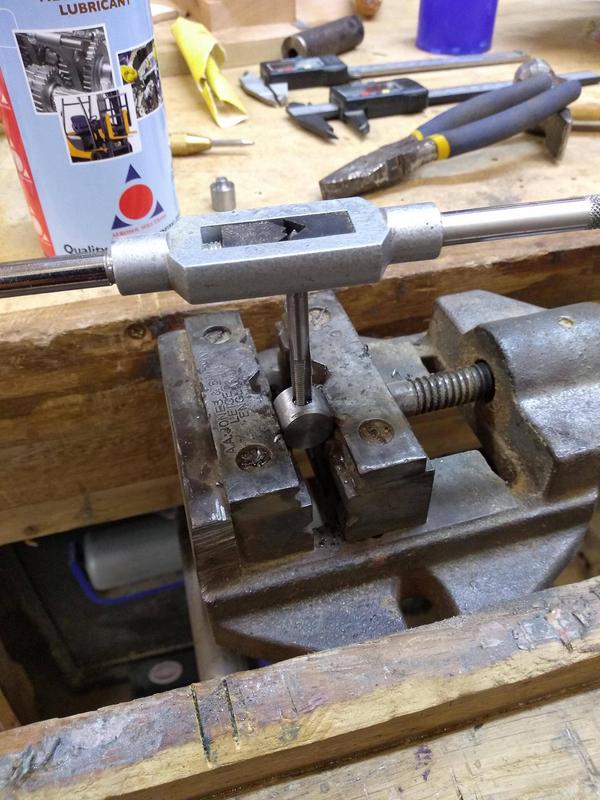
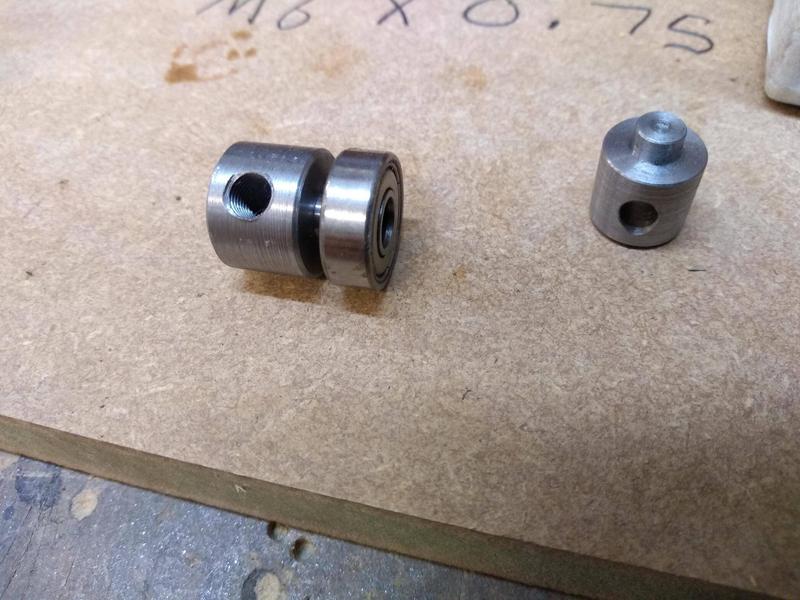
Next I drilled and tapped an m6 thread into the pivot pin.

HVwLksW.jpg


then drilled a 5mm through hole in the blade pin.

nzdN4lk.jpg


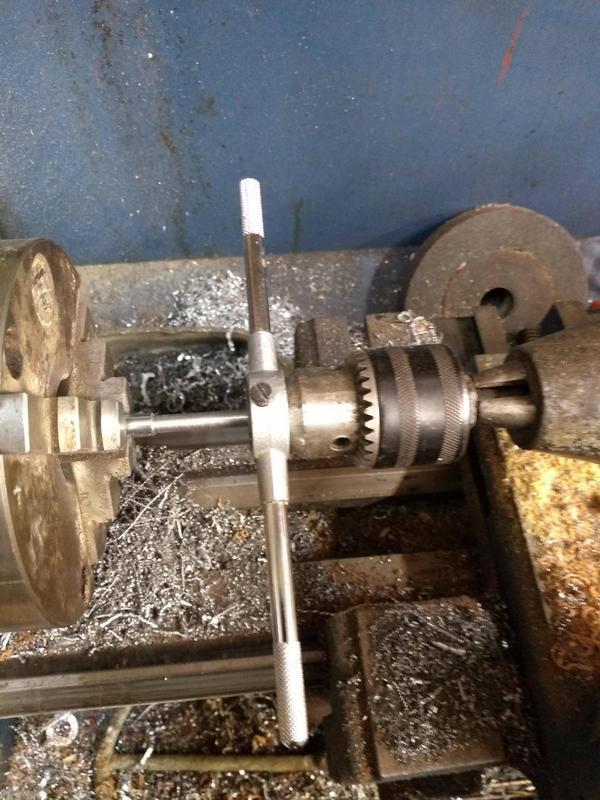
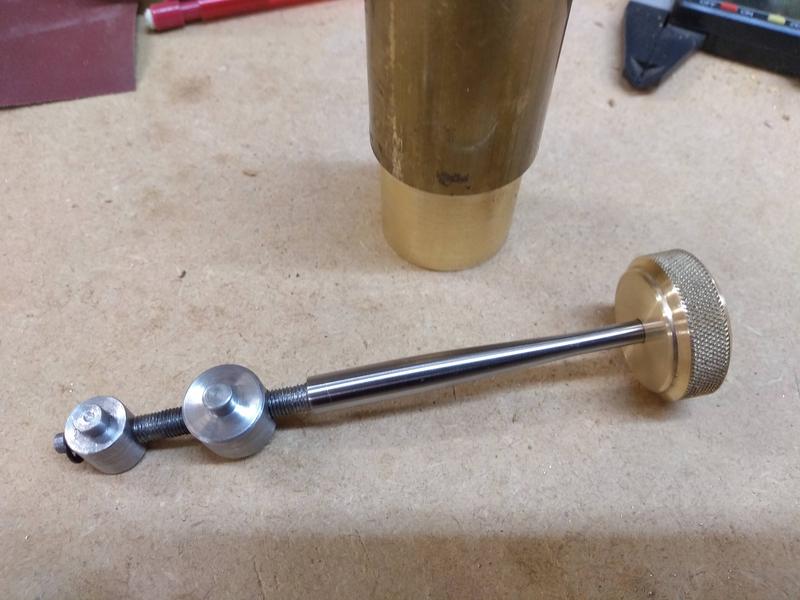
After that I machined the end of an 8mm steel rod down to 6mm and threaded it to match the pivot pin hole.

vBtNrwP.jpg


I then tapered the shaft of the rod.
The pivot pin threads on first and the blade pin pushes on loosely behind it. I secure the blade pin in place with a circlip.

msRacx2.jpg


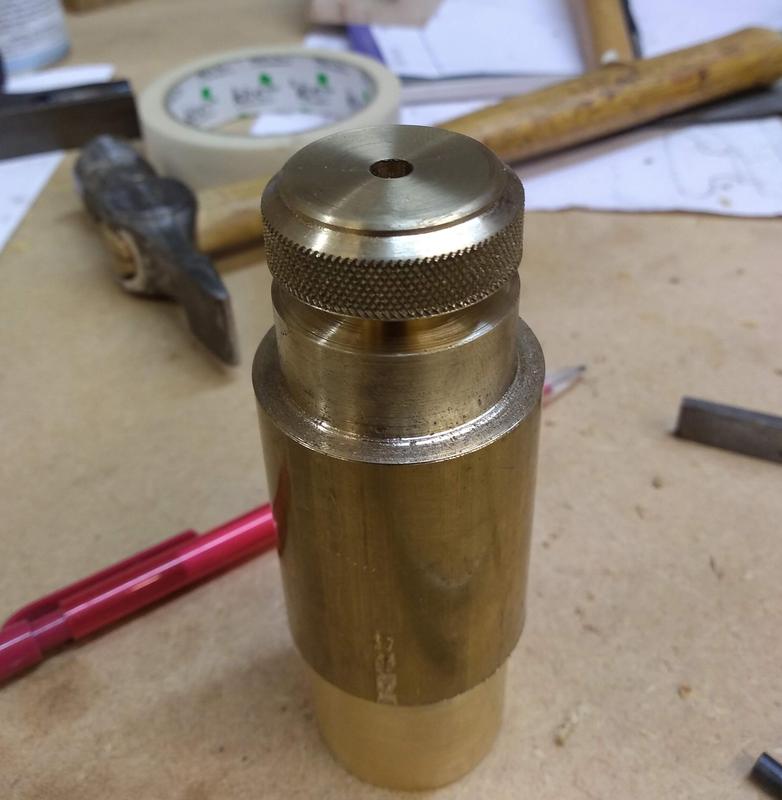
Next I started to make the thumb wheel.
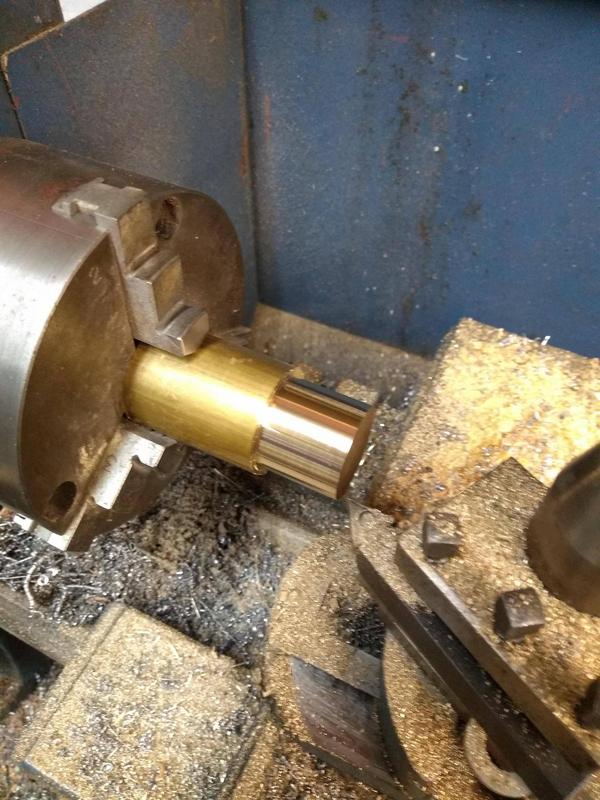
I started by machining some brass down to 30mm

luNR1mf.jpg


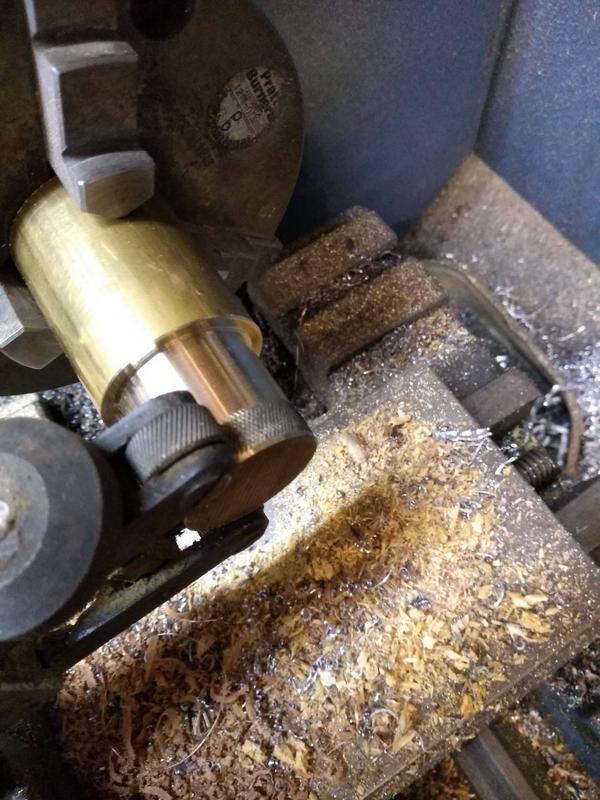
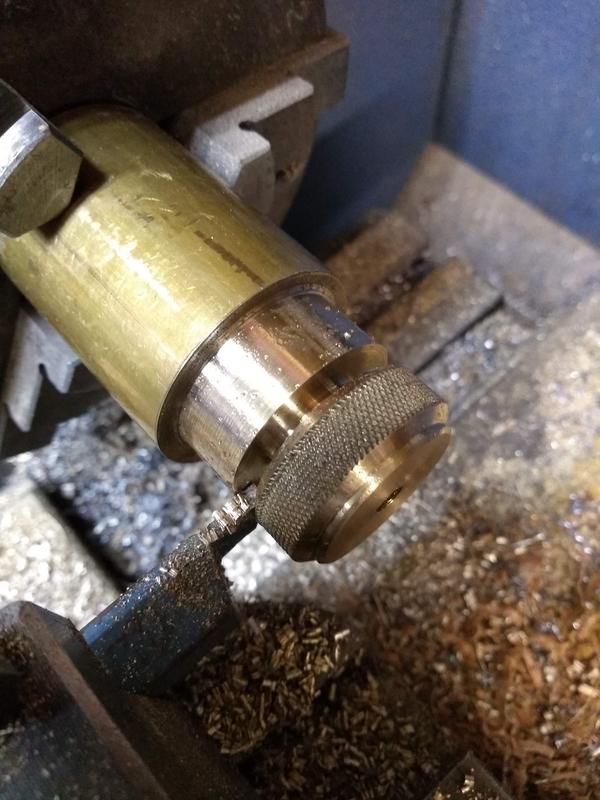
I then used a knurling tool to machine the knurl onto the brass. It was my first time using one.
30mm was pushing the tool to it's limit and there was a lot of lateral pressure needed to machine the knurl deep enough.
Looking into this later it's a good idea to fix a tail stock to the piece being machined to support it.

myAsgL8.jpg


Next I added a bevel to the top of the wheel and a bevel and shoulder to the bottom.
After this I drilled a 6mm hole through the centre
Lastly I started to part the wheel off.

gZCmbj5.jpg


The parting tool wasn't long enough to go all the way through so I used a hack saw to cut the last bit of brass to free the wheel.

ReLSE7M.jpg


The Brass thumb wheel is a friction fit onto the steel shaft. I forced it into place using my vice then peined the end of the steel shaft to lock the wheel in place.

PDJSsdl.jpg


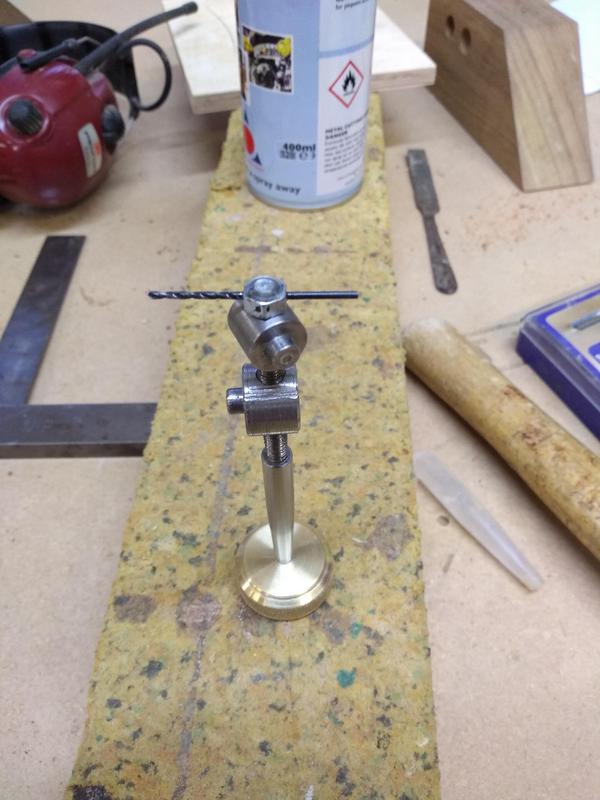
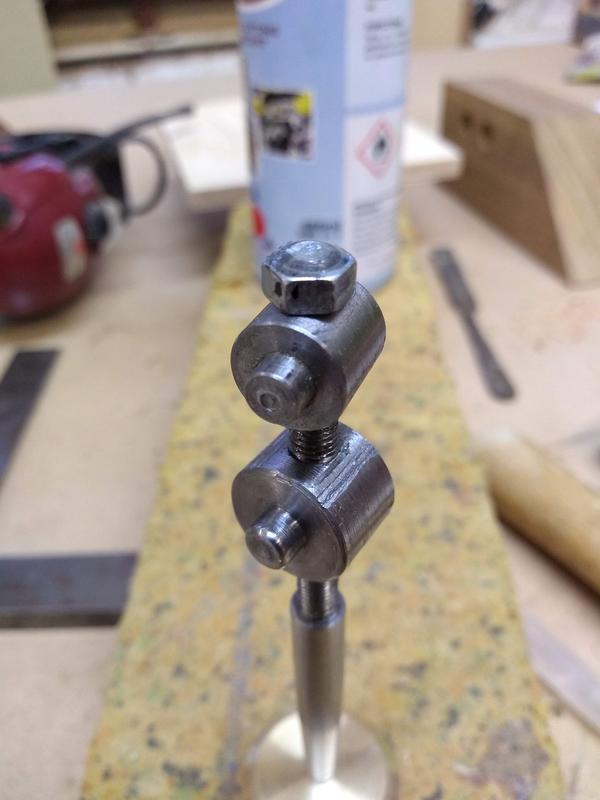
I wasn't happy with the circlip holding the Blade pin in as I feared it would come off in use so I tapped and threaded a bolt onto the end of the shaft then secured it in place with a drill bit.

HTpT3VR.jpg


Not the most elegant solution but it seems to have work as I wanted.

I ground the surplus drill bit away and the adjustment mechanism was nearly done.

15dezEx.jpg


All that's left to do it sand it up and fit it to the infill.

There was a lot of work involved with this stage and a lot of things I was doing for the first time.
The lathe work took a lot patience as I was having to double check every thing I was doing but it was enjoyable.

It took the best part of 3 evenings to finish this stage.
 
Loving the attention to detail. I have made lots of those Norris-type adjusters in the past and they take patience. How many TPI is the 6mm hole? I only ask because that will of course determine how sensitive the adjuster is. Great work and very interesting WIP. Thank you
 
This ranks highly among the all time best "build alongs" on any woodworking forum! If this does not inspire one to try something new, nothing will!
 
Thanks gasman.
I used a 0.75 tap and die for the adjuster, my set is very basic but it also has a 1.00mm as well but I thought the finer pitch of the 0.75 would help to slightly reduced back lash? And also offer finer adjustment.

Thanks Tony. In a world where mass production is taking over its nice to actually make something from scratch and it's even nicer to hear people appreciate it, thank you.
 
Back
Top