Little Boxes

UKworkshop.co.uk

Help Support UKworkshop.co.uk:

This site may earn a commission from merchant affiliate links, including eBay, Amazon, and others.

tekno.mage

Established Member
Joined
4 Apr 2008
Messages
1,308
Reaction score
1
Location
Beautiful Mid Wales
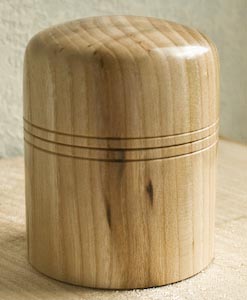
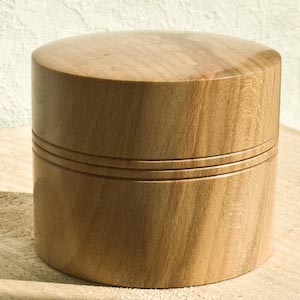
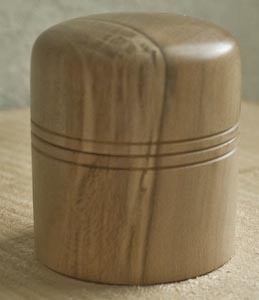
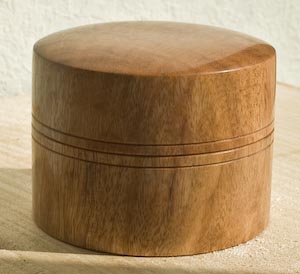
I have at last got round to taking some pics of the little boxes I've been making lately! I'm trying to make boxes from a variety of different woods in order to try the different types of wood and get lots of practise in making boxes! Your comments, critiques, etc will be welcome.

All have over fitting lids - some over fitting better than others! I've had some problems with some woods moving quite a lot in service - some boxes have gone slightly oval, and others can almost be used as hydrometers - when it's dry the lid's too loose, when it rains it fits as intended :-(

The internal shapes mirror the external shapes.

They are all finished with a couple of light coats of thinned melamine laquer, then burnished. Sizes shown are approx.

Here they are:

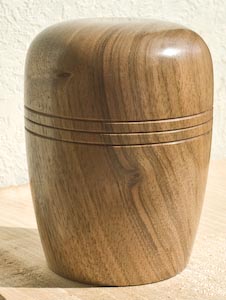
Walnut, 75mm x 100mm. Lid fits great, no movement in service. My current favourite.
Walnut1.jpg


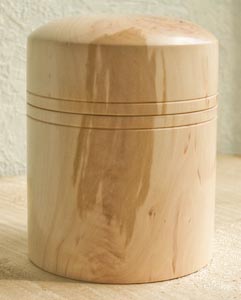
Hawthorne, 65mm x 85mm. Gone a little oval.
Hawthorn.jpg


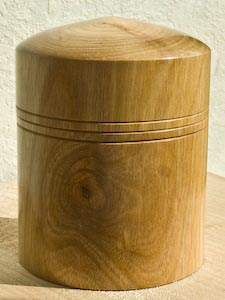
Cherry 75mm x 100mm. Lid made too loose - my fault. Don't like the shape of the lid much either.
Cherry.jpg


Elm. 60mm x 80mm. Gone a bit oval.

Elm.jpg


Beech. 70mm x 60mm. Lid fits well.

Beech.jpg


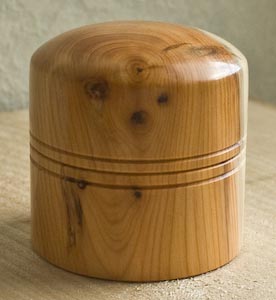
Yew. 60mm x 65mm. Lid fits well on damp days, a bit loose on dry days!
Yew.jpg


Holly. 55mm x 60mm. Gone quite oval.

Holly.jpg


Urundel. 70mm x 55mm. Lid fits well.

Urundel.jpg


Camphor. 50mm x 60mm. Lid fits tightly as intended. Smells lovely!
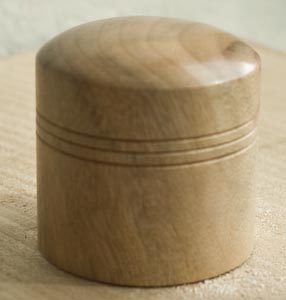
Camphor.jpg


Laburnum 55mm x 60mm. Gone slightly oval. Second attempt, the first one's lid split open tqo days after I made it :-(
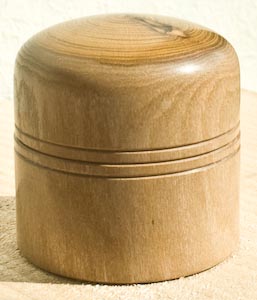
Laburnam.jpg


Spalted Firewood (or Spalted b****er-wood!) 65mm x 85mm. Too rotten really, almost impossible to get a clean cut. Fitted a boxwood flange internally as I thought the wood too soft otherwise. Lid too loose as well (my fault).
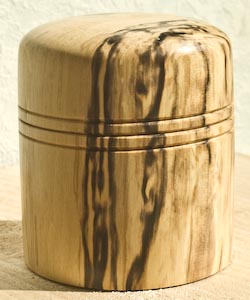
Spalted.jpg


Mulga. 50mm x 60mm. Lid fits well, don't like the shap eof the base - which had to be reworked after I dropped it and a bit chip came off the bottom corner :-(
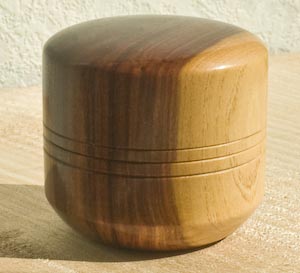
Mulga.jpg


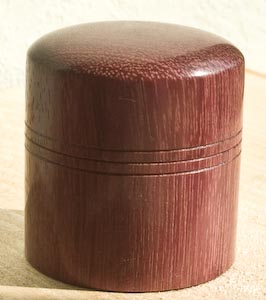
Purpleheart 55mm x 60mm. Lid fits well.
Purpleheart.jpg


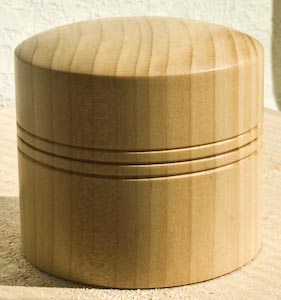
And finally, Cedar of Lebanon. 70mm x 55mm . Lid fits okay, but oil is bleeding through the finish on the end grain :-(
Cedar.jpg


tekno.mage
 
Well !

Fantastic set there. I love the Walnut , Holly and Camphor as my top 3

LOL @ Yew - " fits well on damp days, a bit loose on dry days!"


Loz
 
These are excellent, having struggled to make my first one the other day I know how tricky they are! I like them all but my favourite is the camphor one, I find the shape really pleasing.

Going to be saving these photos and trying to copy some of them! I'ld like some photos of the inside to see what sort of finish you have managed (mine wasn't pretty!)

Best Regards

Matthew
 
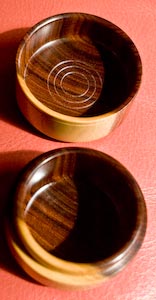
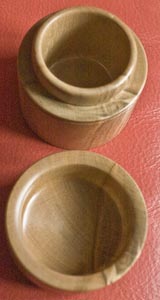
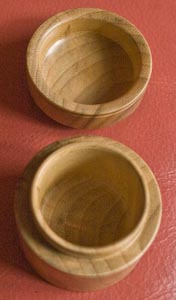
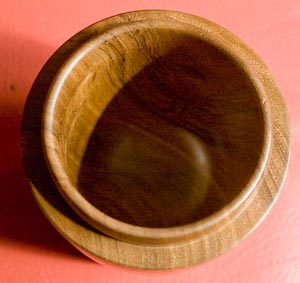
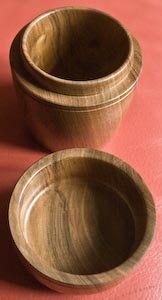
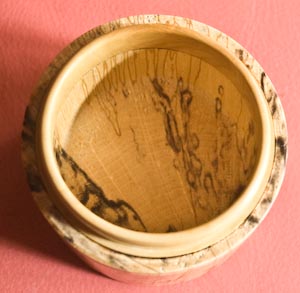
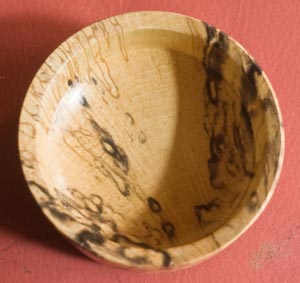
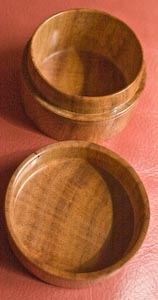
Thanks for your kind comments - I've tried to takes some pics of the insides of some of them - lighting the inside was rather tricky... see what you think. Most of the insides are okay - the spalted one wasn't - horrible tearout because the wood was so soft and it soaked up the finish badly so ended up patchy on the end grain.

Mulga box

IMGP4652Mulga.jpg


Holly box

IMGP4654Holly.jpg


Camphor box

IMGP4655Camphor.jpg


Walnut box

IMGP4657Walnutbase.jpg


IMGP4656Walnut.jpg


Spalted box

IMGP4658bwood.jpg


IMGP4659bwoodlid.jpg


Urundel box

IMGP4653Urundel.jpg


tekno.mage
 
Thanks for posting those - but I kinda wish you hadn't! Getting a finish like that gives me something to aim for I suppose!

Lovely work

Matt
 
Super Boxes TM, they are all very nice indeed ! 8) 8) 8) 8)
Looks like you're getting a good finish on them all,
and I love the 'design' aspect too ... they are all terrific !

If i were to pick fave's ... the walnut and the Hawthorne would certainly be up there ...

I think you've made a lovely job and super collection of them.
Really nice indeed 8) 8) 8) 8) 8)
 
tekno.mage":taoss2h1 said:
Most of the insides are okay

OK ?

Look great to me. I always have domed internal spaces in my lids. I must try flat, I very much like the light decoration on the Mulga Lid.

So When are you going to start the threaded ones ? ;-)


Loz
 
loz":3adhe2kd said:
tekno.mage":3adhe2kd said:
Most of the insides are okay

OK ?

Look great to me. I always have domed internal spaces in my lids. I must try flat, I very much like the light decoration on the Mulga Lid.

So When are you going to start the threaded ones ? ;-)


Loz

Ah well, umm.... I have watched a couple of Screwples DVDs and have access to some thread chasers from a metal working lathe. Most are too coarse I think (3-8 tpi!) although I have got an 11tpi male chaser (duh - but no female!). All need cleaning up (they are rusty) and giving handles. I must revisit the friend I "borrowed" them from to see if he has any finer ones he can lend me. I think thread chasing is probably very hard to learn and I may mess up a lot of wood in practising!

I find flat insides for lids easier to make than domed ones, although if I was to make the curve on the top of the lid deeper I'd probably dome the inside to prevent the lid being too heavy & chunky.

tekno.mage
 
Hi tekno-mage.

Some really nice little boxes there, very impressive.

:idea: If you find the finished item is going oval, usually it is because of , wood not seasoned, or wood not allowed to rest before finishing.

Even if you know the wood is seasoned and dry, you must make boxes in two stages. Wood will still move when you remove the inside, especially if it is limb wood. Trouble is it don't move straight away. When your making your boxes just rough turn them leaving enough to finish later. Then put the two half's away for a month or two, preferably inside the house. After a couple of months all movement should have settled and you can get back to finishing them.

One good idea is if you are going to be making a few boxes, rough out a few more before you go back to finishing the last batch you left to settle.
 
tekno.mage":12xtgkws said:
I think thread chasing is probably very hard to learn and I may mess up a lot of wood in practising!

I had a go at nightschool a few weeks ago, just a male thread on the end of a spindle. Got shown how to move my hands in small circles whilst approaching the end of the wood.

When the chaser finally bit and started to follow its own grooves i squeeled like a girl !

Was so much fun.

Didnt have time to start female threads though,

It's definatly something i'd like to spend some time on in the future.
 
Great box's :D

i echo tam's comments about twice turning them to ensure a good fit- if you need any roughed out box's pm me as i have loads several years old!!

11 or 12tpi is very coarse for wood thread chasing- boxwood can take a 12tpi but theres not many otheres which will- 18 0r 22 are both very good sizes to have.
 
Tekno - I love all of these.

Sorry for ignorance, but how do you apply the lacquer? Is it something you brush on and leave to dry, or while the lathe is spinning?
 
TEP":32ahy8p9 said:
Hi tekno-mage. When your making your boxes just rough turn them leaving enough to finish later. Then put the two half's away for a month or two, preferably inside the house. After a couple of months all movement should have settled and you can get back to finishing them.
.

A month or two - ah - I'm being too impatient, aren't I? I do rough turn and leave to settle but not for a month or two, usually only a week or two inside the house - and some of the exotic woods not even for that long - although I do store my small stock of exotic woods indoors.

I've also got some that I've rough-turned when they were very wet and am leaving these for a long time to dry - most have gone very oval indeed already but only a couple split. I use a cheap DIY damp-meter to test wood wetness. It has a scale from 1 - 10, basically anything that registers more than about 0.5 I consider is still in need of seasoning! When the wet-turned roughed boxes read about 1 on the meter I bring them inside and putthem in paper bags - which seems to be working ok so far...

tekno.mage
 
Lightweeder":1d3jk7lt said:
Tekno - I love all of these.

Sorry for ignorance, but how do you apply the lacquer? Is it something you brush on and leave to dry, or while the lathe is spinning?

First I thin melamine laquer 50 : 50 with cellulose thinner, then with the lathe stopped, I apply this very thinly to the wood using a folded paper towel, rub well into the grain then wipe off any excess. Spin the lathe at reasonably high speed and gently burnish the laquer with a clean folded paper towel - not pressing too hard at this point. You should seen a shine develop at this stage. Repeat with as many coats as needed (usually 2 - 3). Leave the item a few days for the melamine to cure, then burnish away any streakiness (usually only shows on the top of the lid) using a cotton polishing wheel and tripoli compound if required.

tekno.mage
 
loftyhermes":2fyzzinw said:
They're all excellent boxes, I think I'll have a go at making some now I've seen yours.

Do try, they are very satisfying to make once you have worked out a method that suits you - practice on cheap easy woods to start with (I used ash which I have in quantity). Boxes only need smallish pieces of wood so you can try some of the more expensive exotics or more unusual smaller native woods (like hawthorne & blackthorne) They also take up far less space to store than bowls and make very acceptable small gifts.

tekno.mage
 
Jenx":1y4c1l85 said:
You've seen Corny's cupboard, haven't ya ? :wink: :lol: :lol: :lol:

Oh yes :) I'll be helping him make a bit of space in that cupboard soon - I've taken him up on his offer of some well-dried out ready-roughed boxes :)

tekno.mage
 

Latest posts

Back
Top