Thanks guys... will try to answer questions :
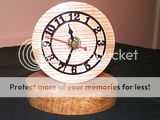
Clock Base - Yes it is also Ash.
Finishes : Clock - Friction Polish ( Chestnut )
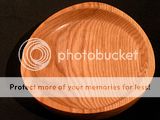
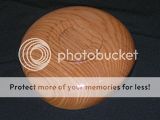
Bowl : Inside - Carnauba Wax
Outside - Finishing Oil ( Liberon )
Clock Components - Bought some plastic 'chapter rings' ( available in various colours from
http://www.clockparts.co.uk Lovely People to deal with, good ( i think ) prices.. Clock Motors available in varying spindle lengths, hands are 'free' with the motors.
When turning the face, just cut a little rebate or recess for the Chapter ring to sit in, so that its flush, you can either 'glue' it into position or leave as 'loose' if your recess is accurate enough.
( Note - I find clocks 'simple' to look at in terms of how they look or should I say, the ones I make are

.. you do have to be reasonably careful with the dimensions though.. to get everything to fit together as a finished thing .. but its not hard. just need to 'measure twice cut once' kinda thing

Love doing clocks though.. probably more than anything else I've done so far...)
How its done ( Bowl ) -- :
I'm guessing there's a multitude of ways to do it .. what I tried here was this ..
1. Mount a bowl-blank as if 'between centres' - Stebcentre in Headstock, Tail Stock brought up on the reverse.
& I then rouughed the blank to a cylinder shape ( may not be necessary )
2. Removed the blank, and took compasses - drew a circle about 45mm diameter , using the hole from the steb as the centre for the compass point.
3. Drew a 6-pointed petal-flower design into the circle ( just like when you were a kid at school... ) Then use / disregard the petal-points alternately, around the circumference of the circle.. so that you are effectively splitting the circumference into thirds. ( This could work equally as well if you wanted to mark your circle's circumference out into 5ths / quarters, / sevenths or whatever you like I suppose.
-- Ideally I thnk you out to transfer these markings to the reverse side of the bowl blank too, but to be honest, I didn't.
4. The re-mount the blank between the centres, but on one of the points that you've marked onto the circumference of the circle you drew.
-- its a 'tad' violent', as she's now spinning off-centre, and the gouge is only gutting for about a third of each of the blank's individual revolutions..
and repeat this on the other two 'off centre' points you've marked on the circumference of the circle.
-- You've then got the basic shape, and I found you cant do too much to alter that, after this stage... or it'll just end up 'round' again..... So a bit of 'hand sanding' was required at this stage.
6. Remove your now 3-cornered blank, and mount it centrally on a faceplate ( which is easy to 'eye' . as you have the drawn circle, an original "true" centre little hole, and a mark from whete the original steb gripped on the first 'true-ing' of the blank.) ... turn the foot, and 'shape' your profile to your individual taste... and that bit can be a bit 'weird'... as only trying it will illustrate ! ...
Reverse it into your chuck jaws and turn the inside..
Sand & finish. ...
( Watch the ghost - however small, be very easy to get a wrap over the knuckles with the lobes ! )
As i say.. there are probably different ways to do it, but thats what I did with this one.

I fancy doing a pentagon version ... may well try that soon 8)


