Jewellery Box

UKworkshop.co.uk

Help Support UKworkshop.co.uk:

This site may earn a commission from merchant affiliate links, including eBay, Amazon, and others.

TheDudester

Established Member
Joined
13 Mar 2007
Messages
268
Reaction score
0
Location
Scotland
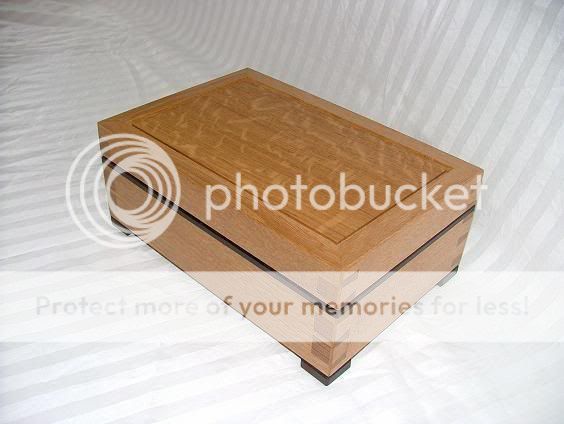
Last month a new magazine (for me), F&C caught my eye because of a picture on the front cover. It was a jewellery box in oak by Rod Stoakley aka woodbloke and everything about it struck a chord with me.

My wife's 40th birthday is on May 19th (ps don't anyone remind her) and I want to build a jewellery box for her inspired by Rob's article

Now I cannot even begin to make a box using the techniques described in the article and my hat is of to Rod for his abilities.

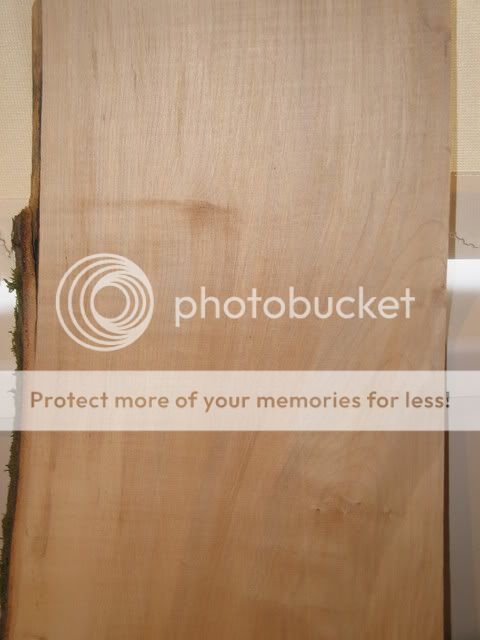
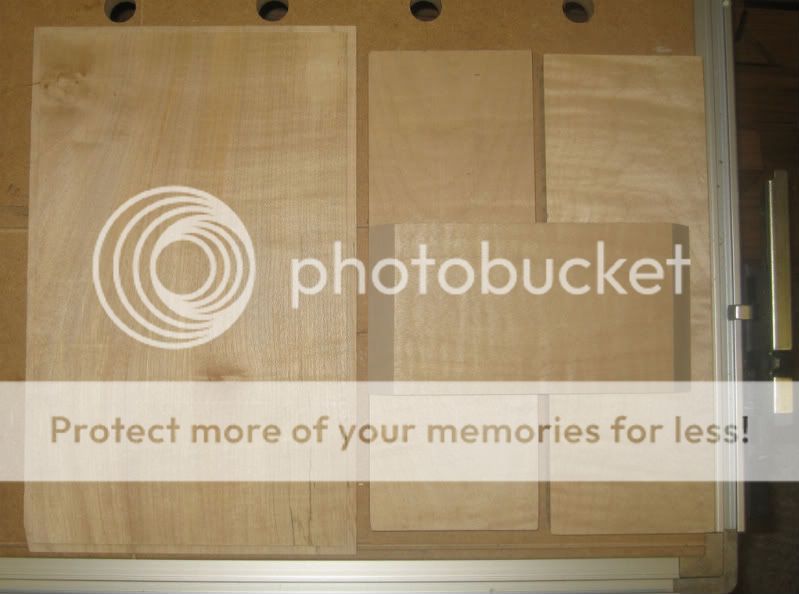
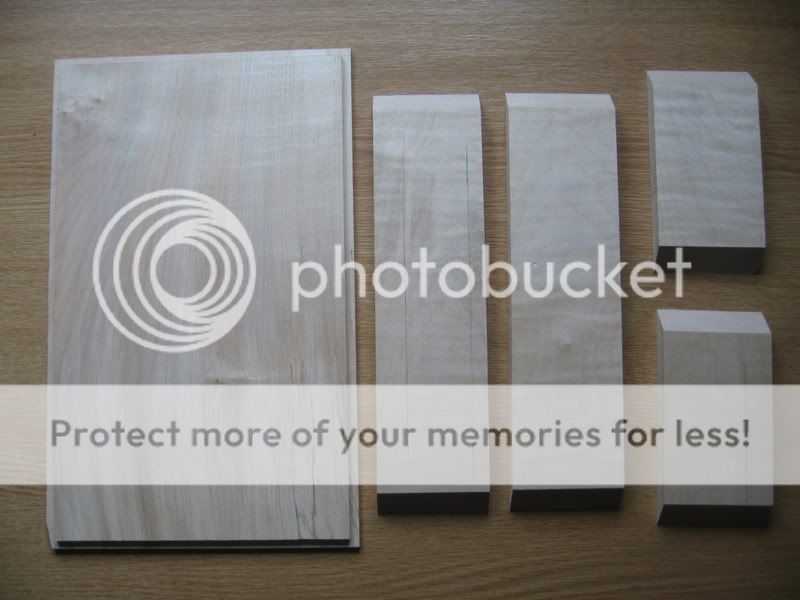
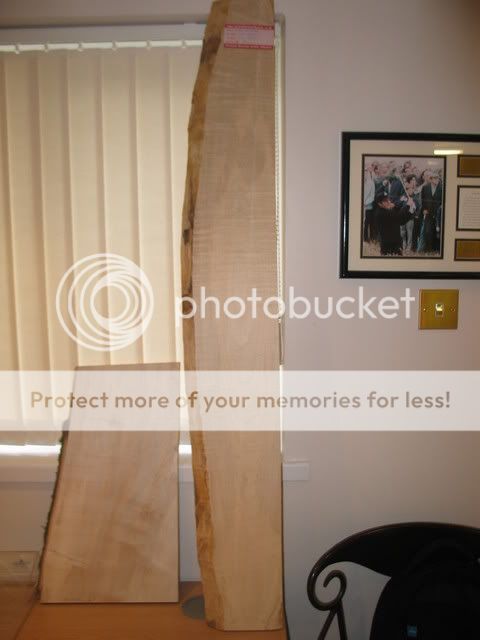
The first step was to go out today and buy some wood to build it with, which ended up being two pieces of sycamore see pictures including close up of grain on each.

They have been machine planed to roughly 3/4inch and I intend to run them through the thicknesser to take off about 1/16 and see what happens. I don't own a planer myself.

The dimensions of the box will be roughly 300wx210dx100h. The thickness of the material used will be as close to 5/8 as I can get.

The long board will be used to make the side pieces. There is about 1.2m of length where I can still get about 150mm of width. The third pic shows the middle of the long board and I intend to use that for the front.

The other board will be used for the top which I hope to cut it out parallel to the way the grain is running (see second pic).

A contrasting wood still needs to be sourced.

I would appreciate any and all comments. I have already been advised that there isn't enough time to finish everything off, so if I can get the basic construction ready, I'd be happy with that.

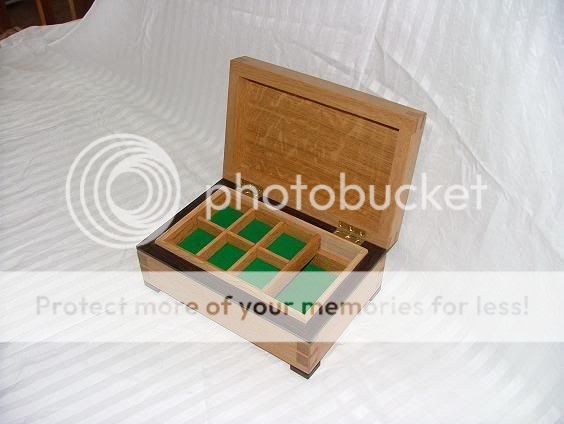
I have posted two pics of Rod's box at the end which I hope he doesn't object to.

Thanks

The Dudester

Pic0011.jpg


Pic0012.jpg


Pic0014.jpg


p1.jpg


p2.jpg
 
D- looks like you've got a couple of nice pieces there. First job would be to mark out all four lengths as one piece of timber, leaving say about 10mm in the width and 100mm in length as waste. Take a skim with a plane to check you have a datum face which is flat and true. Then run this thru' the thicknesser, taking a little off both sides until you are down to about 3mm from the finished size. The same needs to be done with the top panel piece which I'd suggest needs to be about 10 or 12mm thick and made initially the same width as the box. Don't be too hasty to machine to size straight away as the timber may move after machining.

I would then suggest that you make an accurate shooting board (if you haven't got one already) so that the edges and ends can be accurately shot. If you have a look on Alf's web site there's loads of excellent info on how to make and use one.

After a day or two indoors (much longer would be far better but you haven't really got the time) the timber can be machined to exact thickness and marked out ready for cutting to length, leaving about 6mm waste on each piece, longer on the top panel. Once the pieces have been cut to the rough length, stack them in a moderately warm room with some offcuts of sycamore as stickers and put some heavy weights on top (bricks are quite good) to try to minimise any further movement.
This ought to be enough to get you started on this project, will post more as it develops - Rob
 
DomValente":17k21lln said:

Thanks for the link.

After running the timber through the thicknesser, I noticed dark areas on the wood. Is this sap or disease or just a feature of sycamore?

I will still be able to get the four side pieces from it, just not exactly where I would like.

Or should I take the wood back?

TheDudester
 
TheDudester":3v27vc3r said:
After running the timber through the thicknesser, I noticed dark areas on the wood. Is this sap or disease or just a feature of sycamore?
If these run across the grain they could be stickering marks. Sycamore was traditionally end reared for drying because when stickered horizontally it can take on dark bands where the pressure from the spacing sticks are. Those bands can sometimes go clean through the wood but won't affect the areas in between.

Sorry that doesn't sound like good news

Scrit
 
Looks like somebody else has found my favoured timber supply :shock: , (presumably Lanarkshire Hardwoods)

There was some laburnum last time I was there which might be suitable as a darker wood.

I have found Patrick's timber to be excellent (well dried, stable, excellent figuring) on every occasion so far, even if it's not the cheapest place in the world.

I had a similar issue with some sticker marks in some sycamore (only some pieces were affected), but managed to "hide" all of the offending bits.

Good luck with the box.

Cheers,

Dod
 
Wanlock Dod":1xv93kyn said:
Looks like somebody else has found my favoured timber supply :shock: , (presumably Lanarkshire Hardwoods)

A correct presumption indeed!

Thanks for the tip on the laburnum.

Regards

TheDudester
 
woodbloke":2dc4gdr3 said:
Dude - what progress have you made with the box? B-day minus 7 and counting down.... :lol: - Rob

Don't remind me! Editing the thread title was bad enough.

I have rough cut the side and top pieces to size. Stacked them as suggested and will leave them probably until tomorrow.

I need to get a piece of timber for the base and something as a contrasting wood (see last two posts).

Today I am trying to build a shooting board but I am short on suitable material.

Using this image of a shooting board from Alf's website, I have plywood I can use as a baseboard, hardwood strips I can use to make the upper board and something else to use as a stop.

Once I have the shooting board built, I will square the edges and then cut the rebate for the base and groove for the lid on the router table. Cutting the mitered corners will be next.

I have no capability for doing dovetails at present but have been reading an article on inserting spline dovetails. I will give this some more thought.

D
 
Dude - glad everything is going to plan. Once you have the timber shot to length you will of course be ready to do the mitred corners. I assume that you are doing something like a very deep picture frame with splines inserted for strength. It's absolutely critical that you get both pairs exactly the same length or your mitres will never meet and you will have a 'struggle' to pull everything up square. If you have a decent disc sander they can be sanded in quite easily once a suitable fence has been made and cramped to a table which again must be dead square to the disc. The groove for the top should be cut when the pieces are all separate but the best way to do the base is to use a rebate cutter in a router after the box has been glued and then to square out the corners.
To glue and cramp this together, I would treat it as a very deep picture frame. If you haven't got a band cramp(s) to pull it up then you can improvise very effectively with a couple of tourniquets made in the following way:
Cut two bits of 6mm cord twice the length of the sides and ends and add 200mm to each bit. Tie into a single loop (reef knot) and then double up to make two loops. Make eight 'L' shaped bearers for the corners out of some 12mm ply and cut eight bits of substantial dowel (8mm would be good, about 60mm long) and wax them with some candle wax so they will slip easily. Place the tourniquets over the box with a 'L' bearer at each corner, one at the top and one at the bottom, thread the dowel between the two cords on each side and start to tighten up the cords, doing a little on each side. The pressure you can obtain is huge and will easily pull up the mitres, provided all is square. Don't even think about pulling them up with sash cramps or similar, they will never, ever pull up square as you need a constant pressure from all sides simultaneously.

If you have a router table, dovetail splines could be cut as shown in the pic below:

lsdkfj.jpg


This is SWIMBO's jewelry box made in Koa that we got from the US of A a few years ago. If you don't have a cutter and table, it's quite doable to cut and fit them by hand, after the mitred box has been glued together.
If you are making a top panel like the one I did, it needs to be made a little bit lower than the top of the box and polished before the box is glued. Make a slight allowance for shrinkage in the top width ....oh, and don't glue the top into the grooves, but I 'spect you knew that :wink: . I would also suggest a 'dry run' before glue up time so that you know everything is hunkeydoodly. Some WIP pics would be good so we can see how you're getting on - Rob
 
woodbloke":3qzgveba said:
Dude - glad everything is going to plan. Once you have the timber shot to length you will of course be ready to do the mitred corners. I assume that you are doing something like a very deep picture frame with splines inserted for strength. It's absolutely critical that you get both pairs exactly the same length or your mitres will never meet and you will have a 'struggle' to pull everything up square.

I know how important mitres are to you :D and the principles behind them so I tried out the method I will be using to cut the sides of the box.

I have a Festool MFT table which has a 'fence' with a stop and guide rail. Secondly the Festool saw I will be using cuts on the line you make if you line it up with the rail correctly whether you are cutting at 45 or 90 degrees.

I grabbed a piece of timber, pretty rough in fact, and cut 45 degree corners using the stop to determine length.

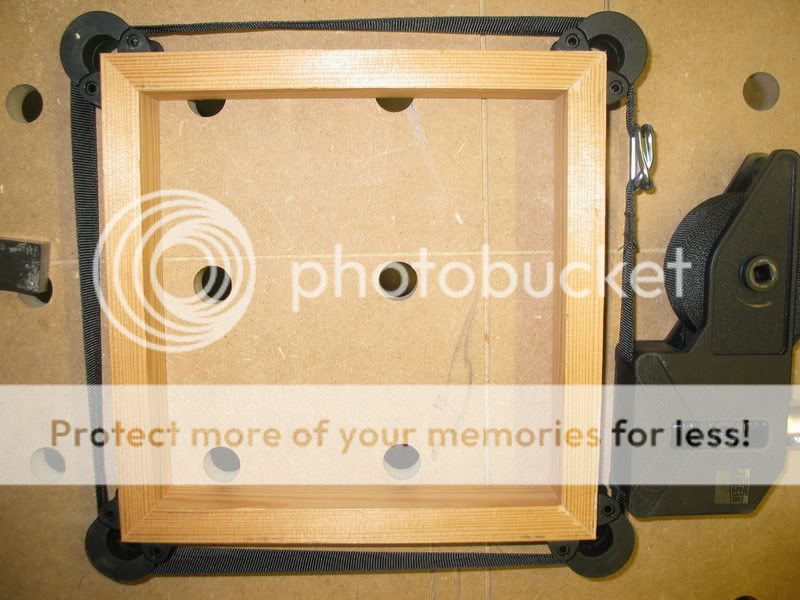
The picture below, shows the result. When I measured thediagonals, one came out at 337mm and the other at 338mm.

Would this be good enough?

As you can see I have a Bessey band clamp. Do I need two for what I am trying to do?

I will be cutting the lid from the box using the router table as well as the splines so all should fit together perfectly. I hope.

Finally is there any other way to test whether the 45 degree cut is accurate.

Regards

TheDudetster


Pic0015.jpg
[/img]
 
Dude wrote:
thediagonals, one came out at 337mm and the other at 338mm.

The diagonals aren't bad, tho' it looks to me as if the top right corner hasn't pulled up....and and the reason is the diagonals are not equal, close, but no cigar. Try planing just a fraction off the longer piece using your small block plane. Put the offending piece in the vice so the mitre is horizontal and take a couple of fine, even shavings across the grain and try again. If the shaving is even, you won't have upset the angle of the mitres. In my opinion you will need another band cramp to pull up the box, and you'll know when the mitres are bang on 'cos the whole thing will go up sweetly without any gaps - Rob
 
A couple of further questions about the top panel before I head off to bed...

The top panel will be approx 8mm thick

A groove will be cut on all four sides 4mm thick and approx 5mm below the surface leaving clearance of 1mm. When the panel is fitted in place, should there be a small gap between the edge of the panel and the sides to allow for expansion?

Thanks

D
 
Dude - panel sounds good, there should be a small amount of clearance on the width of the panel to allow for movement, 0.5mm each side ought to be adequate. The panel surface set in about 1mm below the box sides is also about right - Rob
 
Day six and disaster. This morning I got up early and cut all mitres. Then I had an accident with one of the side pieces and it snapped (ok I managed to stand on it)!

As I didn't have any spare sycamore due to the dis-colouration, I am now stuck for a few days until I can go and get some more which will be Tuesday.

I won't do anything else now until I can complete all remaining operations at the same time i.e. cut the groove for the top panel, fit the top panel etc.

A bit dumped now, lessons learned, but I will just need to be patient (hammer).

Apologies for lack of pictures but when all sides are complete will post then.

D
 
Hi all

**** Please note that all timescales, dates associated with previous postings are completely fictitious :eek:pps: ****


The picture below shows you what pieces I have left. I don't actually want to buy anymore but would still like to make a box of err reduced dimensions.

Maple1.jpg


I expect that I will need to make the top and base out of the original lid. The sides will come from the remaining pieces. The lid and base will probably be recessed and the lid will just be a lift on lift off. The internal will be lined with some felt.

Any thoughts and help would be appreciated.

Regards

D
 
Quick question.....

Does any see anyone problems with mixing maple wih some iroko for splines or as an inlay?

Regards

D
 
I think it's personally down to you to decide. It's your project, after all. :)

I wouldn't have thought there's too much of a contrast between iroko and maple - it's not like you're replacing one of those with American Black Walnut, for example. :wink:

I'm not quite clear on this. Are you thinking of cutting all the splines from one timber, but the inlays from the other? I think that would work well. :)
 
I thought I would post some progress on where I am almost one year on :oops:

After checking the pieces I had left I realised that there were problems with the mitres wandering off and other issues so I decided to start again. I know how this happened originally so will be able to avoid it in future.

I used a rail and saw to put a straight edge on each of the pieces that will makeup the sides of the box. I then used my SCMS to mitre the corners.
This gave extremely smooth mitres and the joints seem to go together tightly.

I cut the side pieces to finished size although I realised leaving then slightly oversized wouldn't have been a bad thing at this stage especially since further operations are required. I left the front and back pieces oversized.

Using my table saw (when I get it setup) I will need to cut the side pieces close to finished height.

Then I will need to put a rebate in the bottom of each of the side pieces to accept the base and a groove near the top of the side pieces to accept the top.

The top and bottom will be made out of the the large flat piece and this will determine the overall size.

I haven't quite worked out how I will cut the box in two to make the lid and I still don't know if the lid will be hinged or just sit in a groove.

I intend to add splines to the box and wondered if biscuits would be unnecessary for alignment reasons?

Regards

D

IMG_2197.jpg
 
I've always thought biscuits are unnecessary for a small job like this. Mitres can be tricky to glue up though, because they can slide as the glue goes on. If you're adding splines then I really don't see the need for biscuits here.

I wouldn't worry too much about cutting the lid just yet. That can probably wait until you glued it up and got the cramps in place.

For future reference though, a lot of people would probably attempt this on the bandsaw with a fine blade. But, if you only have a small saw which can only take a fairly narrow blade, you may find it will wonder slightly.

A better option then may be to use a router table with a slotting cutter. You can set it so the cutter goes all the way through the thickness of the sides but you'll need to pack it out on the last cut so it doesn't "fall" on the cutter as the come to the end of the last cut.

What I've done before is to set the cutter so that it doesn't protrude all the way through and so it won't fall on to the cutter and ruin the job. I then carefully finish the rest of the cut on the bandsaw, leaving enough on to tidy it up with a hand plane. :)

Don't worry about how long it takes you to actually get started on something. I was planning something in May last year, didn't buy the timber until October and finally made a start in January! We all do it!! :wink: :D
 

Latest posts

Back
Top