It's about time I did a refit..

UKworkshop.co.uk

Help Support UKworkshop.co.uk:

This site may earn a commission from merchant affiliate links, including eBay, Amazon, and others.

lee celtic

Established Member
Joined
5 Oct 2016
Messages
80
Reaction score
38
Location
North Wales
Firstly Hello All.. Thanks for letting me in. :D

I've had a good look around and it's nice to see a UK based forum full of like minded People. I came here last week from Garage Journal looking for something a little more for want of a better word British, I realise the tinterweb has made the world smaller and input from other places is common and welcomed but I don't have 50 square miles of farmland or room for a 100 foot square pole barn. What I do have is a small (ish) garage in the middle of a village in the middle of the Snownonia Mountains and I love it...

So a little about me before I begin the stuff your all interested in (The workshop)

Born in Manchester in 67 I was told at school I was good at woodwork. Well I blame my Uncle who bought me a stack of wood and a small but real tool kit when I was young.. I made a very rough box and painted it white. The lid was wonky and one side was longer than the other but I made it and I was proud.. Jump forward 8 years and I left school with an 'O' level in woodwork, metal work and tech drawing..

One item I made for the exam was a coffee table with a flip over top, the underside had a Marquetry chess board and it was bought by a well known High street retailer a few weeks later. (Thanks to the examiner giving them the heads up)

I went on to attend the school of Furniture in Central Manchester where after training in Wood machining ,french polishing, cabinet making and traditional Upholstery the first year I chose Antique restoration for the second year and left Qualified..

I got my first job at an Upholstery company and soon discovered I didn't know a thing, ok I knew the basics but there is nothing better than on the job training with a Grumpy Old Fart who knows what he's doing (Hi Colin) after a couple of years I moved to Bangor North Wales and set up an Upholstery firm with a Mate and we ran it together until I had an accident and hurt my back.. a couple of years later he bought me out.

By this time I was 34 years old and bored rigid with old furniture and wanted to try something different so I took a job making steel furniture for schools and hospitals (the glue dries much quicker) starting at the bottom and working my way up to first welder over 5 years. Bare in mind I'd never welded a thing before but gained Mig and Tig qualifications. I ended up as goods in/out manager and hated it so in an office, when the downturn hit I went for redundancy and left after 7 years.

So here I was 42 years old with two almost grown up kids and a Mortgage.. What to do.. There was a local Furniture Factory so I stuck a CV in expecting the your too old brush off and ended up being given the QC job and I'm still there 7 years later.. 200 bedroom suites a day and a 4 day week.. works for me.

Now when I moved to Wales I left behind a small shack behind my Mums house made of a few old doors and a bit of old bus stop maybe 5' by 6' and 8' high a tiny bench and no power, it was my escape pod.. A few years after meeting my wonderful Wife and having our first child I spotted a house maybe 50 yards from where our flat was and it had potential so we bought it. That was 23 years ago.

We spent a few years upgrading the stone built 1848 house and then SHMBO said I could start the workshop... so I did...

13567396_10210488456794520_6097261334690396048_n.jpg


This was two weeks of jack hammers and skid steer loaders driving truck loads to the dump before work every day. clearing it myself.
Now one thing I can't do is brick laying so I had a mate who could but he was out of work, so I hired him to build while I was at work.. best thing I ever did as he had the shell up in a couple of weeks that was about 20 years ago and since it's been the dumping ground for everything we didn't want in the house.. so now it's time for a make over.

This is how it stood a couple of months ago..

14691059_195225347570054_4070505130142377775_n.jpg


Getting late now but I'll post more tomorrow night.. Hope I didn't bore anyone. I just want to keep a record for myself and ask for ideas to keep the ball rolling. as said more will follow. Thanks for reading. (if anyone does. lol)
 
Croeso Lee. Enjoyed the read.
That's still tidier than my shed. :oops: I registered for a waste permit (work van rules) for the local dump last night after finally having enough of climbing over stuff that we've been meaning to sell or give away.... Enough's enough! I'm looking forward to having some space too. Look forward to the updates.
Cheers
Chris
 
Waste permit...lol.. you have a problem if you need one of those ..

To get the ball rolling I bought a small trailer to use ferrying rubbish to the tip and scrap to the local yard You can just make it out in the second photo above.. I'd been saving stuff up to weigh in and afterwards wished I hadn't bothered with half of it still it put £40 in the pot for the refit. The trailer only cost £30 off ebay but it had no boards left as they had all rotted away and the main T frame underneath had gone the same way. I had a couple of bits of 60mm thick wall tube left over from beefing up the sills in an old Discovery so a few nights and I had a usable trailer.. The boards I got from work for free so all good. I had to re wire the lights too but no biggy. I also managed to shorten the T a little and guard the lights so I can stand it up on end against the wall..

I spent a few weeks of evenings then loading the trailer and doing trips to the tip which is handy for me as it's across the road from where I work. I hate going there and seeing all the good stuff being dumped and not being allowed to take it.. I missed out on a small Beer fridge by Seconds Just as I spotted the guy with it he let go and it fell into the skip . :(

Once I had all the junk I could see and get to out of the way I turned towards what I wanted to do.

I even set myself a mission list to try and keep on track.:-

1. A clear floor!!
2. A place for everything and everything in it's place.
3. matched containers. (I'll explain later)
4. Dust trap free (I'll explain later)
5. Bright, Light and professional looking.
6. No wasted space.

Well the floor was semi clear so I moved on. I did a measure up and drew out a rough plan on a bit of scrap board then sat staring into space for a few hours running ideas through the grey matter.. When I built the workshop I actually knocked down a building that used to be behind my house, it at one time housed a bakery and the walls were 3 feet thick stone. I wanted to make the biggest Workshop I could with a plan to run a small business from there when I got old.. I recover Custom Motorcycle seats for a local shop.

dragon-motorcycles.seesites.biz_--_187445416.jpg


There is a narrow alley behind the workshop so the people next door and can drag their bin out and a lane running along the front. These do not run square to the site so the building is sort of wedge shaped. I did a little picture using an online thingy-do-dah but can't get it to load so just think of a wedge shape 12 feet on the took board wall at the end and 16 feet where the doors are.. and 28 feet front to back.


So to start I'll jump straight to Number 4. Dust trap free.. I hate parts bins, shelves, lips, handles, holes, crevices and anywhere sawdust grinding waste or overspray can settle. I had half a wall of parts bins you know the little blue and red plastic ones. 2 minutes with a skill saw and 2 hours with a hoover/brush. hate hate hate... Even exposed tool racks get covered in stuff so they had to go.. or rather go under cover..

old tool board above the bench. (you'll like the bench but thats later)

13567086_10210488590117853_8213567208658610319_n.jpg


13537623_10210467760397123_2523753166029738152_n.jpg


I came up with a design based on a dart board cabinet, pretty thin so it didn't hang out over the work top too much but it wassn't big enough. So I thought about two of them.. then about spacing them and using better hinges to get them to open out flat.. seems to work well but now my tools look a little tired and I need to clean them up. :shock:

14479805_194641807628408_6593465976792779478_n.png


14600835_194643370961585_8637923792842906283_n.png


14591599_194651487627440_2902300537080931338_n.png


14572888_194644397628149_1530253776785820822_n.png


Where I work we have a lot of waste boards and when I say a lot I mean tons of the stuff.. every pack and pallet has a sheet of MDF or chip on top and bottom. these were made of white faced MDF with a high gloss finish.. side effect is they become really big white boards too.. and I get it all for free.. 8)

So here's a shot of the next bit of the plan Lets call the far end wall the north wall , this next bit is the east wall plan. (hammer)

14680717_194654884293767_9167215360352614941_n.png


I need to go do the washing up and make the Misses a brew.. so more tomorrow.. Thanks for reading. :D
 
Good stuff, keep posting - everybody here loves a picture.

I browse garage journal a little, not a bike man (dad used to be, too old now :D ) but I do like the garage/shop fit out threads.
 
Evening all.. Took a night off from the workshop today.. had a mad day at work so wanted a rest..

Thought I'd slob on the sofa and share some more..

The roof is now used as a Garden and BBQ area so there is a wall around it. looks a bit like a sub station from the outside, the doors are OSB I fitted when I was building it and they are still very solid after all this time. Very good Locks (multiple) and an alarm keep me sleeping at night but I want to change the doors next summer.

Anyway back to the inside.. I finished up the tool cabinets and worked towards the corner, now the thing with corners is they are rubbish for storing anything. Especially when you have to reach over a 3 foot deep bench.

14713580_195225720903350_3394689624278948048_n.jpg


I had a think about what I need around the bench and what would fit, also what I'd be able to lift at full arms length and worked out nothing was going to be stored there I would be able to get out all the time. Then I had a light bulb moment, last year my compressor had packed up after nearly 25 years of use and I was left with a tank and fittings. I did a bit of googleing and ended up fitting a pump from a fridge and it worked really well.. so well I found another tank on ebay for 99p and bought it with a plan to build another silent compressor.

Anyway the tank looked like it would fit and I put a call out for a broken fridge on facebook (got offered 4) The local tip has a guy who drains the coolant from them so I got it emptied and scrapped the fridge keeping the pump.

14708241_195225737570015_4887877879462021692_n.jpg
Knocked up a little cabinet.

14681697_195225760903346_1274641982330059052_n.jpg
The pump and tank won't fit side by side..

14650505_195225767570012_3687420674083111943_n.jpg
Had some galv steel angle from a packing crate at work, it's 1.3mm thick but very rigid.

14681601_195225777570011_6836915407135303338_n.jpg
All riveted together using the tank as a main support to hold the pump, it's not sitting square yet as I need to drill a hole in the cabinet because I moved the drain to the bottom and it's sitting high.

The plan was to split the front of the cabinet so I have a fixed panel for gauges and a switch and a hinged door. I'll finish the compressor after the refit as I said no more projects or toys until it's done.. well I didn't actually say it I just sort of promised myself or I'll get side tracked.. :lol:

14666272_195225797570009_8274049606081223441_n.jpg


Now in this corner of the shop I had to build a strange box out of blocks due to an outcrop of rock that ran from under the house.. It wouldn't break when we were working on it and I figured I'd rather have the blocks in the garage than the house fall.. but as it turned out it's a great height for my drill. so thats where it's going along with a small drill bit cabinet just to keep things tidy. the one in the photo is a mock up and I'll do a proper job later.

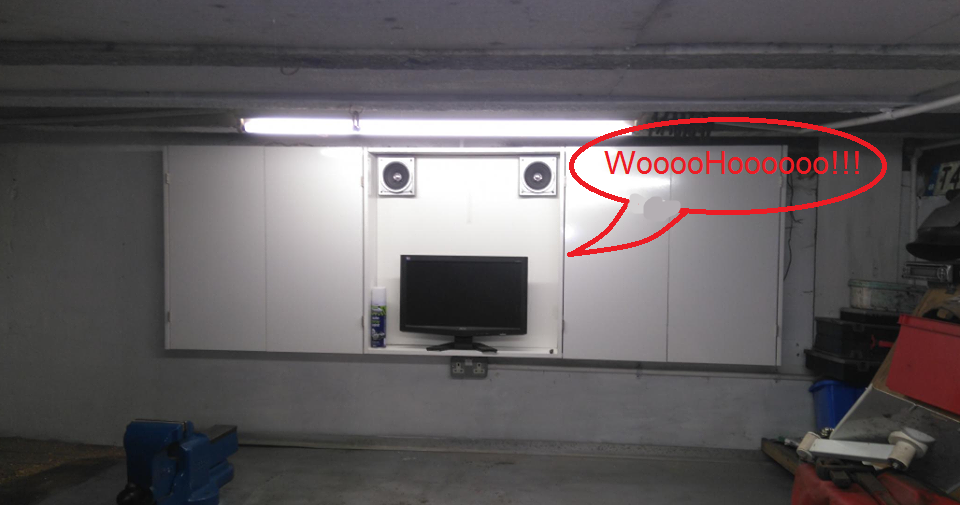
Now as mentioned earlier only one Light was working and I'd put off sorting this until I was building on the east wall.. The conduit I put in I stupidly put along the ceiling instead of running it along the wall inside the space created by the girder.. So one Saturday morning I killed the power and ripped the lot out.

Three hours later I had three working strip lights and a clear ceiling (I need that for the paneling I'm putting up) and I could carry on building. I used a few bits of MDF to make an over head locker but it stuck out so far any work space below would be useless.. So I took 150mm off the depth and stuck it back up.

14606346_195225850903337_3047147945228490689_n.jpg

14650337_195225867570002_1004331578621550666_n.jpg


It worked really well seen here with axil stands in it for scale.. so well I made three new ones and banged them up.

14721593_195225854236670_8146948003865863937_n.jpg


These will eventually have lights underneath to shine on the worktop. Because of this I made the end cabinet a little shorter than the others but left the door the same length to leave a small 35mm wiring channel between the overheads and the next full length cabinet.

14705865_195225927569996_4626638886233272659_n.jpg


Had to move the light switch before building the last one, this is going to be a full length cabinet to cover the fusebox and give more covered storage. but that for tomorrow or the day after.. I'd like to say I'll be tinkering in there tomorrow but it depends on my workload tomorrow.. Night All. and thanks for reading. :D
 
Had a day off due to it being my birthday..

Back to it then.. The area behind the door is where the fuse box is mounted and has always been a mess. An old shelving unit that was given to me by a neighbor had been cut down and used for odds and ends but it looked terrible so out it went.

Before..
14713672_195225940903328_3027019529730675029_n.jpg


After..
14705835_195225444236711_5240190862509475344_n.jpg


I did the measuring up and took a few measurements of stuff that was going in this cabinet then went to work on cutting/drilling.. It's a basic cabinet put together with Dowels. I had intended to cut it all at work but ran out of time so out came the skill saw.

I slid a 10mm impact socket over the cutter I was using to act as a simple depth gauge and drilled everything Making sure the highest shelf cleared the mounting board for the fusebox. As said before the lightswitch was moved to make way for the gable and the twin socket thats in there will be left until the new power points go in under the lockers.

14581560_195225424236713_8719669945846761552_n.jpg


14724656_195225454236710_23972773012660098_n.jpg


14670640_195225427570046_5786201237516448828_n.jpg


At the same time I drilled the holes for the tap in hinge plates and then glued it all together. I was lucky to get a couple of doors that had slight marks on the inside just before they went into the skip at work. Good enough for me but not good enough to sell to a customer so on they went. I left off fitting a top because I want to take some more wiring out through it. I'm also planning to bring in a heavier power cable.

14705833_195225464236709_7094038833661259716_n.jpg


14713570_195225477570041_8240415326974898894_n.jpg


I added the Jack and stands to their final resting place then filled the rest with anything that would fit. I need to empty the old metal shelves before I can build the mobile units that are going to sit under the lockers. I'm making three that will all be on wheels with brakes.

14595538_195225480903374_5512597283717811446_n.jpg


The plan for these units is that they will be against the wall most of the time then they can be pulled out to form a large central island to use as a cutting table. Thats why they are being built last, I needed the exact measurement of the gap they will sit in so I know what depth to make them. I want them to make a neat rectangle when in the centre of the floor.

14947705_208176696274919_4987777627110640521_n.jpg


Also given my trusty Record No.25 and makeover..

14642410_195225617570027_727592701202585464_n.jpg
14721505_195225610903361_441986633103459276_n.jpg
14517391_195225684236687_2029054900939758421_n.jpg


Now I know this forum is mainly for woodworking and it has a small Metalwork section but I tend to have a go at anything in my workshop. I like to tinker with stuff even if it's just taking something apart to see how it works.. in the last two weeks I've swapped the screen on my laptop, soldered a 5mm micro switch inside my wifes car keyfob and upholstered a seat on a chair for the daughter in law to be. so I thought I'd share a few projects I made from scratch to add to my old Discovery.

Raised Air intake made from 63mm exhaust tube and a bought in top.

14568179_195225967569992_310406568477708440_n.jpg


CB slide mount with drinks holders made from steel plate and a couple of rings I made from 8mm bar Sticker was off ebay.

14656246_195225954236660_1077795138663992185_n.jpg


Roofrack (copied a safety devices design) made of electrical conduit material cost £48 and when I scrapped the car I sold the rack for £165 on ebay.. The guy who bought it was made up with it. Unfortunately it wouldn't fit my TD5.. :(

14718757_195225974236658_3581308352480824816_n.jpg


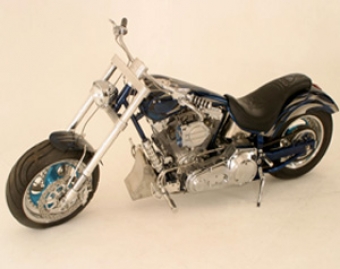
And finally this is going to be one of the first things I am going to try and build when the workshop is finished for my eldest son.. He's been nagging me to make one so I'm going to try for next summer.. 8)

14666107_196746917417897_9062045320140170089_n.jpg
 
Loving what you re doing and the planned chopper bike for your son. I too am planning on some more bike builds, I've built a frame from Reynolds tubing and it was really good fun and lovely to ride!
 
Thanks for reading Curtisrider.. This chop thing will be 60x60mm box with 25mm box addons
most of the parts will come from a couple of scrap BMX bikes he's found and the rest we'll make up as we go along.
It's gonna be heavy as hell but it's the look he's after. he's actually 24 and covered in tattoos (he's a tattooist) and just wanted something to ride around on in summer to advertise the shop.

He's painting it..!
 
Thats Funny because I'm about to restore a 52 1/2.. got it off an old school woodwork bench about 20 years ago.

Then I have to figure out where to mount it.
 
lee celtic":8wuitu9a said:
Thats Funny because I'm about to restore a 52 1/2.. got it off an old school woodwork bench about 20 years ago.

Then I have to figure out where to mount it.


Good to see you here. I'm just down the road in St Asaph.
 
Well onwards and upwards and all that.

Not been doing much due to a mate needing a lift to work every day.. sounds strange eh .. But it means I didn't have room in the car for the stuff I needed.

So I had to break the habit of a lifetime and go into work on a Friday to do...... OVERTIME.!!

This entails going in at 6am then working until 10. Then I clock out and go to work cutting and edging the stuff I need for the weekend.

So how far did I get. well I sat with a beer and a tape measure for a few hours working out what I wanted and how big everything needed to be. then did this really accurate design drawing.

14947705_208176696274919_4987777627110640521_n.jpg


Your impressed I can tell.. :D

After cutting and edging I packed everything up and headed for home and spent a bit of time putting one base unit together. I added a draw and toyed with the idea of a black draw to break up the white.. I didn't like it.

14523116_208176076274981_5478464375147960078_n.jpg


I'm going for white draw fronts. but I left some scrap on there to stop stuff falling out before I get the proper ones done.

Now while I was googling wall finishes I came across a guy who made a really complicated video of how he did a Pallet wall.. now I can hear the groans now but I really like distressed wood but didn't want it too dark. Enter the new ish Pallets I get at work for draw wraps.

These are soft wood but have some interesting grain and light/dark patches. I brought one home and broke it up then just stacked it on top of a base unit and added a wedge to hold it in place.. it looked ace.

14908387_208176692941586_5427184073399245401_n.jpg


The next few days I broke up a pallet a day and filled the boot and also made up the bits for a second base unit. (my mate had a couple of days off so I had room in the car.)

After breaking down the shelving I had I gave the floor a brush. (still can't believe I have a floor) and threw the second unit together then set about cladding the pallet wall.. think it turned out pretty good.


14963196_208176406274948_4255116024717866471_n.jpg


I'm away this weekend so I won't get anything done but I have the boards I need set aside for the final base unit but it's going to be a little more complicated. I plan to have a little record 52 woodwork vise fitted in the centre unit but I will need to allow for this in the unit construction. And I can't work out that construction until I have made the solid Butcher block (style) worktops. I'm also holding off on the inner shelves and doors until I've built this last unit.

I also cut the pallet wall short, I didn't want it behind the drill stand as I drill metals with coolant and it would stain it badly. I'll be adding a wipe-able board there. So far I'm really happy how this is turning out considering the only things I've bought are castors and draw runners. 8)
 
I think that cladding looks great, nice one!

By the way, there's nothing little about a record 52! You might want to consider that when you attach it, and ensure the unit is rock solid first :)
 

Latest posts

Back
Top