How to best approach a first box project

UKworkshop.co.uk

Help Support UKworkshop.co.uk:

This site may earn a commission from merchant affiliate links, including eBay, Amazon, and others.
Joined
28 Dec 2016
Messages
7
Reaction score
0
Location
London
Hi, I'm completely new to woodworking but would like to build some boxes for storage in my baby's bedroom. I have in mind the type of box and will try and attach a picture before posting. Basically, it's an open top box with either holes or little doorknobs on the end for storage. They will sit on a set of very deep and very narrow shelves to act almost like drawers.

My question is, what would be the best approach/design? Online tutorial references would be ideal. Importantly, I'm looking to learn on this, my first, project so would prefer to avoid any hacky approaches. I want to learn good techniques as well as building something which will be (hopefully!) functional and useful.

Thanks in advance,
Alice
 

Attachments

  • set-of-3-open-top-small-storage-display-box-set-201-p.jpg
    set-of-3-open-top-small-storage-display-box-set-201-p.jpg
    128 KB
Thanks fiveeyes.

The tools I have:
A black and Decker workbench
Hand tools like various saws and chisels
Mitre box
If there are other tools necessary, I am happy to buy them as I see this as a first project of many.

Thanks,
Alice
 
this could be a very simple project, right through to reasonably complex, depending on how you do it.

The simplest would just be to butt joint the sides, and fix a bottom to the 4 sides, using ready planed timber.

I think that I would probably go with a relatively simple rebated butt joint. within that, you will need to make a bench hook, do a bit of work with saws and chisels and cut various bits square. That is probably enough for a first effort- you could fix using pins, screws, dowels as you choose.

Fixing knobs on would probably be the easiest, with your limited tools.

That is assuming timber, rather than painted sheet material.
 
Marcros, thank you. I will have a Google on rebated butt joints and bench hooks and hopefully make some progress.

I need ten of these "drawers" so maybe if the first is successful using these techniques I can come back for more ideas on how to make more advanced boxes for the others.
 
The boxes you have shown include mitred corner joints and by the look of it routed slots as handles. I can't tell how the base is done as photo resolution is not sufficient for my eyes: could be thin ply pinned on or it might be set into a slot. If the boxes are set on a shelf, do you need slots or knobs at all?

Things to start with:
Do you have a set square and rule? Essential for marking out.
What dimensions do you have in mind?
Do you have ready planed wood of suitable thickness readily available?
Do you have any experience of cutting wood square against a line, or cutting mitres?

If you have never done woodwork before, you best bet might be visit the workshop of a member here and get them to show you how to make simple boxes. It is very quick and easy to make basic boxes but the key is very accurate marking and straight cutting.
 
Alice, welcome to the forum. Everything said above is good, but the problem with dealing with experts like we have here, is they cant come down to the level of absolute beginners like us. I'm 2 years into this hobby, and still find most advice is above my pay grade.

If this is a cheap, first project, with minimal tools, then a rebated butt joint is not easy to do. Assuming you want a wood finish rather than melamine chipboard, then the easiest way would be to just cut the pieces to square ends, and glue and panel pin the pieces together. Then sandpaper the edges to a slightly round shape and they will be perfectly usable.

the next step up would be to cut the edges in the 45 degree mitre board, and then glue them down to the base board.

If you are really keen to improve, accept that the first few things you make will not be perfect, and then you can plan the mark two versions as your skill and tool kit grows.
 
For a first project I would advise just concentrating on cutting and finishing all the component parts with square edges and to the correct dimensions.
Once that level is achieved I would simply butt joint together with glue and pins.
Start simple and your confidence will grow.
 
Hi Alice

I would agree with Sunnybob. For a first project keepm it simple. Butt joint(Jjust the end butted up to the side) the peices then I would suggest screwing them together. The bottom could be laid on battens screwed to the inside at the bottom. The most importqnt part of this method is to get the ends square, for which you may need a shooting board unless you can get them cut by your timber supplier.

I see about posting a pic later today but busy this morning.

Chris
 
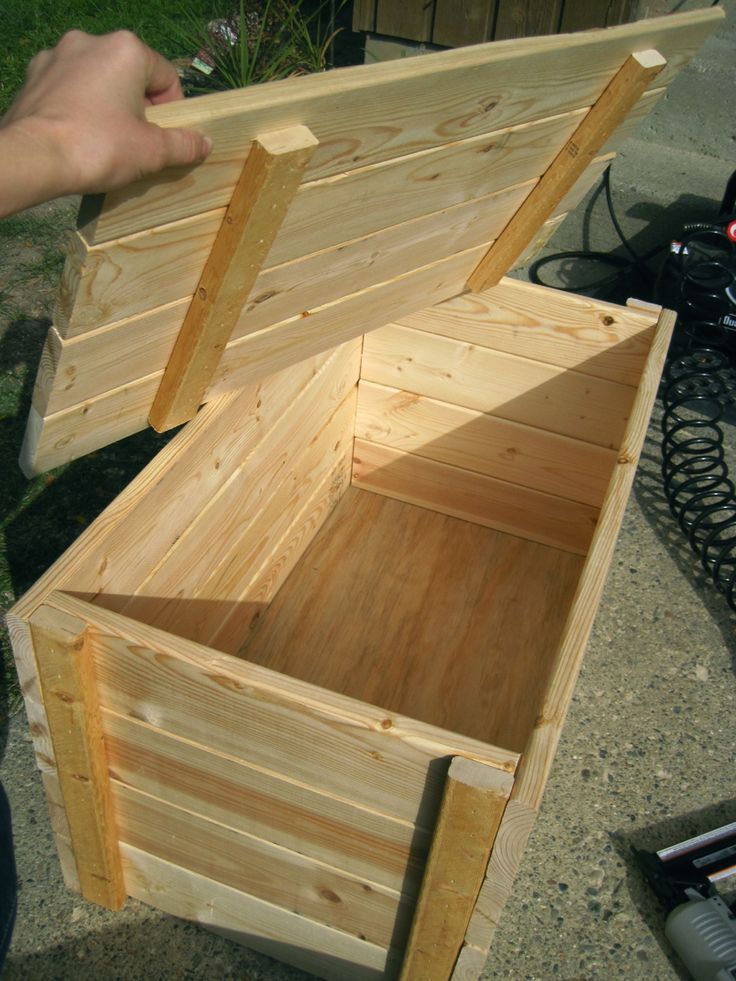
This might be an easier design for you to begin with.

01c78aa0fe7456d49c3326ec77a996ce.jpg


Measure lengthways diagonally, from corner to corner to check if it is square.
When the two diagonals measure the same, it is square.

When you buy the wood, buy planed all round wood, preferably from a timber yard, not B&Q or Wickes etc

If you take a list, maybe they would cut it down into all the correct sized pieces, that way you will have nice square ends.
If you screw it together, always pre drill a hole in the top piece of the two pieces you are screwing together.

Here's another example with rope handles, you could make a smaller version.

http://www.theprojectlady.com/2012/09/wood-storage-chest-make-your-own.html
 
If you are hoping to do a lot of woodwork I'd start with a proper bench; B&D workmates are almost useless for woodwork.
The Paul Seller's simple bench is the place to start.

Agree about plain butted, glued and nailed for a first project. Useful trick with nails is to nail them through just a mm before you attempt to join the sides, then the points locate on the next piece without slipping - which is a problem with glue and plain joints. It also helps to pre-drill for pins and nails, especially with thin easily split box sides as the nails can go off line very easily
But forget mitres - they are more difficult and less strong than all the alternatives - a decorative joint only.
 
Ok, thanks everyone. Here's the plan I think. I will make the first box using butt joints, glue and nails. That will give me some good practice at cutting and some basic skills. I can try out rebated joints and mitres for some of the subsequent boxes.

AJB, I'd love to visit a workshop or even take some lessons but I've a wee baby at the minute so can't leave her for too long. Maybe an option for later in the year.
MrTeroo, that link is awesome! I might make a toybox next and that would be perfect.

From everything said, I now have a couple of questions before I get started:
1. I had planned to buy the wood from Homebase as it's within walking distance. That would be ok for this project and I could find a timber yard for later projects once I know what I'm doing?
2. Should I make a bench hook first?

Sent from my SM-G920F using Tapatalk
 
I was going to post a picture but I think Mr Teroo's is about right. I had not spotted that you don't have a drill. This would make gluing and screwing difficult, so perhaps glue and nail as others have suggested. One of your biggest problems as a beginner will be sawing square ends on your boards and planing them square free hand will be difficult, so I would suggest you make a shooting board (as well as a bench hook) and use it to shoot the ends. Only problem is you may need a drill to make the board.

http://www.christribefurniturecourses.com/index.php/make-shooting-board/

I agree with Jacob that working on a B&Q workmate is fraught with problems. But making a bench is quite an undertaking. A possible stopgap would be a couple of robust saw horses with a good thick board fixed between them. They would also have the advantage of being dismantleable when not in use.

Chris
 
another problem with mitres is clamping them!

the ideal joint is dovetails on the corners, but it's not exactly an easy first project, I'd say it's intermediate level at least, so learn the basics first.

learn how to mark the wood using gauges, squares, pencils and marking knives, and learn about the importance of accuracy,

learn how to do face and edge marking and always do it on every piece you work with, but try getting PAR timber to start with from a proper wood supplier, they will be happy to help you and it's often the best price,

learn how to set up and maintain a hand plane, buy the neccesary sharpening stones and strop you need and keep them ultra sharp, and learn how to flatten the sole.

ideally have a proper workspace with a workbench, even a makeshift workbench is going to be better than nothing, as long as it doesn't move and is the right height with a woodworking carpenters vice.

learn the joints on their own before applying them to a project, practice making joints, and practice sawing as an exercise.

If you do all these things, everything will only get easier and better with time,

practice makes perfect.
 
Buying wood for your first projects.
The timber on sale at the large DIY shops is generally not the best quality*, but you can find some if you are, a) willing to sort through the stuff in the shop or b) not worried about your project being straight.

*It is generally sold in small packs or bundles, with the top and bottom planks/ lengths being straight (ish) but the ones inside spring to all sorts of banana shapes when released from the strapping.
Lots of knots and splits is also on the avoid list.

In a timber yard the lengths are all loose so you can choose which bits you want.

Theres a lot of info about basic timber choices here... http://www.idostuff.co.uk/sections/DIY/ ... n%206.html

One other thing to remember if you see a plan or project on the internet like the one Mr Teroo has linked to, American and UK wood working terms are two different languages so some translation will be required :)
 
Alice,

I would say getting some kind of workbench should be your first target.

What is your situation? ie do you live in a house with a garage/shed you can use as a workspace?

A basic bench like this would be easy to make and would get you started

wswbn40apr_basic_workbench.jpg


Here's one I made for my wife in what she calls her She Shed. Very simple and easy to make.

Measure, saw, drill, screw. That will get you going and then you can make a more complex one later.

sheshed-bench.jpg
 

Attachments

  • sheshed-bench.jpg
    sheshed-bench.jpg
    78.7 KB
Ah, I have a workbench. It's a black and decker one. I see from comments above it doesn't appear to be too popular but I got it for Christmas so that's what I'm working with.
We have a small garage at the end of the garden that we don't use so I was going to start work in there - if I can find space in between the dive kit and gardening tools!

Sent from my SM-G920F using Tapatalk
 
As all above but my pennyworth would be to have a practise with a few bits of 150mm scraps first and see what the problems are going to be then you can put them right before you tackle the proper job
.

Andy
 
Welcome. Don't be put off by the Black & Decker dismissives - work with what you have and you'll discover it's limitations yourself, at your own pace. I don't know where you are in London, but I'm in W12; if you're within striking distance you're welcome to a workshop visit - not very baby-friendly though ;)

Cheers, Pete
 
Thanks. What I'll do is go to Homebase (it's walking distance) and pick up some wood for practicing with, just getting my bench set up, have a go with my saws etc. I'll use my workmate and get used to it. I've had some tips on how to improve it so I can do that if needs be.
And then! After that, I'll find a local timber yard and get what I need for my boxes.

And thank you for the workshop visit offer, I may take you up on the offer later in the year once I can leave the baby for more than a couple of hours!

Sent from my SM-G920F using Tapatalk
 

Latest posts

Back
Top