Hayward Workbench Build - Finished!

UKworkshop.co.uk

Help Support UKworkshop.co.uk:

This site may earn a commission from merchant affiliate links, including eBay, Amazon, and others.
I'm about half way... A video update on progress...

https://www.youtube.com/watch?v=ZojSjRF7Vqk


workbench.jpg
 

Attachments

  • workbench.jpg
    workbench.jpg
    185.9 KB
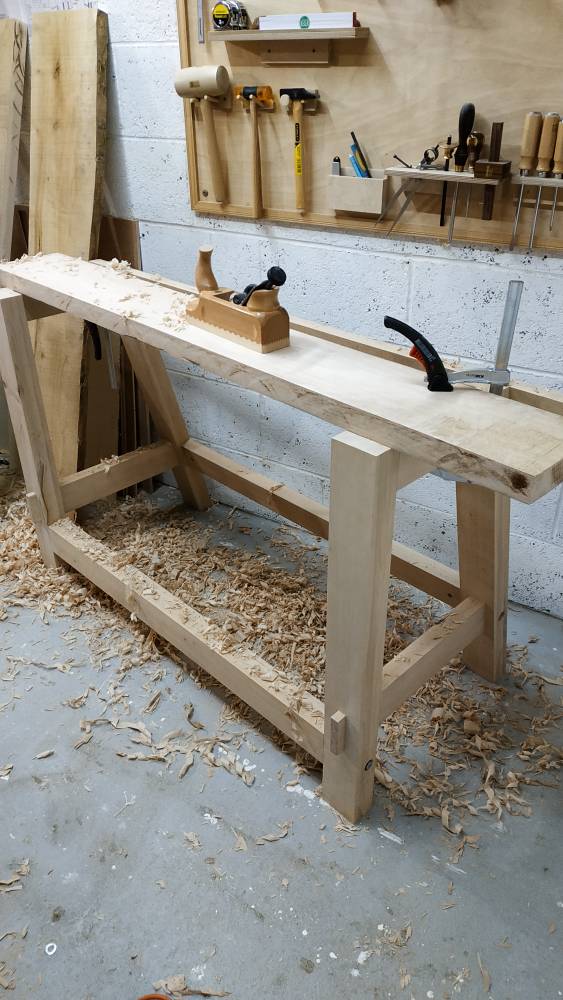
The good thing about doing the base first is that you have most of a bench to work with to finish the top.

Some late night flattering on the front apron, before it hits the thicknesser...
4c31f522826a0c9103d2fe9389597713.jpg


Sent from my Redmi Note 5 using Tapatalk
 
Nice work there Bodgers.

Not sure you name is fitting really but Very Gooders doesn't have the same ring to it :D
 
I came across the first real problem in the project today. Very annoying, but inevitable really.

Basically, I bought a load of this slabbed beech ages ago, and I am fairly impressed with it for the money. I spent £80 for 5 boards each over 2m long and widths of between 400-550mm. Average unplaned thickness was only 38mm though, so without going for a fully laminated top I knew I would have to buy a few lengths of thicker stuff.

So I bought some sawn euro Beech from Duffield Timber. I thought it looked fine at the time. But I have basically decided to junk one of the lengths of the 3. It wasn't cheap as it was 56mm thick stuff. One of them was basically a banana. It took me a full hour of very sweaty planning to get one side vaguely flat. After flipping it and thickness planing it, my flatting wasn't quite enough and it still had some bow in it. After sorting that out and then thicknessing it, I was down to about 42mm thick! Which is way under the 50mm I am shooting for. So annoying. One of the other pieces looks bad as well.

So I have either got to switch to the effort of a fully laminated top or go back to Duffield timber during the week. I still have a slab and a half left of the other stuff, so maybe enough to do a laminated top.

So this weekend I switched to the restoration job on the smaller Record vice I recently got from that auction site. Yes, that auction site.


Sent from my Redmi Note 5 using Tapatalk
 
56mm down to 42mm in Beech and with a hand plane is very hard graft indeed! I hope you have better luck with your remaining boards.

Laminating is of course an option, but it'll really test your hand plane skills to get reasonably tight glue lines, and as there'll be quite a few pieces you'd need to be consistent. Maybe you can take the unplanned dodgy board back and swap it for something better? I don't know if this yard lets you self select, but if you explain what you're doing there's every chance you'll get a sympathetic hearing, most timbers yards will go the extra mile to help the hand tool worker.

Good luck!
 
custard":vi8z2659 said:
56mm down to 42mm in Beech and with a hand plane is very hard graft indeed! I hope you have better luck with your remaining boards.

Laminating is of course an option, but it'll really test your hand plane skills to get reasonably tight glue lines, and as there'll be quite a few pieces you'd need to be consistent. Maybe you can take the unplanned dodgy board back and swap it for something better? I don't know if this yard lets you self select, but if you explain what you're doing there's every chance you'll get a sympathetic hearing, most timbers yards will go the extra mile to help the hand tool worker.

Good luck!
Yep, good for the fitness levels though
In fairness, probably about 3mm of that was on the other side on the thicknesser.

I will decide on the laminations today depending on the prices at Duffield I think. I would attempt to take it back, but they are primarily trade and have only relatively recently started doing more retail. I kind of get the impression it would be a hassle. Maybe worth a shot though.
 
So I went to Duffield yesterday. I mentioned about the banana boards and they said "that's Beech for you".

They've moved the larger Beech stock away from the retail area now, but despite it being lunch time a guy helpfully got a forklift and brought a stack for me to pick through.

I got a single 65mm thick, 190mm wide beast (which gave me a nasty abrasion to my arm getting it out of the car) so what I am going to do is shoot for a 60mm top with this being the back lamination and I will slice the rest of the 50mm ish stock up sideways into 60mm laminations to get to my required top dimensions. Lots of work ahead...

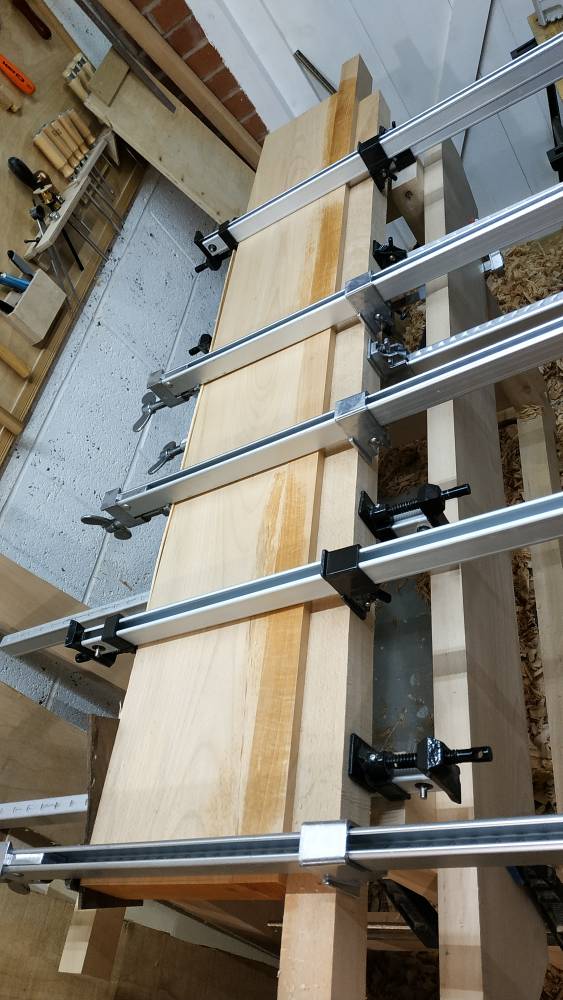
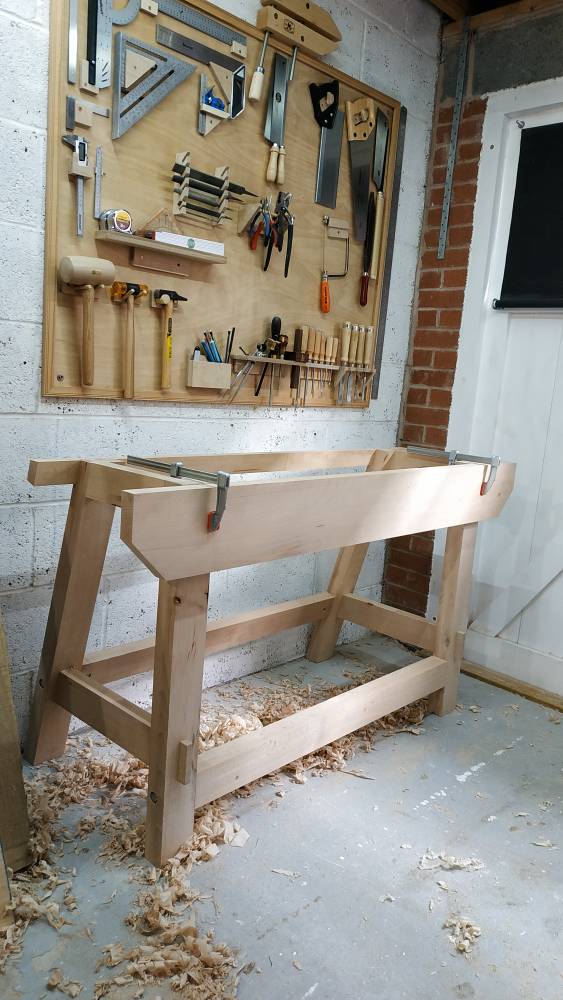
In the meantime, here is a shot of the newly milled apron clamped in place...


c39a28193d814b4810f557382f66564a.jpg
 
Nothing too much to report, other than I got the 62mm thick piece surfaced on 4 sides. Next step is splitting the other bits up for the laminations. A real pain to do the edges to be honest. I have decided I am not entirely happy with my ECE jointer plane.

I seem to be getting a lot of clogging with shavings in the mouth. At one point I had chip breaker issues with stuff getting trapped between the breaker and the blade. That's mostly resolved after I flattened the leading edge of the breaker where it contacts the blade and retighted the bolts to the blade. Still not 100% happy though.

Blade is sharp enough to slice through paper but often it just seems to bite and dig in random spots and then just glide over stuff. No problems with my ECE jack plane, sharpen it and it just works like a dream. I might sell it and get a no.7 or something.
 
Bodgers":9cn54d27 said:
I have decided I am not entirely happy with my ECE jointer plane.

I seem to be getting a lot of clogging with shavings in the mouth. At one point I had chip breaker issues with stuff getting trapped between the breaker and the blade. That's mostly resolved after I flattened the leading edge of the breaker where it contacts the blade and retighted the bolts to the blade. Still not 100% happy though.

Blade is sharp enough to slice through paper but often it just seems to bite and dig in random spots and then just glide over stuff. No problems with my ECE jack plane, sharpen it and it just works like a dream. I might sell it and get a no.7 or something.

There isn't a woodworker alive who hasn't stood where you are now, frustrated with progress and hoping a change of tool will provide the solution.

Maybe it will, maybe it won't.

I find once you get up number 6 or 7 metal bodied planes then if the sole needs flattening it can take an awful lot of time and effort, disproportionately more than with say a 5 1/2. I don't know why that is, but that's always been my experience. So I wouldn't buy a used Stanley or Record 07 and expect it to be working sweetly ten minutes after it arrived in the post.

I don't have an ECE jointer, but I've used them in the past. Personally I didn't like the lateral adjustment mechanism, and for the method of edge jointing I prefer I find wooden jointers are a bit too thick in the body. That doesn't make me right and the ECE jointer wrong, it's just personal preference. And I know a couple of craftsmen who use them regularly and their work is faultless, so there's no doubt they can deliver the goods.

Personally I'd stick with what you've got a bit longer. Maybe try a less aggressive cut. When you first plane a rough sawn board (or even a timber yard planed board), it's normal that the early strokes aren't as productive as you'd like, If the iron is set too aggressively you can be taking a nice fine shaving in the hollows but then come to a juddering halt when the iron hits a high spot. You should set the depth of cut so it's appropriate for the high spots, after that you just have to be patient and keep planing away until the high spots are gone and you're taking a uniform cut everywhere. Even if that means a lot of initial strokes where you're only kissing the board in a few isolated places.
 
Thanks Custard. I think I made the mistake of buying the top end ECE jointer with the fancy height adjuster thinking it would be be better when I would probably have been better off with the standard wedge version. It is very fiddly, I much prefer the lever cap wedge in the ECE jack I have, despite it not having a chip breaker.

Anyway, before I start edge jointing the laminations I think I am going to take a step back and experiment a bit with it, try some different things and techniques on waste bits, see if I can improve things.

Another thing to note about wood planes - I am not entirely convinced about how they are holding up. Despite the sole on this jointer being some sort of Lignum Vitae, it already has a chip out the mouth area and a chip out of the front corner and it is only a few months old. The body of the jack plane is looking fairly scratched uup as well. They are there to be used I suppose, but metal planes would hold up better I think. Maybe I'm just not careful enough :)

Sent from my Redmi Note 5 using Tapatalk
 
A brief update.

So, I gave up on the fantasy of having the top made of two or three wide slabs, so it is now going to be one wide-ish slab, and lots of 42mm laminations.

After lots of band sawing to split the boards up, and then hand planing the faces, and then thicknessing the reverse side, I have all the faces done. I now need to get the top and bottoms squared off and surfaced (and trimmed to the same heights), and the glue up can begin.

There are a couple of the pieces that have bowed a little, but as the faces are completely smooth, I've found with some light clamp pressure they can be encouraged to meet flush without any problems, so I assume this is ok. I am going to do it the slow way by gluing up a couple of laminations at a time to keep it manageable.

I am going to leave one of the pieces very short, as I have a new plan to fit a tail vice. More on that later.
2983deceee9f2cb75570a6b802a79ecf.jpg
 
So I finally got all the laminated strips planed up to the same height, so next step was to start the glue up.

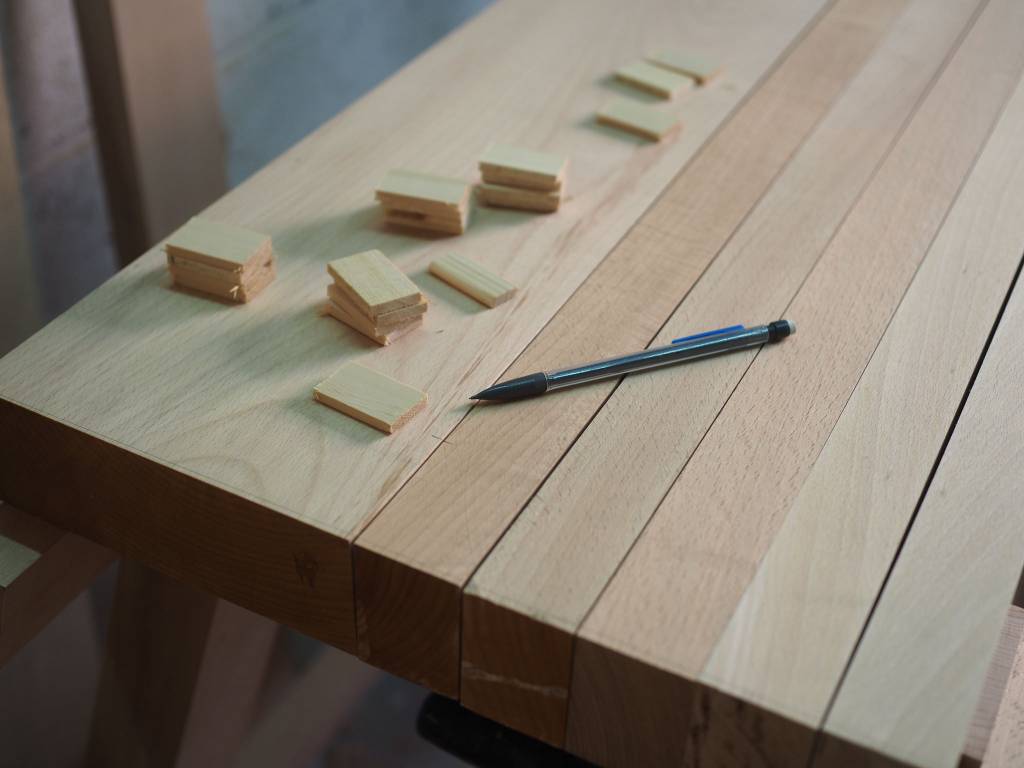
I know you don't need biscuits/dominoes/dowels to align this sort of laminated top, but I am just interested in making the glue up going as well as possible. I also noticed some of the pieces have a very slight bow that can be encouraged into alignment by using this method.

So I cut some of my own dominoes and marked up 5 locations across each length.

4a58be32fcb6a6d80772b858820dcf52.jpg


I am doing the first 2 sections, one strip at a time, just to see how it goes. If that turns out ok, I'll do the rest in one shot.

95db81d3dca0b3c79b13978b944d092f.jpg


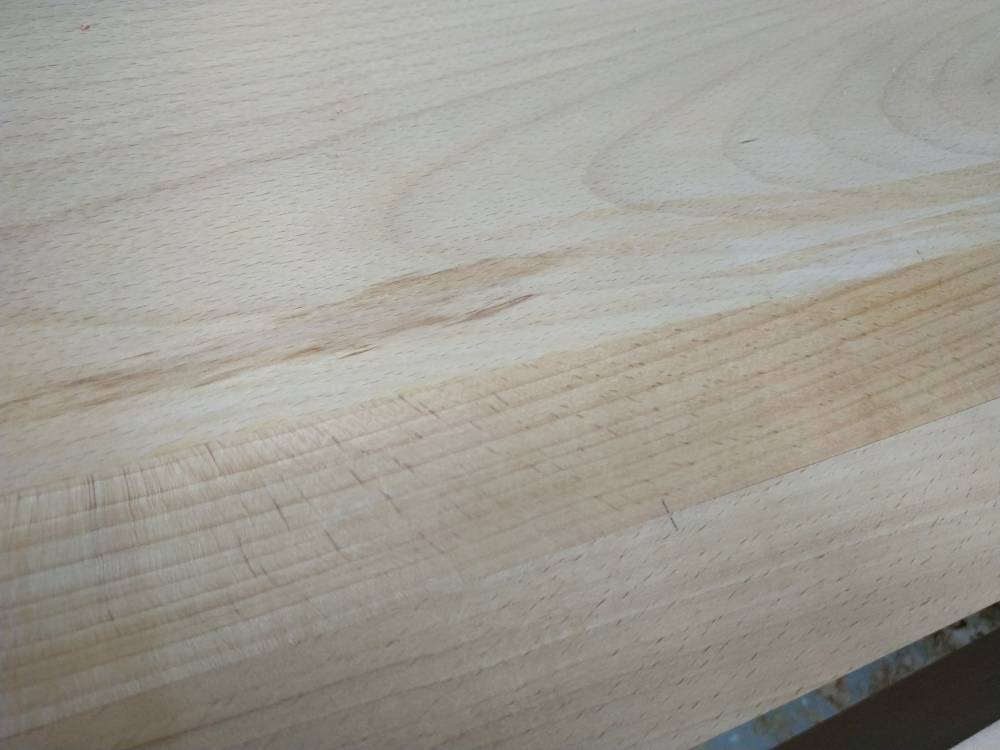
I am not entirely happy with the colour/grain matching across these strips. Yes, I know it is just a bench, but I see this project as practice for better things. The only thing I suppose I should worry about is grain direction matching for when I come to flatten it.

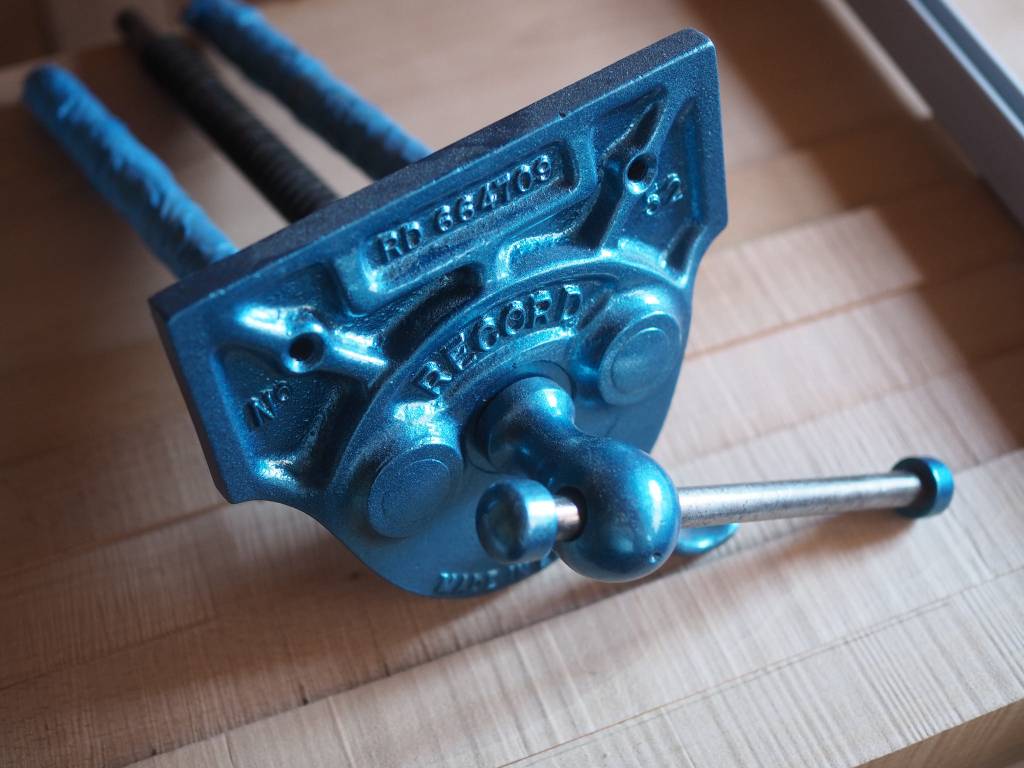
A side project started up a week or so back - an old Record vice restoration. I went for the smaller vice in the end. As this has been suggested it has a whiff of 'fashion' bench about it, I decided to add extra bling with a metallic paint job:
bc1d5e561adc470eb0eb07e1fd2d8f3d.jpg
 
Watching this thread with interest.

I have just bought a heap of Beech with the intention of building a bench...

Not only that but I was given an old Record Vice today which I intend to tart up to go on said bench... I won't copy you entirely though, I'll paint my vice red.

Seriously tidy work though. I hope mine turns out half as good as yours is looking.
 
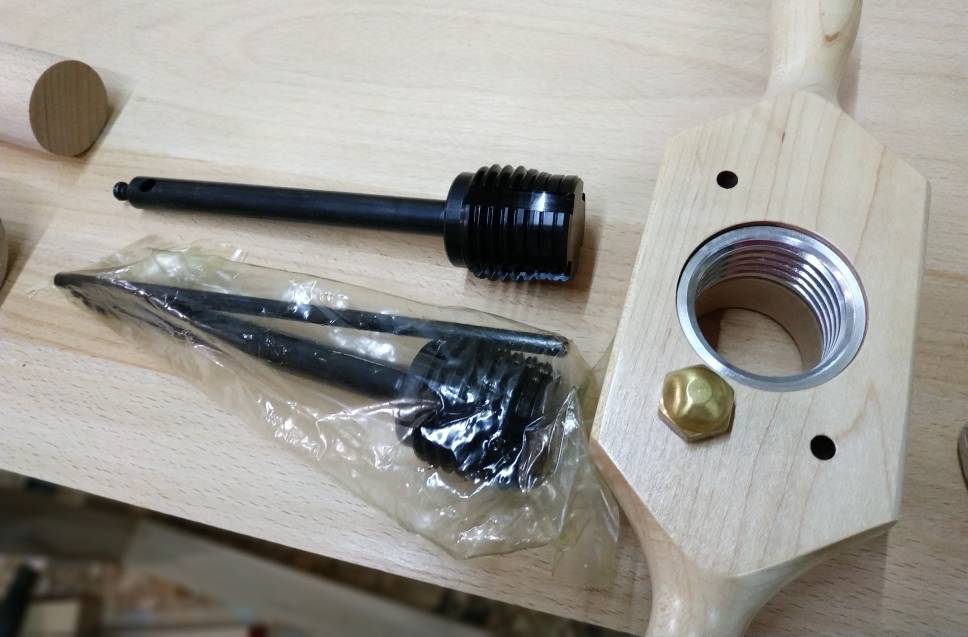
I promised myself I wouldn't overcomplicate this, but a few weeks back I bought this:

c61efae11987ab5050161fbfd9f4e057.jpg


This is one of those wood threading kits (from Axminster). Yes, they aren't the greatest quality, but there was no way I could pay £200+ for the hight quality one from Dieter Schmid for the 38mm version.

The cutter set came with two taps. No idea what the difference is. One seems to have a shallower thread at the start.

The reason for this is that I am going to build a wood screw tail vice into the top. I am basing this off what Chris Albee (Mosquito) did with his on Lumberjocks.

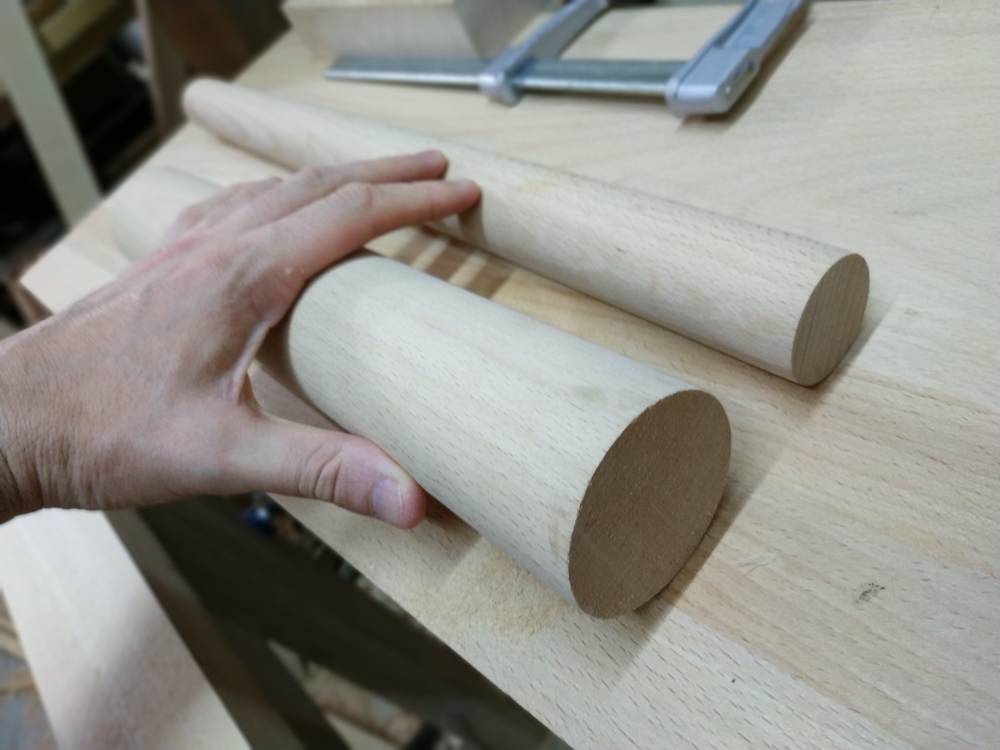
I don't have a lathe, or any lathe skills, so I bought a large (from GS Haydon) 60mm wide dowel for the screw 'hub' and a 38mm dowel for the thread. I will mortise these together somehow. I still could do with a lathe as I need cut a slot/groove in the thread so that it can be captive in the bench top with a collar. I will try and cobble together something with a drill and do it with a bench chisel or saw. Could get interesting.

62b35aa743d8aa338114e3f18b743954.jpg


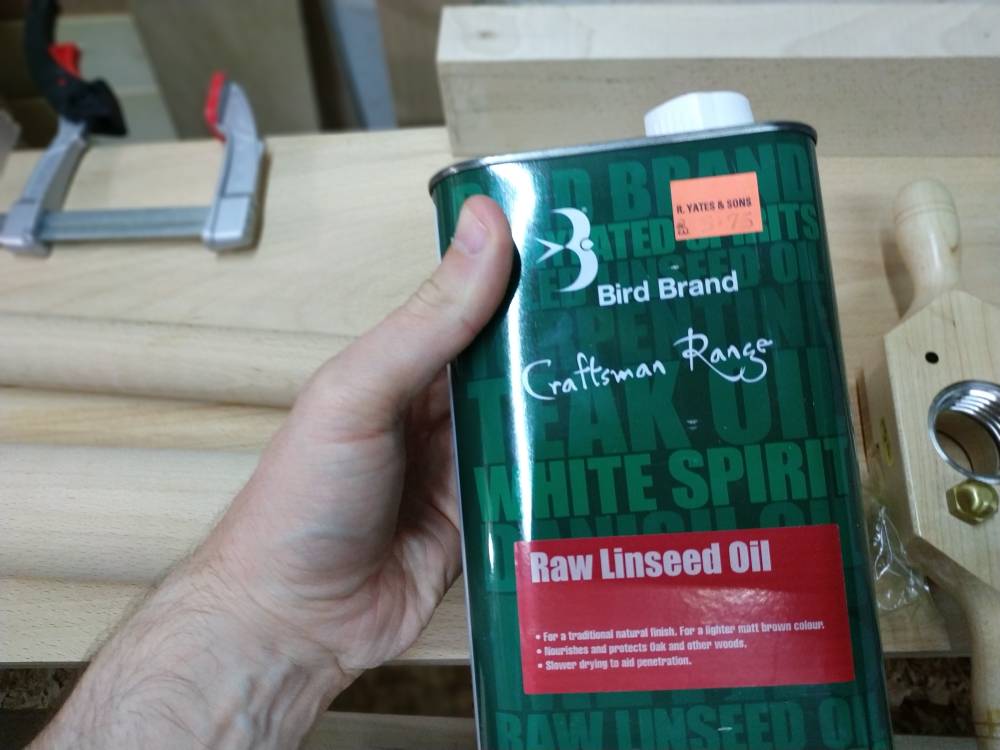
As the thread cutter is cheap, I have done the recommended thing and bought linseed oil. The dowel will sit in this for a few hours before cutting. Hopefully, the cutter steel won't disintegrate at the first attempt.

357cc9431cbcdb5050a7408382097d40.jpg


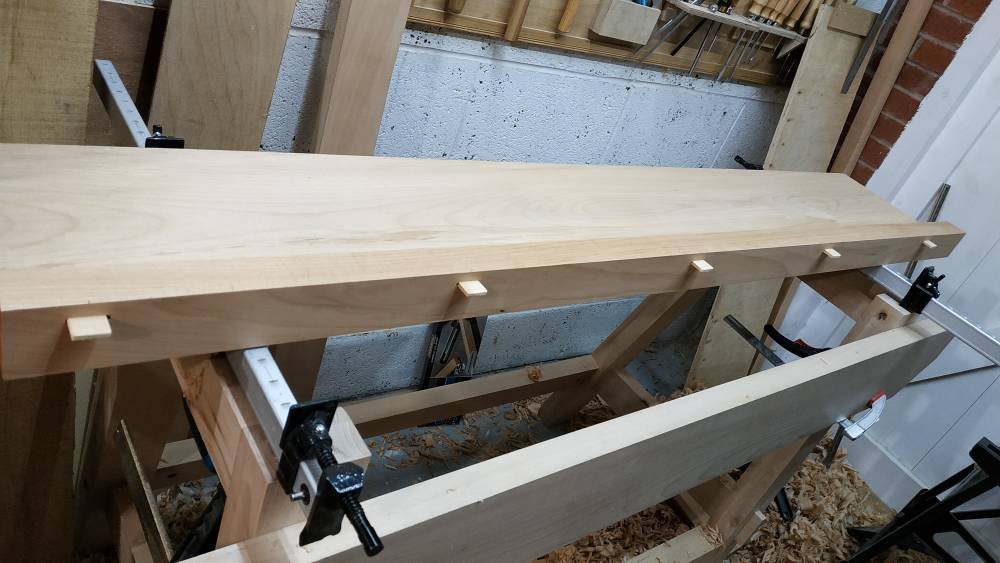
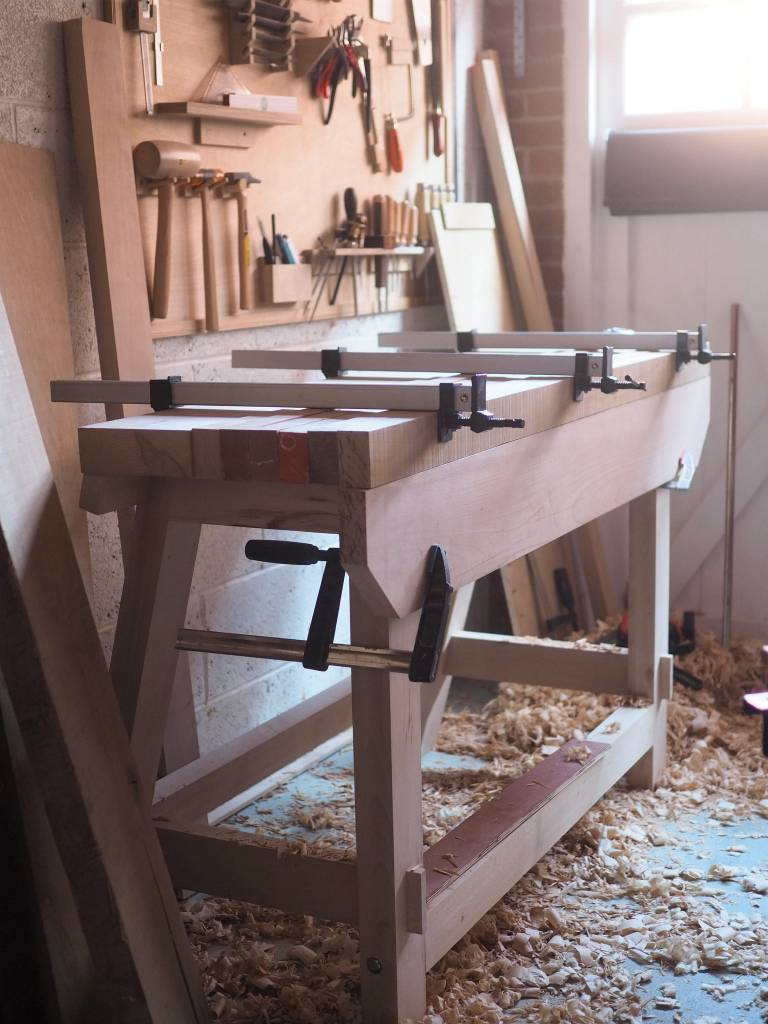
So I have now glued up enough of the laminations to get to the point of the proposed tail vice at the front. It is a seriously heavy bit of timber now. This shows the dominoes I used with each lamination.

3e45d4a0557b41f11d7febe671cda466.jpg


I am reasonably happy with the glue lines. It seemed to work ok, bring the slight bow into alignment on some of the strips.

1d93fb69d35e18573e11fed95e4a69c5.jpg


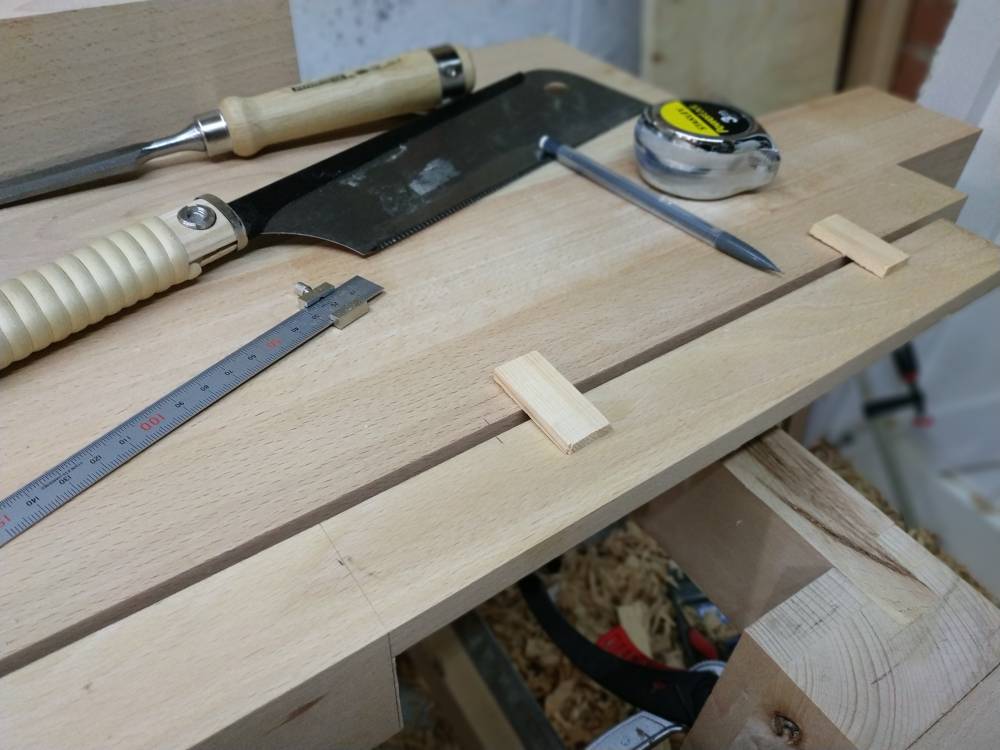
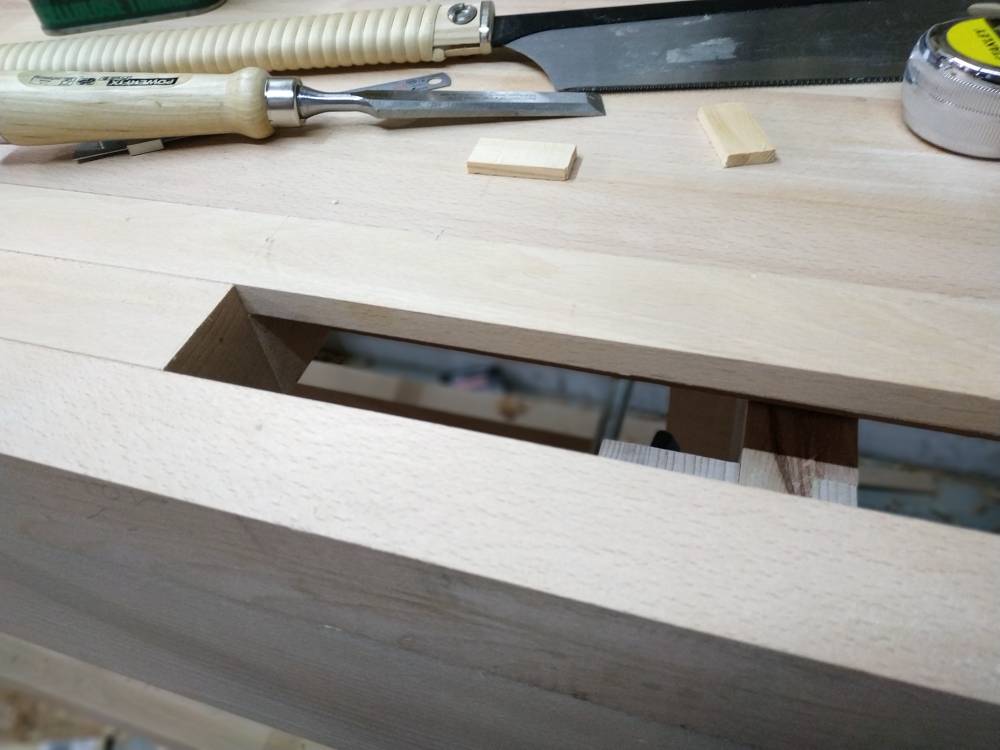
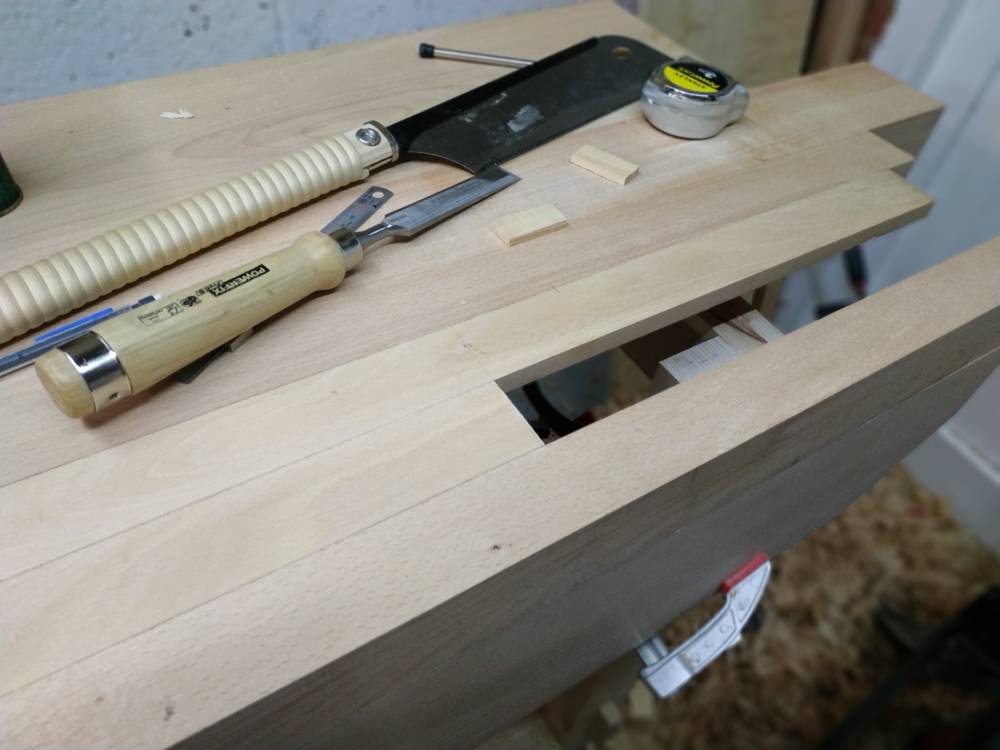
So, to make room for the large tail vice screw thread, rather than cutting it once the top was done, I am modifying the two lamination strips that are involved with the vice. One strip will have the thread running underneath it, and the one next to I cut short that will contain the actual sliding dog. This means the block of wood sliding up and down the thread will be sort of offset, but it will leave the main sliding dog slot completely open if I needed to slot a long work piece all the way through the workbench top and clamp it.

I cut a section out of one strip to allow space for the thread. This leaves a relatively thin top at that point, but I will reenforce it with dominoes.

d6cec8b20152cf07bb8c485d8ca5167b.jpg


The workbench top end cap will then capture the threaded rod.

f61d51284719be347821138ecdc48651.jpg


This is shows a dry fit of the two cut pieces with the final laminated row at the front. No glue yet.

906bcd30afede915497e703ceb980209.jpg


98940d0340fccc56b335c2168816214a.jpg
 
Interesting and ingenious!
The tap with the smaller diameter tip will be easier to use first, as the tip will fit into the hole and keep things square.
The other one will let you tap to the bottom of a blind hole if you need to.
On a large diameter like that I think it might be slightly wider as well, so you don't have to strain and remove all the wood in one go.
You'll need to hone the cutter in the thread box / die. It's like a carver's v gouge. I like to think of it as honing three tools - two chisels connected by a small diameter gouge. Not just two chisels - it's easy to get a strange long point at the intersection if you just treat it as two chisels.
 
AndyT":1dcrowmr said:
Interesting and ingenious!
The tap with the smaller diameter tip will be easier to use first, as the tip will fit into the hole and keep things square.
The other one will let you tap to the bottom of a blind hole if you need to.
On a large diameter like that I think it might be slightly wider as well, so you don't have to strain and remove all the wood in one go.
You'll need to hone the cutter in the thread box / die. It's like a carver's v gouge. I like to think of it as honing three tools - two chisels connected by a small diameter gouge. Not just two chisels - it's easy to get a strange long point at the intersection if you just treat it as two chisels.

Ahh, that make sense with the taps.

Didn't realise that the die cutter would need honing. I have diamond stones up to 1200 grit, so I will see what I can do.
 
Progress creeps along.

I have now:

Done the joinery for the end caps and top part of the front apron. I hand cut these.

I have put rebates into the front apron to seat it into the legs. These will be bolted on with threaded inserts.

SZGt1AYjfE0eF-ElcRM1eL4Iaj3G6exbQ9duPWwrUPqEw5iMgK2XJry7LOM2ns9rk35RscTcf9iqDLYRCuEt3bvK5Ii7xaG8PHjrlHC33bcbvslOFh5SCowVPicaedC2vC3seUj18DdIviafYRD7b-tGTotv0eimnq_nrVN--WP2VInceqdAolxKprreACIFCIcBKyuFVkI7iRZPdSCt0pLzG1wp5LnQmXNhxitjM1Ndb2rwnfiZlm3YPJJpMySvqxtdUIm6Zl33IEevCsDViY65GMebGjydQSd217YO-NTG8LcoZZpKAWEcA3Tfq0uR9KlsH993M6vZTQYNTK2PlQ0nU4FTYBXBfZqlFDl9bDSYsUwG54QIgEghLadYtS-S58zqxHLW-jsU0pAXqAsFhNxNmMsOedufdv9jnw1PRZHNzi2yaDOh_t9Du_Cdd3Ktqw0d3Lf7tLGd_pMrjr9tiQN2DGKoazN-QgQi0NHfL3PHlpvP5rBVRWmKmzKvLM6WK1LzMJ3l8oyQFWuv2iEZZU1BcpWoj_Lri5oc7HQfi0Ybq-B7GpwrUR-ktjwt8ckqM4LaTtghIyfuv3FSmXzyXWj6c_oNagJzjogHx6jSzcEmFWyh08JIRzna2bTpOwk3=w1015-h938-no


Created an overly complicated moving dog for the tail vice.

Moving Dog

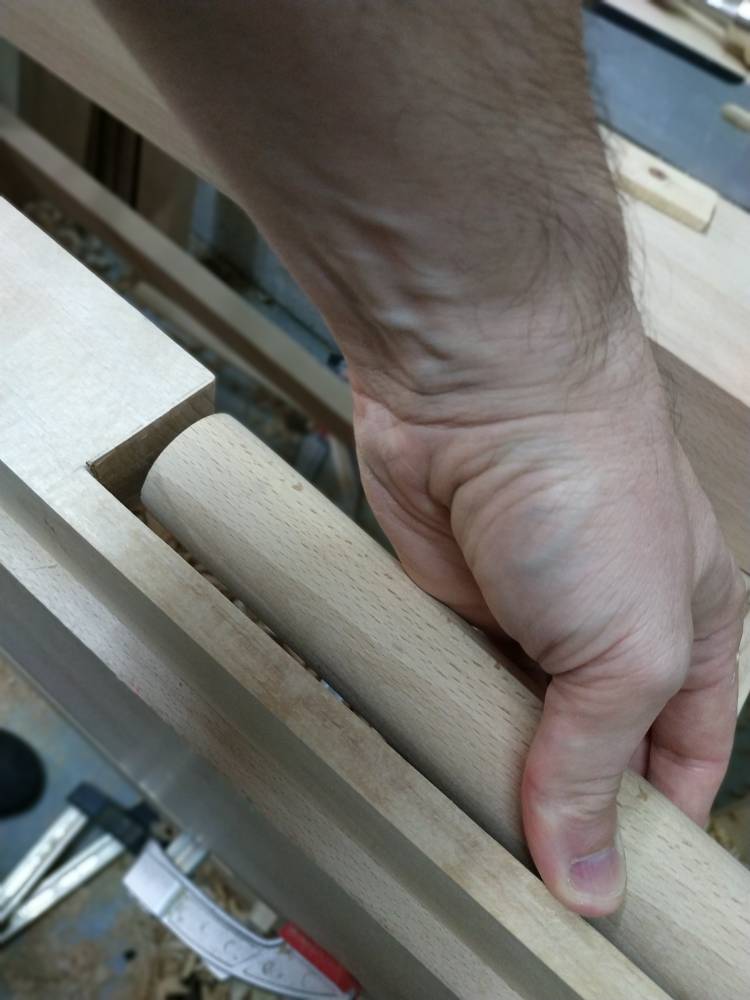
Cut the threads on the tail vice dowel and the moving dog. I finally went with a square tenon rather than a round for attaching the vice hub to the threaded shaft, and I'll be gluing it up with slow set epoxy to fill any gaps there might be inside the joint.

TqTupk4-ewktq77Rqybwf6I57VtaAF_rHQlzOUBy8xe8HHJlfZSlOBvqFpws6RTFMFcBIeEOQNZZF3-SmmvslLUqXvH8cCbP_gqLjbipTQsNVVzN162S6V8NF_oJkZFzdBiZ3RdOpzeYHC05pFJnYLdceSKURBMv4WHvOyRumCpKdPFgM9x0h09POMj7Va85KXzXG5tMTGOUve3k3eKrmLqqYYtZPBiz4f_TK8D9JCyNOBUBp0tYxm7axGjM9P1sxFHp808HhpAJkwVzqglXU9UBCL2ITpOzZFgwSoWfc-4xOYyrqPqJNR8-L6rgaYZ3x0O_DIHBB9j1nU1qBOL35XS9NX3GPDZJ1KwKsNz4WurFTu-WUV0uFm43ZgnUdC4M7lpZOX4oIUCu-qPH6gKqjn48co5MElvxF6KL3lledY_6pfrMeLsILavEWCfCwD4MjYs01sxuB-XPnHiOSuBNc6qhC6s71O8enWC2PiQfQPRRQMwdSPD5d66sKU5OvdLIhiWQCZn5plAPldLXg2poRdiqKXPQ6cT_RUktrrjXNjM6Xweda0xrMK3mSQbyqiKVS9b1V7HS6O6CLlX4hVmrrQBq0sy-7RJHwNW15MmUhyTqzWzOfJYF2-qocD6WwFb5=w704-h938-no


V0eS2LL4HhUqSR0NdFsVEDQhOV-wz59vNFptvnFYrXDkZoo8Rh8KtQYD_rj-Vl7DosnQ90G_I8lHSZa6RtcTmyXSe5I_w9sfic2PU2g0GyVA3AERQrCHZQkTAD2EfA6NJkULENwABdBNSLga78DIyBo4hyKQz6z9rC5IN9SVgexzwb3UI-pJVzZHHlO_H_oRR9hLRt_g-08mxvcYEuti2Yuyl30t25OO6TM0U2DgVdYXJKDM2XH-UK21TSFxK1uU-mLjLL2FuCxp_xoIFuXMfgvWUG9nhR9hyPn00pvHH404TC4F3oh6GhWWLhXclXPy2ilgLtYg3jvuA42f_g87toqHCwmqMcPXdpYyxf8JR30M8BjyN7BWlvHohsvF-xJnMogdmvDiOn9L7FGowTXppHJxH4yi75wUVNtGCDTs1sSkS3mEI1R3lLQ4-l6TMpz9HIflSTN5W3UqrJgmxxmDGIyfEaKs9yoUC3PcDqt8HfKbrKrgmFQvFeB5CThTIvBOv1bc4n2SV_4QUwsEtKhCPyKyv9xkJ_DjiHnH4eh3Tr3TVU3r3tJe5gEdAKn7EDcp7I1O53PArp3hGUfSBF0Vk9on4mIzrr5WclhunH3KmXyc20S2QyLjYVpJVzHFRW5-=w1251-h938-no


I am sending the Axminster tap and die back though. The blade on the die is awful. I got 80% of the way down the dowel and there was a crunch. I poured extra linseed oil on it (after having previously soaked it overnight in the oil - hence the very orange look to it) and ploughed on. The final 20% was very slow. After it was done I removed the die and it there was a chunk missing from the blade. The steel seems like it has the quality of a rich tea biscuit. I would have expected it to just get slowly more blunt. Anyway it is done.

I have come to a point now where things are getting interdependent. The joinery on the end caps is dependant on the sizing of the front apron and top and also dependant on the critical positioning of the tail vice screw. It is a bit stressful to be honest. I have a feeling a mess up now will result in some time costly re-do's.
:(

nHyRJ1ud6gAcNqmfjWZ9VDar4-cKVR1-PgWo1OmO16V4IA89V3yKq8doHyFPCasFJomBAoo6hseaoBbl15IpiD05fBtcbASu24_bQY0r7b5_h0OKY45d1rww26PIB4ziJbXZrYS9B1-XynjfQNUJKrKk6_RkVSd9RROFutjVposxthslC4XIih4n38ZSuJxjB41xu3V-7UUHyCvh7SKLa_suM3pe1T7DGxpffXaZbbFxQpaY7lPjzljIfy_gq0-GxJJ_SGoIpIJCvc64S3Ht_FayzOOAU7mkd-_ozM2EiubXoHkIlR-S8WL0Imqhjf359KLhGHyQq2uvoGJDlqoO_YrRboyBG67Csbp8SLMZbu_iB-dghfndNZmJVyPd5SKAdsj5TzdEoJdr8GX1AGYxZ2Fx5xivTQQRunu5g9n8I-kgoeMr6KOSVZO-hpOBAqRTFJ7Uqxzzvh-Wq0YITGOmi4ZRwAglm9jZOVMEt--G7ChOnyR7yodP9rNQW4b3CDlta7UvGwHYM9rX4VhLncmSlSFkpAozR4xrTKSJxHYMXRTBKJqO3QG3zKIaOfYOwWgUSexJfUbGE5PkVJTFSm_FMk9OWcAJZHDLvQaeX1Ehf5EBE-LPBcuNwxUAxa_3FrDw=w1251-h938-no


CTlHjDTebDnS2BiWK0cTzyyirCtzUiDcjkeWyX2xyy_wPGqjqich3C0czds5M3JK2e0OQJLY3_v_XCDPXvuyr0BI3I7rAsxmlpfBMnxCX3e8dLu3raDdSB9YlvloQsvjzJtFNHy41uHmiXf_q62qmuvO6mqAFPe9zTKQoKUm4E1mDeO4nnohiP-jIxFMHBe9kPtn-YVAJCBXpFtYIkHl7c77Zzx72oEQMCPHiag8Qf8zSxqg4LpQ2M-fm75BEhc-7LGHGeGWoHxDHu75OGLBciAW3RI_qz7q4fkyxOr92oP0FU5rjphYHrVippp3nzImLL4UgypKv7OTUZaK-q_68B_Ydd1NAn8gvu-KvDZGomy1rY2AQcvIyhanJfLTQK2egm-UeqAf_nnqn2mfsHB0FtNuIOdvpn341-vjdQcZfdjujM4jnhlWmgAjZpL9t_lDKkWSwT_oIL8pBStDLJ66MSlw8XbAKd1rdGKuFdFC5_Vgn5Og_BTlF_uthOM3ypNiBvmxBs4h6SbXmH6s8laiZIfVENrrFN_oPZCmlPo-bkB9kSAvexzb6Gj8XygMNYi1_IA2lL-ea7QVAzWME9RoRoBbiAtdsVC_0PWI0adgfAH1B4hO81_QEWB4kHmxwpFC=w528-h938-no
 
Back
Top