Has anyone made the PantoRouter ?

UKworkshop.co.uk

Help Support UKworkshop.co.uk:

This site may earn a commission from merchant affiliate links, including eBay, Amazon, and others.
studders":vc94f5m5 said:
mpooley":vc94f5m5 said:
I hope that not being able to drill a few holes isn't going to scupper my pantorouter :cry:


Mike
I'm sure it will all come out in the wash. :)

I think I have solved it !
My drill press can pivot so although I had checked many times that the bits are held vertical, I adjusted it off of vertical in the opposite direction to the one it was wandering off to!
that amazingly gives me as near as damn it a perfectly vertical hole ! Hurray!

I have dissassembled the main mechanism today (its very easy you just pull the rods out)
I found some racking problems caused by the holes not lining up which I have been tackling.
I am taking more time over it this time round so hope it will all work out ok.

studders let us know when you start on yours! and let me know if you want bad advice lol (homer)

Mike
 
mpooley":xj80wzr8 said:
I think I have solved it !
Good Man. :)
studders let us know when you start on yours!
Keeping my eyes peeled for a suitable S/H Router; too tight to buy new, but I may have to if nothing turns up by the time I've finished my Wardrobes, which is when I want to start this project.
and let me know if you want bad advice lol (homer)
Mike
Oh I will, I will. :)
 
If you're still looking for a 5mm spiral cutter, Trend do one that's intended for routing aluminium proflies (window frames etc).
I use these regularly on wood and they're the dogs kahonies.
Probably a bit late now though as it seems you have it sorted.

Adam.
 
Aces and Eights":5ri60xlw said:
If you're still looking for a 5mm spiral cutter, Trend do one that's intended for routing aluminium proflies (window frames etc).
I use these regularly on wood and they're the dogs kahonies.
Probably a bit late now though as it seems you have it sorted.

Adam.

Thanks thats always worth knowing for the future as there are a couple of this guys plans I like and will probably try out.

thanks

Mike
 
I have been mucking about with the templates for a few days now grabbing a little time here and there.
I have had quite a bit of trouble working it out and I'm sorry to say the guy who sold the plans although he answers all email promptly has not been any help at all.
As I pointed out to him his method for adjusting the height works (I have improved on it though)
But his video making large tenons is the only place he mentions the horizontal axis and he does this by eye!!

I dont think that is good enough for making furniture. Yes it looks very impressive making the joints and is fine as long as you are willing to have them at random places on your timber. But unless you can set them up exactly (to the nearest mm) then I dont think it is good enough ! the only way is to set the fence by trial and error on a test piece first.
Not to bad if you are doing lots but annoying if you ar doing only 1 or 2.

Anyway to my Point!
I think I have a good way of solving the problem but I think you need to do away with his method of holding the templates it is too clumsy. Unless of course you have 2 pairs of hands.
you need a way to slide the template up or down then lock the height in. Then a way to slide it right or left without altering the vertical ajustment you have just made.

I am thinking of a T track set into the main template holder for left and right but would appreciate any thought you might have?

Thanks

Mike
 
Mike,

Would somethink like this help:

A right angled piece of material with pair of slots cut into each face. That way, you could adjust up and down, and clamp with some locking handles. You could then move left or right, and lock with another pair of handles, without that first axis moving. SAomebody suggested a similar idea to make a simple router table fence when I enquired, albeit that it only needed to move in a single plane.

The other way might be to butcher some old machinery- some form of x and y table and a height adjuster off a router?

Mark
 
marcros":zdt4ldww said:
Mike,

Would somethink like this help:

A right angled piece of material with pair of slots cut into each face. That way, you could adjust up and down, and clamp with some locking handles. You could then move left or right, and lock with another pair of handles, without that first axis moving. SAomebody suggested a similar idea to make a simple router table fence when I enquired, albeit that it only needed to move in a single plane.

The other way might be to butcher some old machinery- some form of x and y table and a height adjuster off a router?

Mark
I'm having trouble picturing what you mean but one limitation of this is that all the templates are made up of 6mm mdf backing board with a wood template stuck to it and i will need quite a few for different setups. so the 'device' to set it up must be seperate from the template backing board. And not get in the way of the router when its in action.
with a right angle ,if i am getting you right it would stick out into the pantorouters path wouldn't it ?

I have just had a little brainwave though so will be getting out t workshop as soon as possible top give it a try.

thanks Mark

Mike
 
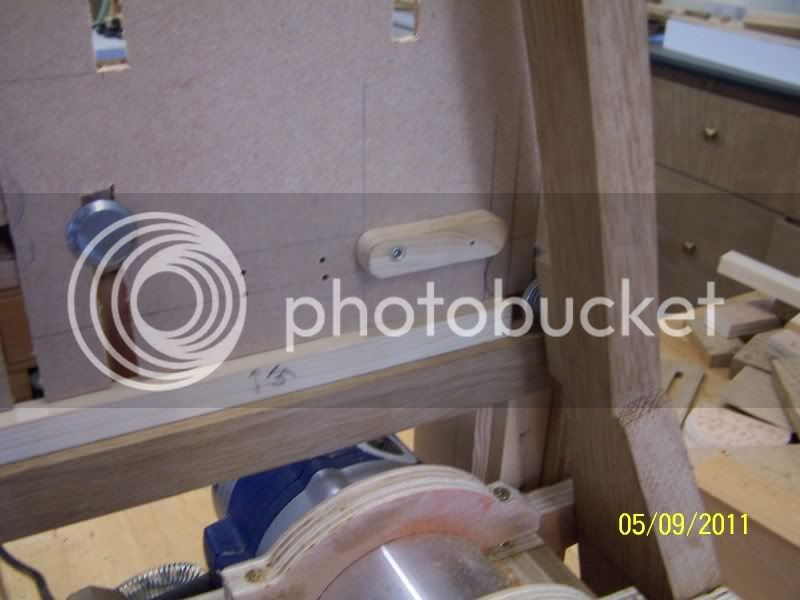
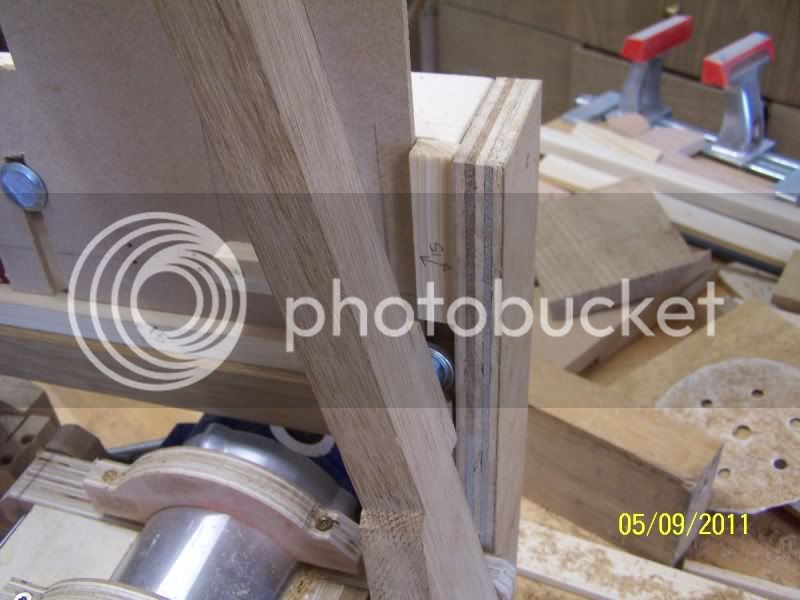
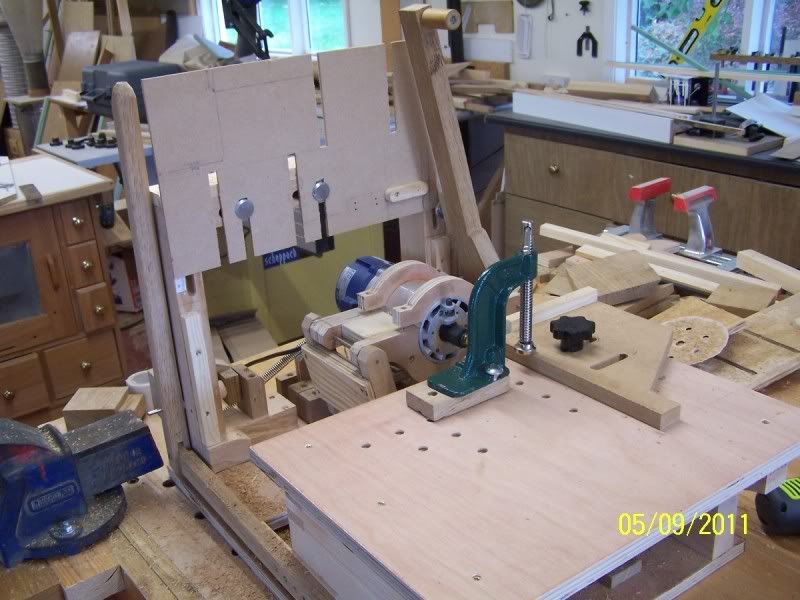
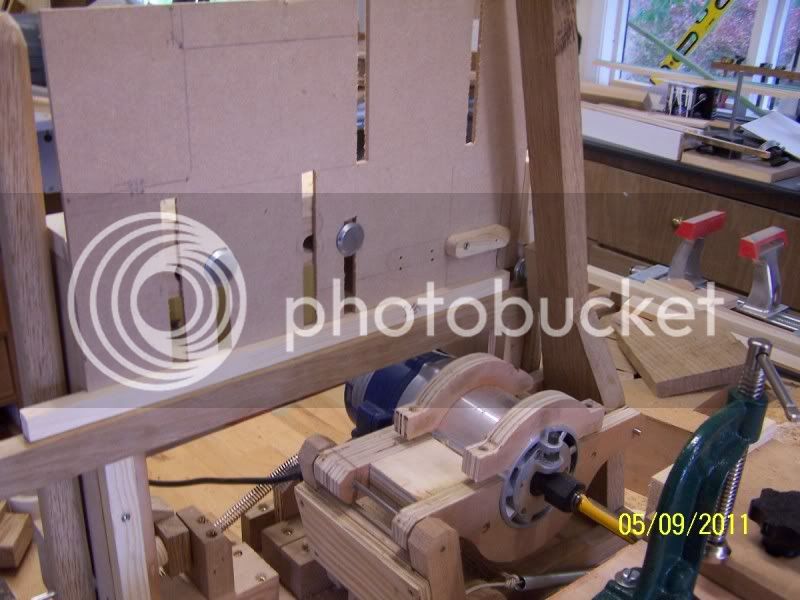
Ok I think I have it worked out now. The photo's show the test template design not the final one.

The idea is to have two templates fixed to each backing piece so thats why there are upside down slots. The 2 sets at the bottom was a change during the design.

I have made two extra pieces of timber up the front of the template holder frame. And another one on the edge of the right hand side which is to be a backstop for the bearing.
Using this backstop you can ascertain the position where the bit will first reach the height of the table. you mark this and set the fence to this mark. (you only have to do this once for each bit/bearing combination)


this is the end result with all spacers etc removed.
pantorouter006.jpg


Then for setting up I place the oak bar accross the other two uprights..
This sets the cutter to 'just' miss the bottom of the workpiece if you slide the bearing along the oak bar IYSWIM

then you work out for each tenon what size the tenon will be and taking your workpiece size into account you now know the offsets you need for vertical and and horizontal.

then say the vertical offset you want for the tenon is 7.5 mm as in the photo's you slide in a 15mm bar on top of the oak bar. then rest the mdf backing piece firmly on that.
Thats your height set.
then as in this case you want 7.5mm offset horizontally you slide a 15mm bar at the far right between the side piece and the mdf backing and snug it up tight.
now you have both axis set up take all the bars out and off you go!

Phew! it sounds more complicated than it is :shock:

the base bar and the spacer sitting on the two uprights.
pantorouter007.jpg


close up
pantorouter008.jpg


the horizontal spacer snugged up to the plywood end stop.
pantorouter009.jpg

Hope you all followed that #-o

Mike Pooley
 
Tinbasher":pc1tggim said:
Does anyone know of a supplier of this type of plywood? All I can get locally is full of voids.

Tin
I used far eastern Hardwood ply - you can get baltic birch ply but i think it will be a lot more expensive.
Having said that, if I was to start over I would at least find out the prices of Baltic Birch. as even the far eastern hardwood is not perfect. (mine wasnt very flat either!)

Mike
 
I like using Birch Ply for my jigs also as they last longer and stop vacumn leak on edge or face on my CNC Router. But you get varied grades of Birch that I have found out from varied suppliers.
 
i was thinking about making one of these during my spare time. how long did it take you to make it do you recon, and do you think my bosch palm router would be a suitable router? or will i also have to by the draper one.
lol
 
alexmorley1":3ucy4vob said:
i was thinking about making one of these during my spare time. how long did it take you to make it do you recon, and do you think my bosch palm router would be a suitable router? or will i also have to by the draper one.
lol

It took me a long time really. I am retired so I could spend quite a few hours out in the workshop every day, nearly , for a couple of weeks.
You might be a bit quicker than me but its certainly not a 1 day job.
I would happily help by giving you the benefit of my experience though, which might shave a couple of minutes off :D
Its very rewarding when you make your first double mortice and tenon though and it fits ! :shock:

Mike
 
alexmorley1":1bqdrh7n said:
do you think my bosch palm router would be a suitable router? or will i also have to by the draper one.
lol
That's probably the one I was thinking of using if the old(very) fixed Black+Decker that I found on the bay turns out to be no good.
Still can't start yet though, still got a Mountain of outside 'Jobbies' to get done first, and the recent weather hasn't helped as it means I've no excuse for not doing them. :(
 
Oh I forgot - the bosch palm router. yes i nearly went for that one myself but was worried that i'd need to use half inch bits.
I want one anyway :D
 
I have watched the Video on you tube of this veryinteresting and complex Jig producing triple tenons and wondered if I could produce the same joint on the super Jig I have been developing and here are the results
PICT0192 s.jpg
PICT0191 s.jpg
 

Attachments

  • PICT0191 s.jpg
    PICT0191 s.jpg
    105.3 KB
  • PICT0192 s.jpg
    PICT0192 s.jpg
    107.1 KB
mpooley":o5542dte said:
ah!
where can we see your device tom?

Mike
http://youtu.be/_JPsZIC3RO0

I have submitted a number of youtube videos some were presented on one of the six Mini Super Jigs I took to the woodshow along with 14 routers all set up for a number of demonstrations of the many processes that can achieved with the super Jig
newtorouting.com
Tom
 

Attachments

  • Tom O'Donnell's  Super Jig.jpg
    Tom O'Donnell's Super Jig.jpg
    206.9 KB

Latest posts

Back
Top