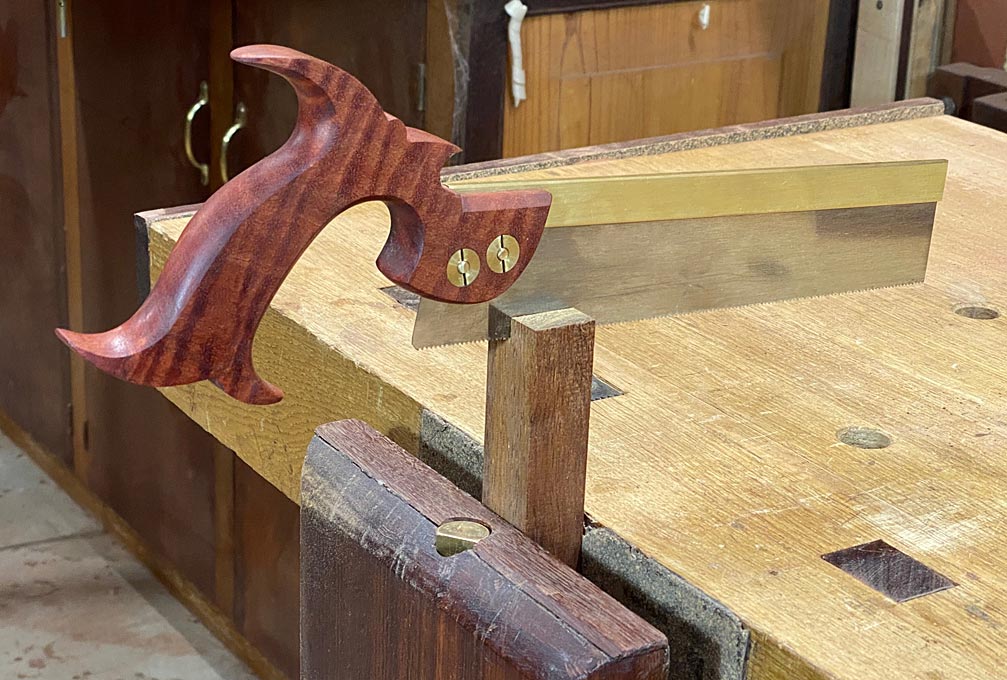
Hand Saw Restoration and Re-teething of a 99p saw Completed

UKworkshop.co.uk

Help Support UKworkshop.co.uk:

This site may earn a commission from merchant affiliate links, including eBay, Amazon, and others.
Thanks Deema

With the jig, Im not sure how you then line up the jig to use with the blade. Do you rest the wood on the lip of the vice and have the height of the blade in the vice upto the bottom of the file hole? No sure ive asked that correctly.

thanks

Colin
 
Without a doubt one of the very best threads I've ever read. Thanks Seems for taking the time to put it together. =D>
Glenn
 
Yes its a great post and as I have a lovely old brass backed tenon saw that I bought at a bootsale only because it looked so lovely, seeing this thread is just perfect. One question I have is the file, slim triangular but looking online at them some are listed as single cut “double ended” I can see the idea being good but given that the file is only six or seven inches is this enough for our purposes? Any ideas?
Steve.
 
That’s a good question, and for me it really depends on what TPI I’m trying to cut. The higher the TPI (smaller teeth) the stroke you need to take on the file is greatly reduced. You will be surprised just how quickly a file cuts the teeth. A double ended is useful for high tooth counts, as the length of stroke required for each pass on each tooth is very short. A single ended file just ends up with half of it being wasted, not used. For the TPI I propose in the thread, a double ended file isn’t what you want, you need a single ended file.
 
Many thanks for the speedy response Deema, thats very much appriciated and once again, many thanks for putting all this together.
All the best,
Steve.
 
Now that the handle is cleaned up, smooth and fits your hand you need to add some form of finish. The conventional wisdom is to avoid varnish as this can rub your hand and cause blisters / sore areas. Well, if your sawing for hours every day, that's good advice, however, virtually everyone precessional or hobby orientated only uses hand tools for a short period I would use what ever you want!

Personally I use boiled linseed oil often referred to s BLO followed by a coat of bees wax.

View attachment 47545

To apply BLO is very easy, literally smother the handle in it, wait 10 minutes and wipe off the excess, let it dry for a few hours and repeat. The end grain will suck up the BLO, so don't worry about it. What you don't want to have is a situation where you leave the BLO smothered over the handle and leave it to dry when the wood has soaked up as much of it as it can. If this happens you end up with a nasty sticky mess that takes a while to scrape and sand back. The trick is just wipe off the excess after c10 mins. You can apply as many coats as you want up until it saturates and won't absorb any more. I don't normally wait for this point and give it about 5 coats.

After leaving the last coat for 48 hours I will give it a coat of bees wax. This isn't to achieve a shiny finish, the bees wax makes a nice finish to hold that isn't slippy. You don't have to wax it, left with just BLO is absolutely fine. This saw had a wax finish on the handle.

Finally don't throw away the cloth or paper towel you used to apply the BLO, spread it out and let it dry. If you scrunch it up and throw it away it might ignite and start a fire. Once the rag or paper towel is dry it's safe to dispose of.
Great advice about the danger of fire - thanks for that in addition to all the other information you are providing. Cheers, Robyn
 
The teeth are now formed and relatively sharp, the next step is to apply some set, this is where one tooth is bent to one side of the blade and the next to the opposite side of the blade. This is repeated down the entire blade. The alternative bending of the teeth effectively increases the width of the blade and when cutting creates a slot or kerf that is wider than the blade. The kerf needs to be wider than the blade to stop the blade from binding and getting trapped in the wood.

How much set should be applied to the teeth? well, in theory the bigger the teeth the more set that is required as the cut will be rougher and the walls of the kerf won't be as even which might trap the blade. If you saw hardwood you don't need as much set as you do for softwoods which are generally more resinous and 'stickier' wood. If you cut Dovetails with the saw you want a fine kerf to help with accuracy.

Just a note, the only real difference between a Dovetail saw and a tennon saw is
1. The death of cut, that is from the teeth to the back is narrower for a Dovetail saw
2. The saw plate is often just a smigin narrower on a Dovetail saw.

Neither of these IMO really make the saws different and you can use a well tuned tennon saw to cut Divetails.

What to do in practice? well I add as little set as I can get away with on the saw, I know I can always add a little more set if I need it, but I can't reduce the set once I've done it very effectively (apart from sharpening the teeth which reduces the amount of set due to the teeth being bent. The tips of the teeth being bent the furthest away from the plate, sharpening reduces the tip height and therefore the amount they are bent away from the plate.)

Initially you want to add a few thousands of an inch of total set, that's the width of the kerf compared to the blade.

The Eclipse saw set has a hammer (moving bit) and an anvil that can be rotated to different positions. All Ecliose saw sets that I have seen (fine and course) go up to 12. I normally leave my Eclipse set at either 10 or 11 for a backed saw. The difference between the two is so small it's not worth worrying about.

With the saw in the vice place the saw set on the blade and starting at the heel (handle end) on the first tooth set the saw set down on the teeth with the hammer positioned exactly on the tooth. Squeeze the handle and keep looking at the tooth. You will see the tooth move, now continue sneezing, and you will start to see the tooth slightly deform, remember the pressure needed to move the tooth and the higher pressure needed to deform the tooth (squash it a little). For all subsequent teeth you want to apply a pressure a little more than needed to move the tooth and not enough to deform the tooth. You can normally feel a difference between moving the tooth and when you start to deform it. Sounds complex, but once you've done it, you will know what you are 'feeling for'

Move the saw set missing the next tooth and set the third tooth. Repeat for every other tooth....1,3,5,7,9...

Turn the saw around and repeat for the 2,4,6,8,10....tooth, in other words the teeth that you haven't set. You will now set the teeth.

View attachment 47659

You can see how the hammer is positioned on the tooth and also to the left the teeth set with one tooth bent to one side and the next the opposite way (this was done for the photo)

The first few teeth are the most difficult to set, as the Eclipse guide is not resting fully on all of the teeth and needs to balanced. Be careful not to let the Ecliose drop down the hammer needs to be positioned so that it pushes just under the tip of the tooth.
Okay Deema, I have been closely reading and absorbing all your instructions and I think I understand them all…..that was until these instructions threw up something called “Eclipse Saw Set”? I admit I am now totally lost - what is this Eclipse Saw Set? Where do I get it - do I need one for each saw or does 1 work for all saws that I am trying to sharpen? Cheers Robyn
 
you can see the guide being used here (around 14 minutes in).


the video covers the retoothing process that Deema describes - worth a watch (incidentally, I really like the chap who presents it - there is a lot of good stuff on his blog(s)).

https://logancabinetshoppe.wordpress.com/2012/03/03/episode-42-re-toothing-a-hand-saw/


Deema, this three has been delayed so I can’t see the jig in use. Any chance I could persuade you to take a photo of the jig in action? It’s the only part of your explanation that I can’t follow. I presume that the file I have to buy would be the smallest for the back saw and slightly bigger file for the 2 saws that have to be between 20-28” long? Does the file have to remain at the 8 deg. for all saws that we sharpen or is there a different angle for the bigger saws? I am trying really hard to understand your instructions and this is the only part I have questions about. You whole post, including photos are AAA+++. Regards, Robyn
 
@CoolNik
Eclipse no 77 saw sets can be bought new, you really only need one. There are two as I describe in the thread, but for the saws you have identified either will do, you dont need to worry. It’s only when you get to say 16PPI and above you need a saw set with a smaller hammer, which you can just file to size it you have a thick hammer version.
https://www.flinn-garlick-saws.co.u...MI_qC3ld2u9gIVBe_tCh2leAsVEAAYAyAAEgKmFvD_BwEBut the originals can be usually bought a lot cheaper on auctions sites e.g.
View attachment 130936

There is a small range of saw files for different PPI, just choose the right one for the job, they are generally longer the lower the PPI. This is a good reference site and explains about files and gives a table of file sizes to PPI.
https://www.blackburntools.com/blog/concerning-saw-files-which-i-am-now-selling/
I only ever use 8 degrees for all saws, it works for everything. Once you have learnt how to sharpen you can experiment with a short saw on different angles if you want……if takes say 10mm a to change the angle. I don’t bother with fleam for cross cuts on backed saw, never found any real difference. I do for panel saws, with big teeth it does make a difference. But, for starters just sharpen RIP a couple of saw.
 
Last edited:
the example saw worked well despite the pitting

but l'd be careful here as a pit near a tooth base can easily lead to the tooth breaking off when setting - then it's start all over again

pitting away from the tooth line is, i thnk, just a cosmetic issue

where i live it''s still poss with a bit of patience to find 1960's S&J etc with only surface rust, and a wood but not pretty handle, for £2 -- couple of days ago got such - one back £3 and one hand £2 both hardly used, with only superficial rust , cut well as is but i'll give them one swipe of the file ea tooth -. mind you a fellow a couple of stalls along was trying to sell v similar ex school back saws for £25 ea

interestingly the 26in 9tpi S&J handsaw was, i think, as originally sold, and cuts well, good steel, but was cross cut angle and a fine set, but with teeth filed (or maybe just punched/stamped) straight across (no 'fleam' i believe, but tell me if i'm misusing that word)
 
Last edited:
ps there's a post above saying that Garlick (several brand names) were the only trad saw maker left (apart from 'boutique') - when the post was written that was not quite true as Atkinson were very much in business (only a stone's throw away, but very much a different business, employing several skilled saw smiths, making handsaws and circular) - sadly Mr Atkinson retired, sold the business and the works have closed in the last year or so - maybe some or all of the operation continue elsewhere?, i don't know
 
@CoolNik, just found that Paul SelleRS has a uTube on how to use the saw set and a good explanation about them.

Deeema, what would you think of this saw, on eBay now, sharpened and ready to go, I think Spear & Jackson 24" 8tpi crosscut hand saw Restored, sharpened, tuned | eBay
and this same seller has a couple of others. - he sells under forces-hand tools

let me know what you think - buying from him means I don’t have the hassle of getting someone to help with gettting the saws sharpened. Cheers Robyn
 
Thank you for that very informative post, most interesting.
One thing I’m curious about is when you file the teeth I assume you’ll create a burr, is anything done about this or is it too insignificant to affect the cut?
 
I’m sure there will be a small burr, but for a saw you don’t worry about it. The main thing to achieve is nicely spaced even teeth, no cows and calves and no flat spots on top of any teeth. The saw teeth when placed on your palm should be ‘sticky’ to your skin. It’s a test I was taught, and you only really appreciate what it means when you have a nice sharp saw to test.
 
By coincidence, I have just completed an article for my website on "Making a dovetail saw: Shaping, Filing and Setting".

This is essentially starting from scratch, but with the aid of a machine punched saw blank (not sharpened) and brass back. The article is about shaping the handle, fitting the back, and sharpening setting the 16 ppi teeth.

This is aimed at the novice in that I offer some foolproof methods. For example, a method to aid in setting the teeth (ever tried setting 16 ppi?! :) ).

The result is a really wonderful dovetail saw ...

MakingADovetailSaw_html_17ef2458.jpg


Link to article: http://www.inthewoodshop.com/ShopMadeTools/MakingADovetailSaw.html

Regards from Perth

Derek
Hi Derek,

I am that novice at sharpening that your article is written for. I found your article to be clear, understandable and hopefully repeatable!

thanks very much for taking the time to write up your project, I hope that I will be able to locate some older saws that I can learn sharpening on and use them!
Regards from NZ
robyn
 

Latest posts

Back
Top