First chair

UKworkshop.co.uk

Help Support UKworkshop.co.uk:

This site may earn a commission from merchant affiliate links, including eBay, Amazon, and others.

Sheffield Tony

Ghost of the disenchanted
Joined
2 Aug 2012
Messages
2,078
Reaction score
91
Location
Bedfordshire
I put this together for another forum, but thought it might be of interest.

Having acquired a suitable ash log the other weekend, I figure it is time to have a go at making a chair. The design I'm aiming for is a Philip Clissett style spindle back. But I'm going to vary it a bit by replacing the wood board seat with a woven seagrass one; this might not be traditional but it will better match my stool.

I want to do without power tools, and no sanding - the shaved or lathe turned finish should be good enough without.

So, to start:
20140705_102433_resized.jpg

This is half an ash trunk, about 5 foot long. Spiltting again with metal wedges:
20140705_102701_resized.jpg


This is repeated again to spilt into 1/8ths, to get the two back legs, which are then shaped by axe and on the shave horse (it had started to rain, so moved indoors !)
20140708_213743_resized.jpg


Here I've been using a French drawkinfe, and a scrap of plywood with a 1 3/4" hole drilled in it as a gauge - when it slides along the leg, it is the right size.

Having got the long bits, and stashed them in a plastic sack to keep them green, now the spindles for the spindle back. Roughed out by axe, and just starting to knock the corners off on the lathe - again indoors using the bungee instead of a pole.
20140713_135623_resized.jpg


Number one of four completed:
20140713_152243_resized.jpg
 

Attachments

  • 20140705_102433_resized.jpg
    20140705_102433_resized.jpg
    173.6 KB
  • 20140705_102701_resized.jpg
    20140705_102701_resized.jpg
    150.8 KB
  • 20140708_213743_resized.jpg
    20140708_213743_resized.jpg
    106.7 KB
  • 20140713_135623_resized.jpg
    20140713_135623_resized.jpg
    133.8 KB
  • 20140713_152243_resized.jpg
    20140713_152243_resized.jpg
    134.7 KB
Hi

As the wood is still green I'd be tempted to put the bends into the rear uprights as soon as possible, (assuming you're design requires them to be bent).

I have to take my hat off to you - I've made several chairs on my powered lathe - I don't think I'd have the patience to do it all with manual tooling.

Regards Mick
 
I am looking forward to reading more of this. Cracking good start.
I picked up a French spokeshave at one of their many outdoor sales last year, I find the size very controllable. Sadly the blade cracked in two the second time of use. Still for 3 euros.
xy
 
That's a pretty dam well defined spindle there considering that's a pole lathe. Very nice. The bead definition is superb. I took delivery of my first Froe last week so I'll watch this with interest :)
 
The drawknife - I tried a couple of drawknives before I bought one. The first was a new Crown one, amd the second an older Marples. The Crown one somehow felt very clumsy, so I decided to look for a good old one, and bought the large Ward one that is on the bench in some of the photos above. It has been good, but seems needlessly large for most of my jobs, or indeed any job - for what do you need a 12" cutting width ? So, I spotted this one on ebay - it is made by Goldenberg from Alsace. I have a couple of their axes I quite like. Anyway, I resisted temptation as it ended with no bids, then gave in to temptation when it was relisted at £15. And I'm glad I did - I feel I shoudn't say it, but I think I prefer it to the Ward.

Regarding froes; mine is quite a lightweight made from a re-forged agricultural flail blade. It has too small an eye to split the bigger bits, hence the Bacho splitting wedges and sledgehammer. It is really good fun splitting a ash log - certainly better than sawing it up.

As I mentioned, I started the WIP for another site about a week ago. Now, a lot of work later, and I have a full set of the turned parts.

chair_parts.jpg


By the time I was done last night it was dark, so not the crispest photo. The bit of a shine you may see is just from burnishing with shavings. Clockwise from top left - four back spindles. Three rails for the back - these need to be bent into a gentle curve for comfort. A pair of front legs. The back legs (not shown) are not turned - they are too long for the lathe - just shaped with drawknife, and will also need to be bent. For the front legs it seemed like a good opportunity for some twiddly bits ! Then a large collection of seat rails and stretchers - the longer ones are for across the front. These are not yet trimmed to length; doing so removes the original centres so that they can't readily be put back on the lathe. I'm holding off doing that until my shiny new Clico auger bit arrives, so if need be I can still adjust the spindle tenons to suit.

The next job is making the jigs for steam bending, I think. I do still have some ash left over, so I can afford a breakage or two. The stage I'm more nervous about is drilling the mortices by hand brace; these have got to be pretty well aligned. I think I'm going to need practice at drilling straight before I start.
 

Attachments

  • chair_parts.jpg
    chair_parts.jpg
    162.6 KB
i saw a very good youtube video on chair making- it was 40 + parts long. Anyhow, i seem to recall him using a spoon bit for drilling. Below is one part- you may have to go forward a few episodes for drilling the bit you are after

https://www.youtube.com/watch?v=zrlWcQ4 ... qtF-1S7orw

You have got some nicely matching components.

edit. he uses a spoon bit for one part, anyway!
 
Loving it.
So different to what I do, quite inspirational (but don't tell my wife, she'd have a fit if I mentioned something that requires / need more tools and space).
 
Agreed...looks lovely Tony. I've only been turning with a powered lathe for 18 months, the very idea of using one that goes in two directions while you're pumping your feet fills me with dread :) And yet look at the fabulous spindles you've created. Really nice work.

I also appreciate the advice on drawknives because my plan is to make a lean to roofed extension to one of my sheds for wood drying and I'm planning a shingles roof from a very straight grained ash tree that came down in the valentines night gale. I will of course need to build a shave horse too. The drawknife is essential when trimming the cleaved shingles.
 
I appreciate its not ideal for outside projects but the guys on the bodgers forum said if I cut them thick, give it a cuprinol spray they'll last at least 10 years and that's all I need.
 
Great thread, keep it coming.
For what it's worth. I tried drilling legs with a spoon bit, and had difficulty controlling wander to start. My backup plan was to start the hole with a brace driven auger, and then to clean out the bottom with the spoon bit. In the end I went with John Brown's (Welsh Stick Chairs, not body) advice and used the auger until the point just broke the surface at the other side of the leg, and didn't bother with the spoon bit. I have not had a fail yet, but then only two years useage.

HTH xy
 
Did a bit more this weekend.

This time, steam bending. I thought I'd start small with the 3 back rails that needed to be bent, and work up to the legs.
As far as jigs go, I made a "one size fits all" jig from some 3x4" skip wood. It's pictured below, but first to raise steam !
steaming1.jpg


Following Mike Abbott's method, this is an offcut of 4" plastic wastepipe, cradled in the saw horse I normally use for cutting up firewood. The ends are bunged up with flowerrpots stuffed with bubble wrap for insulaton, and the pipe wrapped with an old blanket. Steam is provided by a wallpaper steamer. Now, this might class as a power tool which could be seen as cheating, but I'm going to allow myself that one ! Ideally a wood burning boiler would be better, especially one to use the (copious) wood shavings I'm left with .. Future project ( reckon.

45 minutes later:

steaming2.jpg


You can we the jig better here. It is basically one length of 3x4, with a "hump" of radius 18" screwed to it. The hump is placed in the correct spot to do the bend for the rear legs on the same jig later. The two wedges pinned to the underneath set the clamps at the right angle. As the wood compresses more readily than stretches, I hoped that canting the clamps over like this might make it less likely to crack at on the outsice of the curve. A bit of 2x4 with holes bored through it then spilt in half makes a handy pair of clamping blocks, but for the legs I reckon 3 clamps would be better - one on the high spot just to hold everything together and reduce the juggling !

For drilling I went with a Clico Jennings pattern augur bit. Lovely to have a brand new one which has not had its lead screw dinged, or the spurs filed on the outside ! Mike Abbott also comments that spoon bits can be liable to wander when starting, especially on a curved surface, so that (and the price !) put me off them - although they were what Philip Clissett used.

The completed back comb; again it was getting late and my phone camera is rubbish without good daylight so sorry for the picture quality:

back.jpg


Don't know if I mentioned that as well as doing without power tools or sandpaper, I'm hoping to do without glue either - just relying on tight joints and drying shrinkage to lock it together. This was assembled after the spindles had been drying for some time, but with the rails still fairly damp so that they should shrink on tight.

Time to steam the legs next. I'll need a longer bit of pipe for those !
 

Attachments

  • steaming1.jpg
    steaming1.jpg
    163.6 KB
  • steaming2.jpg
    steaming2.jpg
    101.7 KB
  • back.jpg
    back.jpg
    206.3 KB
Cracking work Tony.

I made my steam box from WPB ply and OSB (what I had left over) the wallpaper striper work well don't they.

Pete
 
The wallpaper steamer is perfect for the job. I steamed the legs on Monday night, and one fill of water was just right for an hour of steaming. No photos of this, because it is essentially the same as the back rails - same former, just with the clamps further apart. And a longer length of pipe for the steamer - I found a length of 4" aluminium tube which stands up to the steam a lot better than the PVC !

One thing I would like to pick your brains about ... I got a fair bit of blue/black staining on the ash when it came out of the steamer. I assume from the reaction of the iron in the tools with tannin in the green wood, somehow "developed" by the warm wet steaming. It was not from contact with anything whilst in the steamer. I have cleaned them off with a concave spokeshave and a card scraper made to suit the leg profile, loosing only about 1mm all round. That's OK, the back legs were left a bit chunky anyway with the intention of finishiing off after steaming ... but is there any way of avoiding the staining in future ?
 
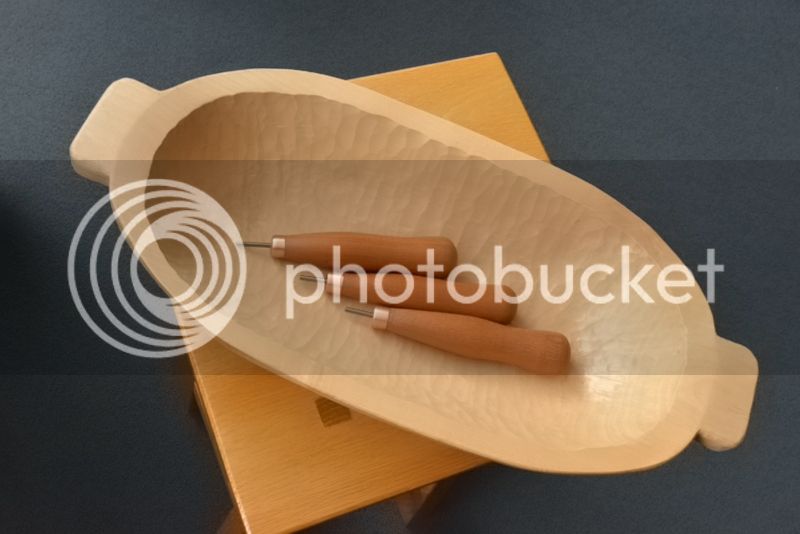
I did make a sycamore bowl from a green log and had problems with it staining from the tools, I could carve them away as I was gradually carving and letting it dry, it turned out o/k.


How are you spacing them off the sides of your steamer? do the marks coincide with the spacers.

Pete
 
My tap water is quite hard - and well analysed because my son keeps fish ! Don't think it is acidic.

The rails were supported by strips of wood, and for the legs I tied a loop of natural rope around each end to space them off the steamer. The staining was patchy, but not where they were supported. Mostly the parts were worked with the drawknife, but where the grain was tricky I used a metal spokeshave - Stanley 055 with concave base. I think that these patches were the worst affected, so maybe it is mostly from the sole of the spokeshave. Perhaps trying a wooden one is an idea for next time. And making sure to leave the final finishing till after steaming.

Incidentally I love the tooled finish on your bowl Pete. I like the way the light comes off the satiny finish.

Anyway, on the home straight now. Drilling and assembly. The bit I've been worrying about because I struggle to drill straight !

Before beginning - all the parts are ready. In case you aren't familiar with this style of woodworking (with apologies if you are) ... The legs have been kept green in a large plastic bag with some offcuts of green wood. The back legs have dried out just a bit during the setting time after steaming, and I've taken the front legs out of the bag for the same amount of time so that they have a similar moisture content. The other parts have all been dried - first in my Corotherm roofed workshop, then in the airing cupboard overnight. The tenon ends which I had accurately turned (using a vernier caliper !) to 5/8" + 10% diameter have now shrunk to ovals. The idea is that you drill the legs 5/8", and the rails will just hammer in with the long axis of the oval tenon oriented along the grain of the leg. That way it is tight without splitting the leg. As the leg dries it grips tight without the need for glue.

Drilling - I used a centre finder made to Mike Abbott's description - the oak block with the bird's mouth and a nail through it to locate the holes. A sliding bevel and a square for sighting the angles. I predrilled the holes 3.5mm with an egg beater hand drill to avoid the lead screw of the auger splitting the leg - I have had this happen on other things. I thanked myself once more for buying new auger bits - this one an Irwin style one from Dieter Schmidt - so much less force needed to drill, makes it a lot easier to control the alignment.
drilling.jpg


Still quite a lot to keep an eye on, 2 angles and the marker pen depth mark.

I assembled the back ladder and front first, then did the side rails. I knocked the joints together with a big mallet I turned myself; the faces are slightly convex with rounded edges so that any marks it leaves are not so visible. It feels brutal, but trying to protect the leg with a bit of scrapwood made the marking worse. Squeezing the joints together with a sash clamp, as I tried on my stool - also leaves worse marking. Any marks left can be lifted out a bit by lightly wetting the surface of the wood to swell the dints back out.

Looking a lot more like a chair now:
assembled.jpg


Jobs left, apart from the need for a seat, are a clean up and oil, and trimming the back legs. I've left these 1/2" long; I won't trim them till it is dry and has stopped moving.
 

Attachments

  • drilling.jpg
    drilling.jpg
    97.1 KB
  • assembled.jpg
    assembled.jpg
    208.3 KB
That's looking very very nice, what are you going to do for the seat?

The bowl had no sanding just sharp tools and scrapers.

Pete
 
Back
Top