Finish for lined box

UKworkshop.co.uk

Help Support UKworkshop.co.uk:

This site may earn a commission from merchant affiliate links, including eBay, Amazon, and others.

ScaredyCat

Established Member
Joined
17 Mar 2017
Messages
1,120
Reaction score
107
Location
Suffolk
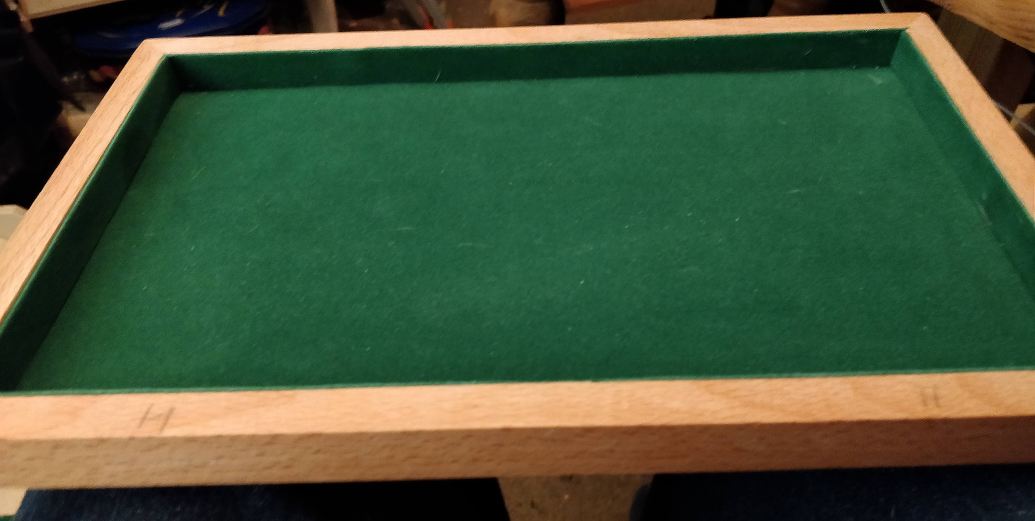
I'm making a box and my intention is to line it. for the finish I was thinking of boiled linseed oil and then beeswax polish buffed up to a sheen. I know that I need to finish before lining.

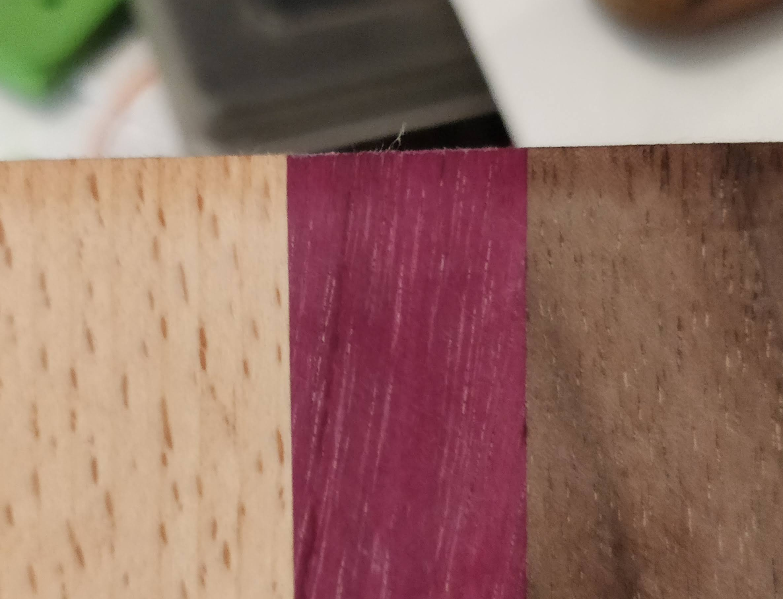
I have a test piece that I'm using to look at how the blo works out, but as you can see (and probably already know) it gets sucked into the wood. This means that on the side I want to put the lining I'm getting linseed oil. I suspect this will affect any adhesion - can someone let me know if this is going to be an issue? Are there other, comparible finishes that'll give the same effect but not cause lining issues?

Also, what's the expected drying time of blo? I put some on last night and it was still a little oily this morning.
fin1.png
 
Oil finishes inside a box or a cabinet aren't the best solution. The smell just takes too long to dissipate from inside an enclosed space.

A single coat of Osmo is just, and I mean just, acceptable, provided you leave the box/cabinet open for a week following application.

Regarding finish and lining adhesion. I use masking tape to cover the inside, allowing just 2 or 3mm of overlap between the lining and the finish. I then ensure the finish is bone dry before fitting the lining, especially with pig suede which is my normal lining material as it will soak up finish like a sponge.

Beeswax is also a bit dodgy for a frequently handled item like a box. Warm hands won't melt beeswax, but they will soften it, which leaves a sticky feeling. You need a genuine hardwax, ie a wax with a decent amount of carnauba wax in the formulation.
hard-carnauba-wax-vs-alfie-shine-vs-paste-wax-t112414.html

how-to-line-boxes-drawers-t106375.html
 
custard":2l1zqo4u said:
Oil finishes inside a box or a cabinet aren't the best solution. The smell just takes too long to dissipate from inside an enclosed space.

A single coat of Osmo is just, and I mean just, acceptable, provided you leave the box/cabinet open for a week following application.

Just wanted to be clear, I'm only thinking of oiling up the outside, it's just that some had got to the other side (capillary action?) of my test piece.

custard":2l1zqo4u said:
Regarding finish and lining adhesion. I use masking tape to cover the inside, allowing just 2 or 3mm of overlap between the lining and the finish. I then ensure the finish is bone dry before fitting the lining, especially with pig suede which is my normal lining material as it will soak up finish like a sponge.

Ok, I was planning on adding tape just below the edge and covering the sides and base so as to avoid any contact with the finish.

custard":2l1zqo4u said:
Beeswax is also a bit dodgy for a frequently handled item like a box. Warm hands won't melt beeswax, but they will soften it, which leaves a sticky feeling. You need a genuine hardwax, ie a wax with a decent amount of carnauba wax in the formulation.
hard-carnauba-wax-vs-alfie-shine-vs-paste-wax-t112414.html

Ok, didn't know about this I'll look at that too.

custard":2l1zqo4u said:
https://www.ukworkshop.co.uk/forums/how-to-line-boxes-drawers-t106375.html

Yes, I'm making notes and buying alreay. My intention was to follow your posts. :)


Thanks for the reply and knowledge custard.
.
 
Good luck Scaredy Cat, if you hit any snags or need any help then don't hesitate to PM or post!
 
I sometimes, though not always, just use a couple of coats of shellac on the inside of a box followed by some Renaissance Wax applied with a grey Webrax from Ax - Rob
 
Stage one, the lid, done. An inordinate amount of profanity went into that. Just the rest of the box to go...

eaWo9nO.png
 
Looks great, the lid's harder than the box because the side pieces are smaller and fiddlier.

Just remember, the side pieces MUST be half a mill below the wooden sides, otherwise they'll prevent the box from closing properly.
 
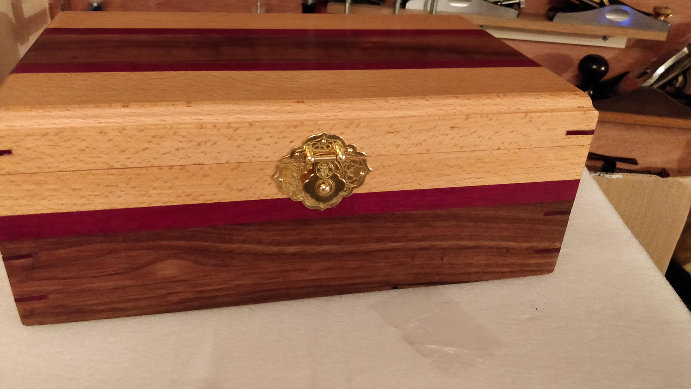
Ok, so progress has been made but I'm not really happy with it.

Main box

wOxUGJY.jpg


Box with tray

drkDvDq.jpg


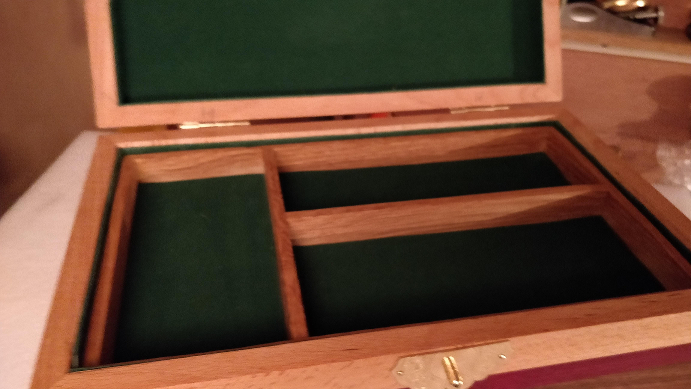
Inside

pqNc2kp.jpg


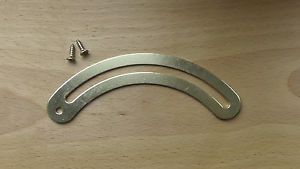
It needs a stay fitting but I'm really too stupid to be able to work out how it fits..

MLjLX2S.jpg


.
 
What are you not happy about?

Remember, you know every little error and mistake. The recipient or customer will see it as the handmade and fantastic item that it is. The joints look tight, it is nicely lined and finished, be proud of it.
 
The lid isn't good. You can see the join.
Some of the lining isn't right, too low on the inside of the box.
Inner tray should, at least, be level with the base top.

Surprisingly the mitre joints came out really well.

Custard's lining thread was really useful and I think I got a bit better at is as I went along. The tray was the last thing I did and there are no gaps between the lining and the sides/partitions there and it doesn't have side lining to cover any issues.
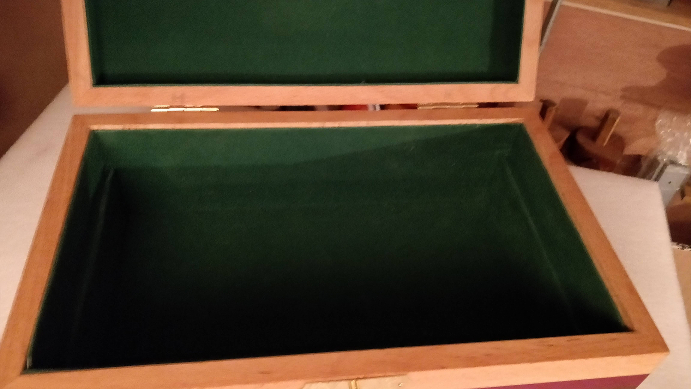

Also, confession, I didn't use pig for the lining, I used synthetic stuff as I know my wife would prefer that.

The whole thing has been a bit of a nightmare. Since I have no workshop I'm working either outside or in my office whilst listening out for the wife as I don't want her to know about it until it's finished. Adds a lot more stress to the build and I have to plan to hide bits as I move along. The test pieces I've made are a good cover for the "what are you making" questions, "just trying some ideas out dear" but it'd be so much easier if I could do it in a workshop so she didn't have any idea. (I suspect she knows about it anyway)

.
 
I salute your quality focus Scaredy Cat, but I think you're being too hard on yourself. You've done well, and for a first lined box you've done really well! Remember, most people start projects like this and never complete them, so as far as I'm concerned you're a winner for even getting across the finish line!

Regarding the quadrant stay, the one you've got fits inside the box and isn't really compatible with a lined box. There are better versions which fit inside the sides, although they're a real pain to fit. Nowadays most box makers have abandoned quadrant hinges and quadrant stays in favour of hinges with inbuilt 95 degree stops. Quadrants are still used for antique repairs and traditional pieces, but for anything with a more contemporary twist they're more trouble than they're worth.
 
custard":txu0r3x4 said:
I salute your quality focus Scaredy Cat, but I think you're being too hard on yourself. You've done well, and for a first lined box you've done really well! Remember, most people start projects like this and never complete them, so as far as I'm concerned you're a winner for even getting across the finish line!

Thanks for the kind words - I definitely need more practice at this though. I tried to make the top/bottom match better using sandpaper on a large flat tile but juts couldn't get it "just so". I'll make another after this one too.

custard":txu0r3x4 said:
Regarding the quadrant stay, the one you've got fits inside the box and isn't really compatible with a lined box. There are better versions which fit inside the sides, although they're a real pain to fit. Nowadays most box makers have abandoned quadrant hinges and quadrant stays in favour of hinges with inbuilt 95 degree stops. Quadrants are still used for antique repairs and traditional pieces, but for anything with a more contemporary twist they're more trouble than they're worth.

Do you have any recommendations for hinges and clasps and stays?

I spent ages trying to find some and ended up with these. If there's somewhere I can get a good selection of good quality then I'll be much happier. Classic hand tools is not far from me and they have Brusso hinges but I couldn't find a matching clasp. It also looks like they need to be routed out using an extra template and bushing. The selection of hinges isn't very big though.


.
 
ScaredyCat":7zkx6bex said:
Do you have any recommendations for hinges and clasps and stays?

Personally I like the Smart Hinge range,

https://www.smartboxmaker.com/product/box-hinge/

If you use these you don't need a stay as they self support at 95 degrees. They're about £27 a pair, which sounds pricey but that's cheaper than Brusso and fitting them is pretty straightforward as long as you have a router table and an 8mm spiral bit. Have one or two practise run throughs on some scrap and afterwards you'll nail it every time.

Smart hinges do restrict you to boxes made from material that's about 12mm thick, but that's a dimension that works well for me.

Now for the bad news, the matching Smart Lock is a lot more expensive and supplies are frustratingly stop and start, and there are no clasps in the range.
 

Latest posts

Back
Top