Fingernail grind?

UKworkshop.co.uk

Help Support UKworkshop.co.uk:

This site may earn a commission from merchant affiliate links, including eBay, Amazon, and others.

johnny.t.

Established Member
Joined
29 Oct 2008
Messages
1,714
Reaction score
0
Location
Norfolk, near the sea.
My mate came round yesterday evening and made me a new sharpening jig based on the the around the woods one, he made me the arm part, from steel ,I had previously made one from ply as in the article but found it flexed a bit(the steel one's rigidity has made a hell of a difference to the tool edge). So far all my tools are ground 'standard' but I want to make the blocks from the article to make/try the swept back fingernail type grind. How do I go about converting my gouges and would it be worth it? I have the perform ones and know that the bowl gouge isn't much of a bowl gouge and more resembles a spindle gouge but would still like to try before splashing out on a better one with the different grind.

cheers JT
 
Hi Johnny,
I have just read your question and looked at the link so i guess the jig takes the end of the handle and you adjust the contact point on the grinding wheel to set the angle. This is fine for normal grind gouges but to create a fingernail grind the only way is to use another tool holder to hold the gouge in a clamp on the end of a stem that goes into the grinding jig you have already. By setting the angles right you can then sweep the gouge from far over to the left through the central position and over to the right.
If you have a look at the Sorby video clips you will see how they do it and also i believe its the Wolverine system as well.
I made mine in the workshop and have just done one for our new grinder at the club and they seem to work well.
If i can be of any more help I will be only too happy to assist,
Regards, Ian.
 
Mornin' JT.

IMO this is one of the best designs of jig. This and a flat table will do all the sharpening you can ever wish for. I would go ahead, better the Perform gouge than a better one later.

The way I, and many others start preparing a gouge for long wings is as follows.

I don't measure my wings, what I do is grind them so the side edge is approx 1 1/2 times the width of the tool. So make a mark with a felt tip this distance from the tip.

Using a flat table place the gouge flute down and adjust the table so as you can grind the corners off between the mark and the bottom of the flute. (Which is now uppermost)

Gently grind away until you just reach the bottom of the flute, try not to take any more, it won't do any harm just means you grind away more steel than needed. You should now have a almost flat angle on both sides between you felt tip mark and the tip of the tool.

When you look down on the top of the tool you should now have a elipse? shape on each side of the flute. The inner edge of these flats is where the edges of your wings will come to.

Once you have made your swept wing jig, fit the gouge into it, set the nose of the tool to the wheel at the angle you fancy. Nothing too critical here. Then slowly grind a little on the nose swinging the tool slightly from side to side with just light pressure.

Once you have the shape of the tip, now swing the jig right to the side and begin working on the sides. DON'T swing the jig from right to left, all you are doing is working on one side at a time, just roll the tool following the inner edge of your line. Grind a bit on one side staying outside the inner edge of the flat.

As each side heats up from the grinding, swing the jig around and work for some time on the other side. Alternate like this until you have a shape corresponding to the inner edge of the flats.

Once you have your your full shape now is the time to swing the tool from side to side, very gently. Until you see a complete edge from one side to the other. Be careful on the tip it is very easy to grind too much away here.

That's it! Just be careful in use, these grinds are great but can be a bit vicious if your not used to them.

:idea: Another tip is drill a hole approx. 2" deep in a wood block, and use this to set the tip overhang each time you sharpen the gouge, this way it saves you wasting steel. Also you can make a sizing stick to mark how far your arm is away from the wheel, so it saves you even having to measure this each time also.

I guess from this you have figured I'm a lazy b****r, I prefer to call it efficient. :lol: :lol: :lol:
 
Turn it up, I know that :roll: :lol: !!, on the web page I linked you need to go forward a page or so to come to the second part of the jig(the blocks)! :lol: I'm not(that) daft :lol: :lol: Thanks for answering anyhow :wink:

Thanks Tam, that explains it perfectly,thanks for taking the time to type all that out :D Now to try to do it!!

Cheers JT
 
What wheel is best for this initial shaping. Grey? or White? Or Red? ...Or Turquoise? ;)
 
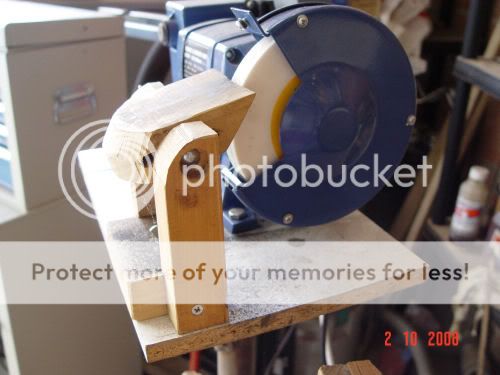
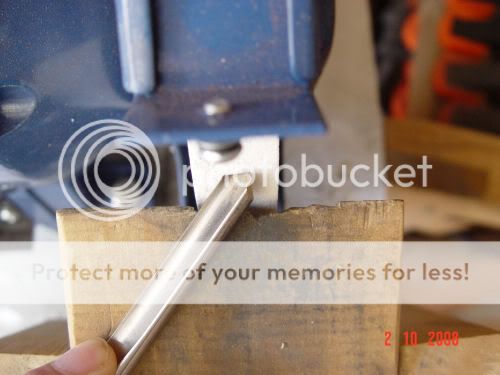
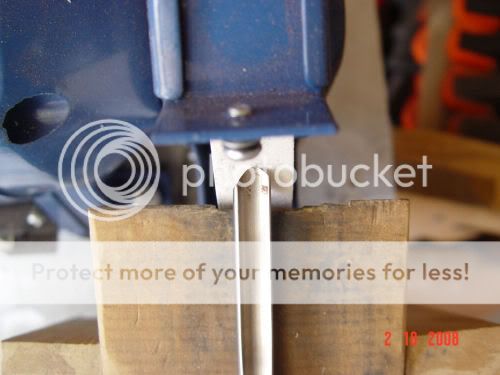
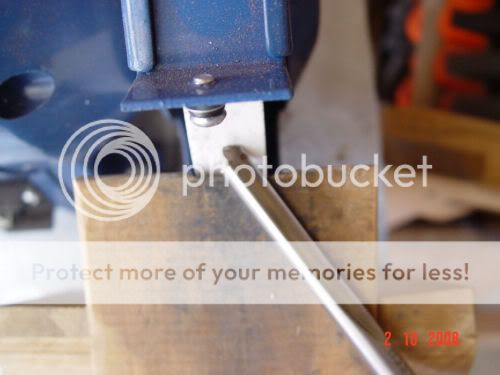
I have used a white stone and a very simple jig to sharpen my gouges.

Grindingjig.jpg


Grindingjig1.jpg


Grindingjig2.jpg


Grindingjig3.jpg


All that is needed is to set the angle of the cut on the flat surface, start the cut with the gouge tilted and the gouge at an angle as shown and rock the gouge as you move it from left to right. It is very easy to do after a very short while. To do a bowl gouge you just readjust the angle and roll the gouge across the surface. Scrapers, the same and you get the angle you want all the time. well I do anyway :D
 
Back
Top