Dovetailed Infill - First Fumblings

UKworkshop.co.uk

Help Support UKworkshop.co.uk:

This site may earn a commission from merchant affiliate links, including eBay, Amazon, and others.

Richard T

Established Member
Joined
24 Apr 2009
Messages
1,743
Reaction score
1
Location
Wet Midlands
I have been wary about starting this new thread as I have another two WIPs on the go and I don't like to leave things unfinished. But as it's cold enough in the shed to freeze the brass off a monkey, I thought I'd do something a bit warmer and post some pictures of progress thus far.

So; you're about to make your first plane from scratch, what kind of plane do you make? Well, the plane that I would most like to make first would be a Norris type smoother, coffin form, with brass sides, tool steel sole and and old iron. Not just any old iron - a Marples say ...

Then I did some sensible thinking and talked myself into making the first one from mild steel because I'd already got some and if I made a pineapple surprise out of it, it wouldn't have cost anything and to make it straight sided to get the feel of dovetails without trying to go round in a curve with 'em.

So how to begin and what to bare in mind. Starting with the sole: This will be a bevel down smoother so the mouth will have to be quite wide to let the bevel side through but it's best to keep it tight while making it so it can be fine tuned later. Also there needs to be enough width of soul to allow for extra metal to peen into the dovetails.

I decided on 6mm plate for the sole. The Iron is 2 - 1/8" wide so I left 5mm either side of that for the sides and a cautious 1/8" extra either side for extra metal. It should be 1/16" and I've probly made myself some work there but I'll see how it goes and maybe be more brave with the next one.
Then to think about where the mouth should be - I agonised over this until I decided to put it where it looked right without measuring. So the back half of the sole takes two hours to cut with the hack saw and the front takes nearly an hour .... a small bandsaw for the bench is a thought I keep returning to.

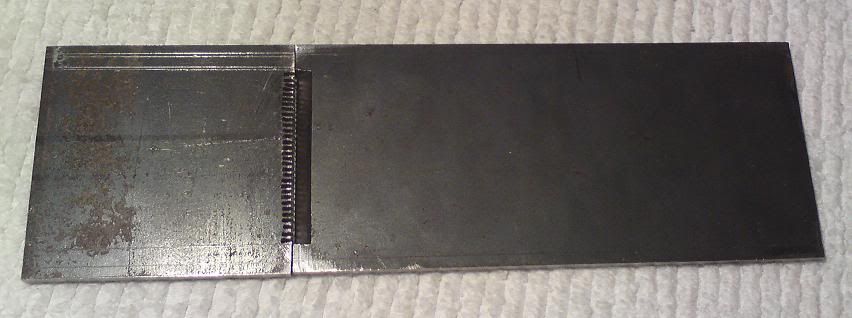
Here's the front with saw cuts to take out the start of the mouth.
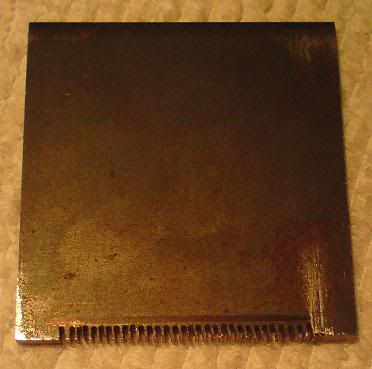
DSC00459.jpg


And here's the back having had the same treatment, cold chisled out and filed down to close to finished.
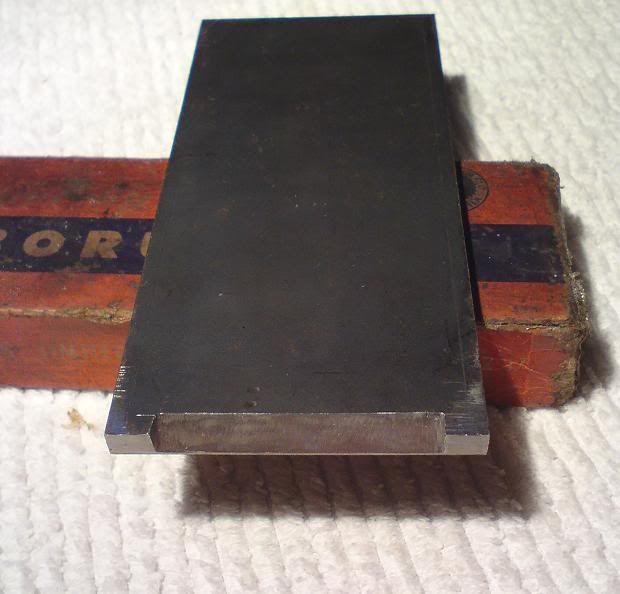
DSC00452.jpg


Butted up together.

DSC00463.jpg


More soon ...
 
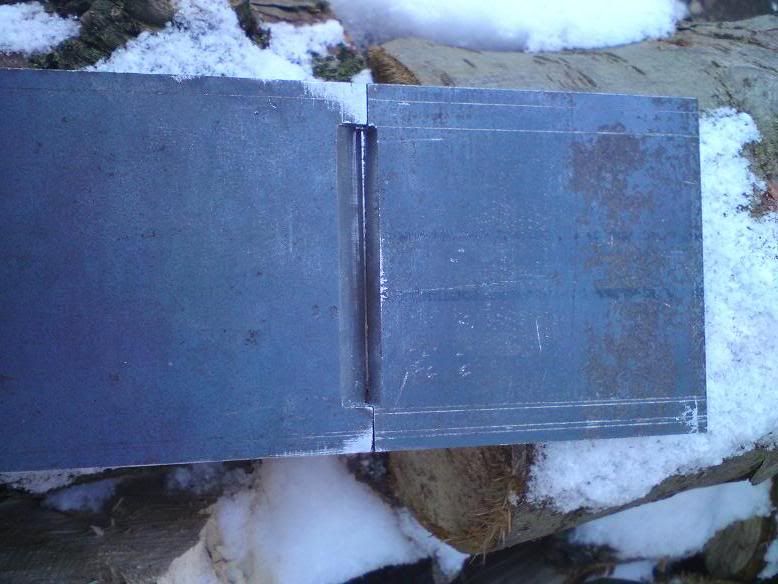
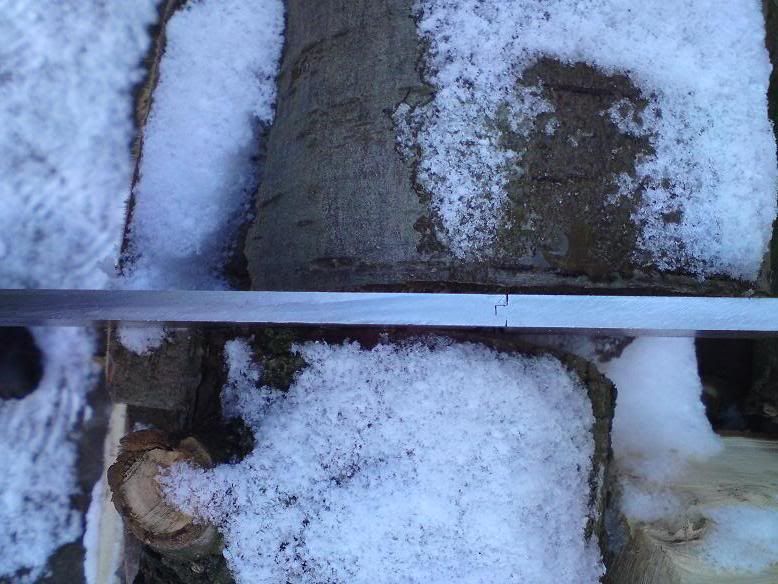
The two sole plate must then be tongue and grooved together. This was the part I was dreading most and I was right to worry - 'twas a nightmare... But it worked.
DSC00136.jpg


DSC00137.jpg


As you can see it still needs some tightening up. But it's very satisfying that I have to tap it apart with a hammer to work on it. When it's togethr, it rings when flicked :shock:

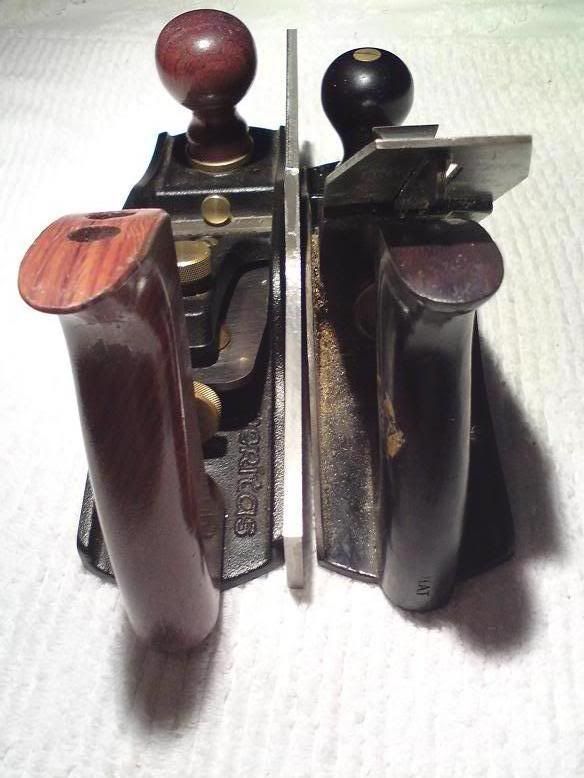
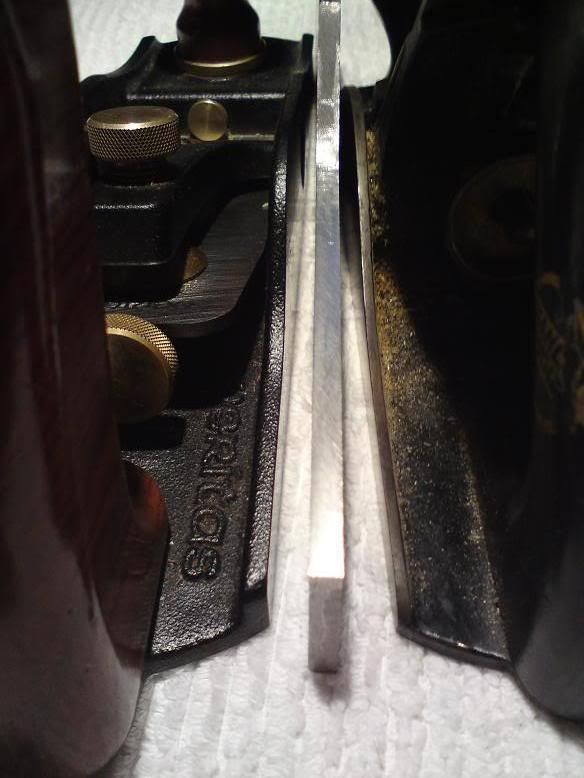
So, the sides. As I said I decided on 5mm thick for them. This is what 5mm sides look like compared to some old favourites.

DSC00094.jpg


DSC00096.jpg


Quite substantial. I've only cut out the back form of the sides - haven't decided on the shape of front handle/bun yet.
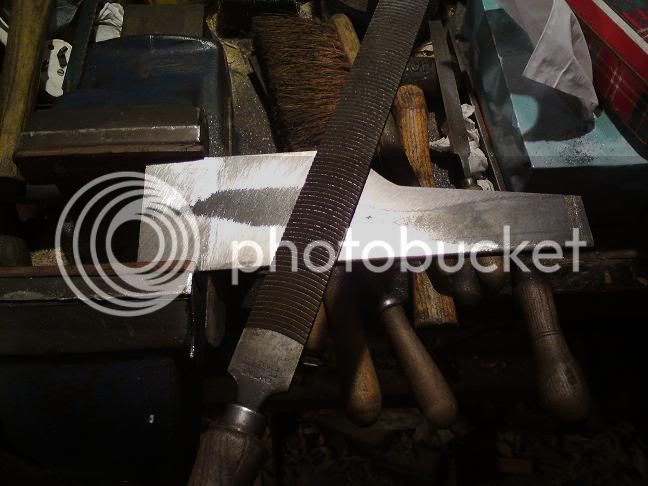
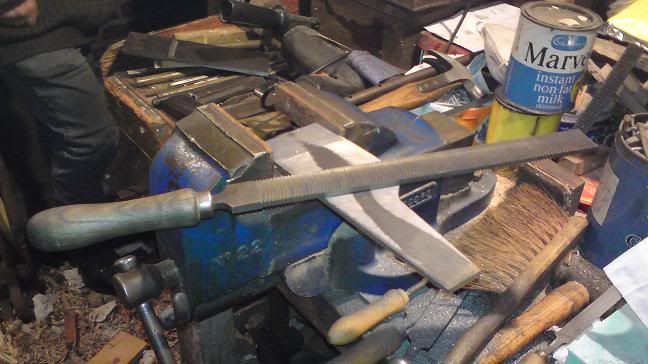
One job I didn't anticipate was how much flattening they needed. First I thought they might be cupped, but no; both sides were V. slightly concave. So I spent ALL day yesterday doing this.
DSC00142.jpg

DSC00141.jpg


The Dreadnought file; One great leveler to another ... I hope.
I then drawfiled 'em and have started with the emery cloth. There're looking good, but a bit less than 5mm now I fear. Not much though.

More soon..
 
Hi, Richard

Dreadnought files are ace I did the bevels on my knife with one bigger than yours :wink: cost me 50p from a car boot. If you draw file with them they made little curly shavings :D

Pete
 
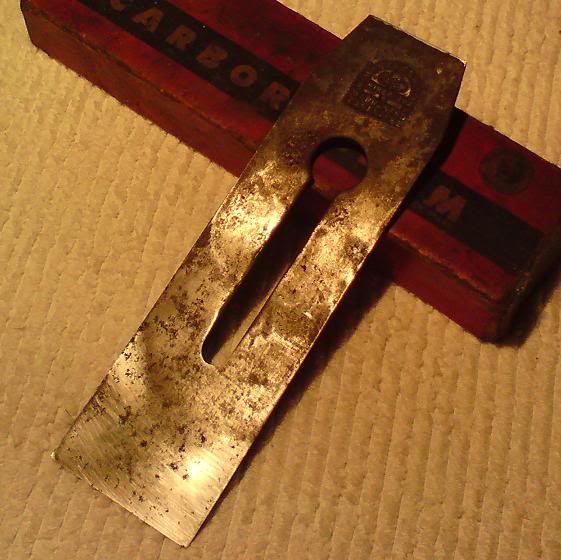
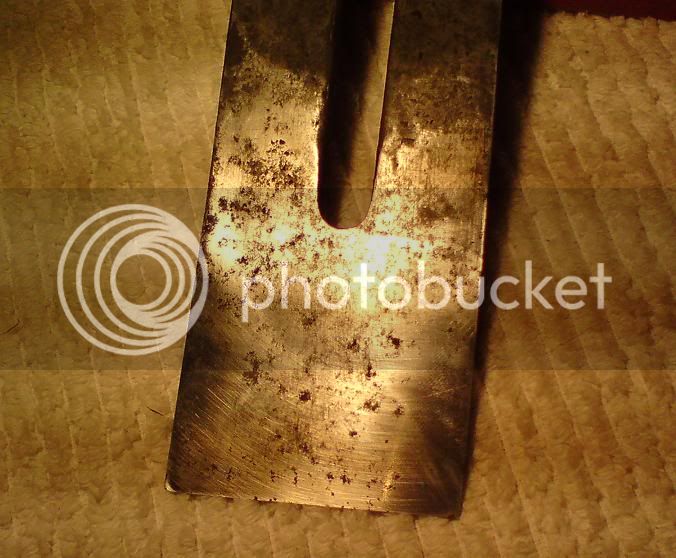
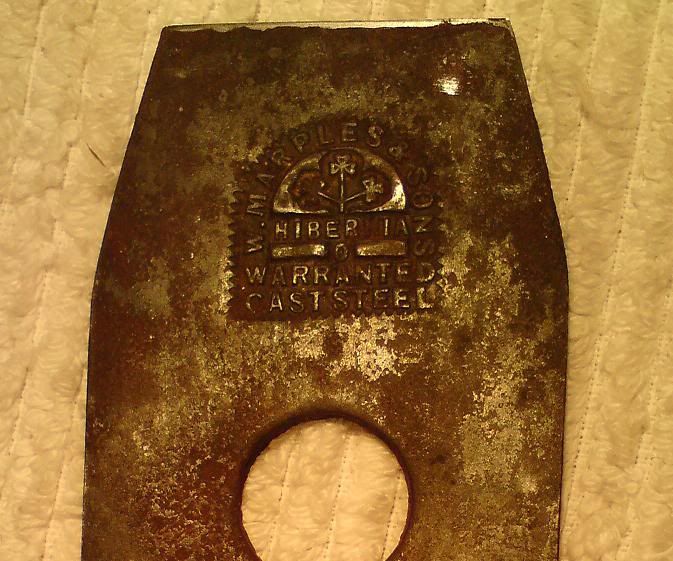
The Iron I am building this around:

DSC00446.jpg

... As it was .... Honest! It looks much better now... This was some serious pitting.

DSC00445.jpg


In these pictures I'd only just started cleaning it up. Must get some of Jimi's magic stuff to have a go at it with. That stamp deserves to be seen in all its glory.
BladeMarples.jpg


(btw I'm not using the Carborundum to grind it ... yet. )
 
By the time that I got on to my 2nd little plane I had concluded that I was better off leaving any more than coarse flattening until the end, after peening the dovetails and rivets. This avoided flattening, beating dents into it agagin and then having to flatten all over again. However, you might not be so clumsy as me!
 
Richard!!! You scoundrel! :D :D


I wonder who else is cooking up an infill out there and also in lurkerland!

This is a wonderful start! I love it already...BRAVO my dear friend!

This gives me something to look forward to each day to see any updates that you have made....great fun..I shall be watching this with pleasure judging by the start you have made.

And it is refreshing to see that we appear to be getting all the tips and wrinkles as you go along....magic!

Keep 'em coming!

Cheers my friend!

Jim

P.S. I wouldn't have used your Veritas plane to smooth of the edge of the steel though! :D :wink:
 
Crooked Tree You may have a good point there although I do want a flat surface to mark - I think I'm probably just delaying marking the dovetails for as long as I can ... today I made the cap iron instead for eg... Oh well I will find out how dinked it is after peening and maybe next time I will have more of an idea.

Jim, I don't know about the "each day" updates - I've also got a halloween horror to fix as well as a Thing in the Garage to build, but this is what I'm most excited about at the mo' so like as not. I've been cutting and filing things in the day that I can fettle in the evenings in front of the woodburner. I guess I'm pretty much sloped on this.
 
It's great to see another member having a go at building an infill, I was just saying to the wife last night that I was tempet to make another one soon. I quite fancy haveing a go at a 24" jointer :roll:

Just one question, why have you gone to the trouble of cutting a tongue and groove joint for the mouth, bearing in mind that this is to be bevel down plane? You could have just chain drilled a 5mm slot and filed it straight, I fear that the mouth that you've created is way too tight, and will be a nightmare to open out once the body is dovetailed.

As regards the dovetails, if you PM me your e-mail address I'll send you a copy of my Small Shoulder Plane assembly instructions that give fairly detailed instructions as to how I go about assembling/peining the dovetails.

Also, if you search the forum, I've written up a couple of dovetail plane builds and also a large smoother that I screwed together that worked out quite well in the end, despite breaking two taps in the sole at my first attempt.

Cheers

Aled
 
Richard T":2jr8tfbn said:
Oh well I will find out how dinked it is after peening and maybe next time I will have more of an idea.

Top Tip - Three layers of masking tape will protect the sides from all but the nastiest dinks, and will potentially save you hours in clean up time later on. Masking tape is your friend, I have mine on a "sellotape" dispenser on the bench at all times.
 
Hello Aled,
that one question: "why have you gone to the trouble of cutting a tongue and groove joint for the mouth, bearing in mind that this is to be bevel down plane?" is a very good question... I think I just got so involved in all the skills involved in making these planes that I wanted to try everything all at once just to see if I could... I've made lots of metal joints over the years but this one ( a la Bill Carter) was new to me , so I was just curious even if it it not nessecsesry for a BD smoother.
And worry not, this is not the final mouth gap. I will be opening it up before adding the sides. (As it is it wouldn't be wide enough for a BU.)
I have read your thread (s)- in fact yours was maybe the first I read - as well as just about all the other info on the net about the subject ( this could be why I am trying everything at once) but I'm very glad that you have noticed my efforts and can add the voice of experience to my first fumblings. :D
 
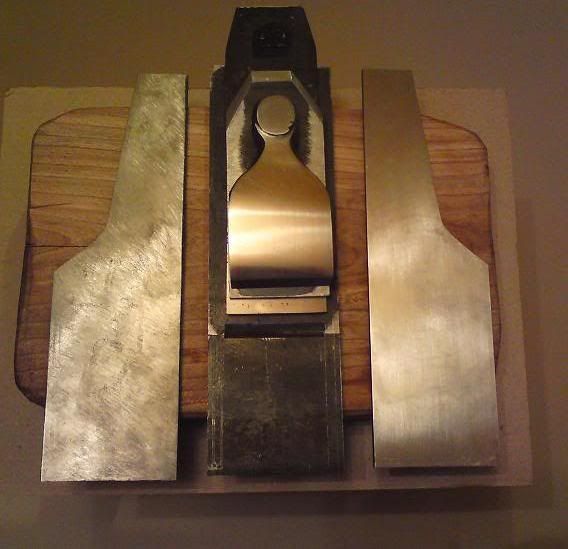
Here is everything so far. Some bits fettled more than others.

DSC00147.jpg


The RH side has been draw filed and emery clothed, the LH side has been merely dreadnaughted.
Lever cap still needs some shaping and evidence of forging removed and the cap iron is only very roughly shaped ... got far too cold to finish it last night.
 
You just KNOW this is going to be a masterpiece...you can just feel it!

Wonderful progress mate!

Tell me something...what are you forging your lever caps out of?

Can we have some shots of the forge and the forging process...mould making and process in general.

I am contemplating a backyard foundry and this part is the bit that worries me so any help or WIP gratefully received

Cheers and once again...some gorgeous work there mate...

Jim
 
Now careful there Jim; don't put the fluence on it ... :)

The lever cap was forged from a mild steel bar a tad narrower and deeper than the widest part of the finished cap. First held at 45 deg to the face of the anvil and drawn out at that straight angle, then drawn over the bic (or horn if you're Americorn) to give it the concave neck. Then I beat the top into a ball and got it all as good as I could before hot cutting it off.
As the smith on one Roy Underhill episode points out; 10 minutes at the forge is equal to an hour at the bench. Very true.
There's still a lot of file work here though, no matter how good you can get it with the hammer and there would be with a casting too although with a mould you could certainly save some work with making steep, crisp steps and features that I couldn't get by forging alone.
There again, bronze or brass is a pig to file compared to mild steel ... I think both methods might even out as being of equal faff.

This made me wonder if lever caps were ever traditionally forged. I asked Bill Carter and he's never seen one. That's good enough for me. So maybe I should draw attention to this unique feature - "call yer self a plane collector? You haven't even got one forged lever cap ... that'll be sixteen million pounds fifty, ta. "
Maybe I should stamp them accordingly although "genuine forged" would appear to be a misnomer. I'll think of something.

Another plane will need another lever cap and when I make it I will try to coincide it with SWMOM and her camera.

Will be very interested in how you go about casting Jim. I think a dedicated furnace could be easier to make than a forge ... ever the optimist ... Hey, you could make up your own alloy recipes - proper old fashioned gun metal for eg ... 8)
 
Somewhere along the line I got forge and foundry all mixed up in my head! DOH!!!

Got it now...

I am stumbling through the great book Adam gave me to try to understand the nomenclature....and getting more and more confused by the minute!

I think I need to visit a foundry and actually see some small scale stuff before I embark on this road...but if I crack it...it should be quite easy to make many more castings and thus start selling crude ones for finishing...

But that's down the road....we shall see.

Cheers mate

Jim
 
For casting, a high heat needs to be maintained around a crucible for as long as it takes to melt the contents. I'm guessing that this can be achieved with dedicated apparatus for the task that can be left to do its thing. I s'pose I could melt brass like that in my forge but there would be a hellofalot of pumping and probably airway welding up as there would be no raking during the long heat.
If I were you Jim, I'd have a peruse of the Anvilfire site; it takes some patience to search what you want to know but it's all there eventually. Hot metal work is such a big subject.
There a several companies still here in Brum who offer casting services - I'll look into it,
 
I have done a little backyard casting, mostly aluminium and some brass, for a mill restoration project.
This is a good place to start:
http://www.amazon.co.uk/Metalcasting-Cr ... pd_sim_b_5
although there are several books around.
A well made pattern and cast should reduce the finishing work to not much more that clean up although you will have to manage gassing and grain size in the metal.
This furnace is on my "one day" project list:
http://www.artfulbodgermetalcasting.com/index.html
interesting links there too.
Chemicals needed (some very toxic) and other stuff we bought from here:
http://www.johnwinter.co.uk/

If you tackle this expect lots of failures at first, good luck.

Robert
 
Many thanks for those links Robert.
Just been reading the artful bodger site. Very interesting - but no mention of using coke (that I could see.) If going down the solid fuel route there would be nothing better.
I use what are variously known as blacksmith's beans or beads- quite small pieces of coke that are pretty dense. I can easily get up to melting steel with 'em when I'm not trying to ... and that's in a forge not a furnace.
 
Major **** - up on the sides front (homer) :roll: I had a load of wood delivered just as I was embarking on the dovetails and when I came back my head must have been full of sawdust .... anyway I've since made new sides and finished one (with the gaps in the right places this time.) Photos soon.
The next piece to make is the steel frog block that the very bottom of the iron sits on. I don't think enough is written about this. You never see it in pictures of planes as it is hidden away in there - people just want to show of the prutty curves and joints ... but it is an essential part that is probably going to be just as much work for me as the lever cap. It needs forging, shaping, getting the angle at the front dead right, and riveting into the sole before being riveted into the sides when they go on.
My plan is to leave tabs on the sides and drill through for the sole rivets. We shall see .....
 
Oops! I wondered what those hashed lines were for!

:mrgreen:

Nil desperandum Richard...we have all done it...some more than others. My favourite is cutting stock short...it's never a "too long" error is it?

I am sure that you will use the steel for something else!

The "frog block" is something that I learned to respect after the brass shoulder restoration...a tiny deviation in the relationship between this and the sole will create havoc later on.

At least yours is out in the open...I have the chariot slope to mill! I am calling on dental assistance for this! :wink:

Jim
 

Latest posts

Back
Top