DIY router plane.

UKworkshop.co.uk

Help Support UKworkshop.co.uk:

This site may earn a commission from merchant affiliate links, including eBay, Amazon, and others.

Jameshow

Established Member
Joined
4 Oct 2020
Messages
5,533
Reaction score
3,400
Location
Bradford
I recently brought a piece of 6.5mm Alu plate, for another project.

Which got me thinking how hard would it be to make a router plane?

Alu block as an upstand bolted with 6mm countersunk bolts. Saddle clamp secured with 6mm bolts.

Axininster rider cutter.

Two beech handles turned from a length of wood I have.

See pic.

Any thoughts.

Cheers James
 

Attachments

  • IMG-20210130-WA0004.jpeg
    IMG-20210130-WA0004.jpeg
    32.7 KB
Not too difficult at all James, go for it.
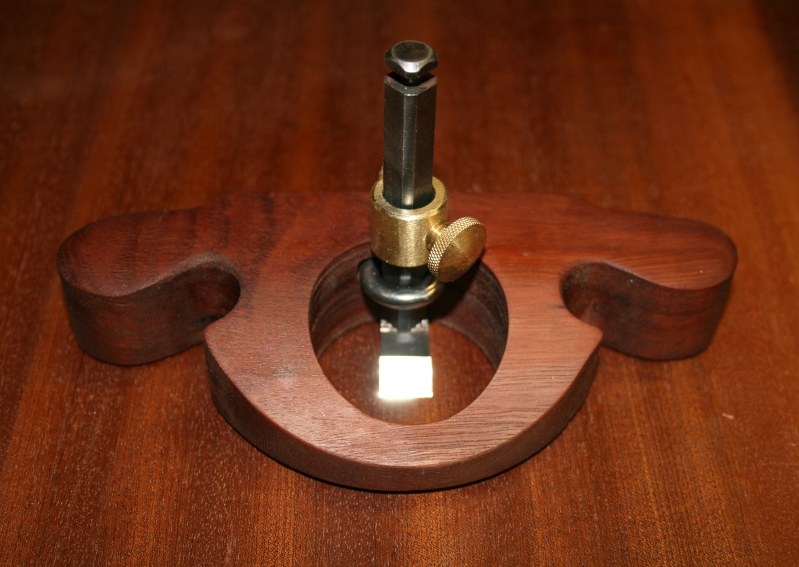
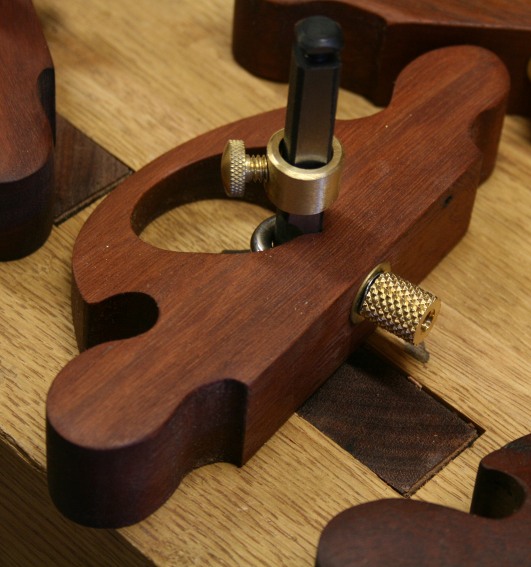
I've just made one this week, I don't want to post up the project on here as I've already posted on another forum, mine was 8mm alloy plus a scap block and brass, the cutter is from an allen key. Didn't cost me a penny, just time.
RP 1.jpg
RP 3.jpg
 
That's really nice !

Allen key! Genius!
The cheaper they are the softer they are?!

Did you weld the block to the base?

I was going to tap the block with countersunk bolts?

Cheers James
 
That's really nice !

Allen key! Genius!
The cheaper they are the softer they are?!

Did you weld the block to the base?

I was going to tap the block with countersunk bolts?

Cheers James
No
I drilled through the plate from underneath with the block clamped in place to get the spacing right then drilled and tapped the block to accept countersunk machine screws. I added some epoxy when screwing it together, belt and braces stuff.

The Allen key is not my idea, pinched that of the net.

EDIT
I already have the Allen keys but any half decent one will do the job if you don't want to buy a cutter. I haven't heat treated mine yet as I have some other stuff planned and will use the oven to anneal when the missus is out, difficult when isolating though.
 
Last edited:
Perfect sounds like a plan.

Alu block ordered.

Better space out the bolt orders to keep Mrs on side!!

Cheers James
 
Not too difficult at all James, go for it.
I've just made one this week, I don't want to post up the project on here as I've already posted on another forum, mine was 8mm alloy plus a scap block and brass, the cutter is from an allen key. Didn't cost me a penny, just time.
View attachment 102252View attachment 102253
Pardon my ignorance but I've been admiring your design and was somewhat puzzled as to the function of the various locking nuts. At first I guessed the screw on the right in the 2nd image was locking the cutter at the desired depth after being set by the brass wheel on the vertical screw which seemed to make the locking nut mechanism attached to the cutter itself redundant but I then leapt to the conclusion that the screw on the right was actually only holding the end of the vertical depth adjustment screw which would then need a means of locking off via the aforementioned locking mech attached to the allen key. Do I win a prize?
 
Pardon my ignorance but I've been admiring your design and was somewhat puzzled as to the function of the various locking nuts. At first I guessed the screw on the right in the 2nd image was locking the cutter at the desired depth after being set by the brass wheel on the vertical screw which seemed to make the locking nut mechanism attached to the cutter itself redundant but I then leapt to the conclusion that the screw on the right was actually only holding the end of the vertical depth adjustment screw which would then need a means of locking off via the aforementioned locking mech attached to the allen key. Do I win a prize?
Hi Terry

The knob screwed into the main block at the back holds the cutter tight at it's cutting depth, it engages with the flat on the back of the cutter shaft.
The nut around the cutter with a tightening hex knob is a depth stop (just a steel nut drilled out to slide on the cutter then drilled and tapped through the side). The wheel behind the cutter is a depth adjuster, the wheel engages in a slot cut halfway into the cutter shaft so with the other screws loose the cutter moves up or down as you turn the wheel.

It's a very common method in shop made router planes so I haven't invented anything. The beech sole on the router is just because I felt it would be less likely to mark the work, the alloy base would would just as well.
 
That's really nice !

Allen key! Genius!
The cheaper they are the softer they are?!

I’ve made router blades out of Allen keys in the past. If you are serious about using a router plane, build the plane around the Veritas router plane blades. Then you will have a wide range to choose from, and be assured that the steel will hold an edge. Going cheap here is a mistake.

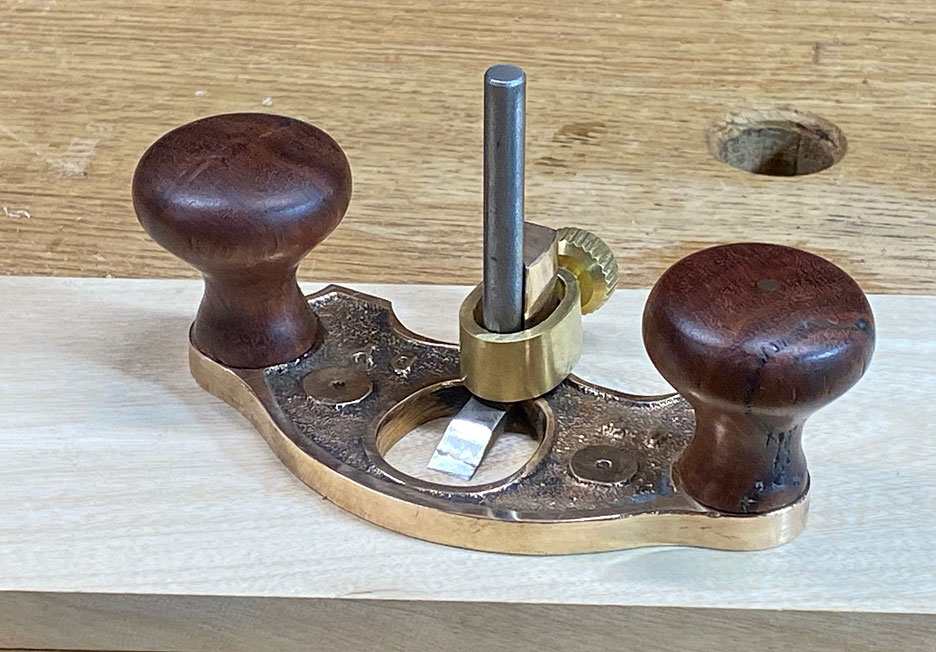
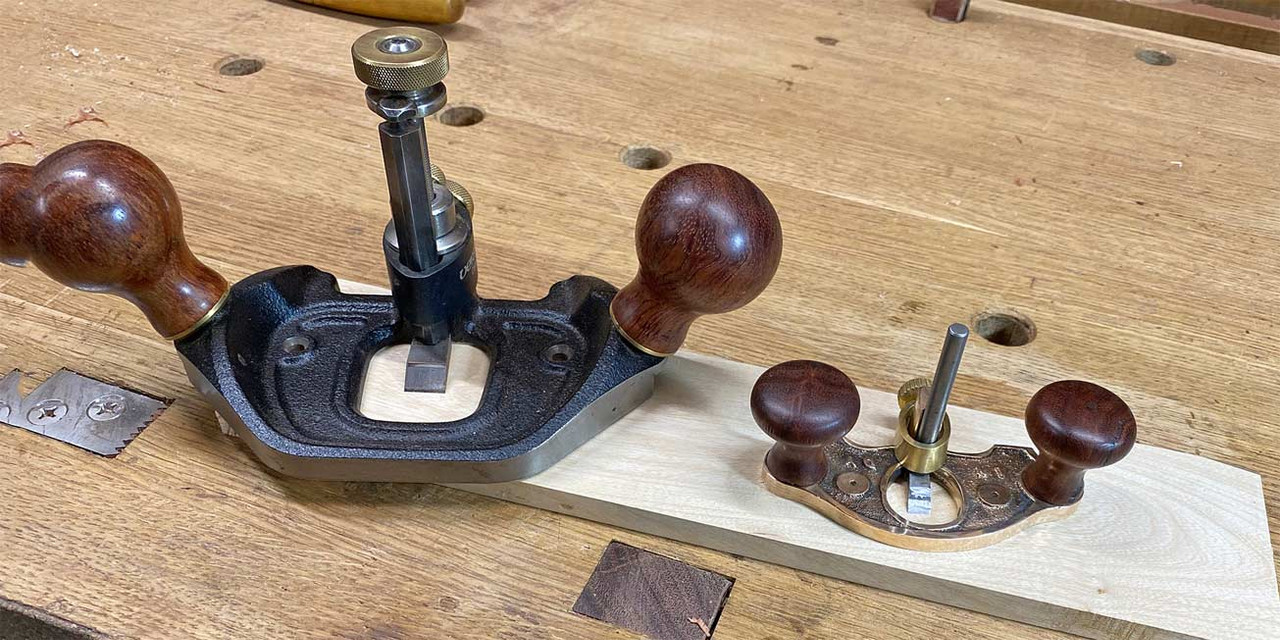
The woodie I built was not in place of a manufactured router plane - I have a Large Veritas - but because I wanted a smaller router plane. I use these tools a great deal. Here is one I built from a (rough) St James Bay kit ...

1-1.jpg


.. compared against the Veritas Large ....

5.jpg


Regards from Perth

Derek
 
I'd never thought to have a go at making a router plane, there is little to it in parts and as pointed out up there ^, lots of options in off the shelf cutters.
I have a Syil X4 CNC that is sat in storage (awaiting a new workshop), would be (relatively) easy enough to machine a brass base.
Looking forward to seeing others on the thread.
 
Update I turned a couple of handles on my B&D lathe.

Also the plate arrived so I have marked out the layout...any comments please.

Cheers James
 

Attachments

  • IMG-20210204-WA0012.jpeg
    IMG-20210204-WA0012.jpeg
    121.3 KB
  • IMG-20210204-WA0022.jpeg
    IMG-20210204-WA0022.jpeg
    52.5 KB
Have a look at Sawdust's awesome build James. Think you'll like it. Might even be prettier thann Lons' one! 😬
https://www.ukworkshop.co.uk/threads/the-“keeper”-router-plane-wip.109785/And I'd heed the advice of Derek Cohen to invest in a Veritas cutter. Why not build your plane round a guaranteed iron? Makes total sense unless you have experience heating and tempering. Good luck with the build btw. Whatever way you proceed.
 
Last edited:
Slow progress tonight.

Finally cut the 2" holes using the slower speed and cutter fluid gt85! Thanks guys!

Cut the cutter holder and tapped it.

Had to tap the holes all the way through as the tap is tapered. There must be a specialist tap to do blind holes?

Cannot find the m8 bolts for the handles so I definitely need to tidy the workshop!!

Also need to buy a 12mm drill to drill out cutter holder.

Cheers James
 

Attachments

  • IMG-20210217-WA0008.jpeg
    IMG-20210217-WA0008.jpeg
    135.1 KB
Great timing :D
I just picked up a bnib Stanley 271 router, to replace the one I have but snapped one of the screw holes, and was wondering what to do with it. The open end side is ok, and I was just thinking this evening of setting it into a nice piece of something to make a medium sized router.

Just wondering what timber to use. Maybe lignum, maybe blackwood.

Do you think you'll be able to incorporate a fine adjuster ?, certainly hope you can, that makes a big different to their use.(and I can copy it lol)
 
Great timing :D
I just picked up a bnib Stanley 271 router, t
Do you think you'll be able to incorporate a fine adjuster ?, certainly hope you can, that makes a big different to their use.(and I can copy it lol)
Just seen this post.
Yes you can quite easily adapt it. Here is a picture of my very old 271 modified with an adjuster (although I seem to have committed the offence of using a sharpened hex bolt - works find for me, after Cherry red temper and then anneal in the oven at 190, needs honing about as often as a regular plane).
To make the adjuster: tap one of the two holes in the screw posts (not the blade hole...) with M6 - ok its about 5.5mm diameter so its a thin screw wall. The adjuster rod is M6 threaded rod, can be secured with glue as well as the screwed grub. The adjuster itself is a knurled nut. The nut is a bit tricky as din standard nuts for m6 are 24/25mm diameter which is too wide for the 271, it would sever most of the cutter, so either find a non standard M6 at 20mm diameter - lots of hours search on ebay. Or a standard M5 nut at 20mm and enlarge the m5 hole with a 5.2mm stainless bit (and drill slow revs and fast progress to minimise heat - or go very slow and keep cool) and then very carefully tap to M6, as its stainless so steady turns and lots of cleaning with oil).
.
Matching the cutter. It cut the slot (notch) in the hex to match the thickness of the knurled part of the nut (lets call it the collar) so as not to get play on the M6 rod when adjusting the blade depth . If you go for Veratas or similar cutters you may need to get a thicker knurled nut collar and sand to the size of the cutter notch. - if that makes sense.

You say you snapped on of the screw posts. For this design both posts are needed, one for the cutter and one for the adjuster so you will have to repair the second screw post enough to hold the adjuster. Not sure what bit has broken. If its the retaining hole for the lock-screw that can be replaced. The hole is an imperial thread just below 5mm, so you could re-tap with M5 and lock with a hex screw or carefully drill and tap a new hole and then glue the bolt in with super glue. Once the adjuster is screwed in place it can stay there permanently. Its only the cutter that you use, and I find I never use the closed end of this router, its so small and in any case you just screw it onto a piece of hardwood.
I usually use the 271 bolted to a piece of 15mm oak - quite large 7" by 2/34"- not shown in the photo.
Hope all this makes sense - good luck.
 

Attachments

  • modified Stanley 271.jpg
    modified Stanley 271.jpg
    121.6 KB
Just seen this post.
Yes you can quite easily adapt it. Here is a picture of my very old 271 modified with an adjuster (although I seem to have committed the offence of using a sharpened hex bolt - works find for me, after Cherry red temper and then anneal in the oven at 190, needs honing about as often as a regular plane).
To make the adjuster: tap one of the two holes in the screw posts (not the blade hole...) with M6 - ok its about 5.5mm diameter so its a thin screw wall. The adjuster rod is M6 threaded rod, can be secured with glue as well as the screwed grub. The adjuster itself is a knurled nut. The nut is a bit tricky as din standard nuts for m6 are 24/25mm diameter which is too wide for the 271, it would sever most of the cutter, so either find a non standard M6 at 20mm diameter - lots of hours search on ebay. Or a standard M5 nut at 20mm and enlarge the m5 hole with a 5.2mm stainless bit (and drill slow revs and fast progress to minimise heat - or go very slow and keep cool) and then very carefully tap to M6, as its stainless so steady turns and lots of cleaning with oil).
.
Matching the cutter. It cut the slot (notch) in the hex to match the thickness of the knurled part of the nut (lets call it the collar) so as not to get play on the M6 rod when adjusting the blade depth . If you go for Veratas or similar cutters you may need to get a thicker knurled nut collar and sand to the size of the cutter notch. - if that makes sense.

You say you snapped on of the screw posts. For this design both posts are needed, one for the cutter and one for the adjuster so you will have to repair the second screw post enough to hold the adjuster. Not sure what bit has broken. If its the retaining hole for the lock-screw that can be replaced. The hole is an imperial thread just below 5mm, so you could re-tap with M5 and lock with a hex screw or carefully drill and tap a new hole and then glue the bolt in with super glue. Once the adjuster is screwed in place it can stay there permanently. Its only the cutter that you use, and I find I never use the closed end of this router, its so small and in any case you just screw it onto a piece of hardwood.
I usually use the 271 bolted to a piece of 15mm oak - quite large 7" by 2/34"- not shown in the photo.
Hope all this makes sense - good luck.
Just noticed your reply to my reply....

Thats exactly the thing i was thinking of, and pretty much the same design, although I was thinking of cutting a thread on the top of the cutter to screw on a flange of sorts,rather than try to cut a slot into it.
Thing is though, i went to thread it and ran an M6 through but it hasnt cut a very deep thread,. in fact i think its just about marked it and cut near about nothing, so what exactly is its diameter :unsure:

I was also going to epoxy in the threaded rod, so wasnt thinking id need to have a screw to hold it in place and stop it turning, and was going to make a small indent to which a grub screw would contact, also epoxied in, just to make it solid.
Was also looking at Phosphor bronze rod rather than steel, which i can get at 1/4"(6.35mm) put a thread on it but ive been thrown off by the M6 not cutting anything, and ive no digital calipers at the mo to get an exact size. Ive the usual M3-M12 tap and die set, but the plane holes could be imperial after what youve said there.

Im ok with making small metal things from scratch and tapping or threading as needed, but i think id prefer to know what the basic sizes are first.
I usually use the 271 bolted to a piece of 15mm oak - quite large 7" by 2/34"- not shown in the photo.
Was thinking of using Maple, or even something fancy like Bocote as a base for it to give a more usable size/shape and allowing for turned handles, you know, make it into a little project of its own.
 
Last edited:

Latest posts

Back
Top