DBT85s Workshop - Moved in and now time to fit it out

UKworkshop.co.uk

Help Support UKworkshop.co.uk:

This site may earn a commission from merchant affiliate links, including eBay, Amazon, and others.
Did I? No, I definitely did all the faces. I took some boards off a while back to alter the window, and they were painted all round. Both faces, both edges, and both ends. I'm not sure I would do that if I were building for someone else, but for your own workshop......peace of mind and all that.......
 
MikeG.":3m3kx6za said:
Did I? No, I definitely did all the faces. I took some boards off a while back to alter the window, and they were painted all round. Both faces, both edges, and both ends. I'm not sure I would do that if I were building for someone else, but for your own workshop......peace of mind and all that.......

I refer the honourable gentleman to exhibit a

http://www.thewoodhaven2.co.uk/viewtopi ... 4103#p4103

Nice to know it's not specifically essential.

Honestly I'm not sure on colour and can;t really clad it until I am. Not even sure if I want to fit fascias unpainted as I'll have to do them after with tiles sitting on them.
 
It's certainly much easier to do the fascias beforehand, because the damn membrane gets in the way afterwards. You still have to do a quick once-over with it in situ, to cover the nail heads.
 
I know you're probably set on your larch cladding idea.
But all this talk of which paint or finish to go for reminds me of why I changed my mind on same.
I have a 4 by 5 metre log cabin which has 44mm thick external log thickness, finished with primer and three coats of stain.
That was done in 2013. And twice more since. :roll: :roll:
Now can't wait to add external insulation - Actis - and especially, over clad it with horizontal Hardieplank.
The initial decoration was ok ish but I hate having to redecorate every few years......
 
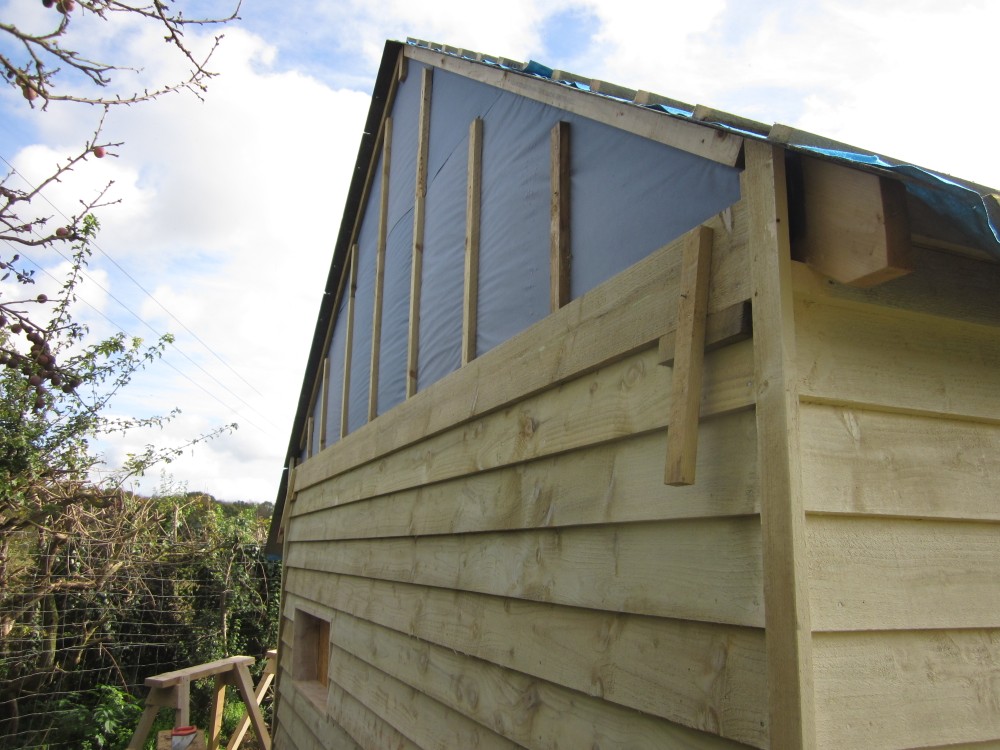
Mike, another question. from what I can see on your build and Phils, battens were put along the top edge of the face of the gable rafters, I assume to give the board something to rest on.

As seen here and later in the build
34HIdmR.jpg


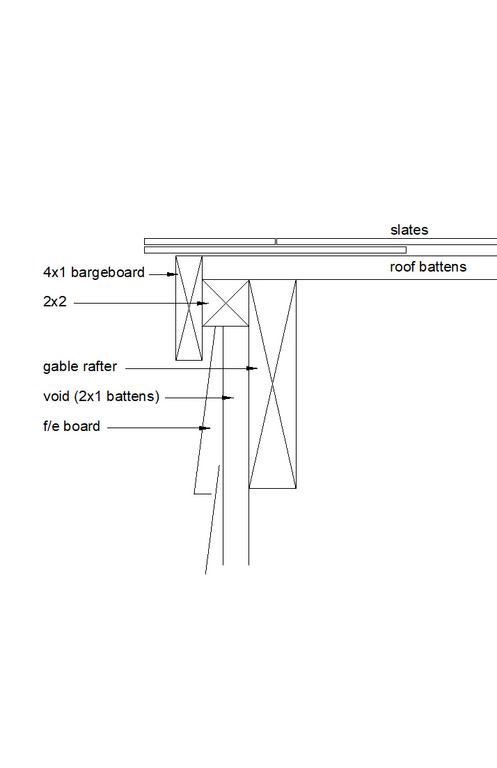
In this drawing you did for me there is no batten, just a 2x2 upon which you've put the barge board. Is that 2x2 hard up against the underside of the roof battens and then a batten below that to give that support?

FaWgInX.jpg


Westwood":2nzi8e7f said:
I know you're probably set on your larch cladding idea.
But all this talk of which paint or finish to go for reminds me of why I changed my mind on same.
I have a 4 by 5 metre log cabin which has 44mm thick external log thickness, finished with primer and three coats of stain.
That was done in 2013. And twice more since. :roll: :roll:
Now can't wait to add external insulation - Actis - and especially, over clad it with horizontal Hardieplank.
The initial decoration was ok ish but I hate having to redecorate every few years......
I have £600 quids worth stacked up ready to go so yeah rpetty set on it haha. Though its just treated FE, not larch or anything fancy.
 
That batten would sit up to the underside of the 2x2 in the drawing. The photo you show still has slate undercloaking in place, which I later removed and replaced with the precise detail I've drawn for you. That batten picks up the ends of the boards as you go up the gable. It's use becomes obvious when you do it, and if you left it out the ends of most of the boards would just be flapping.
 
MikeG.":3dfi81rw said:
That batten would sit up to the underside of the 2x2 in the drawing. The photo you show still has slate undercloaking in place, which I later removed and replaced with the precise detail I've drawn for you. That batten picks up the ends of the boards as you go up the gable. It's use becomes obvious when you do it, and if you left it out the ends of most of the boards would just be flapping.
Great thanks. I can start battening the gables now!
 
A bunch more battening done, just the other gable end to finish now. I spent a fair while working out which bits of the gable to do in which order and which bits if any were going to be visible or not. EG, the 50x50 along the underside of the roof battens mustn't stick out beyond the fascia which isn't yet fitted, so I got a bit of that clamped in place to cut and fix the 50x50, then I could work out the end battens, then the battens that sit under that 2x2, and then finally all the bits in the middle.

I've just chopped up a couple of bits of featheredge to see how far it protrudes so that I can mount the corner detail appropriately. That's with a 40mm overlap.

50069345492_e0981b7fd2_b.jpg


50069345292_d123f54887_b.jpg


The LED panels also arrived so are tucked away. I'm waiting for the electrician to let me know when he can come and fit a CU in the workshop and hook me up with some power while I progress.

Still no closer on paint.

Richard G do you have any more photos of your garage I can look at?
 
Hi All,

First post on the forum so please be gentle...

I have been following along with your build and have to say it looks absolutely fantastic, incredible work ! I am in the process of planning my own workshop which I think will be pretty similar, I have found your experiences and knowledge very helpful in honing my ideas but also driving along my enthusiasm to get it kicked off.

I just wanted to add another vote of support for the Bedec Barn Paint, I have a log cabin painted with it on recommendation and it is great, definitely not the cheapest but worth it. I have Forest Green, I appreciate you said you were thinking grey/white but would be more than happy to send some pictures of the green if it were helpful.

Swifty
 
Swifty if you could it would be great, you might have to have 3 posts or something to be allowed to post pics. I can't remember. Glad my ramblings have been useful for you!

I'm at the point where I could kind of do the roof or the walls but can't do either until I've picked a colour. There are other jobs to do like paint the inside or run the SWA, tidy up etc, but those are all boring bits!

So yes. Photos please! It's surprisingly difficult to find examples of various colours, or you find one you like and the buggger didn't mention what colour they used!

I might actually make a thread on that very subject.
 
iLgQxpz.jpg


This and my workshop are Country Cream.

TEtfKLS.jpg


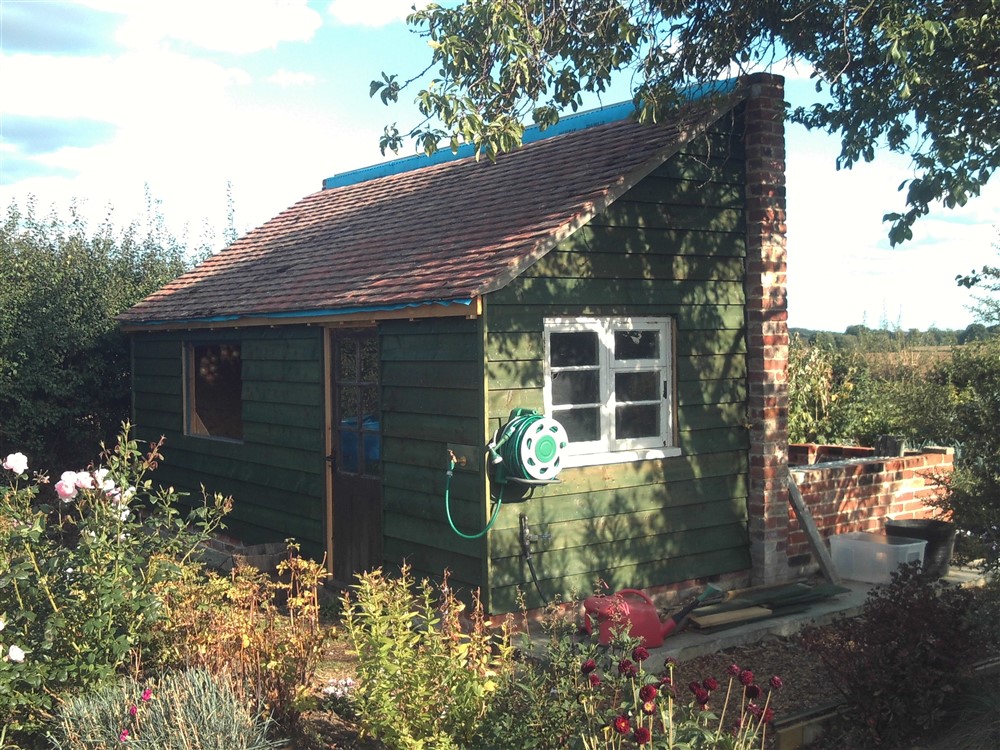
The potting shed is Dark Green. I always use semi-gloss. Incidentally, it only had one full coat at that point, so looks patchy. It darkened up a bit and got more even when the second coat was applied.
 
I couldn't agree more about colours, you know what you don't like instantly...but finding what you do seems overly complex ! I am really happy with the Forest Green, part of the cabin was originally stained (Medium oak I think) and although on paper it looked ok I never liked it, too yellow, the green has made it blend in rather than stand out.

Thanks for the heads up on the pictures, I just took one of the tin with my phone so will try that and if it works will get a better camera to get some decent pictures in the sunshine...if not then I am 1 post closer :lol:

Forest Green.jpg


If the colour looks like an option for you then I would be more than happy to stick some in the post.
 

Attachments

  • Forest Green.jpg
    Forest Green.jpg
    212.3 KB
That photo with your phone looks fine to me mate, just go with that!

Thanks for the offer on the paint, but I'll just buy some and get it done. Even testing a patch is never the same as looking at a 14sqm wall!


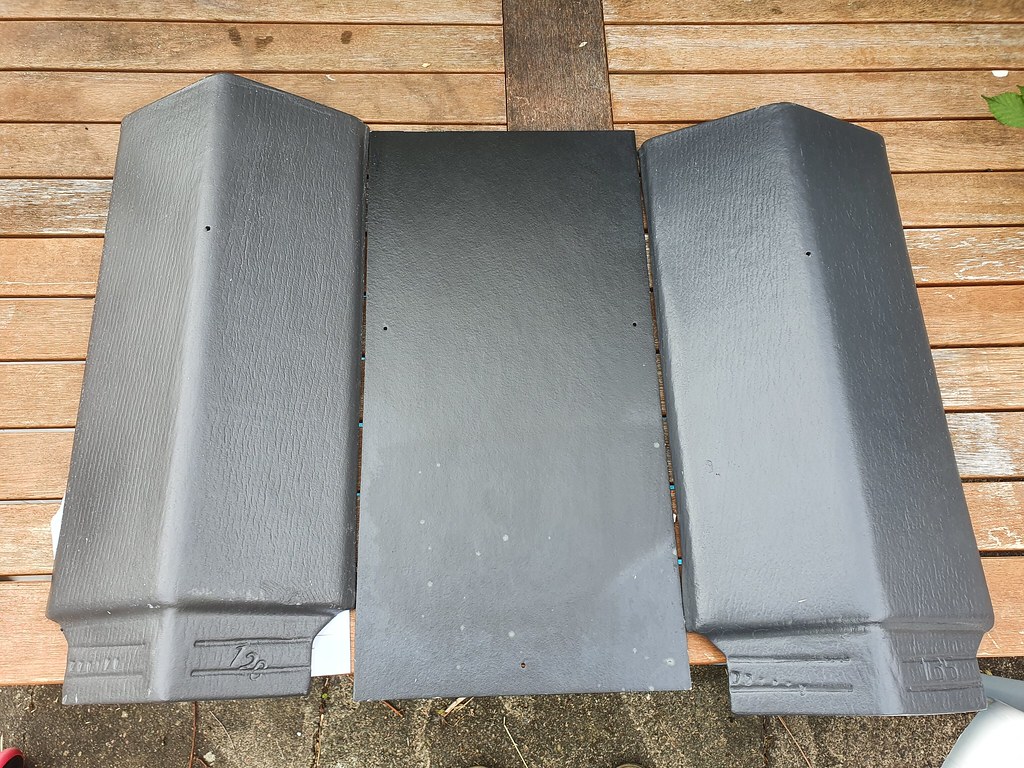
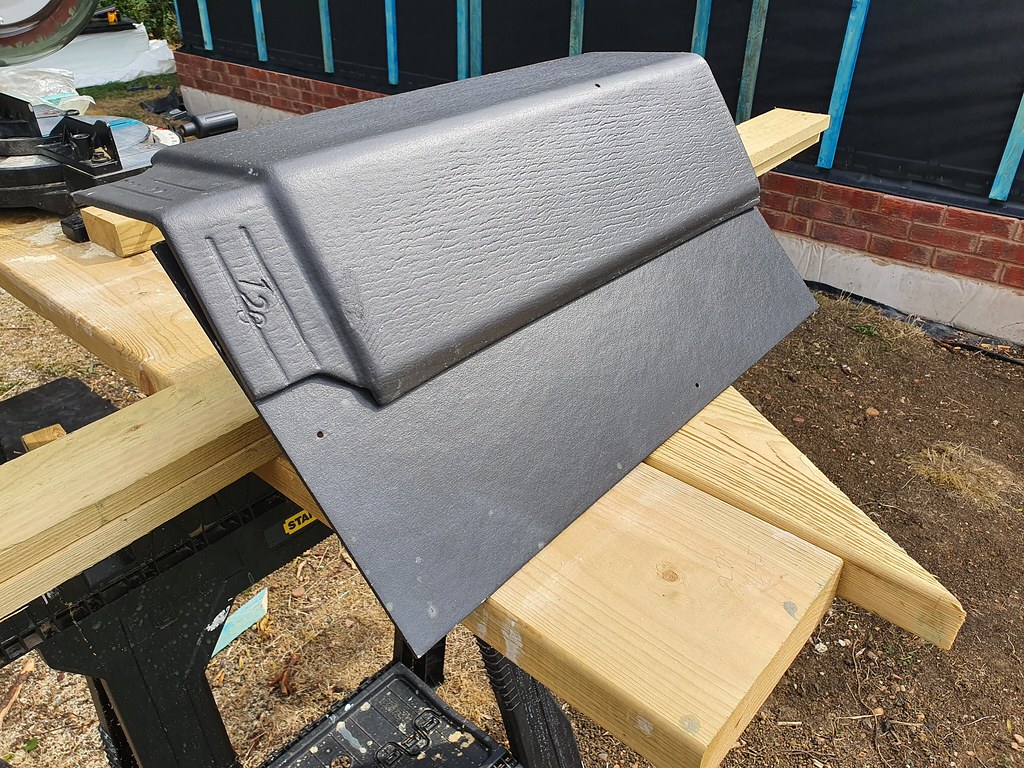
In other news, the new ridge tiles have arrived. I initially thought they'd sent the same graphite colour as before but they are in fact slightly different. Apart from each other you'd never know but when side by side you can just about tell. If anything it's actually easier when looking at the photo. They aren't as black as the actual tiles but at an angle with glare you're probably not going to see it. Though why they don't use the same colours I don't know.

120 deg bl/blk - bl/blk Jutland slate - 135 deg Graphite
50071567147_f4ff353a82_b.jpg


120deg bl/blk - 135deg Graphite
50071566852_e78df907f3_b.jpg


120deg bl/blk & bl/blk Jutland slate
50071314206_3676c59b8a_b.jpg


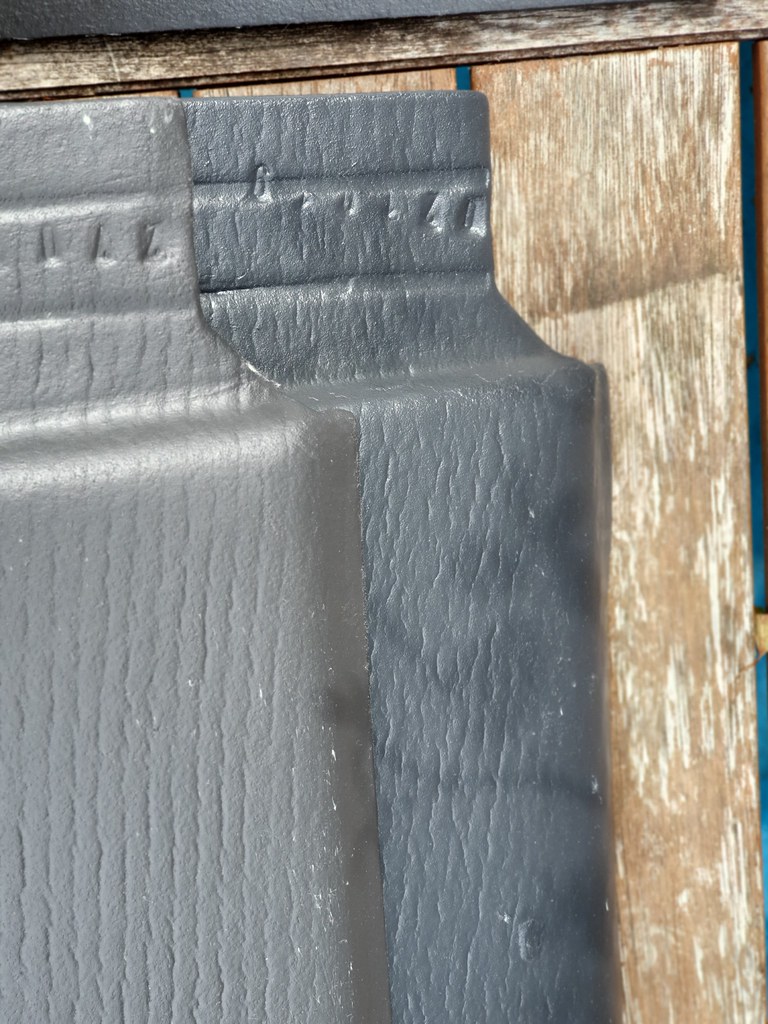
I have asked why they have a hole in the top and shall receive communication from someone in the technical dept soon apparently.

Looks to me like its supposed to be fitted like this to me. But this is a Marley photo, not a Cembrit one. I can't find anything from Cembrit that shows this fixing method.

ridge-tile-2.jpg
 
ok...well the overriding feeling here is embarrassment for the state of the garden and disrepair of the cabin ! However, as promised, here are a couple of pictures. I took a few that varied in brightness as the clouds were blowing over, these 2 look to be the best representation of the colour.

Please don't judge me...I am in the middle of some jobs here and wasn't expecting anyone to see it in this state :oops:

P1060719M.jpg


P1060717M.jpg
 

Attachments

  • P1060719M.jpg
    P1060719M.jpg
    1.2 MB
  • P1060717M.jpg
    P1060717M.jpg
    1.8 MB
DBT85":3lgg1bzv said:
I have asked why they have a hole in the top and shall receive communication from someone in the technical dept soon apparently.
They're for the skyhooks mate.
:wink:
 
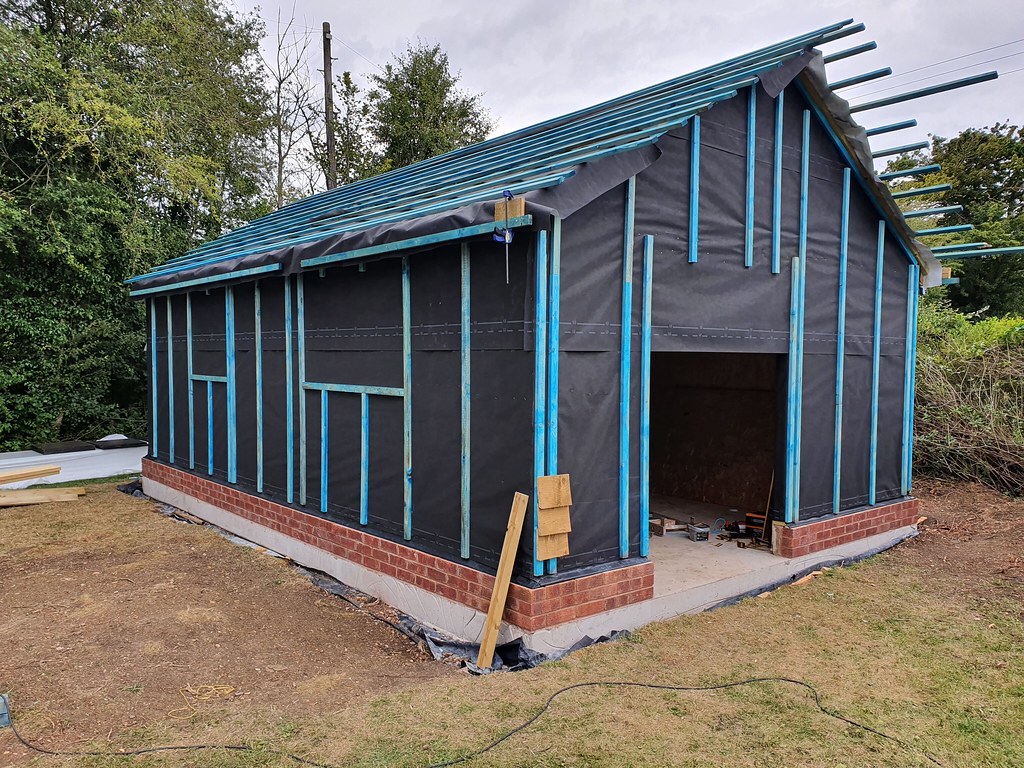
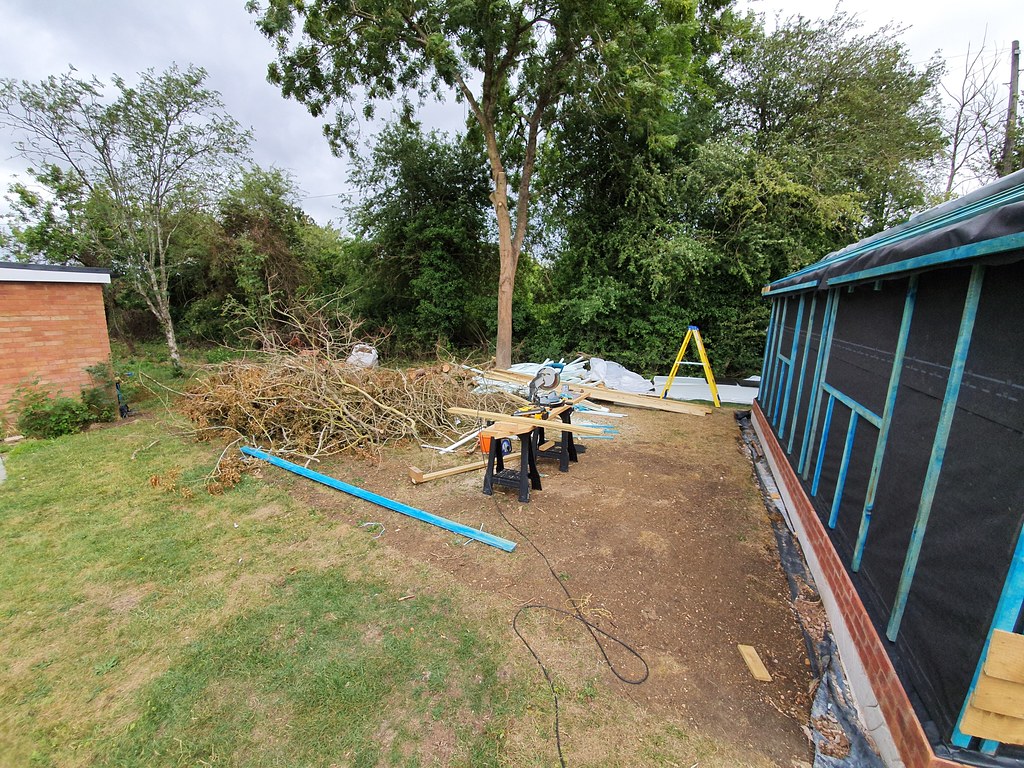
That's the other gable battened out. My workshop currently looks like a Tron tribute.

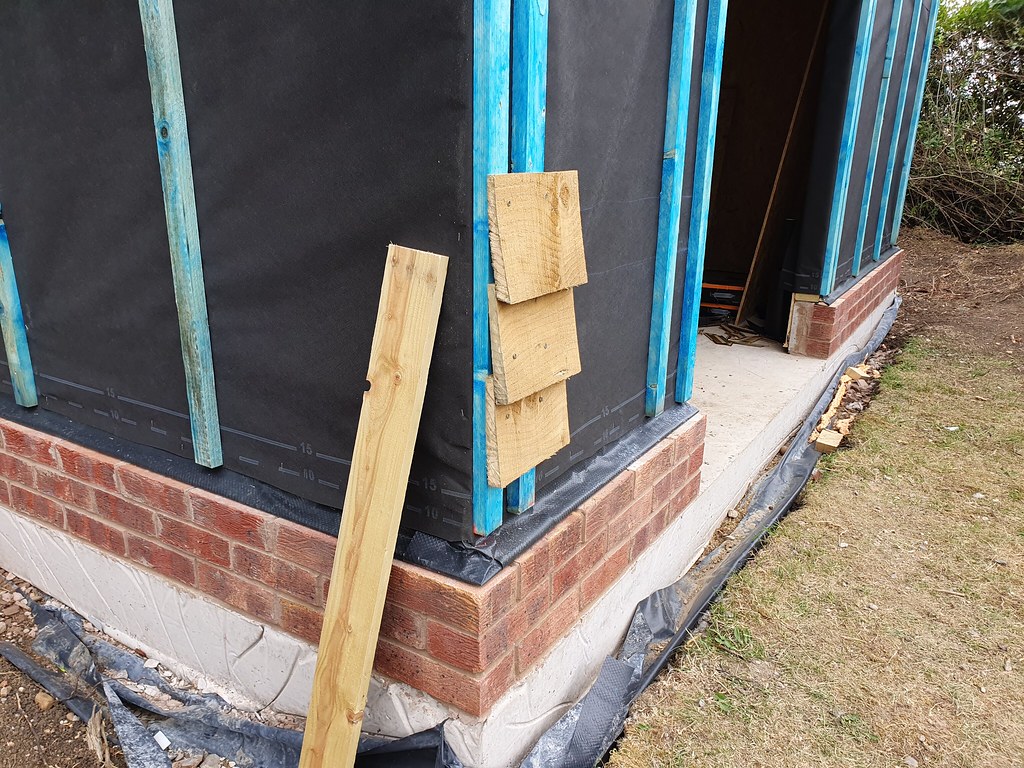
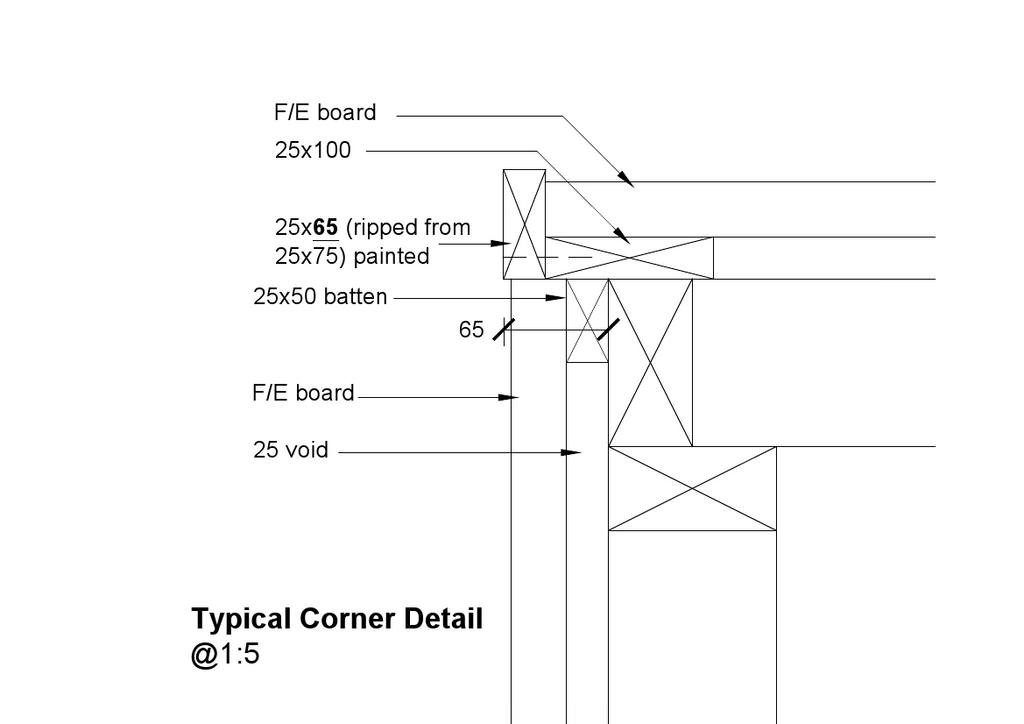
I then spent some time sorting these corner details out. Making sure I had the battens in the right place, 25x100 in the right place and 25x65 in the right place, as per Mikes drawing.

LLWd9UU.jpg


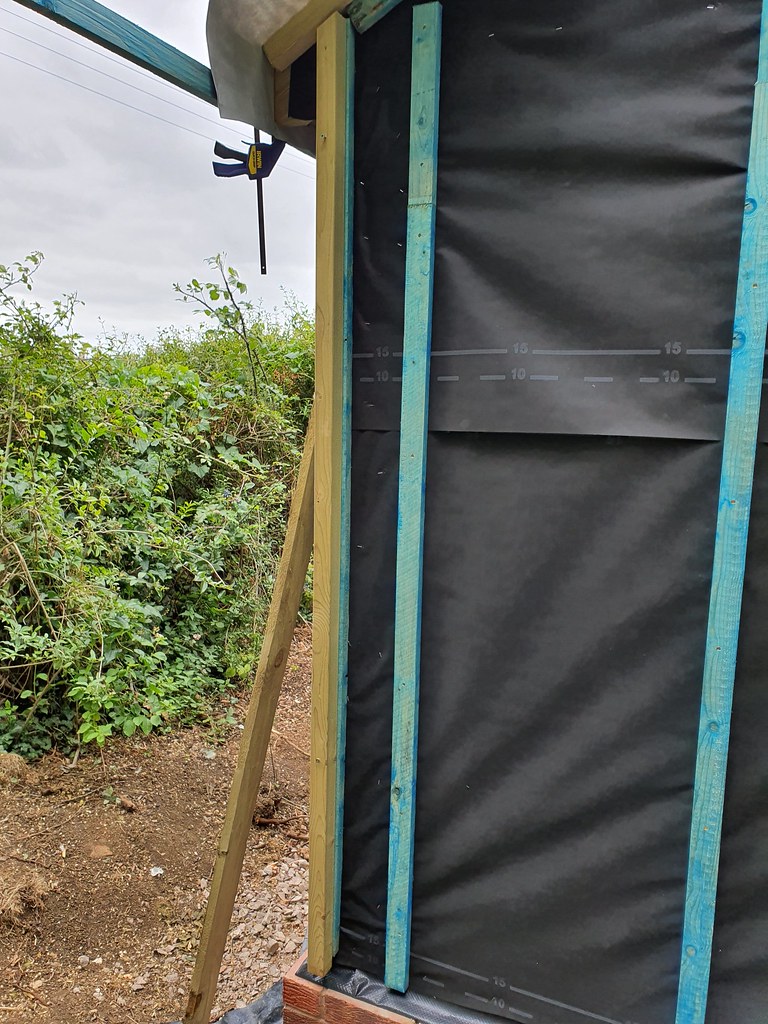
I secured a bit of 45x45 to the batten which gave me the leading edge I needed to mount to as that's how far my FE will protrude as measured from my 200mm demo section pictured earlier. Trying to hold up bits in the wind and measure and screw them was pointless so this solved that as I had something I could clamp the 25x100 to as well.

45x45 mounted to batten as a gauge and clamping point
50071831957_e5367f7e9f_b.jpg


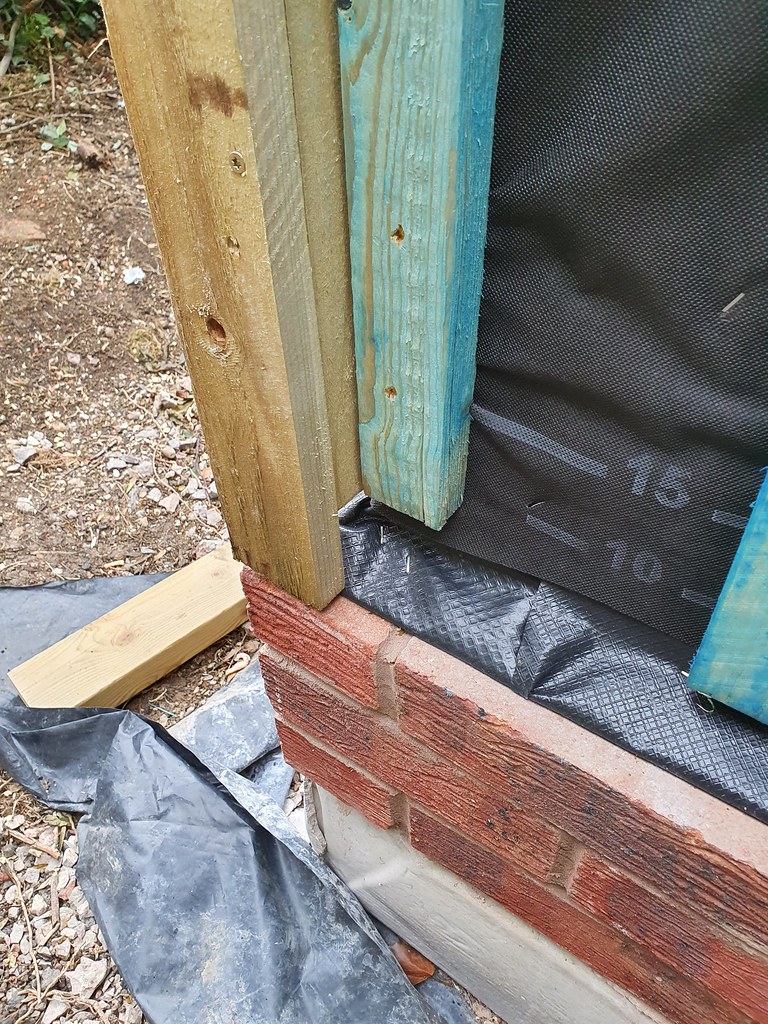
Once finished the 25x65 bit to be painted was sticking out way past the brickwork. NOOOOOO I specifically did the brick and block plinth to help avoid this. I got it wrong. :oops: Fortunately it was only a test run with everything screwed in place. I had the 25x100 mounted so that IT would cover the whole ends of the FE, which then meant that the 25x65 trim would stick out past it. Once I worked that out I re fitted and now it looks much better.

Fitted correctly, and nicely aligned with the plinth
50071831837_834699dab1_b.jpg


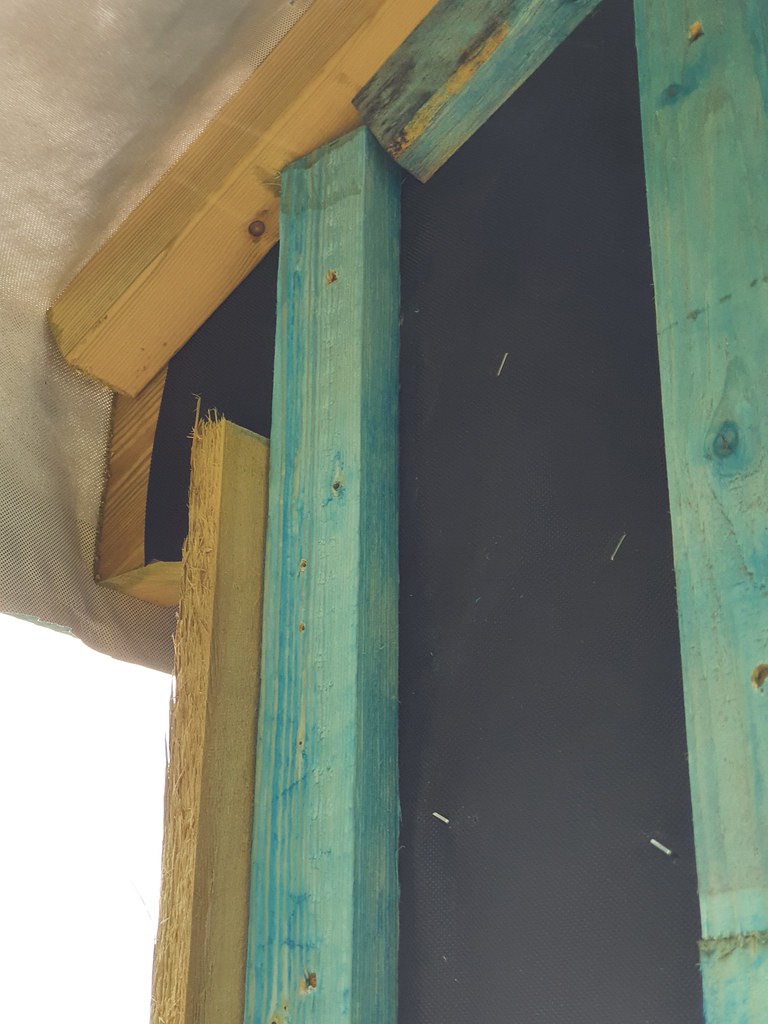
What I'm still working out is the top. This test was just using an offcut for the 25x65 bit, so its only 600mm long and down at the bottom of the wall. For the top I need to work out where it will end, because there is a barge board to come down under the tiles as well as a fascia to fit to the plumb cut on the rafters. I don't the fiddly details, they don't show huge progress in just a few hours like framing or getting walls up!

What to do at the top for the corner detail.
50071578931_8c84002905_b.jpg


It's now pouring with rain again. So I can work this out, then look at more paint and maybe just finalyl tidy up inside the workshop as its still a dump. I had hoped to start on tidying the garden too.

Sw1fty":2b35wvr9 said:
ok...well the overriding feeling here is embarrassment for the state of the garden and disrepair of the cabin ! However, as promised, here are a couple of pictures. I took a few that varied in brightness as the clouds were blowing over, these 2 look to be the best representation of the colour.

Please don't judge me...I am in the middle of some jobs here and wasn't expecting anyone to see it in this state :oops:
Thanks for the pics! I really do appreciate it. I can show them to the good lady and see.

To make you feel better, here is the messy area in my garden. Yours is fine!

50071018038_746a5c3c08_b.jpg
 
The bottom planks should stick out past the line of the corner boards. I took my line from up the wall where the effect of the wedge at the bottom has gone away....but you got to that point by yourself.
 
MikeG.":2818zyvk said:
The bottom planks should stick out past the line of the corner boards. I took my line from up the wall where the effect of the wedge at the bottom has gone away.
I have done the same mike. There are 3 small boards pinned up and my measurement is taken from there, so the bottom boards with the wedge will stick out.

Am I taking the 25x65 corner boards all the way to the underside of the roof?

I'll note that if I do that it overlaps the 50x50 that's also on the underside of the roof, which means the barge board can't run all the way down unless its spaced out, which it would probably need to be anyway to go over the FE.
 
Back
Top