Corvid19 Desk

UKworkshop.co.uk

Help Support UKworkshop.co.uk:

This site may earn a commission from merchant affiliate links, including eBay, Amazon, and others.

Fitzroy

All the gear...
Joined
12 Mar 2013
Messages
2,994
Reaction score
2,543
Location
Aberdeen
Three weeks back the schools announced ‘over to you folks’ and my wife and I became teachers for our boys, both primary aged. We’re fortunate to have plenty of rooms, but with me also working from home, we were desk real estate lacking and the boys were working from the kitchen table. I know I’ll knock up a quick and dirty desk for them from those oak boards I have, it’ll only take a weekend. It didn’t it took three, which for me is still a vast improvement in execution time.

It started with the knowledge I only had six boards, each one 2100x140x27mm, and we needed a desk for two to sit at. Some planning was required.
EB276D77-09DF-4585-A64E-5C1F97AE4894.jpeg

Design was approved by the management, and it was to sit in the playroom spanning over the fire hearth, this set the length of the table at about 150cm with a depth of c.60cm. From 12.6m of board length 6m would be in the table top. I then had legs that would have to be laminated up and aprons etc. Could I get it all out the boards?
07A9916B-7D85-49EB-948E-66A81A81DDED.jpeg


I bit of Tetris with parts and I had a cutting list. Biggest compromise was that I was going to have to cut the front and rear aprons (is that the correct term?) from a single board meaning my apron height would only be 70mm max. This ended up being a bit of a weakness, which you’ll see later.

EF3F0E3F-48EB-42A7-B79C-D815CEA055C9.jpeg

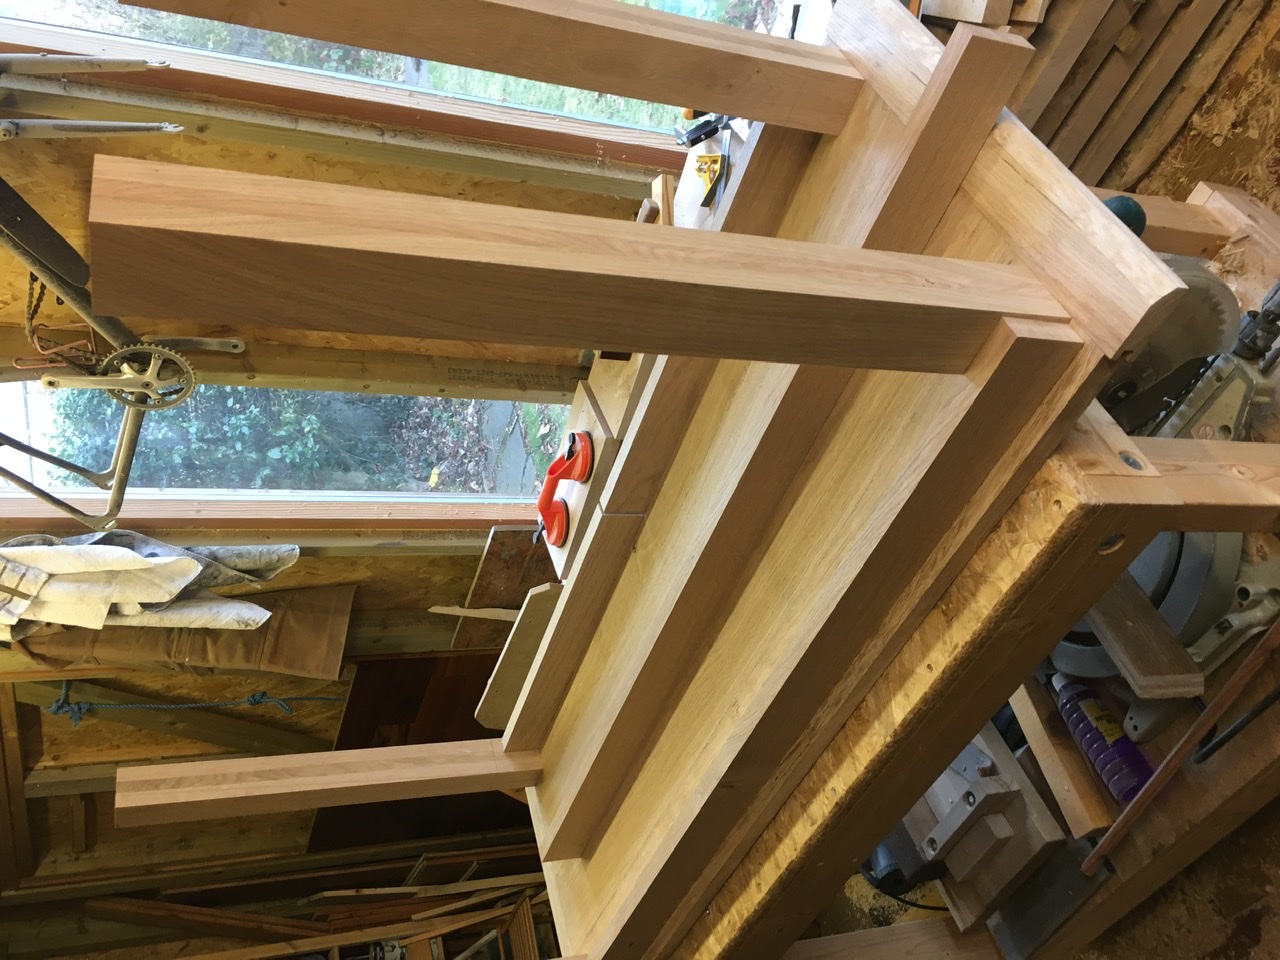
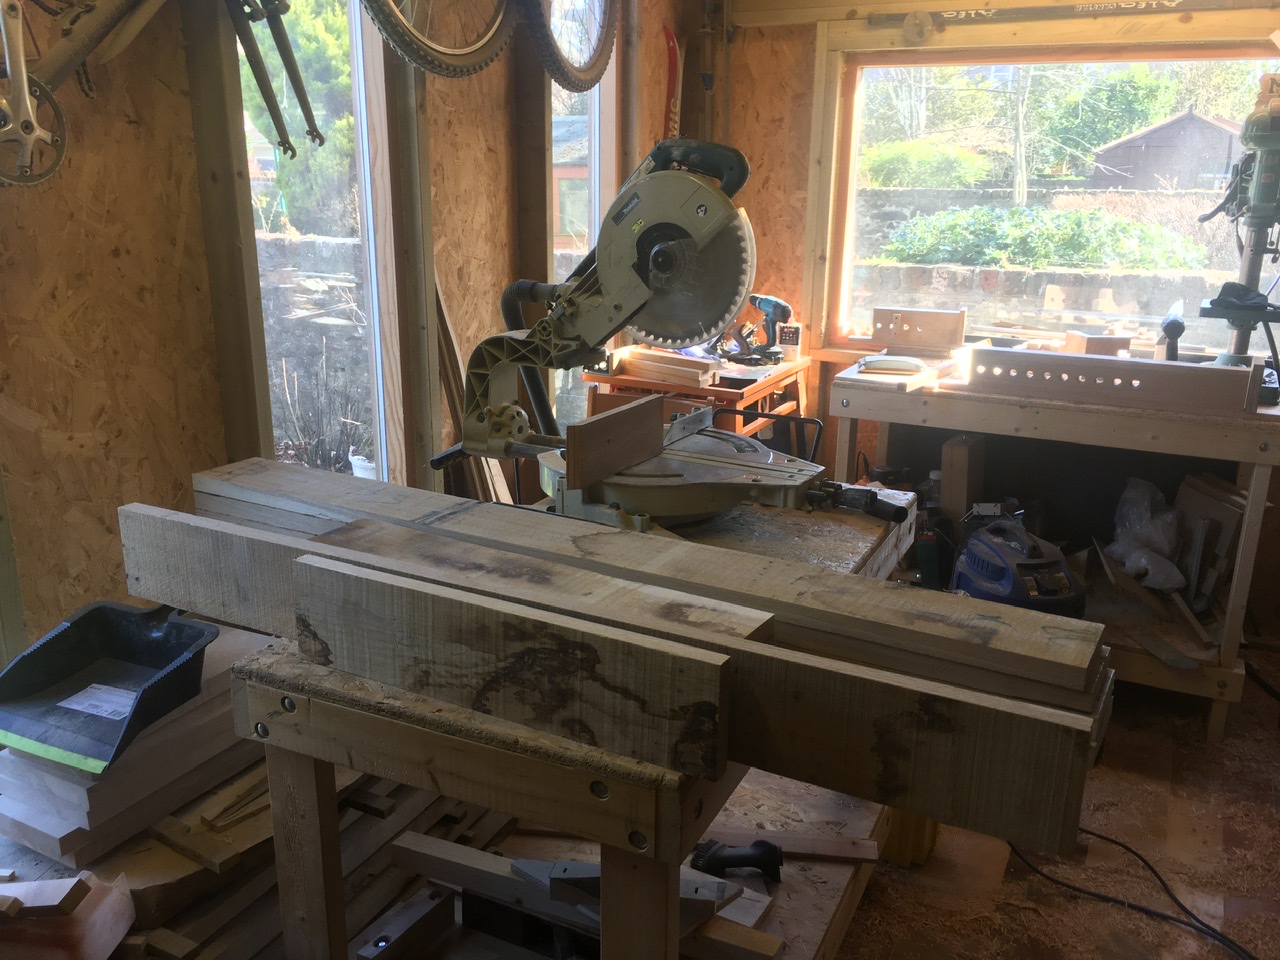
When your cutting list calls for you to use 90%+ of your available material you need Lady Luck on your side. Fortunately I had four boards straight enough to get tops from and with some thought the remaining components were marked up.
1094C022-E8D0-46C8-A75F-CC572F59B127.jpeg


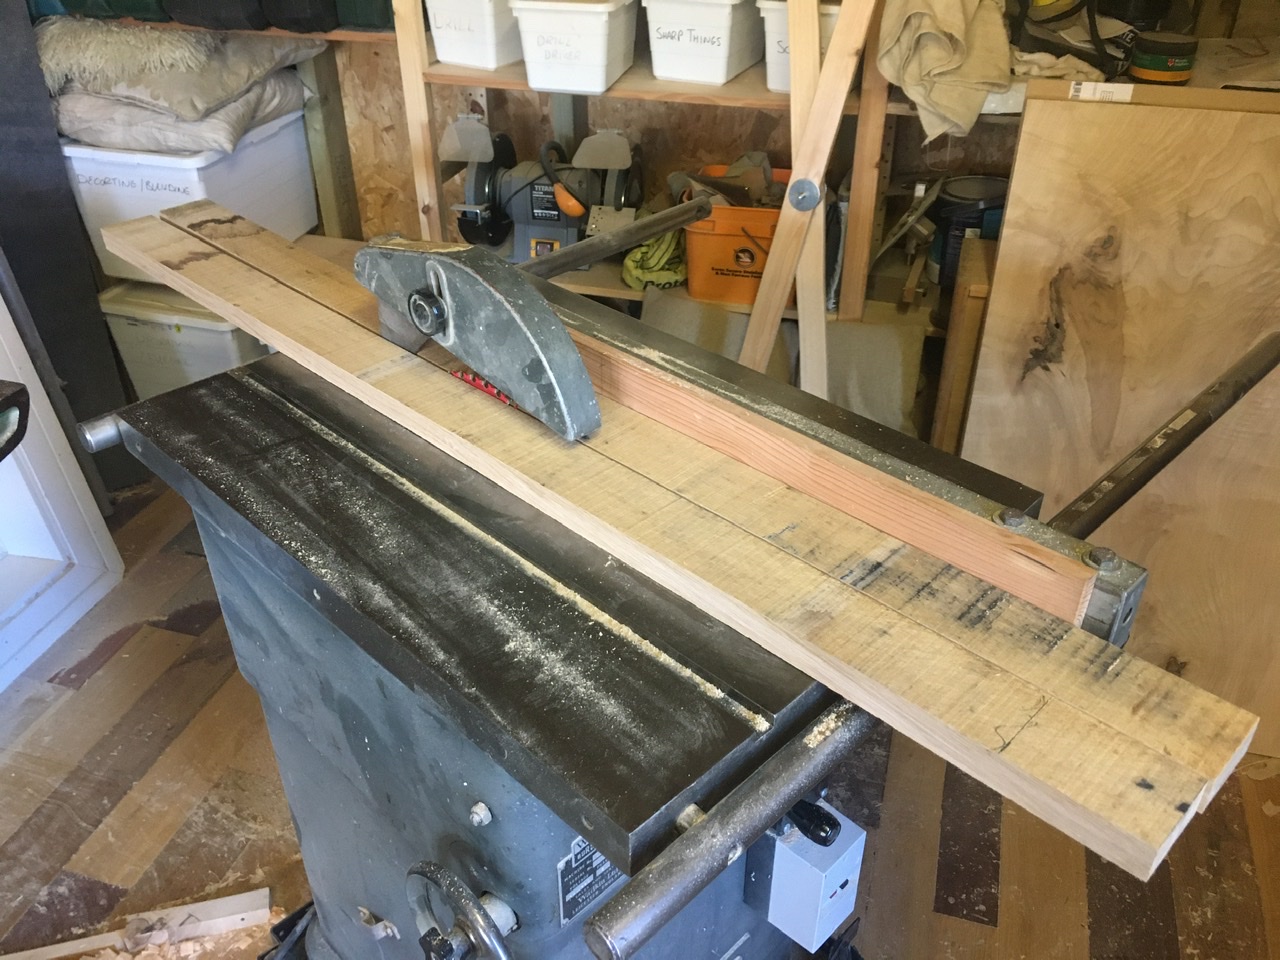
Some boards were ripped in half for aprons and legs.
73B7728C-64E6-4A9B-9C02-0688DE15FDC5.jpeg


Top boards were face planed on the Wadkin BFT 9, and given a square edge.
12C0A747-7106-44E9-AA13-9FF6A06DC22C.jpeg

CE75ED52-3C40-456D-9DB9-E6AAEB940C7A.jpeg


Table top boards were shuffled to get the grain running all in the same direction, and the best pattern I could conjure.
E50271AC-73F1-41E3-B2ED-D274449A40E8.jpeg


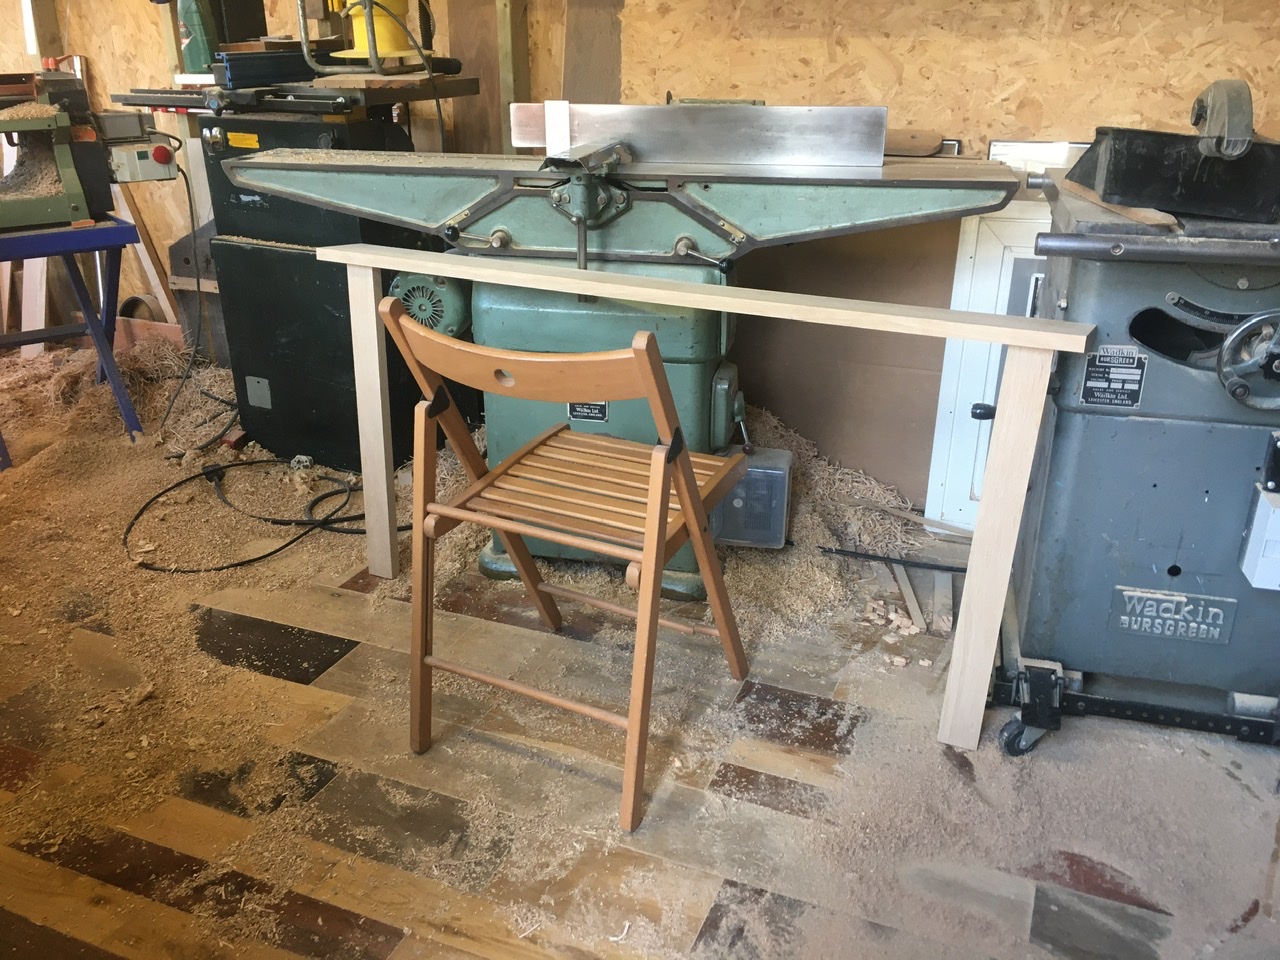
With leg boards cut roughly to length I had a panic that they were nowhere near long enough and there was only one way to convince myself.
B41AB083-EBA1-4DD3-B6CC-B4F2519C0F7D.jpeg


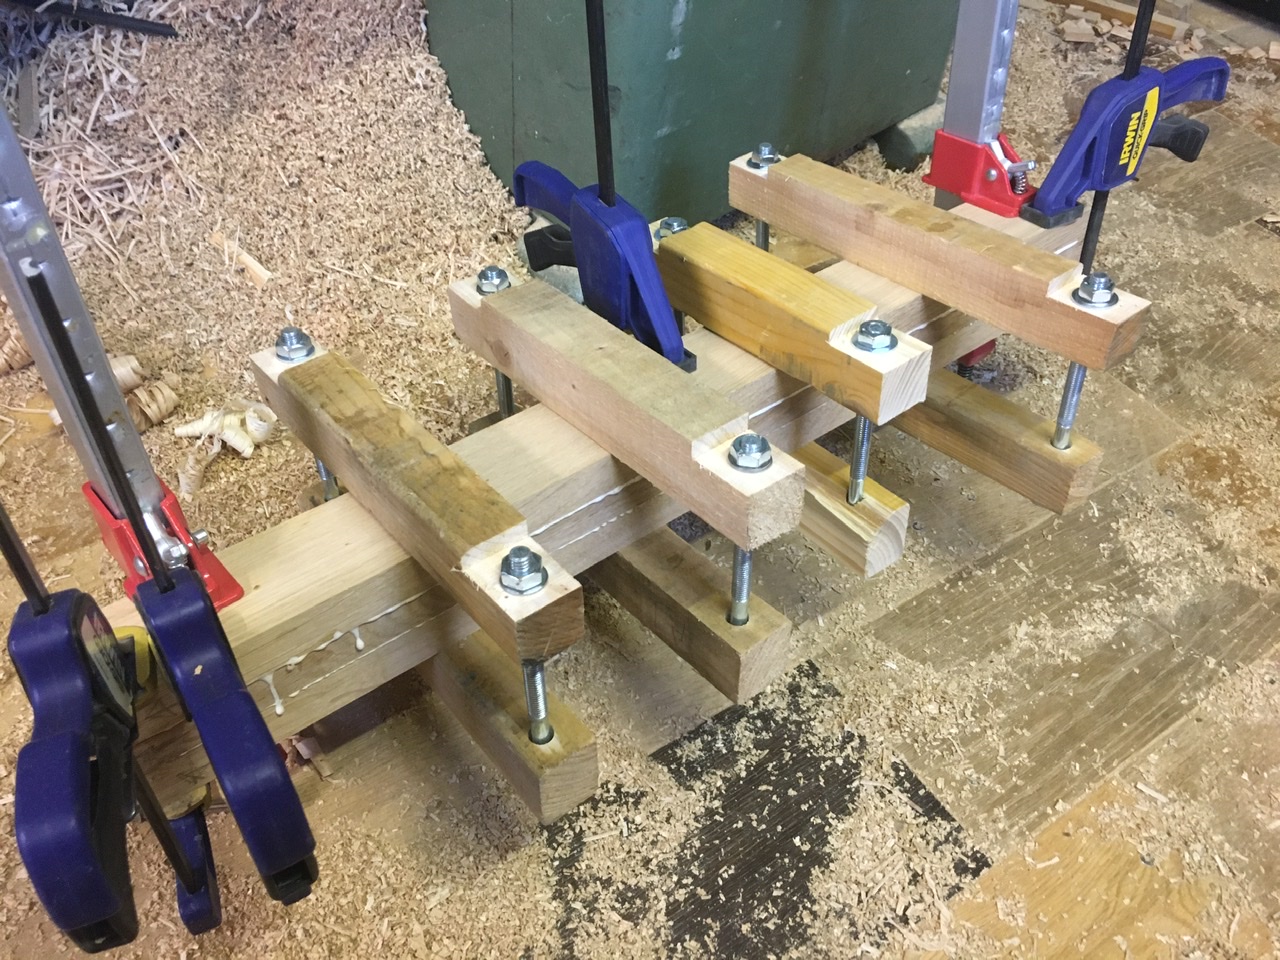
Leg boards had the faces hand planed to remove the scallops from the planer thicknesser and were laminated up. Home made franken-clamps to the rescue. You can never have enough clamps and my collection is pitiful!
ED64A1C4-BD16-4E67-8A06-E812D08E19F3.jpeg


To be continued.
 

Attachments

  • EB276D77-09DF-4585-A64E-5C1F97AE4894.jpeg
    EB276D77-09DF-4585-A64E-5C1F97AE4894.jpeg
    296.4 KB
  • 07A9916B-7D85-49EB-948E-66A81A81DDED.jpeg
    07A9916B-7D85-49EB-948E-66A81A81DDED.jpeg
    293.8 KB
  • EF3F0E3F-48EB-42A7-B79C-D815CEA055C9.jpeg
    EF3F0E3F-48EB-42A7-B79C-D815CEA055C9.jpeg
    374 KB
  • 1094C022-E8D0-46C8-A75F-CC572F59B127.jpeg
    1094C022-E8D0-46C8-A75F-CC572F59B127.jpeg
    358.3 KB
  • 73B7728C-64E6-4A9B-9C02-0688DE15FDC5.jpeg
    73B7728C-64E6-4A9B-9C02-0688DE15FDC5.jpeg
    385.8 KB
  • 12C0A747-7106-44E9-AA13-9FF6A06DC22C.jpeg
    12C0A747-7106-44E9-AA13-9FF6A06DC22C.jpeg
    386.4 KB
  • CE75ED52-3C40-456D-9DB9-E6AAEB940C7A.jpeg
    CE75ED52-3C40-456D-9DB9-E6AAEB940C7A.jpeg
    244.6 KB
  • E50271AC-73F1-41E3-B2ED-D274449A40E8.jpeg
    E50271AC-73F1-41E3-B2ED-D274449A40E8.jpeg
    323.3 KB
  • B41AB083-EBA1-4DD3-B6CC-B4F2519C0F7D.jpeg
    B41AB083-EBA1-4DD3-B6CC-B4F2519C0F7D.jpeg
    446 KB
  • ED64A1C4-BD16-4E67-8A06-E812D08E19F3.jpeg
    ED64A1C4-BD16-4E67-8A06-E812D08E19F3.jpeg
    508.6 KB
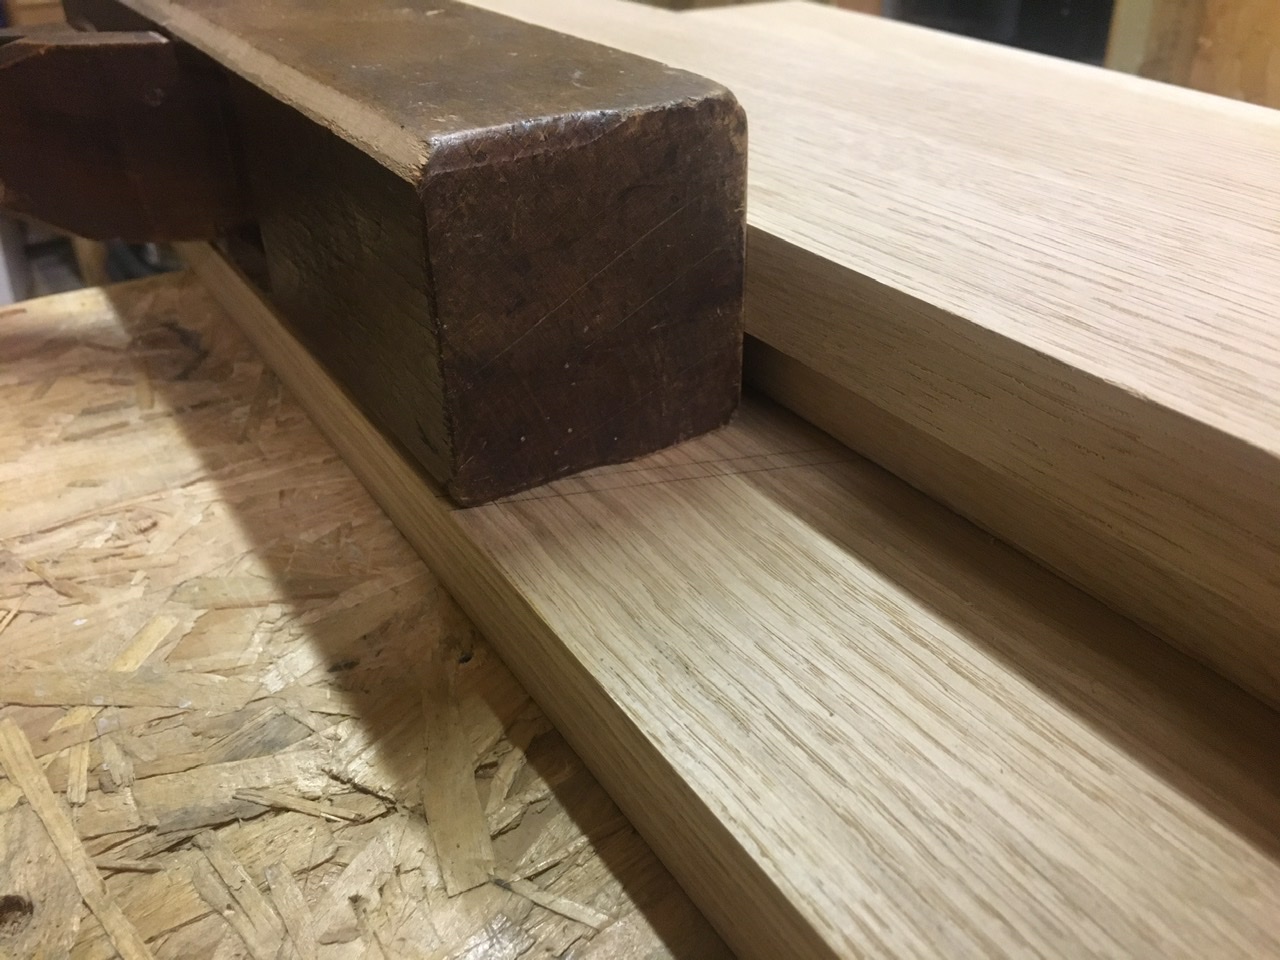
Boards for the table top had their edges shot, ‘shooted?’. I have a old woodie that I sent over the surface planer to set one side and the base perpendicular. I then stack up the boards to give a running board, a spacer board, and the board I’m shooting, the whole lot is clamped to the bench.

FA23750A-418C-47A7-88F4-96CC9BEF605F.jpeg


9763AD5D-7CC1-4315-8223-7C03B233DAD0.jpeg


Boards balanced on edge to check for gaps, all looking good.
B67A30F9-AEC8-43B9-827B-294518347BE9.jpeg


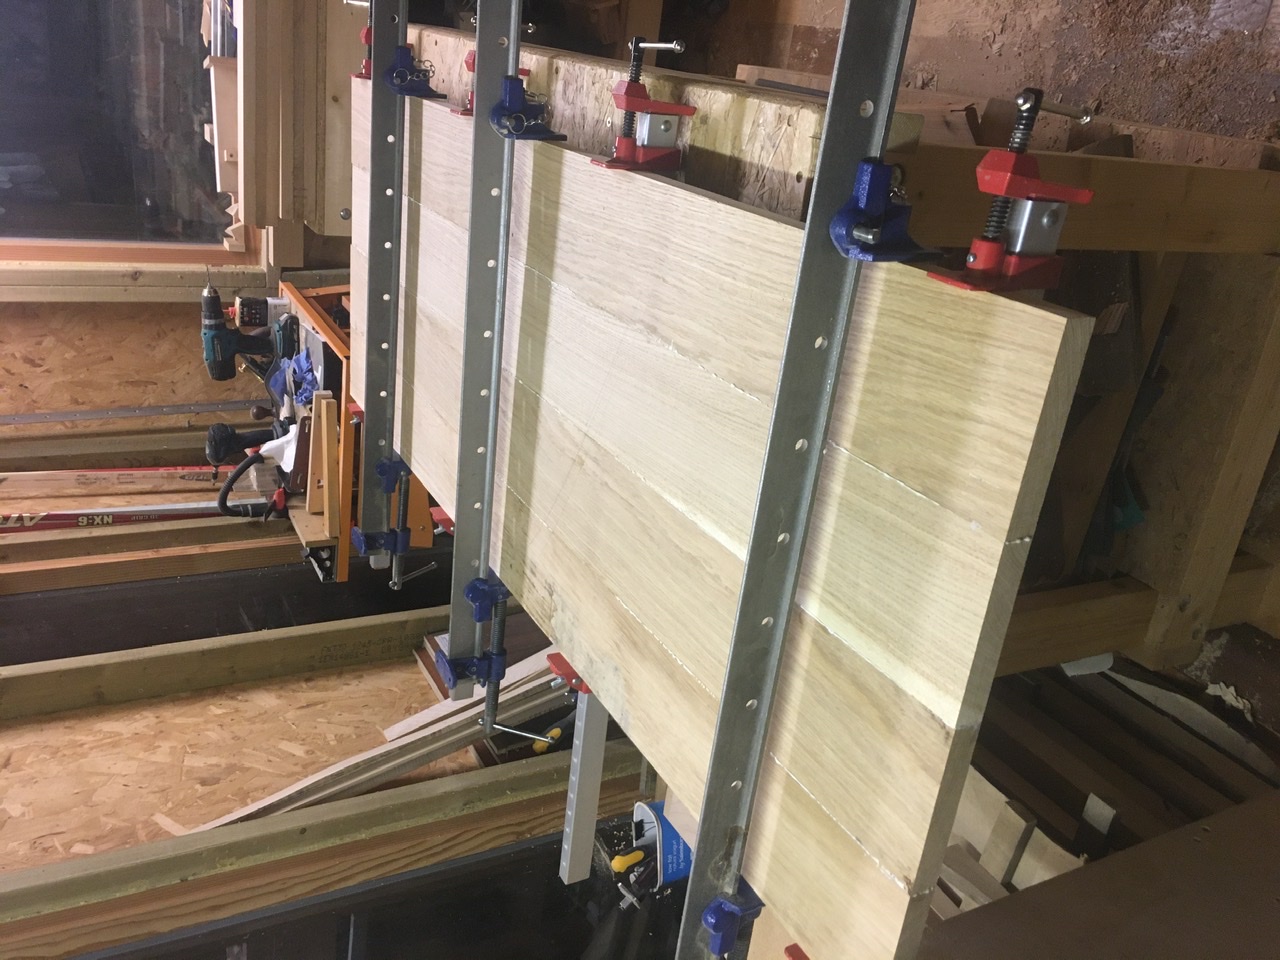
Glued and clamped, I find glue up so stressful, luckily it seemed to go ok with reasonable squeeze out along all joints.
5742C5B3-F03C-4E5D-92DF-5B8CB7EF15D8.jpeg


Top was flattened with another old woodie. It has a 2.5” width blade of great quality steel which when sharp and well set is a pleasure to use, but when blunt or set too deep rips chunks out of everything. I remembered to sharpen first and increase cut depth very slowly this time, so it all worked out lovely.
FA4CA5AE-7897-4977-B61B-D12CDB579D5B.jpeg


Top about flat and lightly sanded then wet with white spirit hoping it looked ok, it does phew!
958027ED-C4B3-41C2-9AA7-6DD07318618F.jpeg


Up until this point I was honestly planning on this being top done, I’d bang out a frame and then I was there. That was when I started reading about attaching the top to the frame, this led on to top movement, and keeping the top flat, and what breadboard ends were.... I had one spare length of board, long enough to rip in half and make breadboard ends, game on. Sorry boys your desk ain’t going to be done this weekend.

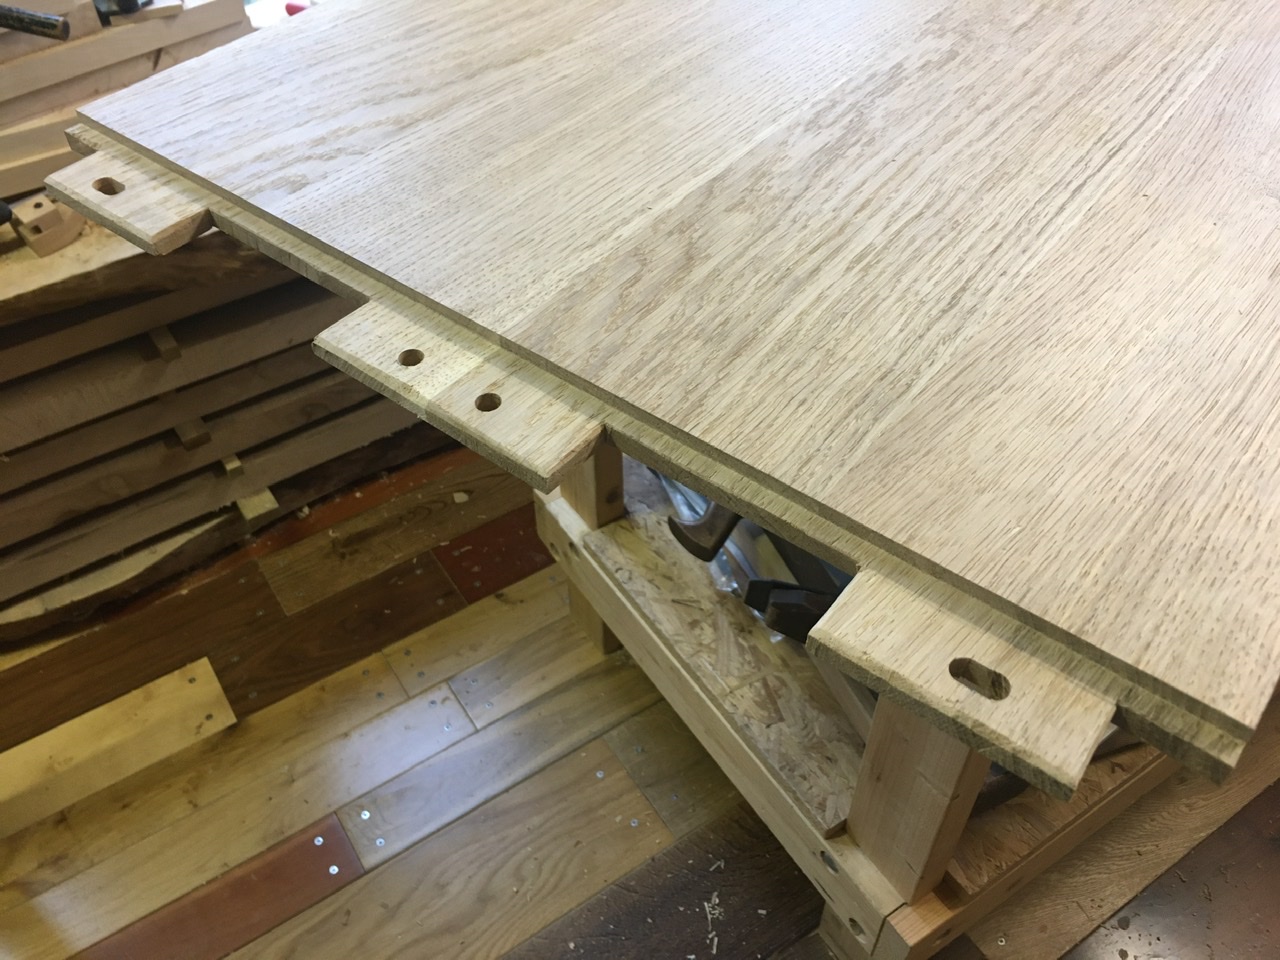
The board length had one waney edge which set the profile for the ends and also the max depth for the mortises. A full length groove was cut on the table saw, incorporating a number of guides and guards, removed for photo.
118D6227-6E52-428C-8EDC-18C493BC2CBC.jpeg


The router plane was employed to bring the groove to a constant depth.
163EF6B6-2E45-405F-8BC5-B08B0215ABCF.jpeg


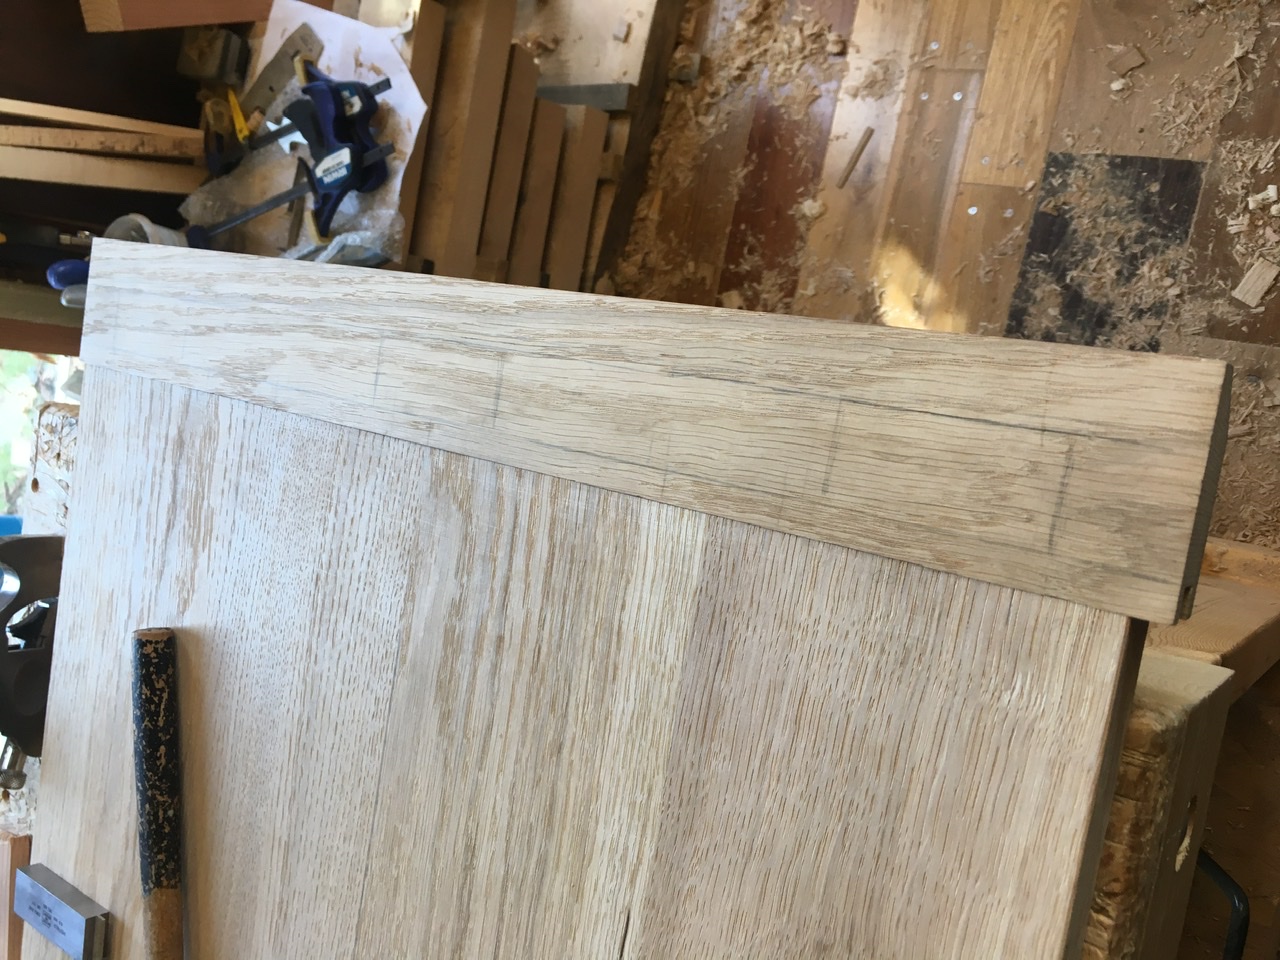
Sorry no pictures but mortices were marked and drilled on the bench drill with a brad point bit and then cut to square with a chisel. I’d not done mortices in a while and was pleased with how they turned out.

I can’t cut straight for toffee so knife lines marked the shoulder of the breadboard ends then a straight piece of timber clamped on top, tenon saw run along this edge produced a great cut with c. 1mm left to be chiselled back to the knife line.
A19706DF-BFE4-4E34-AF68-4CF954247BCD.jpeg


With the shoulder cut a router (mechanical) was used to hog out most of the waste, and then a router plane employed to fine tune the tenon to the groove in the end.
07838A7A-81ED-4706-9761-8DA86287244B.jpeg


To be continued...
 

Attachments

  • 9763AD5D-7CC1-4315-8223-7C03B233DAD0.jpeg
    9763AD5D-7CC1-4315-8223-7C03B233DAD0.jpeg
    324.9 KB
  • B67A30F9-AEC8-43B9-827B-294518347BE9.jpeg
    B67A30F9-AEC8-43B9-827B-294518347BE9.jpeg
    383.6 KB
  • 5742C5B3-F03C-4E5D-92DF-5B8CB7EF15D8.jpeg
    5742C5B3-F03C-4E5D-92DF-5B8CB7EF15D8.jpeg
    351.1 KB
  • FA4CA5AE-7897-4977-B61B-D12CDB579D5B.jpeg
    FA4CA5AE-7897-4977-B61B-D12CDB579D5B.jpeg
    399.6 KB
  • 958027ED-C4B3-41C2-9AA7-6DD07318618F.jpeg
    958027ED-C4B3-41C2-9AA7-6DD07318618F.jpeg
    450.7 KB
  • 118D6227-6E52-428C-8EDC-18C493BC2CBC.jpeg
    118D6227-6E52-428C-8EDC-18C493BC2CBC.jpeg
    298.5 KB
  • 163EF6B6-2E45-405F-8BC5-B08B0215ABCF.jpeg
    163EF6B6-2E45-405F-8BC5-B08B0215ABCF.jpeg
    361.7 KB
  • A19706DF-BFE4-4E34-AF68-4CF954247BCD.jpeg
    A19706DF-BFE4-4E34-AF68-4CF954247BCD.jpeg
    385.7 KB
  • 07838A7A-81ED-4706-9761-8DA86287244B.jpeg
    07838A7A-81ED-4706-9761-8DA86287244B.jpeg
    327.5 KB
  • FA23750A-418C-47A7-88F4-96CC9BEF605F.jpeg
    FA23750A-418C-47A7-88F4-96CC9BEF605F.jpeg
    361.9 KB
Tenons were cut to width and pared down to thickness with the router plane, as the breadboard end is designed to allow some movement on the top the tenons are narrower than the mortices so width is not critical.

82E29545-2BE7-4C5D-9B33-8324BDCE4A6E.jpeg


However length is important and mine were too long, even though I measured many times. Why is my wife always in the shed when I first fit things, she’s ever more thinking a can’t measure right.

A3B88C93-F9E9-4EAB-AC55-3C82BD4D66F2.jpeg


Tenons trimmed to length and.... it still didn’t fit, yes the management was watching the whole time! Not sure how I missed the tongue was longer than the groove was deep, such fail.

6446D6FD-EABA-4A60-BB51-A0E01BDCE196.jpeg


Finally with the tongue pared back it all fitted and the top was done bar drawboring and the finishing. I had to order some dowels for drawboring the ends so it was on to the frame.

196271C8-6523-4734-BBB3-CC0E8FD90050.jpeg


I’d still not committed to how close the legs and frame sat to the ends and side of the top, so a good hour was spent procrastinating before making a decision and cutting aprons to length.

9D15A7B4-703C-4DBD-9E75-EAF0252D4090.jpeg


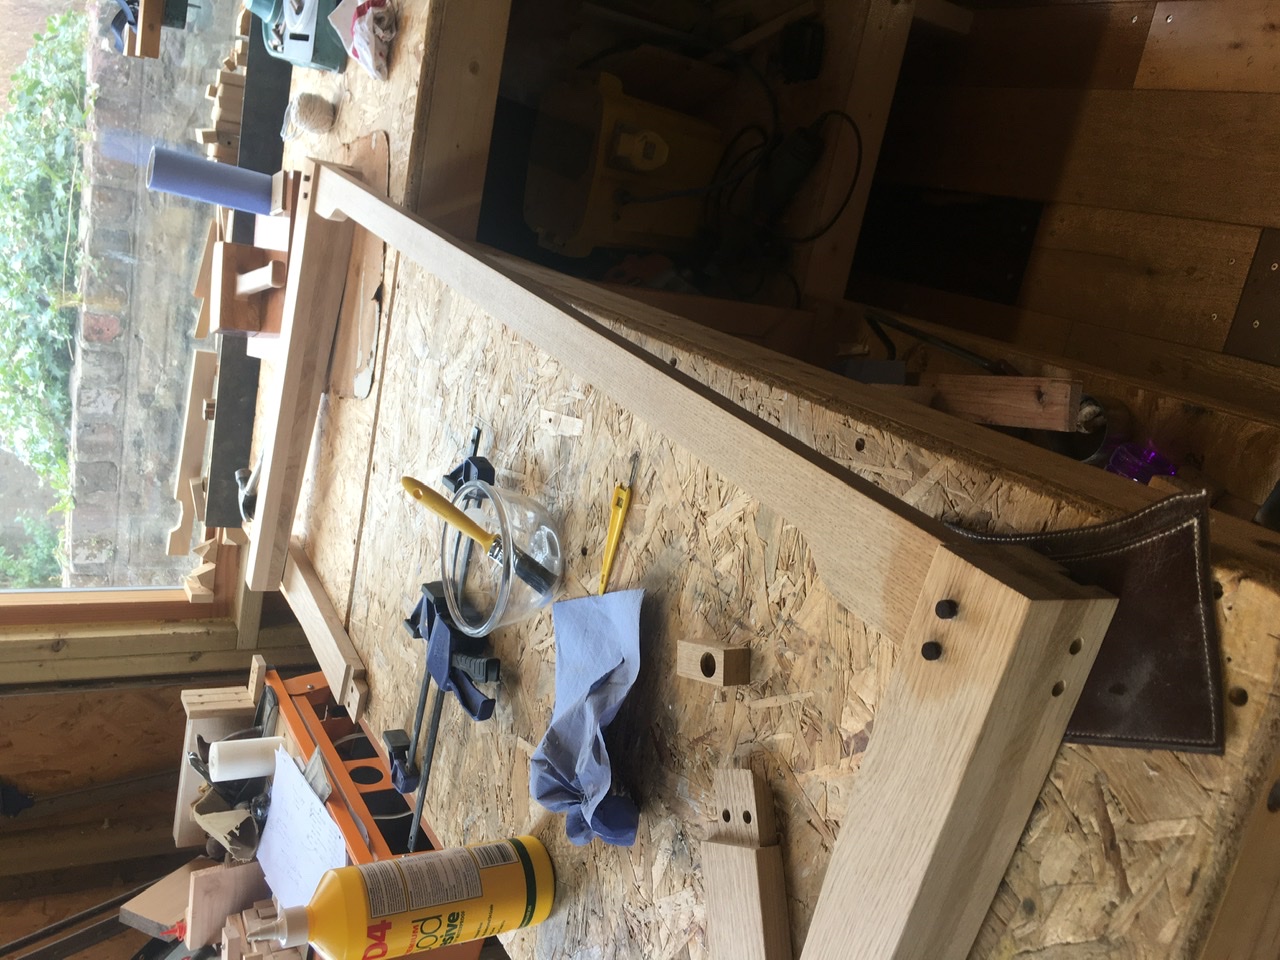
With a decision made, legs were cleaned up of glue, the show face on each identified and sides brought square and true.

130024A0-A3F7-40E4-81BE-3474A4A46813.jpeg


Aprons to leg joints were decided as drawbored haunched mortice and tenons. The final aprons turned out only 65mm tall, which is about 15mm shy of what I’d have liked. As a result I wanted to maximise joint height by using a haunch. Additionally the lack of height meant I wanted to maximise the glue cheek area in each mortice and decided to mitre the internal intersection of the two tenons rather than cut away a section of each to fly one over and one under. Only difference to the diagram below was I wanted to maximise tenon thickness and strength so excluded a rear shoulder.
9762DD4F-230D-4E35-88B5-7A29279F8D85.jpeg

Diagram shamelessly stolen of the inter web, sorry if it’s yours!

Leg mortices were marked up and drilled out on the drill press. I made two fences that I could bolt on to the drill press table, these ensured the line of drill holes was accurate and all I would be left with was chiselling they walls true.
E47C004C-4668-416E-915D-1DBF4068BF9F.jpeg

Hole placement turned out great with the two fences.
BB3CA7E4-F205-44EA-AF2C-6D5138D7D34C.jpeg

Some chisel work later and the mortices were done.
757062FD-6F39-49E9-905C-08E205117272.jpeg


With the edges of the drill holes accurate it was quite easy to chisel straight and I ended up with mortices I was pleased with.

To be continued.....
 

Attachments

  • 82E29545-2BE7-4C5D-9B33-8324BDCE4A6E.jpeg
    82E29545-2BE7-4C5D-9B33-8324BDCE4A6E.jpeg
    404.2 KB
  • A3B88C93-F9E9-4EAB-AC55-3C82BD4D66F2.jpeg
    A3B88C93-F9E9-4EAB-AC55-3C82BD4D66F2.jpeg
    383.6 KB
  • 6446D6FD-EABA-4A60-BB51-A0E01BDCE196.jpeg
    6446D6FD-EABA-4A60-BB51-A0E01BDCE196.jpeg
    202.9 KB
  • 196271C8-6523-4734-BBB3-CC0E8FD90050.jpeg
    196271C8-6523-4734-BBB3-CC0E8FD90050.jpeg
    401.2 KB
  • 130024A0-A3F7-40E4-81BE-3474A4A46813.jpeg
    130024A0-A3F7-40E4-81BE-3474A4A46813.jpeg
    358.5 KB
  • 9762DD4F-230D-4E35-88B5-7A29279F8D85.jpeg
    9762DD4F-230D-4E35-88B5-7A29279F8D85.jpeg
    111.1 KB
  • E47C004C-4668-416E-915D-1DBF4068BF9F.jpeg
    E47C004C-4668-416E-915D-1DBF4068BF9F.jpeg
    294.7 KB
  • BB3CA7E4-F205-44EA-AF2C-6D5138D7D34C.jpeg
    BB3CA7E4-F205-44EA-AF2C-6D5138D7D34C.jpeg
    301.7 KB
  • 757062FD-6F39-49E9-905C-08E205117272.jpeg
    757062FD-6F39-49E9-905C-08E205117272.jpeg
    332.9 KB
  • 9D15A7B4-703C-4DBD-9E75-EAF0252D4090.jpeg
    9D15A7B4-703C-4DBD-9E75-EAF0252D4090.jpeg
    354.2 KB
I had a good run in the shed but in my over excitement I rather forgot to take any pictures but it was all pretty formulaic. Tenons were marked out and shoulder lined knifed in, waste was cut away on the bandsaw. Tenons were brought to thickness with my favourite, the router plane, and fettled to fit snug in each mortice. Shoulders were then chiselled back to the knife line resulting in clean straight shoulders. Tenon ends were mitred with a handsaw, they bring no strength through interaction with each other so it’s just a case of trimming short enough they don’t touch.

76F9BF35-8CB6-41FC-A9FD-A2AE478792D8.jpeg


I’d read about ‘buttons’ being the way to attach a top but had little idea about what they were. Some reading later I was now the one eyed king in the land of the blind. I spared myself the embarrassment of trying to cut button mortices in a glued up frame, but still had no idea how many buttons one required, so I’ve likely over buttoned, feel free to share your views on what enough buttons is! Button slots drilled out and squared up. The slots are over length to allow for movement so the ends can be left round. You can also see the lack of shoulder on the rear of the tenon, keeping them as thick as the stock would allow.

A86F3CD0-ED78-4168-8486-6A138222AFAC.jpeg


More photos lacking! Legs were tapered on the bandsaw freehand to the waste side of the line then hand planed to the line, a quick and easy process with no requirement for jigs etc. On final inspection I think I could have tapered them more, but every day’s a school day!

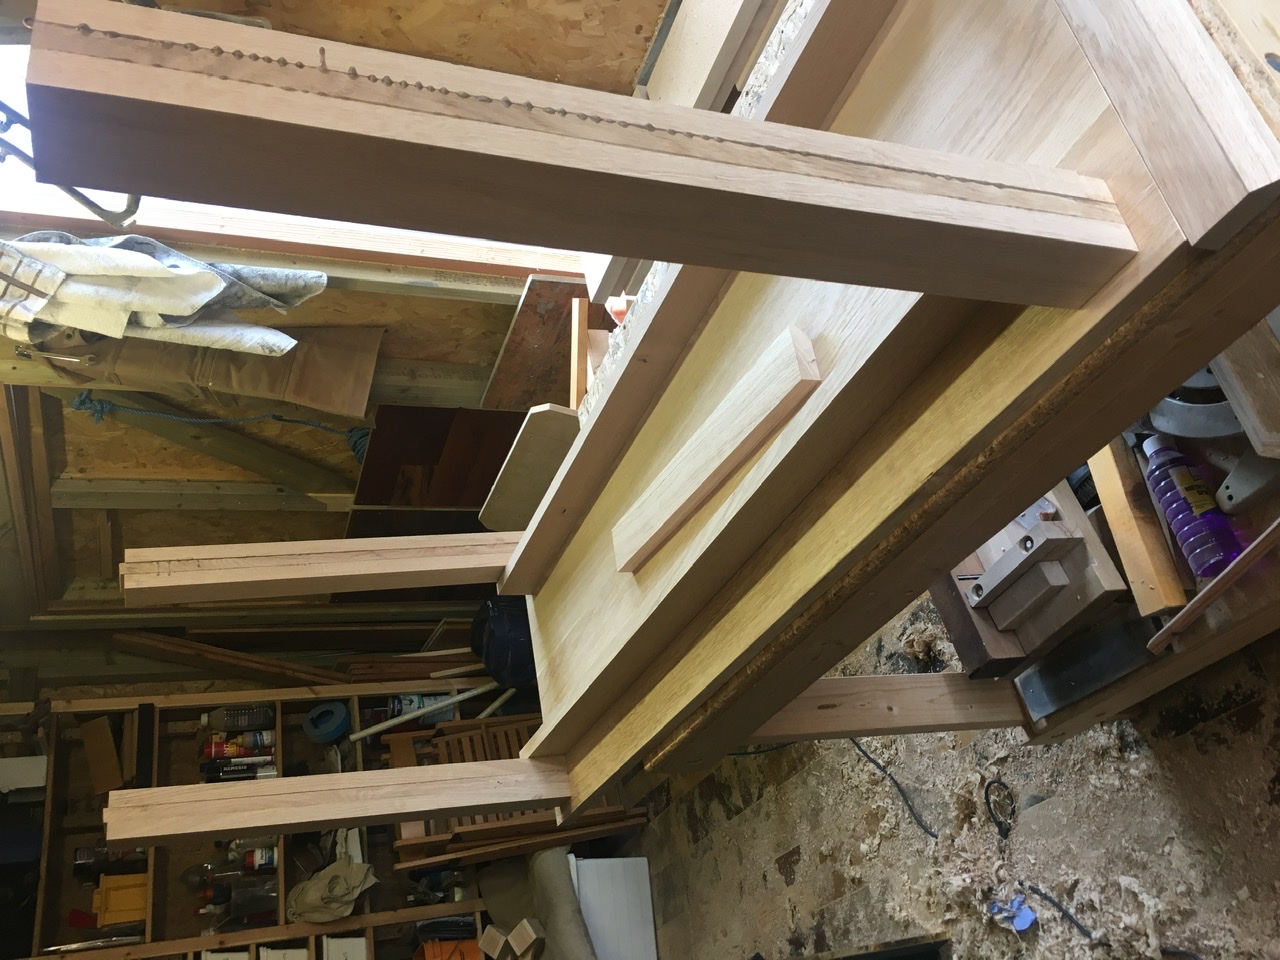
With the frame joinery done I could dry assemble, place the top on, and get a first feel for how it would be to work at. This raised the problem that I couldn’t get my thighs comfortably under the front apron, if you look back at my original design I thought this may be the case. I marked up a line to trim the apron back to, cut it away on the bandsaw and cleaned up with a plane, card scraper and plenty of sanding.

The final form of the desk appeared. However I may have ballsed up, the shallow front apron lacks strength and the front legs splay a bit with moderate pressure on the top.
CE82A5E4-B452-42E6-8665-AE1F39151A5F.jpeg


I’d decided to drawbore in contrasting dowels, perhaps a bit twee but hey ho, and ordered walnut dowels online.

Shout out to G&S Specialist Timber (toolsandtimber.co.uk) for quality dowels and a good price and quick delivery even with everything going on! No personal affiliation with them but you have to give credit where it’s due.

I’d tried drawboring before and had ended up with problems as the hole was too offset. First up was doing the breadboard ends. Dowel holes were drilled on the drill press, the ends dry fitted and the centre point marked.

The dowels I ordered were 3/8” or 9.5mm. I have a set of dewalt extreme 2 metal bits which cut superbly on wood, although can be very grabby when they breakthrough. I have a 9.5mm bit in the set which was a perfect fit with the supplied dowels. The bit has a leading edge that is c. 4mm in diameter and meant I could use an accurate 4mm Brad point wood bit to establish ‘pilot holes’.
E43623FB-05B6-42FC-BF1A-A57113A39C57.jpeg


The drawbore holes in the breadboard end are elongated to allow for movement, two pilot holes offset from the centre gave a pleasing little face ready to be drilled.
12B93BDC-8C89-4CD0-A11F-809EF8DD7DAB.jpeg


Drill press was employed to ensure holes were square.
76ED085B-7F7F-491B-A481-FFF0A00A8F7A.jpeg

4C7A4800-31A5-46CB-9F53-FFEBE2503BAD.jpeg


Ends are fitted with glue only on the middle tenon, dowels are glued and driven into pulling the end on tight. Ends are long left long during fitting so they can be knocked off easily.

CE1DE493-E21A-45FF-81AD-C85179B17525.jpeg


The ends all went on nicely, with only a minor gap at one end, about 3cm long.
0F561A67-C2D0-4CAB-99FD-707FD63ACB4F.jpeg


Another learning was that I shouldn’t have taken the mortice to the end as it’s not the best fit, it made it easy to cut on the table saw but that’s not worth the ugliness.
7129285E-D93F-4082-8A5A-3E3707521526.jpeg


To be continued...
 

Attachments

  • 76F9BF35-8CB6-41FC-A9FD-A2AE478792D8.jpeg
    76F9BF35-8CB6-41FC-A9FD-A2AE478792D8.jpeg
    274.8 KB
  • A86F3CD0-ED78-4168-8486-6A138222AFAC.jpeg
    A86F3CD0-ED78-4168-8486-6A138222AFAC.jpeg
    335.3 KB
  • CE82A5E4-B452-42E6-8665-AE1F39151A5F.jpeg
    CE82A5E4-B452-42E6-8665-AE1F39151A5F.jpeg
    316.9 KB
  • E43623FB-05B6-42FC-BF1A-A57113A39C57.jpeg
    E43623FB-05B6-42FC-BF1A-A57113A39C57.jpeg
    15.8 KB
  • 12B93BDC-8C89-4CD0-A11F-809EF8DD7DAB.jpeg
    12B93BDC-8C89-4CD0-A11F-809EF8DD7DAB.jpeg
    354.6 KB
  • 76ED085B-7F7F-491B-A481-FFF0A00A8F7A.jpeg
    76ED085B-7F7F-491B-A481-FFF0A00A8F7A.jpeg
    385.8 KB
  • 4C7A4800-31A5-46CB-9F53-FFEBE2503BAD.jpeg
    4C7A4800-31A5-46CB-9F53-FFEBE2503BAD.jpeg
    365.7 KB
  • CE1DE493-E21A-45FF-81AD-C85179B17525.jpeg
    CE1DE493-E21A-45FF-81AD-C85179B17525.jpeg
    394.9 KB
  • 0F561A67-C2D0-4CAB-99FD-707FD63ACB4F.jpeg
    0F561A67-C2D0-4CAB-99FD-707FD63ACB4F.jpeg
    320.3 KB
  • 7129285E-D93F-4082-8A5A-3E3707521526.jpeg
    7129285E-D93F-4082-8A5A-3E3707521526.jpeg
    228.6 KB
The breadboard ends are pretty poor quality bits of wood, with quite a few surface checks, which once a mortice was cut into became pretty fragile in places. I dribbled CA glue into many of the checks to strengthen, but when I drove the dowels into one of the holes it blew the back out. Learning three, support the back of the hole until the dowel is placed then drive it through the rest of the way.

E69EE90C-0204-44C9-A5E7-1AD3CAFF70CB.jpeg


The rest of the drawboring was uneventful. Lots of cleaning up with warm water was observed to minimise finishing difficulties.
ED8F242C-53F7-4351-9D63-F2EC483DFF7E.jpeg

C49C3A36-FF70-4154-8A41-735C582370A8.jpeg


Joints were pulled in lovely and tight with no clamps required, and look tidy once trimmed flush with saw and chisel.
A2339F76-62FE-40EF-894F-300BD877CBE9.jpeg


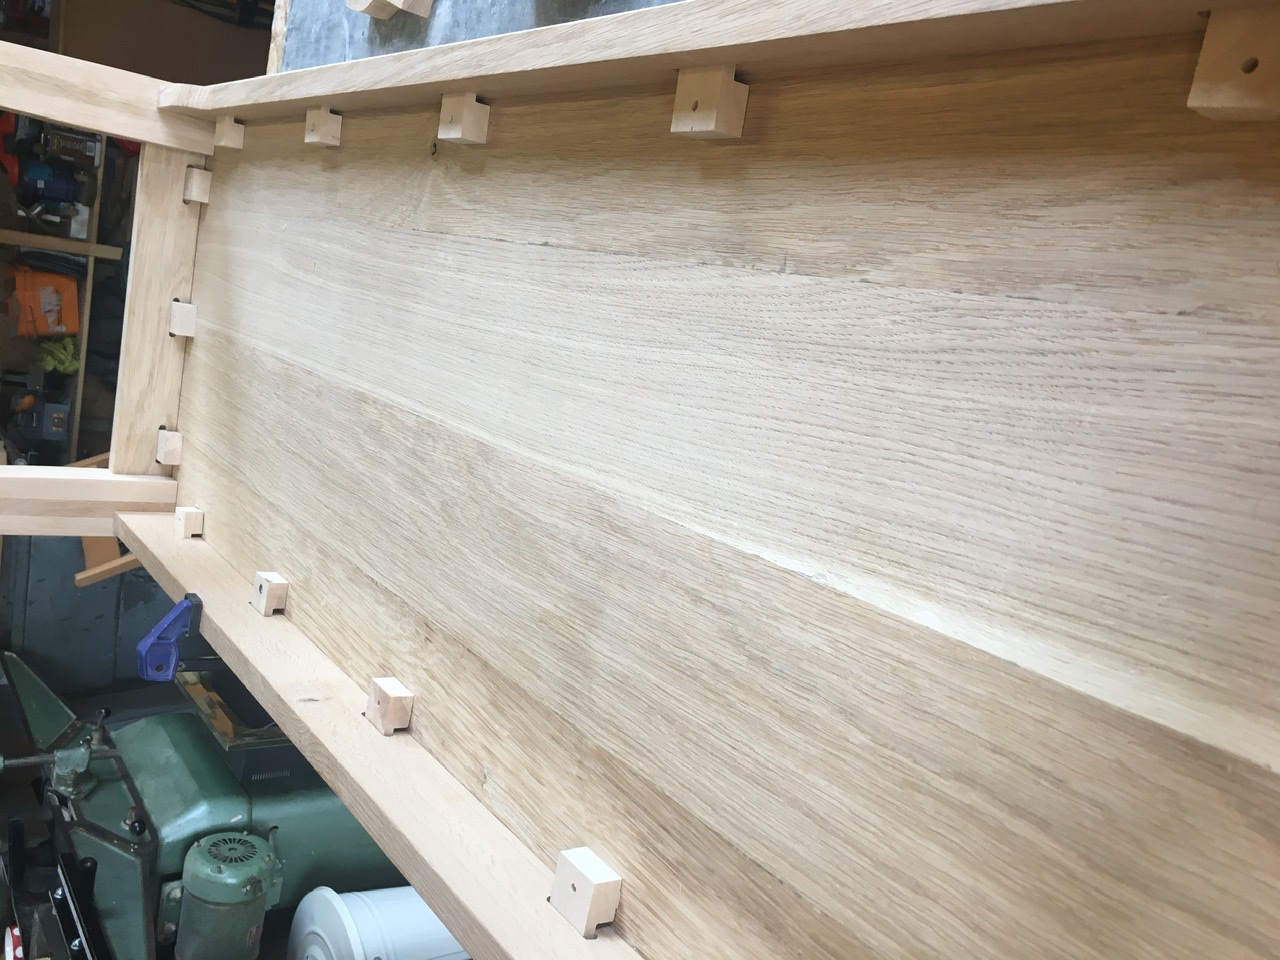
Buttons were made out of some sycamore, observing the run of the grain to ensure the tongues were not in the wrong direction and likely to snap off.
2FBA58BC-893A-4555-94FF-8CD2A5D4BA63.jpeg


Button overkill? Let me know.
9EC986E4-FF92-4EA3-ACA5-F8A0FD8EEEC8.jpeg


With all the joinery done it was onto finish. Most of the frame components were planed and sanded prior to glue up, so a final grain raising with hot water and sanding back to 240 grit was all that was required. Danish oil finish was used with two coats on the frame.

The top was taken through the grits from 80 to 240 to ensure the ends and top were flush and all dings gained during joinery were removed. The top was finished with 3 coats of danish oil, and a final coat applied with 600 grit wet and dry developing a slurry before leaving for 5 mins then wiping off. It came up super smooth with still some grain feel. It also showed up some tearout in one of the ends I’d missed, the wood’s pretty punky and it’ll just be what it is.

64F8FB2C-A238-4C11-803E-DB6BBD700936.jpeg


Top and frame were finished separately then buttoned together. Buttoning the top to the frame has strengthened everything up but there is still some flex and I may have to strengthen the front rail somehow.
9E74F903-E2F5-4541-AA07-7114BA2724EA.jpeg


After designing the desk to fit in front of the fireplace we rearranged the whole room and it’s ended up in a much better location. There is now room for the boys to sit on opposite sides which will workout much better.

88DBBE1D-C7FD-4C8C-935A-5DE80442DFE1.jpeg


10E9F42C-67AA-4CEF-8C79-21E2257126E4.jpeg


So that’s that, it’ll stand for a week which will let the finish harden, then my boys will draw all over it and I’ll have to bite my tongue knowing that’s its purpose!

Overall I’m really pleased with how it turned out. I like the form and the details. The wife has bagsied the desk once the boys are back at school so that’s a vote on confidence!

Hopefully I’ve provided some entertainment in these odd times. Comments, questions and criticism welcomed.

Fitz.
 

Attachments

  • E69EE90C-0204-44C9-A5E7-1AD3CAFF70CB.jpeg
    E69EE90C-0204-44C9-A5E7-1AD3CAFF70CB.jpeg
    365.2 KB
  • ED8F242C-53F7-4351-9D63-F2EC483DFF7E.jpeg
    ED8F242C-53F7-4351-9D63-F2EC483DFF7E.jpeg
    387.5 KB
  • C49C3A36-FF70-4154-8A41-735C582370A8.jpeg
    C49C3A36-FF70-4154-8A41-735C582370A8.jpeg
    335 KB
  • A2339F76-62FE-40EF-894F-300BD877CBE9.jpeg
    A2339F76-62FE-40EF-894F-300BD877CBE9.jpeg
    284.8 KB
  • 2FBA58BC-893A-4555-94FF-8CD2A5D4BA63.jpeg
    2FBA58BC-893A-4555-94FF-8CD2A5D4BA63.jpeg
    241.7 KB
  • 9EC986E4-FF92-4EA3-ACA5-F8A0FD8EEEC8.jpeg
    9EC986E4-FF92-4EA3-ACA5-F8A0FD8EEEC8.jpeg
    349.4 KB
  • 64F8FB2C-A238-4C11-803E-DB6BBD700936.jpeg
    64F8FB2C-A238-4C11-803E-DB6BBD700936.jpeg
    324 KB
  • 9E74F903-E2F5-4541-AA07-7114BA2724EA.jpeg
    9E74F903-E2F5-4541-AA07-7114BA2724EA.jpeg
    376.9 KB
  • 88DBBE1D-C7FD-4C8C-935A-5DE80442DFE1.jpeg
    88DBBE1D-C7FD-4C8C-935A-5DE80442DFE1.jpeg
    254.3 KB
  • 10E9F42C-67AA-4CEF-8C79-21E2257126E4.jpeg
    10E9F42C-67AA-4CEF-8C79-21E2257126E4.jpeg
    232.9 KB
That looks great! All credit for doing a proper job when you know it’s going to be used by the kids...

On that note I have no idea if you’ve used too many buttons, but having young kids myself I don’t know if it’s possible to over engineer anything they will use.
 
That's really nice, Fitzroy. Proper joints 'n all. =D> =D> =D>

I like the contrasting pegs, but even oak ones contrast quite nicely in oak, because they're end grain. And yes, you're right about the tongue and groove effect on the end of the breadboard. I always finish that square (ie no t&g).
 
Nice job and well finished, but you're right; you have left the front rail a tad on the thin side which appears to make the legs seem overly large. With all those buttons underneath it's going to be tricky to reinforce the front/rear rails without removing them but there is a way, a little crude though it is. You could remove said buttons and replace them with a piece of 25mm angle iron running the whole length of the table. Holes could be drilled to fix the angle to the rail(s) and elongated holes drilled and filed to affix the top using round headed screws. Time consuming and messy but the bending resistance of the angle iron would ensure that the front rail didn't bow - Rob
 
looks great fitzroy, I like how you used the draw bore method instead of clamps, really nicely made table that will last generations.
 
Super table, well done!
That should end up being a family heir loom......
Interesting skirting in the last 2 photos.....what era is it from?

Sent from my SM-J530F using Tapatalk
 
1875 Aberdeen. Made of three separate pieces. I had to reproduce a section when I reinstated period fireplaces.

Also the skirting boards get shorter and plainer the further into the house you go. Same with doors and frames.

Fitz.
 

Latest posts

Back
Top