Competition Entry WIP - Pearwood Mantle Clock now completed

UKworkshop.co.uk

Help Support UKworkshop.co.uk:

This site may earn a commission from merchant affiliate links, including eBay, Amazon, and others.

Escudo

Established Member
UKW Supporter
Joined
26 Nov 2006
Messages
965
Reaction score
81
Location
Sheringham, North Norfolk
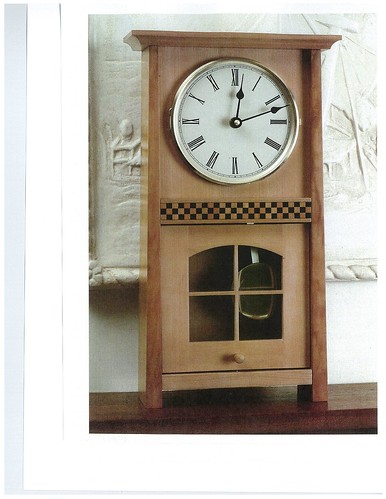
My competition entry is a small mantle clock , with arts and crafts influences, based on a design found in a text book called "In the craftsman style".

The design calls for the use of a timber with a mild, uncomplicated grain which will allow the design to dominate.

Here is a picture of the clock;
3871589247_5b372e6aab.jpg


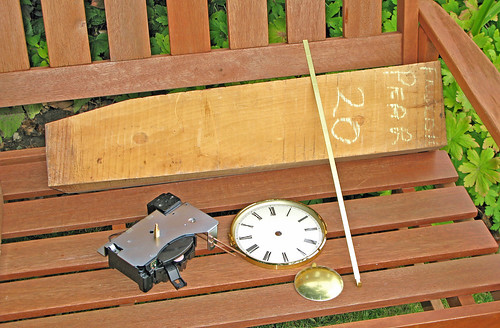
A few months ago I called to see Nigel at English Hardwoods in Geddington and we managed to find a chunk of English Pear. Nigel also kindly gave me a small piece of Bog Oak for the checkered inlay.

I also made an order from Merritt's Antiques, in Douglassville, USA for the clock parts, movement, dial, hands and pendulum.

Here is a picture of the materials;
3872380184_71d4545492.jpg


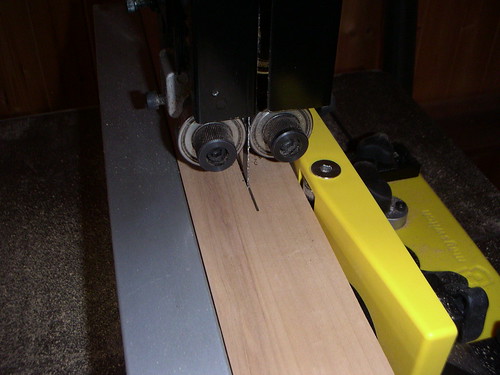
I started work a month or so ago by planning and thicknessing the Pearwood and then using my bandsaw I divided the timber into various pieces which I cut roughly to size.

Here is an action shot of the resawing;
3872381576_2068bf0e75.jpg


The yellow gadget is my Magswitch guide which works a treat.

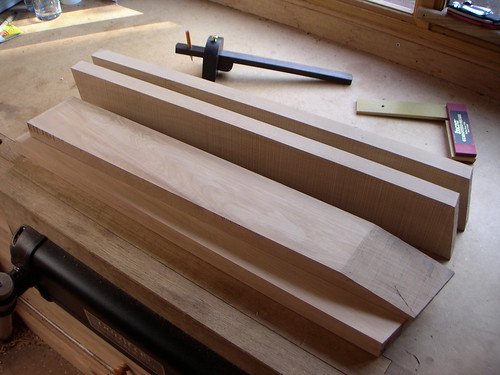
and the fruits of my labour (sorry for the pun).
3872384018_565dfa54fd.jpg


I left the pieces in my study for a month or so before picking up the action again this weekend.

More pictures and progress to follow this week.

Cheers, Tony.
 
Tony

Thats going to look nice.

Where did you get the "Magswitch Guide" from and is it effective.

Are you planning on an over nighter at Cressing Temple?
 
Waka, I have no plans at the moment to stay over for Cressing Temple as it is only about 70 miles from home and I had only thought of attending for one day.

The Magswitch is very effective. I bought mine from Axminster as part of a set with various other attachments. Here is a link;

http://www.axminster.co.uk/product.asp?pf_id=796865&name=magswitch&user_search=1&sfile=1&jump=0

I use mine for resawing and as a guide on the bandsaw, it would be equally as effective on a table saw. The magnets are strong, place the guide in position and turn on, rock steady when activated. The magnets can be removed from the plastic guide and could be used in a homemade jig. I have some in a feather board as well.

I will bring mine to CT if you fancy a fiddle.

I have made some more progress on the clock today and will update the thread soon.

Thanks for comments fellas, cheers Tony.
 
Tony,

looks like a nice project on the go,keep the pics coming.
Any particular reason that you orderded the movement from the States rather than more local?

Mark.
 
Hello shipmates,

Here is my first update on progress over odd evenings and Saturday afternoons on the Mantle clock.

My first task from the roughly dimension timber, after a pass through the thicknesser was to begin work on the two side pieces.

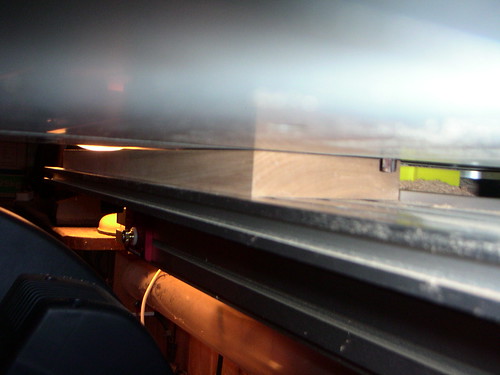
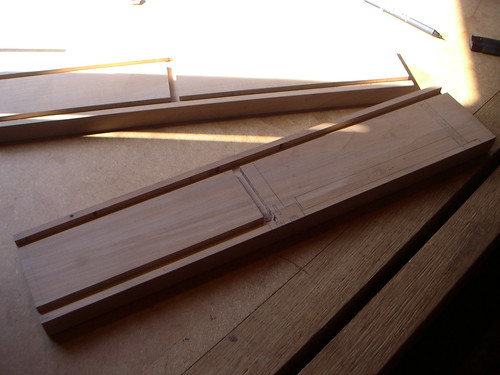
I used my woodrat to make grooves to house the back and front panels and a trench to fit the inside shelf which separates the clock mechanism from the pendulum. I purchased the clock from the American firm to be sure it fitted the dimensions of the frame which were outlined in the reference book.

Here is a picture of some woodrat action. My modification to the rat is effective for managing work in this way, as it slides along the aluminium bed.

3929482761_1e69a9a970.jpg


Here is a picture of the completed work on the side pieces

3930252528_01481cd52f.jpg


You might just notice I have drawn in pencil the layout for the central piece and the position of the door below.

I decided not to cut the trench for the bottom shelf until I had made and fitted the door, that way I could make this to fit nicely.

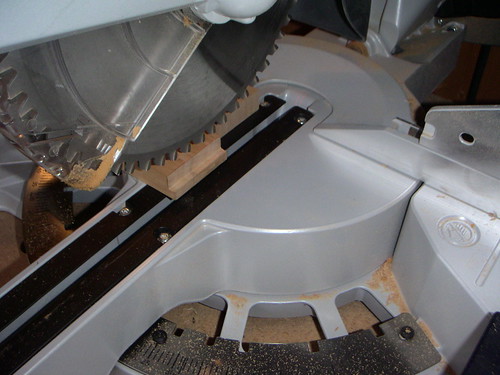
The next move was to make the little shelf, here I cut the rebates using my sliding saw

3930345092_92029f06f4.jpg


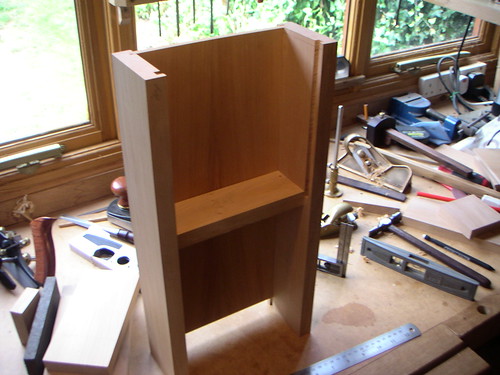
Here is a picture of the assembled frame coming together. It is a little taller than it will end up at this stage and until the bottom shelf is fitted I will leave the final work on hand planning the slight taper on the sides.

3929471635_ab1888f2e8.jpg


You can also see the back panel in the picture above which I made by veneering some Pearwood slices onto a piece of oak faced mdf.

I had cut the grooves with an 8mm cutter the oak mdf is 6mm and the veneer just less than 2mm.

Cutting homemade veneer and gluing this to obtain a nice tight joint was a new challenge and not without some setbacks. I cut some slices of Pearwood using my bandsaw about 4mm thick and using some pearl glue I had originally glued these to a piece of mdf.

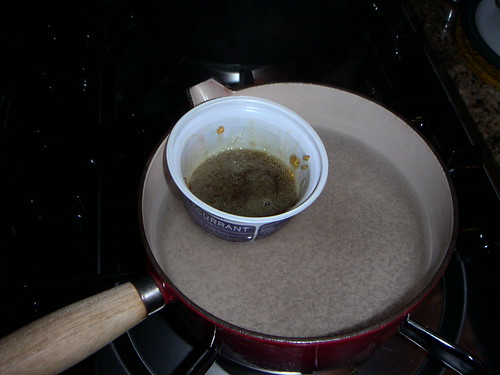
Here is a picture of the pearl glue being melted in my missus best saucepan. (I did this when she wasn't looking. :wink: )

3929470743_3e0e4febb6.jpg


Once the glue had dried I used my thicknesser to reduce the panel to 8mm. The results were acceptable although, it was not long before the piece cupped badly. I was worried this might happen as I had not veneered both sides which is the recommended approach. I had hoped to avoid this as the pieces are quite small I did not think it would be necessary.

To overcome the problem I decided to plane the mdf away and re glue the veneer to some oak faced mdf as mentioned.

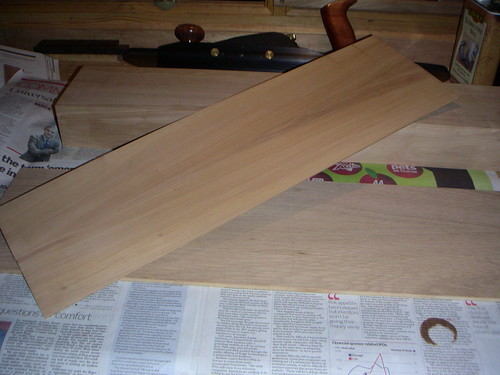
Here is a picture of the veneer

3930382050_3af5ec5cc5.jpg


I did the same for the front piece and so far so good. I bookmatched the veneer which looks very nice.

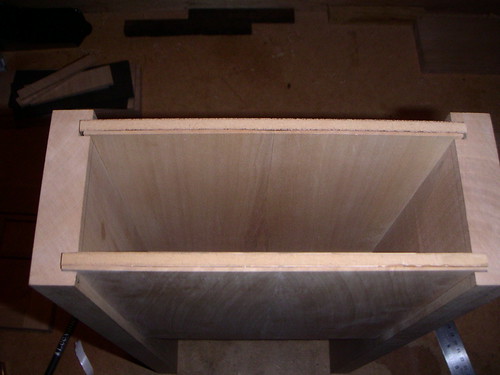
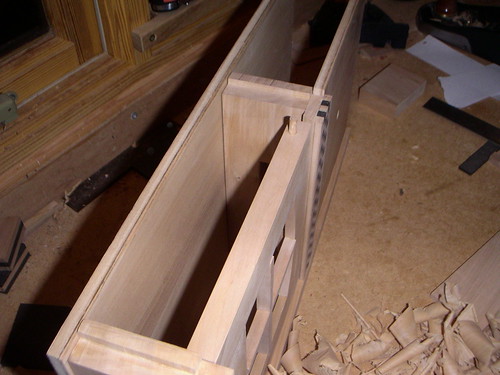
Here is a picture from the top of the box showing the area where the clock mechanism will sit.

3930261538_a8cf8a1b05.jpg


I have already begun work on the little door and will post my next update regarding this along with the centre piece which will include the little chess board squares.

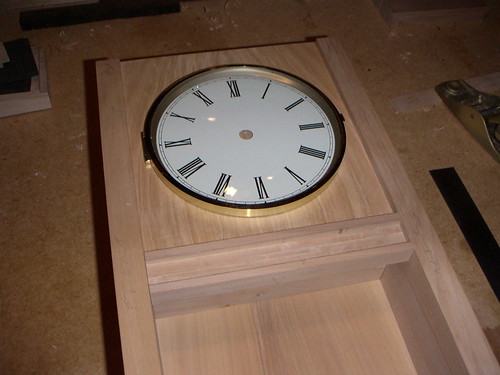
Here is a glimpse of the clock face sitting in place.

3929480231_6ae45da849.jpg


This is an enjoyable project, thanks for looking and comments.

Cheers, Tony.
 
Looks like it's coming along very well, Tony. :)

One question though... It looks like you've done well to overcome the problems of a cupped panel but, isn't pearl glue reversible? Could you not have removed the oak without having to plane down the MDF? Or, does that only work with animal/hide glue? :?

I do agree though, that this unfortunate incident most probably happened because you had only veneered the one face.
 
Well here is update No 2. on the mantle clock.

Work so far has been on the clock cabinet. I decided to leave the positioning of the lower shelf in the cabinet until the door had been made in order to locate this to fit perfectly.

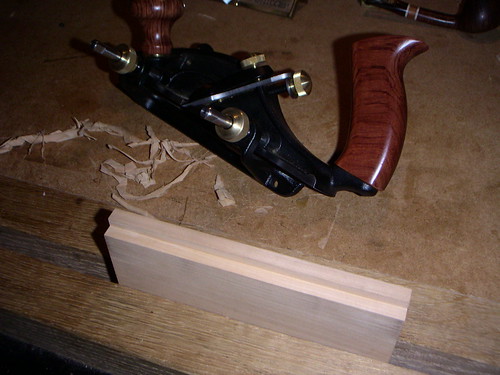
I cut and prepared the pieces for the door. Here is a picture of work on the rebate for the glass. I cut this using my skew rebate plane. I like using this handy tool, so much nicer than a router.

3929474179_e79a65be4f.jpg


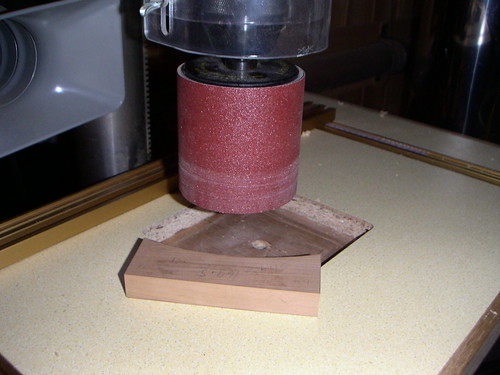
I cut a curve into the top piece with my bandsaw and tided this up using a drum sander fitted in my pillar drill.

3930260708_dcc0b7e0d6.jpg


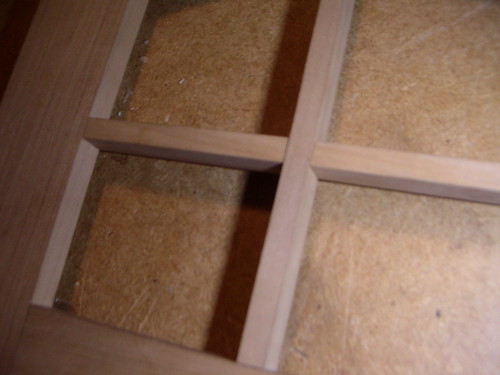
Using a few offcuts I fashioned two small pieces for the window muntins. Here is a close up of this fiddly little job.

3964276250_0d61b61e01.jpg


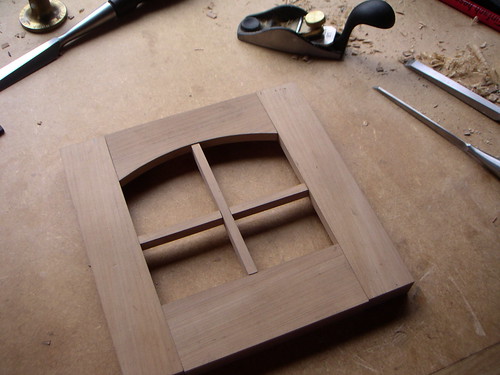
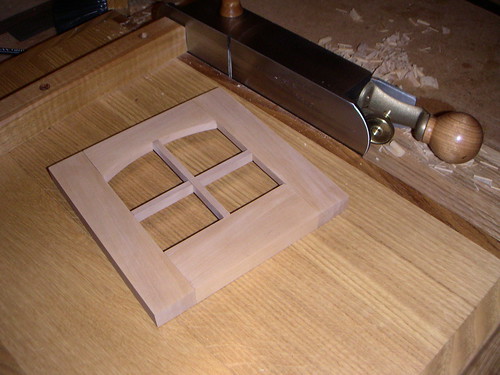
Here is a picture of the door taking shape.

3964273900_6b2411a187.jpg


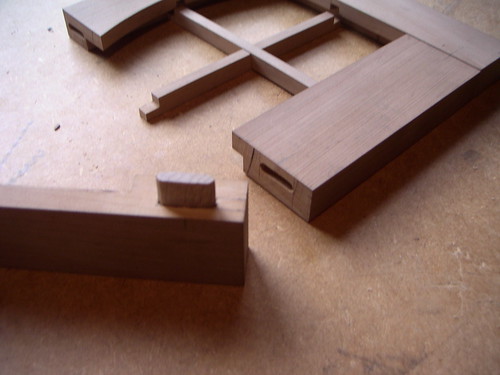
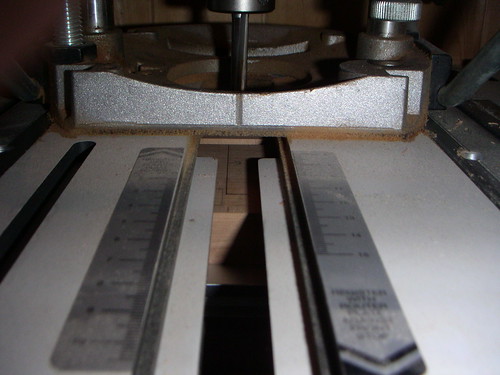
I used my domino jointer to cut four small mortices for loose tenons. It was difficult to hold some of the pieces given their small size so I cut some of the mortices using my pillar drill tidying up by hand.

Here is a picture of the loose tenon in place.

3964274998_f6cfdb60f4.jpg


A final picture of the door which I lightly sanded before glueing and fine tuning to square using my shooting board and Iron mitre plane.

3963496575_d1091e6325.jpg


I have also made a start on the inlay which is being made from Pearwood and a piece of Bog Oak.

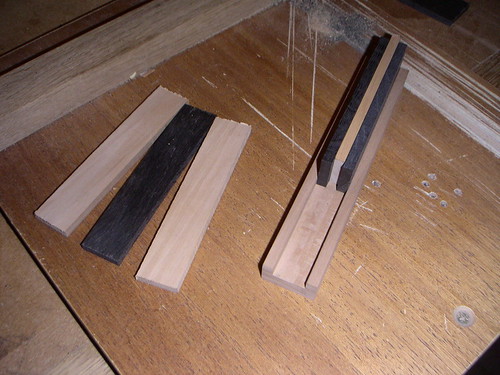
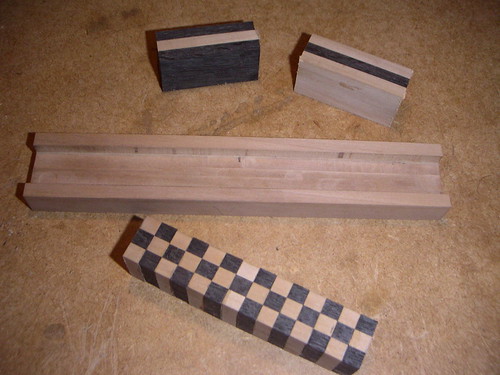
I had previously made the holding piece which will eventually be attached to the middle shelf. I used my Woodrat to cut a series of grooves until I had an 18mm trench in this piece. I cut and thicknessed the pieces to make the inlay 6mm each.

Here is a picture of the pieces and fitting into the trench before glueing together. Alternating timbers to make the chess board effect.

3963490277_5b4ca7d9b4.jpg


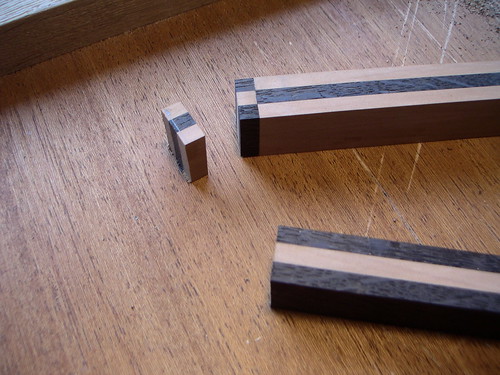
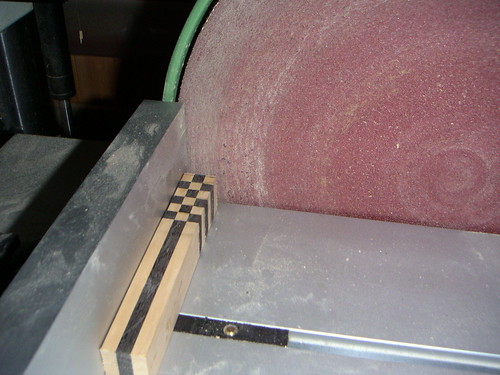
The pieces for the inlay are so small I had to think of away of how to ensure that the faces were square before glueing these together, keeping them all the same size as well. I came up with the idea of glueing each piece one by one and used my disc sander to obtain a square side.

Here is a picture of the first segment glued in place, looks a bit like a bar of liquorice allsort. :)

3963492429_c73e6cbe40.jpg


.........and a picture of progress with some disc sander action.

3964269648_a0bba3e816.jpg


I will cut slices from the bar and fit these into the trench shown in the picture above.

Next jobs;

To complete work on the inlay and fit the lower shelf in the cabinet.

Lots left to do.

Cheers, Tony
 
Hello Olly,

Thanks for your earlier comment. I must confess I didn't really get to grips with the veneering aspect of this project.

I wanted to use pearl glue as I had not done this before. It is effective but I do not have any veneering tools and in the end just used the glue like any other.

The problem with my first attempt was that I glued the veneer to a piece of 6mm mdf. The mdf cupped badly. I decided to plane the mdf away and glue the veneer to a piece of oak faced mdf. I hoped the oak veneer on the mdf would make up for the fact that I had only veneered one side. I also could glue with the grain in opposite directions to hopefully avoid the tension that caused the cupping.

The veneered pieces are quite small only 170mm wide.

I must learn more about veneering, invest in a few tools. A vacuum bag press would be a good idea as well. It is difficult to glue evenly with simple clamps.

Despite my above problems I seem to have overcome, if not by using a text book approach.

All the best, Tony.
 
Nice to see someone doing their thing with hand tools in addition to machinery. I myself know your problem, I recently had to work on some very small pieces, it does make the work slightly stressful and in your case not a large amount of spare timber to compensate for any problems.
 
Here is update number three on the Pearwood mantle clock.

I dashed home from work tonight, scoffed my tea and headed straight to the workshop.

The plan this evening was to finish work on the chess board inlay. During the last week or so I continued cutting and glueing alternating pieces of the Pearwood and Bog oak sandwiches, until I had sufficient length of the inlay.

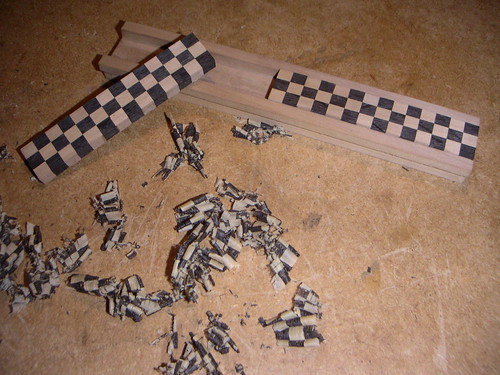
Here is a picture of the inlay before I cut slices to fit the rail piece.

3985636060_41fe714cb0.jpg


After some planning square and some bandsaw action I was very pleased with the outcome. :D

3985638572_18e42838a3.jpg


I cut the inlay slightly over size (thick) in order to be able to plane this back to fit the rail piece.

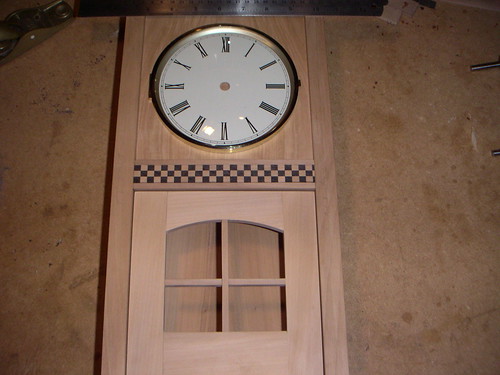
Excited by progress I put the clock together for a preview.

3985637458_27072239c8.jpg


I am going to reduce the width of the clock very slightly to ensure that the inlay is made up of whole squares. (Notice the little fraction on the right).

Next jobs;
To finalise width size and fit the clock mechanism to the front panel.
Cut the inner shelf to allow room for the pendulum and chime rods.
Fit the lower shelf.
Plane the taper on the side pieces.
Source a piece of glass for the door and fit.
Make the top piece and work out how to attach this.
Turn a small knob for the door.

Lots more to do, but determined to finish before the month is out.

Tony.
 
That is a very good thought Dev.

Although, I think my case width will be fine as the arc of the pendulum is controlled by the mechanism and also determined by the length of the pendulum arm which I can set to fit. The arm will only be about 75 - 100 mm so the swing travel is not that wide.

The pendulum is only cosmetic and does not control time keeping as it is a quartz movement.

Thanks for your input.

Hope to do a bit more this evening. Lots still left to finish before the end of the month.

Cheers, Tony.
 
Here is updated number four for the Pearwood mantle clock which is almost ready for final assembly.

During the last two weeks or so I have continued with construction, completing the following tasks;

I managed to carefully fit the little door, which is held in place by two small dowels fitted into the side pieces. I used a dowel plate to make the dowels and carefully drilled and fitted these for the door to swing up without fowling the middle shelf.

The challenge here was to try and avoid a noticeable gap at the top of the door and I managed to achieve this by planing away sufficient material on the underside of the shelf.

Here is a picture of the side of the clock, which also shows the bottom shelf which I fitted once the door had been installed.

4039176863_ecaf90c407.jpg


Here is a picture of some Woodrat action as I trenched the groove into the side piece for the bottom shelf.

4039923094_1c27b47786.jpg


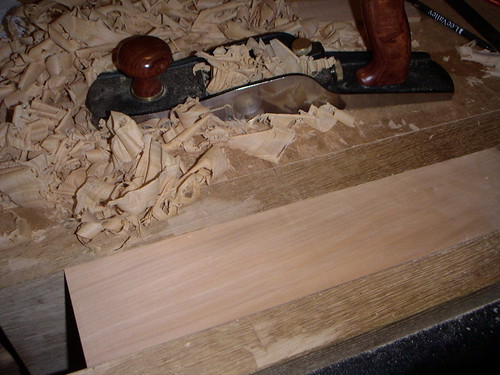
Once I had completed work on the side pieces I was ready to plane the taper which provides a lift to the design and shape of the clock.

Using my LAJ plane I removed material from 20mm down to 13mm, amazing volume of crisp shavings produced.

4039924128_ea83334838.jpg


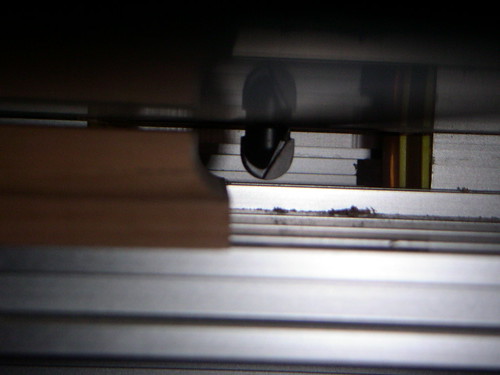
Now my attention turned to the top. I used my Woodrat again to cut a small cove on the underside , and also to cut grooves to fit the front and back panels.

Here is a picture of the cove box router bit in the rat for cutting the underside of the top piece.

4043937246_d03b2fb997.jpg


I was planning to use my lathe to fashion a little knob for the door but found a small Brusso knob which was a perfect size and easy to fit by drilling a little hole in the door. I sourced a small piece of glass and from some offcuts made some pieces to hold this in place.

The back panel needs to slide in and out to enable the battery to be replaced. I made a small piece with a rebate for the back panel to sit in, this will be screw to the bottom shelf to hold the panel in place.

The construction of the clock was complete! :) Attention now turned to finishing.

I gave all the pieces a light sand, finishing with 400 paper and moved from the workshop into the dinning room to ensure a dust free environment for application of the finish.

I decided to apply the first part of the finish before gluing the cabinet together.

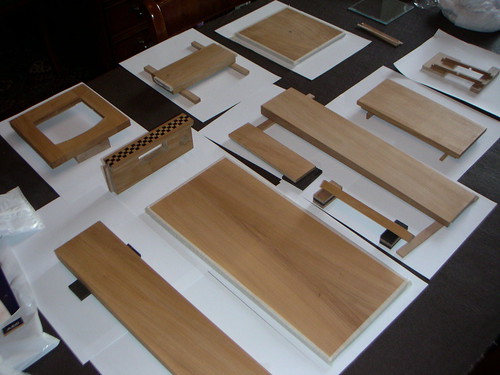
Here is a picture of the pieces layed out ready for some Liberon White Polish diluted with meths. This approach will retain the natural colour of the Pearwood.

4039921864_1336c6d1e0.jpg


I have just applied the third light coat of polish and once this has dried overnight, I will move to assemble the cabinet and finally finish with some clear wax.

Should be completed by tomorrow ready for the end of month deadline. :)

Cheers, Tony.
 
Pleased to hear that you're on course to finish in time, Tony. Looking forward to seeing the completed clock. :)
 
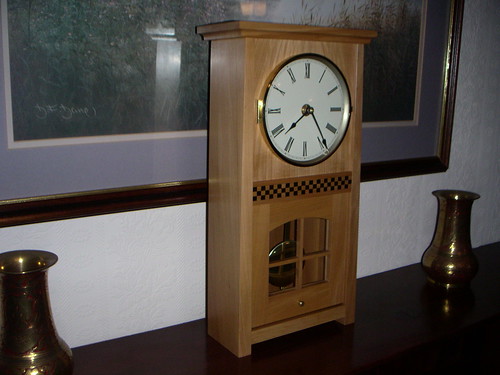
The Pearwood mantle clock now sits in pride of place on the dinning room mantle piece.

I completed the finishing this morning by applying some clear wax and after a quick polish I began the very simple process of glueing the middle and bottom shelves and the dowels for the little door.

The front and rear panels captured and the top simply pushes on. I did not glue this as it provides easy access to turn the chimes on/off.

The rear panel can slide out to provide access for the battery and is held in place by a small rebated piece attached with a couple of screws.

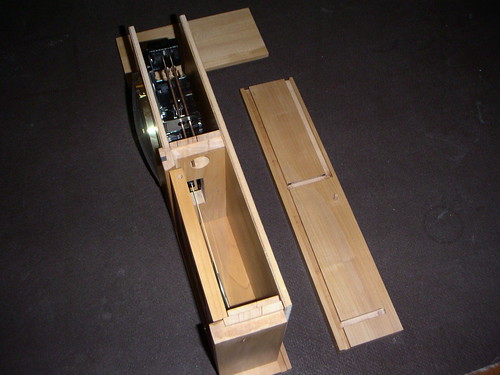
Here is a picture of the inside ready for the final assembly. You can see the clock mechanism and the pendulum.

4043938846_591b5f50bd.jpg


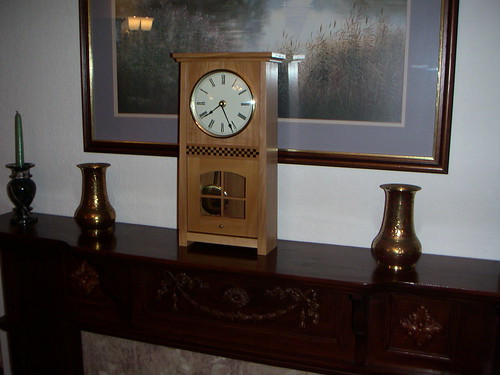
The clock in all its glory on the dinning room mantle. (I think I will need to reposition the picture which hangs above the fireplace.)

4043190167_bf90e94092.jpg


4043940556_e1944eee7e.jpg


This has been a very enjoyable project, sufficiently challenging, yet quite simple construction. Accuracy was important, with regard to a number of issues. The fabrication of the chess board inlay, positioning of the dowels and muntins for the little door. I can tell you I made one or two of those muntins before I achieved success.

The veneering aspect was a new challenge and using the pearl glue.

All in all a good test of skills, in a small package. I can see this little clock remaining in our family for all the years ahead.

Cheers, Tony.
 
Back
Top