Celtic knots howto ?

UKworkshop.co.uk

Help Support UKworkshop.co.uk:

This site may earn a commission from merchant affiliate links, including eBay, Amazon, and others.

loz

Established Member
Joined
3 Jan 2008
Messages
2,161
Reaction score
0
Location
Dublin
Hi Guys,

I have seen some of the pen guys create wonderful looking Celtic knots i think they are, or loops. I 'm not a pen man but wondering if the effect might be sucessful on goblets or spindle items like canle holders etc..


Im confused though of the lamination, cutting and reglue involved.

Anyone have a howto /link ?

Thanks

Loz
 
If you Google 'celtic knot lamination' there are afew tutorials on the first page that might answer your questions

Hope this helps

Pete
 
Oh yeh Google - :oops:

Seems there more to this then i expected
 
Hmm,

The laminate insert has to be the same width as the kerf of the blade... not fair.

I don't have any thin stock/ veneer , so was going to use some 1/4 inch pine strips for a trial run. ( on a goblet or something similar ) but bandsaw sure doesn't have a 1/4 inch kerf !

if, after my first glue up, on my second cut i sand away 1/8 inch on each block ill have a 1/4 inch gap to the ? - or does that sound too simple ?

Loz
 
He was inserting the laminate on a square blamk. No reason why you can't cut right through and lue 1/4" laminate between each section. Only problem is waitting for each one to dry. His way they all dry at saome time.
Hope that makes sense.

Pete
 
Bodrighy":33l1aj54 said:
He was inserting the laminate on a square blamk. No reason why you can't cut right through and lue 1/4" laminate between each section. Only problem is waitting for each one to dry. His way they all dry at saome time.
Hope that makes sense.

Pete

I can't visualise properly - i'll have to test. getting cross eyes trying to think i three dimentions ! :)
 
i have made a couple of these pens loz, unsucessfully i might add too, they need to be really accurate, as you have mentioned, it doesn't matter what thickness you use, it must be the same width as the cut from the blade otherwise they dont align properly when turned.
It is good fun though, try it out.. :lol:

try using pickguard for guitars, you can get some great colours.
 
If the insert stock thickness is different from the saw kerf width then the loops won't match up where they cross. The key is that the same amount must be removed each time the piece is cut and that amount must be exactly replaced by the insert stock so that the overall length of the blank remains the same throughout. If you have another method of guaranteeing that the same amount of stock that is removed is replaced on each cut then that should work too. :)

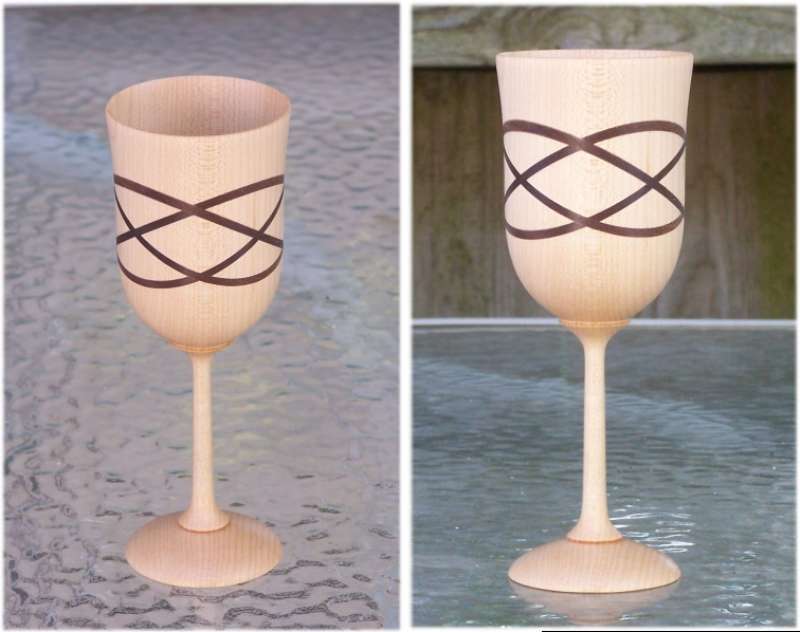
Here is a goblet I did last summer in maple & walnut:

goblet%20challenge-800.jpg


Take care
Bob
 
Some time ago I was asked to make a small bowl with a Celtic cross in the base. In order to do so I found this website that allows you to plan your own Celtic design using your keyboard. You can then use a Laser printer and transfer the design to the bowl using Cellulose Sanding sealer on the back of the design.

http://www.clanbadge.com/

The programme is cheap and very effective.

Peter.
 
bobham":l6730sl6 said:
If the insert stock thickness is different from the saw kerf width then the loops won't match up where they cross. Here is a goblet I did last summer in maple & walnut:

goblet%20challenge-800.jpg


Take care
Bob


sorry bob, but this is not true. the secret is....
that when you start to do a celtic knot..
first of all your blank must, and i stress, must be pefectly square before you even start before you cut your blank.

pearsonr006.jpg
 
Well, I suppose that I do try to pick the most difficult route because my experiment into the Celtic knot was definately not square or round!

Boxwood2.jpg


Boxwood1.jpg


In fact a piece of oval box 4" x 3 1/4" and very alkward to get the cuts at 90 deg to each other never mind at the same level or angle :shock: . But I had a try and this is the result. The crosses almost line up all the way round too. The insert is mahogony, I think?? Each 'slice' was cut through completely, glued and left for at least 4 hours before the next cut was made. Then left overnight to set properly before turning.

Celticknot3.jpg


Now I know what to expect I will have another try

My neighbour has promised me an even larger piece of box too!
 
.


Like you Loz, and a few others i suspect, i've not been turning long... in fact it's just gone past the 12 month mark (and 3 of those i didn't do anything as it was too cold down the shed...!!). So i'm not claiming to be good at it, just got an eye for detail.... and patience.... you need to be patient sometimes... dont be tempted to rush it.


Like you i was impressed and amazed at just how the Celtic Knots were done... so i watched the you-tube thingy, and was left thinking that if a twelve year old boy could do it.... so could i, and set about having a go..... here's some pics (i hope...)


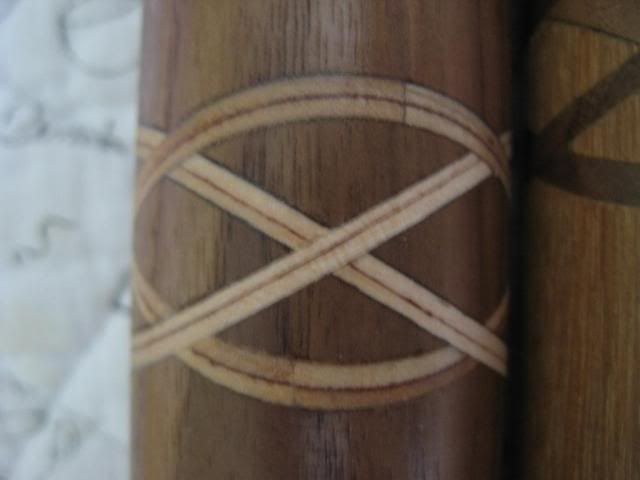
chose my piece of wood... a bit of Walnut, and decided to use Birch Ply as an insert, 2 reasons..... 1, i liked the contrast of dark and light wood, and 2, i had some...!

Then set about setting up my chop-saw with a couple of 'stops' for depth and length (sorry, forgot to take some pics of that bit), and proceeded to cut at 30 degree angle. Now the blade width is approx 3mm and the ply was just over 6mm.... so had to cut down to right(ish) size on bandsaw and sand smooth first (this is the patience and preparation bit...!!)

oh... i also forgot to mention that the ply was only 25mm wide..!! so each cut & glue step needed TWO inserts of Birch ply to get to the same depth as the Walnut.... keeping up with me..??

Once the two pieces were glued in (just using ordinary PVA), i used a wedge and a weight strategically placed to help close the joint. (again no pics of this, sorry). And left to dry overnight. Did this another 3 times for the other faces, making sure i used the same depth & length stops. And each time 'wedging' the cut closed (and cleaning up the faces before the next cut....).

By the end of cutting and glueing 4 faces the Walnut lump was looking a bit errr.... bent and slightly twisted lets say. But hey.... it's my first attempt....

Here's the pics......


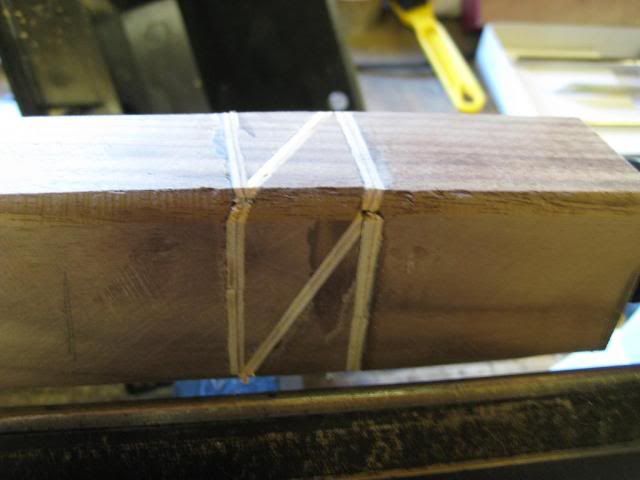
IMG_2881.jpg


i think you can just about make out the 'bend' in the Walnut here...


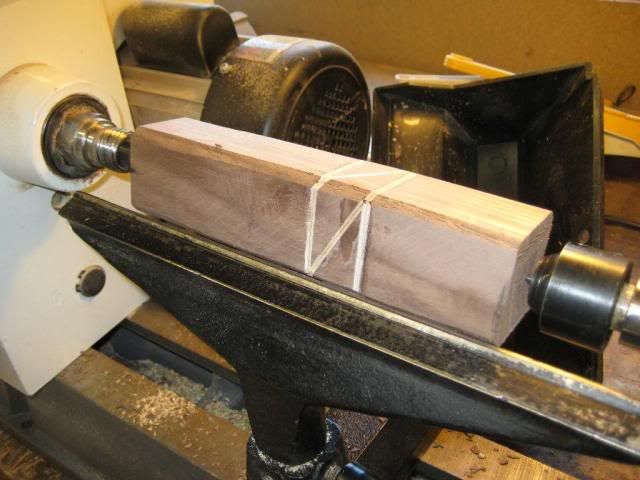
IMG_2884.jpg


on the lathe ready to go...


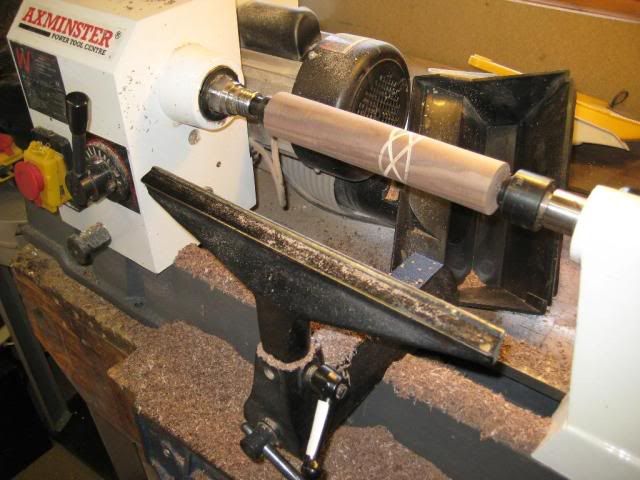
IMG_2885.jpg


turned to round...


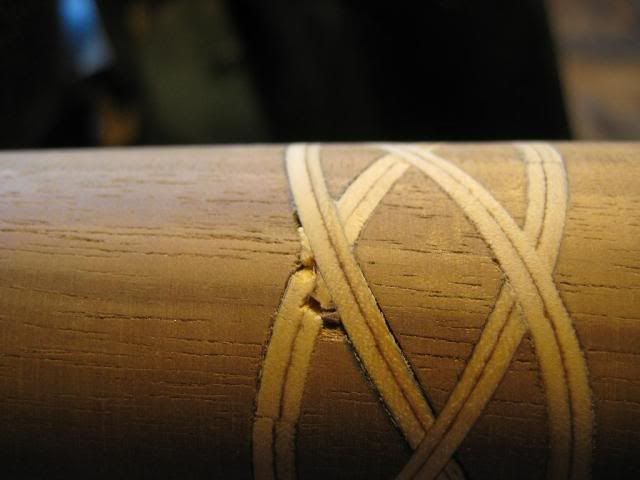
IMG_2887.jpg


close up of a 'dink' in the ply insert


The 'dink' probably due to me 'easing' the ply in with a hammer while glueing..! Got over this quite easily... just turned it a little bit thinner...!! This left just a tiny errr blemish, which was filled with a bit more glue and sawdust rubbed in.


IMG_2893.jpg


see top and bottom of the inlaid ply and you can just make out the join in the two pieces per side...


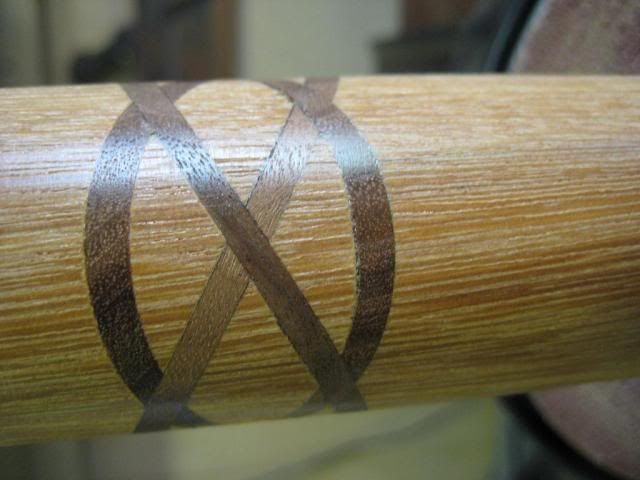
At the same time i also did a Kapur with a Walnut inlay...


IMG_2891.jpg


this one also suffered the same bending and twisting as i glued it...


IMG_2895.jpg


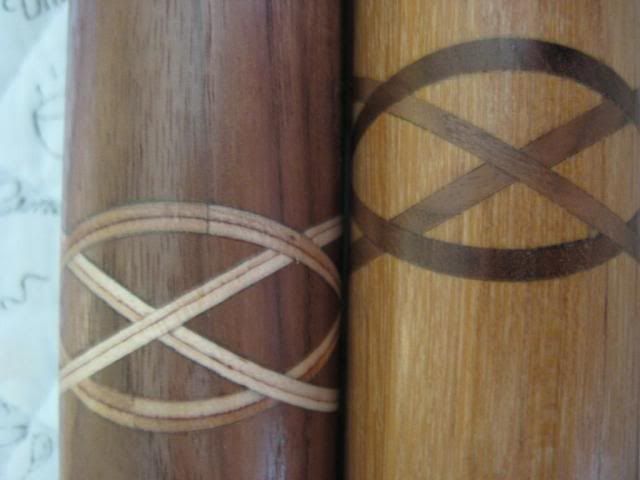
the two side by side.... ready to be made into nice box's.


I know some of the other guys on here are wizzy experts and have been turning for years and make it all look very easy. I'm NOT an expert... just needed to be pointed in the right direction and give it a go. I'll definitely be trying this again..... just like the lad in the video clip.

Give it a go..... i did..!!


Oh.... and on the subject of that lad.... i was a bit bemused as to why he had to cut up so much wood just to make a pen..!! are you pen guys that picky about your wood then...?? :lol: (de-forestation, climate change, blah blah blah...)


Nick


almost forgot to say.... i left the turned pieces of wood on the kitchen worktop, and when my missus (BIGGEST CRITIQUE..!!) comes home she asks where i bought them from..!!! so they must look good enough to use.....??
 
That's really good! I like the effect of the ply with the dark line and I love walnut anyway!!

I, and I expect others, will be looking forward to seeing the final boxes..

The only time that I have done anything in ply was a shallow bowl made by gluing 2 1 inch pieces of birch ply together. Several people thought it was porcelain and because of the amount of dust and blunting the tools I probably won't be doing a production run with it? :shock:
 
Does this technique create true celtic knots? I.e. with the overlapping of the bands in the correct places? Is it even possible without resporting to veneering the object after it has been turned?
 

Latest posts

Back
Top