Box in Mahogany

UKworkshop.co.uk

Help Support UKworkshop.co.uk:

This site may earn a commission from merchant affiliate links, including eBay, Amazon, and others.

loz

Established Member
Joined
3 Jan 2008
Messages
2,161
Reaction score
0
Location
Dublin
Hi All,

Just wondered if you would have a look at my first box, and give any feedback. Its not exactly a jam fit lid, but tight enough not to fall off when upsidedown ! - Still getting used to calipers...... :oops:

The grain does line up, but was in such a hurry this am i didnt line up on the pics ! damnit!

Thanks

Loz

click to enlarge etc...



Hiya Loz, That looks pretty good to me it's a pity about not getting the grain right ,but it is not that important,it's the fact that you've turned a small piece in a nice clean cut and a good finish. I think it's harder to get the small objects right than the big ones.
Anyway the real turners will give you their views and then you will be advised whether or which way to go about it. But from a begineer like me well done. By the way the shed looks good. Regards Boysie.
 
Best 'dive in' before the real turners do too .... :D

Looking very good Loz, nicely proportioned and well finished.
I have a DVD of box making by a guy Richard Raffan, it looks like one of his !
Most impressive !

Keep 'em coming ! 8) 8)
 
Hi Loz

It's better than my first one :lol:

..a little paper burn on the bottom of the lid would have disguised the lid/bottom join line... alternatively use simple score lines.
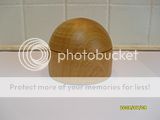
For me, the upward taper on the lid doesn't appeal... each to his own!

If you like it, it's a good'un :wink:

more!!!
 
oldsoke":1v2v7y6c said:
Hi Loz


For me, the upward taper on the lid doesn't appeal... each to his own!

Nor me but i couldn't work out how i was going to mount it to remove ! - i only realise now that i could have just taped the lid to the body while the body was still mounted ! doh.
 
If you've hollowed out the lid then you could expand the chuck into the recess.... very, very carefully, too much pressure and you're into making a new lid :shock:
 
Nice one Loz, i wouldn't worry too much about the fit of the lid. If too tight and someone tries to open it, chances are the contents will go flying across the floor. :lol:

Very commendable for a first attempt, my first attempt would never have made it onto the forum pages :oops: . A few ended up in the firewood bin before I came to grips with it.
 
Good one Loz, as Graham said a burn line on lid/base at the join would have hidden it.

I personally think a flat top without the inward curving edge would go better with the plain cylinder look, even an outward flare might work better and provide the 'grip' for removing the lid.
A bit of hand sanding on the parting pip would be an improvement, not sure the "central pimple " really adds to the looks.

All the above comments are purely my own thoughts and do not detract in any way from a splendid first effort on your part.

On the lid fit, unless your wood is very dry and stable, too tight a fit inevitably leads to a lid that won't fit due to distortion over time.

One way of reducing this problem if you really want tight fitting is to rough turn the box to near size and remount the parts after a rest period of a few days/weeks to finish to size.

I just give up on most items and make the location method such that the lid centralizes but is loose enough to accommodate shrinkage.

Undercuts or beads at the join can also disguise any slight movement.
 
Well thanks for all the replies, I'm quite pleased with myself now, and have lots of improvment tips for the next one !!

Loz
 
Loz wrote
I'm quite pleased with myself now
So you should be :D
Very nice little box that as been well finished for a first attempt.
You could still turn and fit a little finial for the top to disguise the pimple.
 
Nice work
Like others,my firstfew attempts (as well as some succesive ones ) :cry: have kept the kindling box well ssupplied. You van use the box as a jamb chuck tto finish the top of the lid off. Just make it a tight fit and use light cuts. Skim the box down a touch afterwards to make a decent fitk

Pete

P.S. Chris Stotts book ' 50boxes' is a good buy if you want to go on making them
 
Well done on the turning and fit.

I'm with Paul on the top finish doubts, not so much re rounding or otherwise just removal of tooling/sanding marks.

That piece of 'Mahogany' looks suspiciously like Iroko, if it is be very careful about the dust coming into contact with skin and lungs.
 
Thanks for the feedback, I think i'm getting a little better,

Its the ends i seem to have problems with, either at the tailstock, and avoiding getting indentations, ( and tearout ) , and parting off at the drive seems to be a big issue also !

Re parting off, ive been using a parting tool down to maybe a half inch, the cleaning up the base with a skew , and then parting off ( or cutting with the skey ) the rest.

I need time to build some methods of reversing properly all my pieces !!!
 
CHJ":kr8y3wxb said:
That piece of 'Mahogany' looks suspiciously like Iroko, if it is be very careful about the dust coming into contact with skin and lungs.

HI,

The second box is the other half of the stock i did the first box with, just finished with beeswax, im fairly sure its mahogany ( but im no expert - so will be very careful as per your advice ! )
 
To finish off top and bottom, put a piece of scrap wood in the chuck and turn it down to a firm fit (very slight taper) in the lid or base central hole.

Just tight enough to hold it whilst you cleanup and sand the endgrain face.

One way to get the central scrap piece to grip your box is to turn it to a good fit, then immediately before placing your box on it give the scrap spigot a wipe with a wet rag, this will cause the wood to swell slightly inside the box and increase the hold while you work.
 
Very good first boxes there loz!! listen to these guys and you will on the top table in no time. they know about wood turning .... even if 'some of them's' puns make the eyes water at times! :lol:
 
luv that rounded top Loz!

You're half way to a Fabergé type egg :wink:

a box with the proportions... 2/5ths top, 3/5ths bottom has a universal appeal to the eye :wink:
 
Back
Top