OPJ
Established Member
My aim here was to build something sturdy enough to take the weight of my 70kg SIP 12" Bandsaw which would also give me space inside to store all my blades and perhaps a few other bits and pieces on the shelf above.
This first photo shows my old stand. While it is sturdy enough, I cannot move it around and there's absolutely nowhere to keep those bandsaw blades nice and dry.
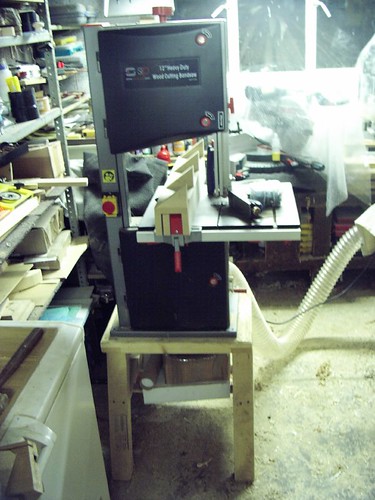
(The shining light in the background emits from my hold Bosch SCMS! ) :wink:
18mm shuttering ply (one good face) was the material of choice, mainly due to cost (plywood seems to have gone up a bit in the last year or so?). It's a fairly simple-yet-effective construction; edges were rebated and screwed together, as were the edges on the top and base. The shelf sits in a groove cut all the way around the back and two side panels, screwed in place. I also added a solid (European/French) oak lipping to the front edge, just to make it look nice.
I did a similar thing with the top rail on the front of the cabinet, using some "oak-effect" chipboard I salvaged from a twenty-year-old chest of drawers mum was throwing out after years of rodent abuse and damage from moving, etc.
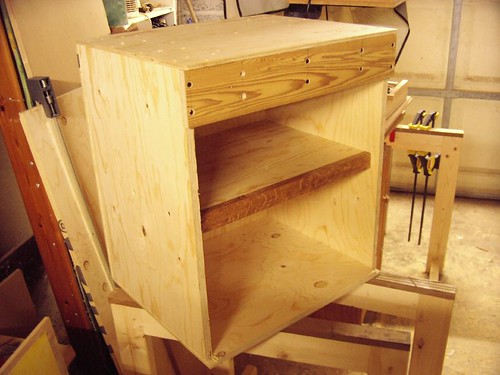
I also did something similar with the door, using more scraps of laminated chipboard. And, although you can't see it yet, I've used a think, 4mm back panel of laminated hardboard, from the same piece; rebated in to the back of this door.
After biscuit-jointing the frame however, I realised you cannot sand this stuff flush! It's not real veneer!! It goes as white as a ghost! :roll:
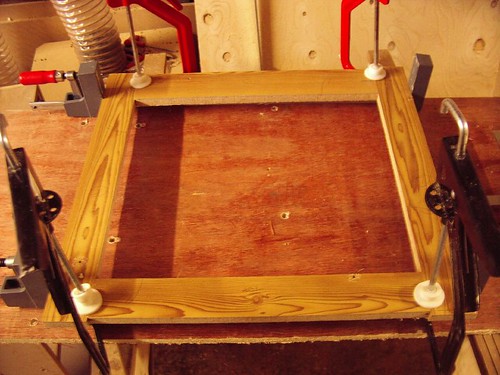
(I need a new biscuit jointer - I've lost all patience with the £25 Ferm! Bosch and Makita look nice though - then, I wouldn't need the extra clamps! :twisted: )
If, like me, you always forget to cut a rebate in the bottom step before assemby, this is what I did, using my router, guide bush and "straight-edge". :wink:
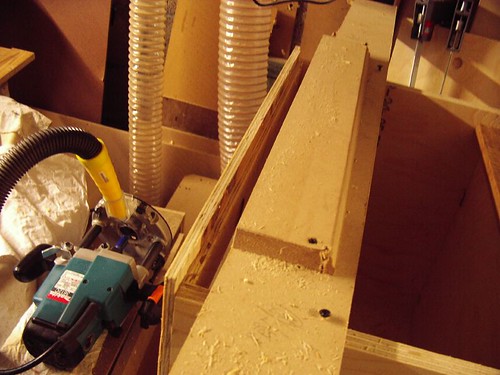
(In actual fact, I later realised there was no point in doing this - and you'll see it too, when you look at the mobile base I'm using, which means I'll have to trim the door 1-1/2"-or-so anyway. :roll: )
)
I also need to trim the face edges on my cabinet slightly to allow a little extra room so the door would sit flush.
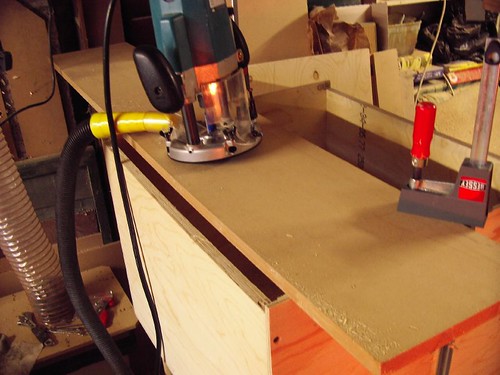
(My halogen-router cutter made light work of this! :wink: )
)
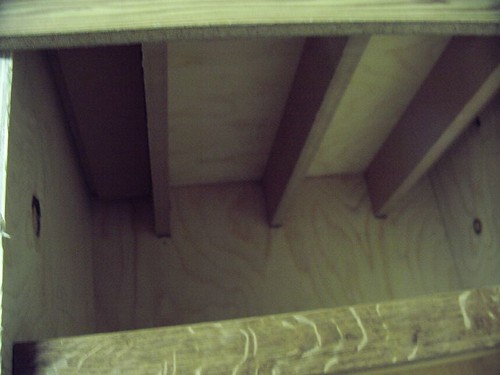
Just to beef up the top even more, I housed in some 19mm MDF "joists" at front and back of the cabinet (always spanning the shortest distance, just like a floor). You can also just see two scraps of MDF, one either side, face-glued to the top to give something extra for the nut and washer to 'bite' against when I secure the saw. I find it works very well.
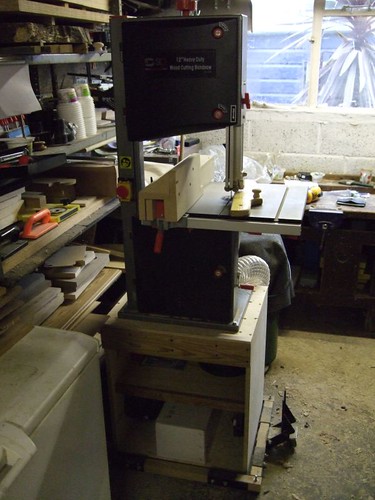
And finally, some shots of the finished article (yes, the door is still missing to this day after I bought the wrong hinges!). I gave it two coats of sanding sealer and don't think it really needs any more.
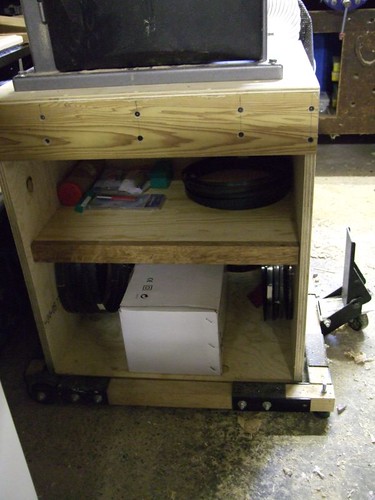

Plenty of space for all my blades and even some room for my biscuit jointer. The 'hooks' are simply some 100mm lengths of 18mm dowel with a 45x45mm scrap of MDF stuck on the end, all screwed through from outside the cabinet. Router cutters will go on the shelf above.
The wheel kit can be purchased from either Rutlands or Axminster for about £30. Very simple and effective to use, but you will need your own hardwood. They also tell you to drill the bolt holes several times over size - but, why bother, when you can do it accurately with a pillar drill?
I've also made this deep resawing fence from 18mm MDF, using one of Steve Maskery's method (short rip fence) for clamping to the fence itself.
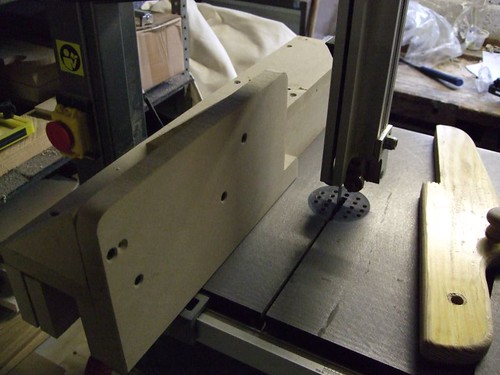
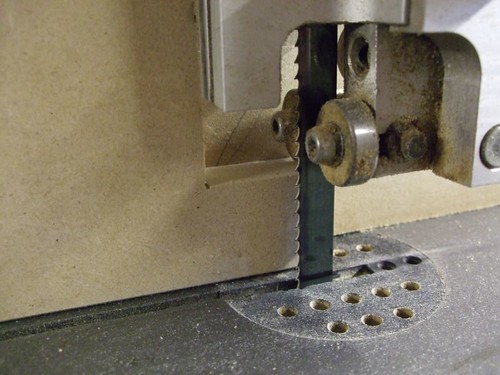
This little notch on the end allows me to have the fence very close to the blade, for narrow cuts, without having to raise the guard so it can clear the fence. Without this add-on, having the normal fence this close would mean exposing roughly 4" of blade. :? :shock:
Thank you for looking.
This first photo shows my old stand. While it is sturdy enough, I cannot move it around and there's absolutely nowhere to keep those bandsaw blades nice and dry.

(The shining light in the background emits from my hold Bosch SCMS! ) :wink:
18mm shuttering ply (one good face) was the material of choice, mainly due to cost (plywood seems to have gone up a bit in the last year or so?). It's a fairly simple-yet-effective construction; edges were rebated and screwed together, as were the edges on the top and base. The shelf sits in a groove cut all the way around the back and two side panels, screwed in place. I also added a solid (European/French) oak lipping to the front edge, just to make it look nice.
I did a similar thing with the top rail on the front of the cabinet, using some "oak-effect" chipboard I salvaged from a twenty-year-old chest of drawers mum was throwing out after years of rodent abuse and damage from moving, etc.

I also did something similar with the door, using more scraps of laminated chipboard. And, although you can't see it yet, I've used a think, 4mm back panel of laminated hardboard, from the same piece; rebated in to the back of this door.
After biscuit-jointing the frame however, I realised you cannot sand this stuff flush! It's not real veneer!! It goes as white as a ghost! :roll:

(I need a new biscuit jointer - I've lost all patience with the £25 Ferm! Bosch and Makita look nice though - then, I wouldn't need the extra clamps! :twisted: )
If, like me, you always forget to cut a rebate in the bottom step before assemby, this is what I did, using my router, guide bush and "straight-edge". :wink:

(In actual fact, I later realised there was no point in doing this - and you'll see it too, when you look at the mobile base I'm using, which means I'll have to trim the door 1-1/2"-or-so anyway. :roll:
I also need to trim the face edges on my cabinet slightly to allow a little extra room so the door would sit flush.

(My halogen-router cutter made light work of this! :wink:
Just to beef up the top even more, I housed in some 19mm MDF "joists" at front and back of the cabinet (always spanning the shortest distance, just like a floor). You can also just see two scraps of MDF, one either side, face-glued to the top to give something extra for the nut and washer to 'bite' against when I secure the saw. I find it works very well.

And finally, some shots of the finished article (yes, the door is still missing to this day after I bought the wrong hinges!). I gave it two coats of sanding sealer and don't think it really needs any more.


Plenty of space for all my blades and even some room for my biscuit jointer. The 'hooks' are simply some 100mm lengths of 18mm dowel with a 45x45mm scrap of MDF stuck on the end, all screwed through from outside the cabinet. Router cutters will go on the shelf above.
The wheel kit can be purchased from either Rutlands or Axminster for about £30. Very simple and effective to use, but you will need your own hardwood. They also tell you to drill the bolt holes several times over size - but, why bother, when you can do it accurately with a pillar drill?
I've also made this deep resawing fence from 18mm MDF, using one of Steve Maskery's method (short rip fence) for clamping to the fence itself.


This little notch on the end allows me to have the fence very close to the blade, for narrow cuts, without having to raise the guard so it can clear the fence. Without this add-on, having the normal fence this close would mean exposing roughly 4" of blade. :? :shock:
Thank you for looking.


