CroppyBoy1798
Established Member
The backstory
Got the above mentioned block plane off of 'Santa Claus' this Christmas so I figured I'd throw together a review/test of it, might be of some use to people as its hard to find decent reviews for this make, I believe there is one other on the forum somewhere but for some reason I havent got the 'search' function anymore?
Anyway, I had my eye on the Qiangsheng planes that Rutlands are offering, and having heard so many good reports on them I decided I'd HAVE to get myself a good block plane, well, when I say 'good' I mean 'a fine cheap block plane'.......cant quite reach to the Lie Nielsens or Veritas's just yet. Unfortunately however I left it too late to order and Rutlands were out of the 60 1/2's so, I had a gander at Axminster and spotted the 'Rider' (curious name?!) brand of block planes. Searching the net I couldnt find anything on them, only the one review, already mention, here, which gave it a thumbs up (eventually). The only other options at this stage were the mentioned expensive models or the cheaper Groz, Axminster own brand and the, I believe, dire Stanleys. So, I forked out and ordered myself one.....took a risk so to speak.
First impressions
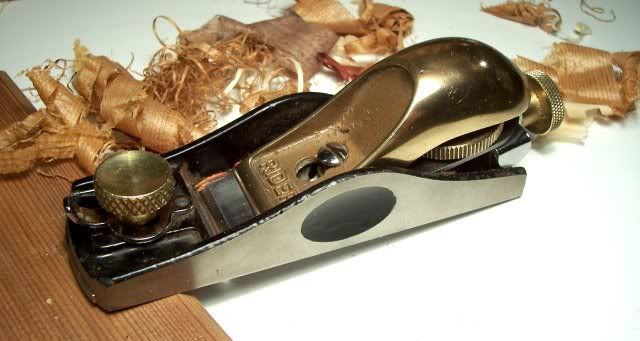
It was pretty hefty and a nice weight to it! My only previous experious with block planes were the pretty crude and basic Stanley 220's, so you can imagine I got a land. It comes in a cardboard box (no fancy wooden boxes here!) with the brand name of 'SOBA' all over it, a quick search shows that SOBA are an Indian based company. The plane itself is mummy wrapped in cellofane and has a liberal coating of oil.
Fit and Finish
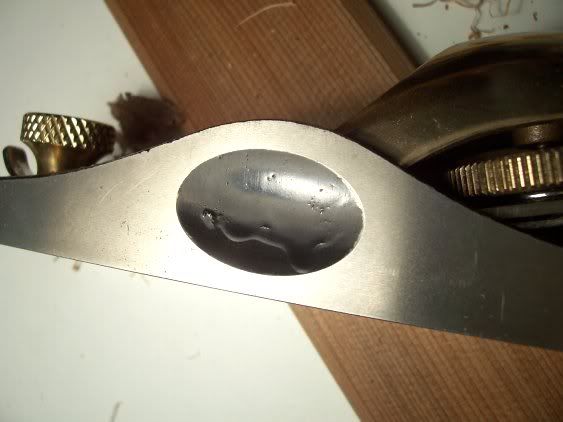
One of the first things noted after the weight of the plane (down mostly to the solid bronze cap) was the somewhat crude paintjob. The paint in the left thumb recess has a fairly noticable run and along the top of the rear left side wall the paint has flaked off. The bronze cap is a tad roughly cast around the logo area and seems to have a slight little curve in it when looking down on it.
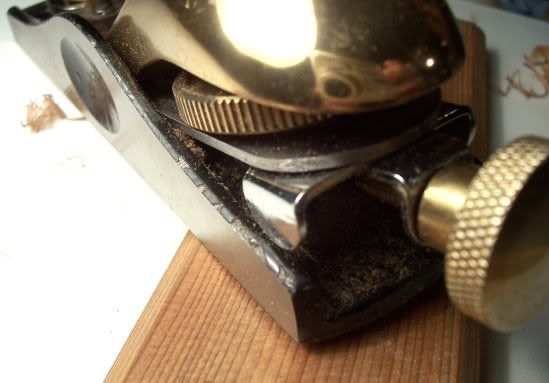
The adjustable mouth seemed to move pretty smoothly and sit well against the base. The adjuster screw at the rear however seemed to have a bit too much backlash in it, must take a turn or two before it kicks back in again to retract or advance the blade.
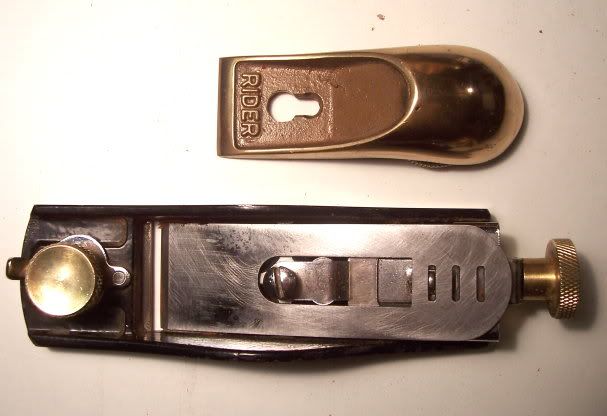
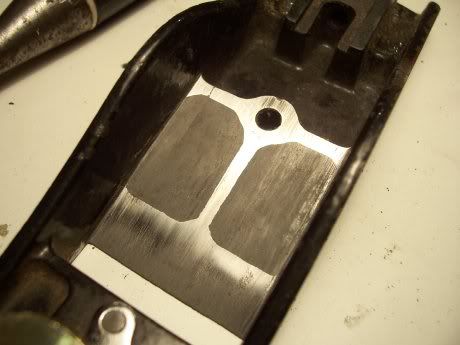
I was resonably happy until I put a square on the sole and seen it was a fair bit out and there was more light coming through than I'd hoped! It took a fair bit of effor to bring it down to a somewhat 'resonable' level of flatness and still there is someway to go as you can see from the image below. There is a visible low area both infront of and behind the blade. I understand its acceptable, but to this degree? I polished it off with 600 and 1500 wet and dry, think I'm gonna have to go back at it though.
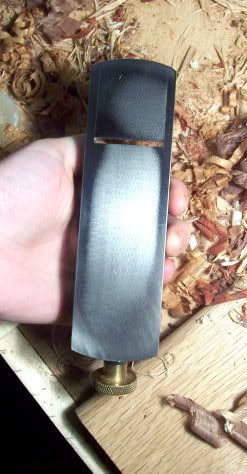
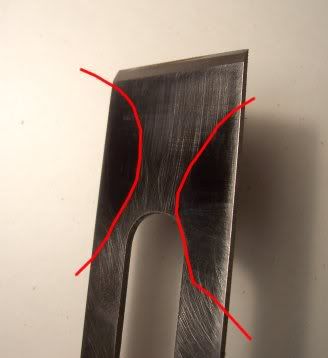
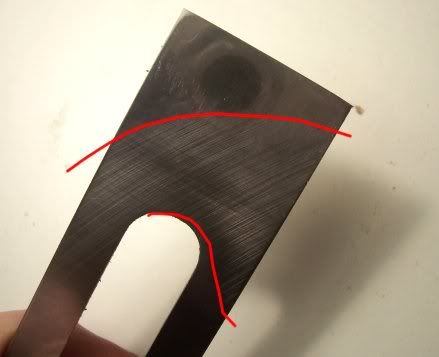
Ok, so that was the sole dilemma somewhat sorted, I figured I'd have a look at the blade and check that for flatness, one word described that......dire! It was very out of flat and after much sanding its still a long way off decent and seems to have a pretty uneven shape both front and back. The images below highlight the flatened areas (polished) and the low areas (rough). The low areas are low enough to let a good bit of light through!!
Just to add, the flat surface I was using was the cast iron table of the Record bandsaw which is satisfactorily flat.
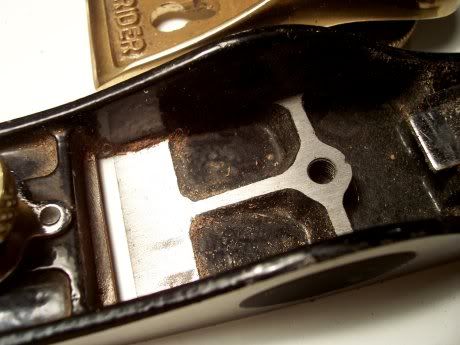
The bedding needed some attention also, there was visible maching marks and general roughness, a few passes of a file cleaned it up. The mouth thankfully was square so no adjustment was needed.
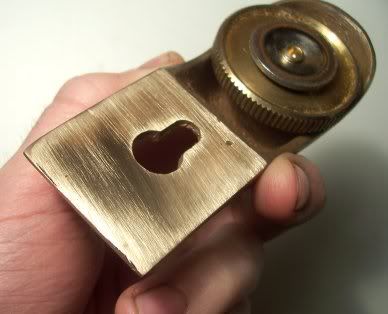
The underside and leading edge of the bronze cap was extremely uneven, I wish I'd taken pics but I just started working on it, next thing my hands were black and I didnt bother. But it took a good 15-20 mins to flatten it and square off the leading edge which was and wasnt rounded and a bit hit and miss. Only a few mm's of the front edge of the cap actually come into contact with the blade so obviously a complete flattening of the surface wasnt necessary, but, I done it anyway.
So, with all those adjustments provisionally done I figured I MUST have a pretty decent plane at this stage. I should add however that the plane was 'ok' out of the box, it seemed sharp and done the job, planed wood etc, but after highlighting all the issues it cant have been 'right' or have lived up to its full potential.
Got the above mentioned block plane off of 'Santa Claus' this Christmas so I figured I'd throw together a review/test of it, might be of some use to people as its hard to find decent reviews for this make, I believe there is one other on the forum somewhere but for some reason I havent got the 'search' function anymore?
Anyway, I had my eye on the Qiangsheng planes that Rutlands are offering, and having heard so many good reports on them I decided I'd HAVE to get myself a good block plane, well, when I say 'good' I mean 'a fine cheap block plane'.......cant quite reach to the Lie Nielsens or Veritas's just yet. Unfortunately however I left it too late to order and Rutlands were out of the 60 1/2's so, I had a gander at Axminster and spotted the 'Rider' (curious name?!) brand of block planes. Searching the net I couldnt find anything on them, only the one review, already mention, here, which gave it a thumbs up (eventually). The only other options at this stage were the mentioned expensive models or the cheaper Groz, Axminster own brand and the, I believe, dire Stanleys. So, I forked out and ordered myself one.....took a risk so to speak.

First impressions
It was pretty hefty and a nice weight to it! My only previous experious with block planes were the pretty crude and basic Stanley 220's, so you can imagine I got a land. It comes in a cardboard box (no fancy wooden boxes here!) with the brand name of 'SOBA' all over it, a quick search shows that SOBA are an Indian based company. The plane itself is mummy wrapped in cellofane and has a liberal coating of oil.
Fit and Finish
One of the first things noted after the weight of the plane (down mostly to the solid bronze cap) was the somewhat crude paintjob. The paint in the left thumb recess has a fairly noticable run and along the top of the rear left side wall the paint has flaked off. The bronze cap is a tad roughly cast around the logo area and seems to have a slight little curve in it when looking down on it.


The adjustable mouth seemed to move pretty smoothly and sit well against the base. The adjuster screw at the rear however seemed to have a bit too much backlash in it, must take a turn or two before it kicks back in again to retract or advance the blade.

I was resonably happy until I put a square on the sole and seen it was a fair bit out and there was more light coming through than I'd hoped! It took a fair bit of effor to bring it down to a somewhat 'resonable' level of flatness and still there is someway to go as you can see from the image below. There is a visible low area both infront of and behind the blade. I understand its acceptable, but to this degree? I polished it off with 600 and 1500 wet and dry, think I'm gonna have to go back at it though.

Ok, so that was the sole dilemma somewhat sorted, I figured I'd have a look at the blade and check that for flatness, one word described that......dire! It was very out of flat and after much sanding its still a long way off decent and seems to have a pretty uneven shape both front and back. The images below highlight the flatened areas (polished) and the low areas (rough). The low areas are low enough to let a good bit of light through!!


Just to add, the flat surface I was using was the cast iron table of the Record bandsaw which is satisfactorily flat.
The bedding needed some attention also, there was visible maching marks and general roughness, a few passes of a file cleaned it up. The mouth thankfully was square so no adjustment was needed.

The underside and leading edge of the bronze cap was extremely uneven, I wish I'd taken pics but I just started working on it, next thing my hands were black and I didnt bother. But it took a good 15-20 mins to flatten it and square off the leading edge which was and wasnt rounded and a bit hit and miss. Only a few mm's of the front edge of the cap actually come into contact with the blade so obviously a complete flattening of the surface wasnt necessary, but, I done it anyway.

So, with all those adjustments provisionally done I figured I MUST have a pretty decent plane at this stage. I should add however that the plane was 'ok' out of the box, it seemed sharp and done the job, planed wood etc, but after highlighting all the issues it cant have been 'right' or have lived up to its full potential.


