August Challenge - A Decorated Bowl. Post Images Here

UKworkshop.co.uk

Help Support UKworkshop.co.uk:

This site may earn a commission from merchant affiliate links, including eBay, Amazon, and others.
Status
Not open for further replies.

nev

Established Member
Joined
21 Jan 2011
Messages
4,860
Reaction score
16
Location
The green and wetter end of the M4.
Looks like our Challenge for August is a Decorated Bowl .

Our Judge for August will be Richard (i think)

Must be New work for this Challenge

Maximum size 300cm ( 12" ) diameter.

Any wood type ( Wood type and cost / value will not be taken into consideration ) as this challenge is all about design / shape / form / turning and finishing skills.

Other materials can be incorporated as long as it is turned on wood turning lathe with wood turning tools.

Colouring / textured / burning / piercing / carving / Multiple Segmented turning all allowed.

Entry does not need to be fit for purpose of holding fluids.

Any entry's that look more like a vase or a platter or are outside the rules and requirements will not be judged

The Judges decision is final ( Any negative comments re judging must be via PM only and not on the open forum )

NO Critique or comments on any work until after the Judging and results.

Please state wood type if known, dimensions and a little about how you made it and what tools and finish you used ( this helps the judge )

Please post 3 images of your work
1 side profile
1 showing the item looking down inside ( general view )
1 With the bowl turned upside down showing the bottom
Image size please use image size 640 x 480 0.3 mp, same previous months

When your entry is ready please go to our new scoreboard http://ukwturningcomp.co.uk/
Log in to your account and mark yourself as ready by 10 pm on the 26th August after this time the scoreboard will be locked


Edit:
Entry’s to be uploaded from 10pm on 27th Aug up until 10pm on the 29th Aug. after this time the thread will be locked for Judging

... apart from mine that shall be a reminder to everyone to read the original rules properly! :oops:
Gut luck! (a la great escape :wink: )

Results will be given on 31st August

E&OE

August Roundup
 
First up - my entry.
all work done on the lathe
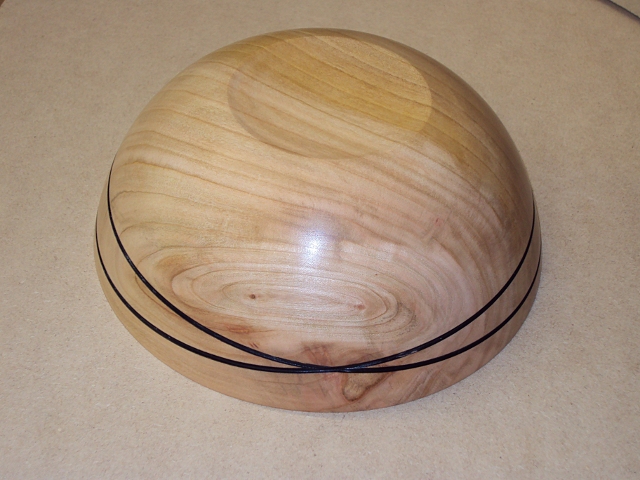
Simple Cherry bowl, about 8 inches x 3 inches, sanded down to 600 and finished with cellulose sanding sealer and a quick soft wax.
Decorating is not really my bag so tried to do something simple while it was spinning.
Started on faceplate, shaped outer. then slackened fixing screws on faceplate and put a spacer (7mm drill bit) under one side of faceplate re-tightened and cut first line with thin parting tool.
Repeat with spacer on opposite side to create a crossed line pattern.
Black toy safe paint in grooves. allow to dry.
Remove spacer and have final cleaning cut on outer, shape spigot and finish.
mount in chuck and hollow.
Tiny tiny step on top rim with scraper. sand and finish.
remounted tother way round and foot removed.
finish.

Nabbed straightaway by a neighbour for a birthday present and since then have tried to do another and cannot for the life of me recreate the pattern :shock: I guess i must have had the radius in the just the right place??

Dec bowl top.JPG


Dec bowl base.JPG


Dec bowl profile.JPG
 

Attachments

  • Dec bowl base.JPG
    Dec bowl base.JPG
    212.8 KB
  • Dec bowl profile.JPG
    Dec bowl profile.JPG
    199.8 KB
  • Dec bowl top.JPG
    Dec bowl top.JPG
    218.4 KB
A bowl in yew and maple. This was going to be a bowl in yew,but the further I got into this diagonally cut slab full of checks and cracks,and worm holes, the more I realized I would have to stabilize it with something. I hollowed out most of the yew and glued a ring of maple to the top, and glued the centre of the maple ring to the bottom. Undercut the rim, sanded to 320 and oiled as much of the top as i could. Mounted it in the cole jaws and cleaned up the bottom,a bit between centres, and then oiled the bottom. Finished with lacquer on the outside and danish oil on the inside. I used bowl gouges, conventional and ellsworth grind, scrapers and a parting tool to cut the grooves for the orange(a sharpie as per my rings). 5-3/16" high and 10-9/16" in diameter.The orange ring on top was going to be drilled and carved out as well, but ran out of time. Too many houses and reno's to do. Thanks
 

Attachments

  • P1010984.JPG
    P1010984.JPG
    146 KB
  • P1010988.JPG
    P1010988.JPG
    153.9 KB
  • P1010989.JPG
    P1010989.JPG
    153.6 KB
August decorated bowl.

Real struggle to get lathe time this month. Its bedroom decoration time. Two to finish before guests arrive.

Anyway, a bit of wormy and holey Cherry 170mm diameter and 75mm high.

Bowl turned to shape with roughing gouge and then finished with straight scraper held at an angle. Inside turned using half inch bowl gouge to cut and then scrape.

Used a high speed parallel sided rotary tool to follow the main grain patterns, then drilled through the channel created. The islands textured with a round burr. The channels finally blacked out.

It is intended to have a night light inside to shine through the holes - this was decided by my wife after the event :? :? which is why there is nowhere specific for the nightlight to fit!!!.

Sanded to 320 then polished.
 

Attachments

  • 100_3938.jpg
    100_3938.jpg
    57.1 KB
  • 100_3937.jpg
    100_3937.jpg
    47.2 KB
  • 100_3936.jpg
    100_3936.jpg
    45 KB
So here's my entry...

I was lacking inspiration and had thought to enter something based on the decorated platter which I entered last year, but leafing through a book I spotted something by Dewey Garrett that gave me inspiration and several new techniques to try.

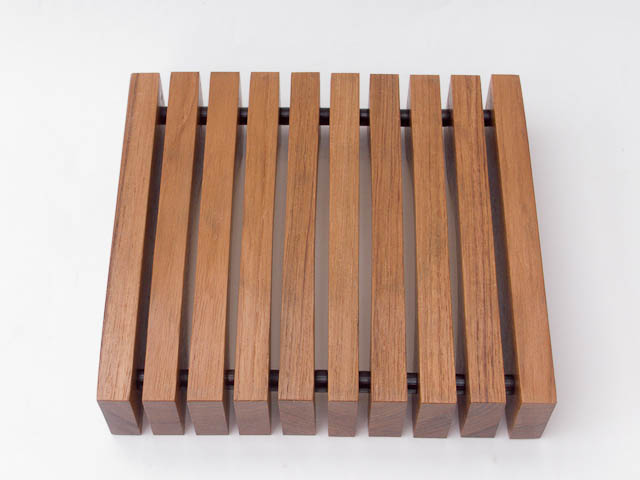
It's 19.5cm x 18cm x 4.5cm and turned from some random piece of exotic hardwood I found in the shed. The connecting pieces are made from ebony piano keys. The gold colour is some form of metal leaf that almost certainly isn't gold.
Finish is sprayed laquer.
This was supposed to be a test piece for the real thing but it came out good enough to enter :D

Get the piece flat and uniform all over by mounting on vacuum chuck and skimming off the top surface. Sand that side and repeat for the other. The edges were planed and sanded. The thickness was determined by the thickness that my cheap table saw will cut.
Turn a simple bowl in the centre of the square.
Rip the blank against a fence to give even(ish) thickness and then sand with a sanding pad held in the lathe - the strips were placed on a table held in the banjo.
Drill holes in each blank for the connectors.
Make the connectors - 3 from a piano key. There's a round tenon on each end of the 18 connectors.
Spray the lengths on all sides
Apply melamine lacquer by hand to the connectors
Apply the metal leaf
Glue together
Final spray over the leaf

No sealer was applied to the wood other than lacquer so grain can be seen faintly through the wood. The inspiration piece in the book used paint rather than metal but I didn't have anything suitable and fancied something different - I had the metal from a previous project that didn't work.

Top
top5.jpg


Side
R0013125.jpg


Bottom
R0013122.jpg
 

Attachments

  • R0013122.jpg
    R0013122.jpg
    67.7 KB
  • R0013125.jpg
    R0013125.jpg
    64.8 KB
  • top5.jpg
    top5.jpg
    124.7 KB
Here’s my entry for this month and I worked on the principle that ‘less is more’ with this piece.
The bowl is Beech and measures 150mm x65mm (approx 6 x 2 ¾) so not a large piece by any stretch of the imagination.
Once the shape had been roughly turned a 20mm band was marked and then defined by the tip of a skew, the bowl was then removed from the lathe and using a Dremel with a small burr bit the pattern was carved and the surface lightly sanded.
The band was then scorched with a small gas fired blow torch, once dry the pattern was painted with a Red Chestnut Spirit Stain.
The bowl was then remounted and the outside was finished with a shear scraper which had the effect of raising the band. It was then rechucked and held in Mini Cole jaws and the base was defined. The bowl was then finished by sanding to 400grit and with three coats of Chestnut Hard Wax Oil which was flattened between coats. Once dry it was then buffed on the buffing wheels.

Tools used were a 3/8 bowl gouge, skew chisel and shear scraper.

Nice to be back in the challenge this month after a month away and I’ll be playing with a new lathe next month so will definitely be in next month as well.

Good luck everyone.

Steve
 

Attachments

  • DSCN0796.JPG
    DSCN0796.JPG
    137.3 KB
  • DSCN0810.JPG
    DSCN0810.JPG
    125.9 KB
  • DSCN0815.JPG
    DSCN0815.JPG
    126.9 KB
Hi,

Here is my entry, made of a maple and bubinga sandwich. Sadly time ran out and I have to leave it as it is. I used a bowl gouge, and a BCT hollower with a pick. Sanded from 120 to 400, S/S, friction polish and a couple coats of Wax. Its 200mm wide by 120mm high.

Good luck to everyone.

Side.jpg

Top.jpg

Bottom.jpg


Cheers
David
 

Attachments

  • Side.jpg
    Side.jpg
    29.5 KB
  • Top.jpg
    Top.jpg
    30.4 KB
  • Bottom.jpg
    Bottom.jpg
    30.7 KB
Here is my entry for August – a decorated bowl.

This bowl was made from a 305mm x 52mm blank of kiln dried ash. The blank was mounted on a faceplate ring, which was then held in my chuck jaws. The outside of the bowl was turned using a ½” fingernail bowl gouge and a spigot made for reversing the workpiece. The outside was sanded to 600, cellulose sanding sealer applied and then finished with microcrystalline wax.

The piece was then reversed onto the chuck jaws to turn the inside. A wide rim was turned using the bowl gouge. The rim was then sanded to 400, carved with a Proxxon mini-carver and ebonised with three coats of Chestnut ebonising lacquer. The inside of the bowl was turned using the fingernail bowl gouge and finished with a traditional grind gouge to give a small undercut. A small “ledge” was turned to provide a seat for the turned ring. A final trimming cut was made with a round nosed scraper. The inside was sanded to 600 and then airbrushed in mixed colours with dried leaves used as masks to provide a three dimensional effect and colour contrast. The bowl was finished with microcrystalline wax. The bowl was then reversed again onto a jam chuck to remove the spigot. A texture was applied to this area using a Decorating Elf and three point tool. This was finished with microcrystalline wax.

The coloured ring was turned from MDF, sanded to 240 before parting and hand sanded after parting to 400. Two coats of acrylic sapphire blue iridescent paint were then applied. The rings and the ebonised rim were then finished with a single coat of acrylic gloss lacquer. The rim was finally glued in place onto its seat inside the bowl.

The finished piece is 44mm high and 302mm in diameter. The bowl section is 145mm in diameter and 35mm deep.
 

Attachments

  • P1020736.JPG
    P1020736.JPG
    81.3 KB
  • P1020728.JPG
    P1020728.JPG
    96.7 KB
  • P1020732.JPG
    P1020732.JPG
    98.2 KB
For this bowl. I tried to go for a worn, aged look.
Turned from Ash.
Size 7 1/2" diameter X 3" high.
Once turned, the bowl was scorched, wire brushed and buffed to remove any remaining ash.
The band around the rim was indented, then finished in gold acrylic with a light wash of brown. The studs around the rim were turned from sycamore and similarly finished.
Finally, the whole lot was given a couple of coats of clear acrylic satin finish.

Ian
bowl1.jpg

bowl2.jpg

bowl3.jpg
 

Attachments

  • bowl1.jpg
    bowl1.jpg
    122.5 KB
  • bowl2.jpg
    bowl2.jpg
    193 KB
  • bowl3.jpg
    bowl3.jpg
    176.5 KB
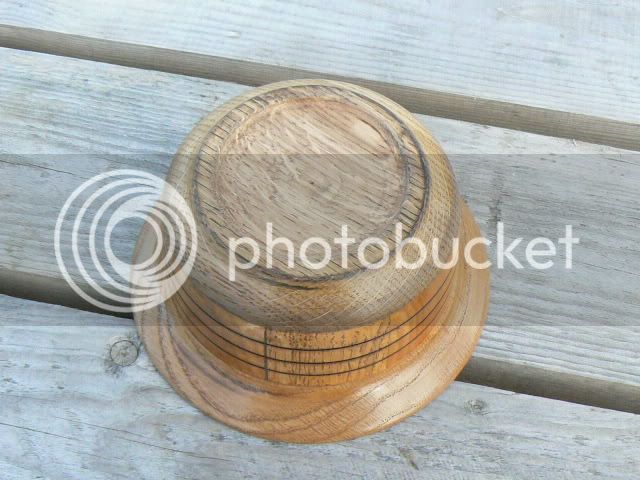
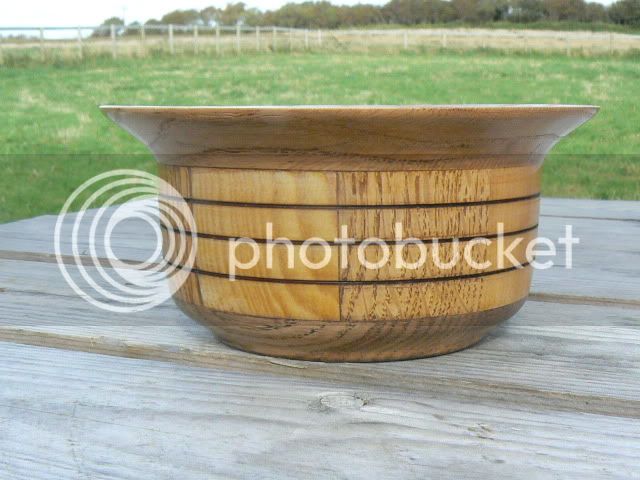
My first segmented bowl made from parana pine and oak.
33b2b646.jpg

fbb8dd6a.jpg

040dc77b.jpg

room for improvement methinks, only managed to finish it by making a set of coles jaws.
 
Status
Not open for further replies.

Latest posts

Back
Top