Aragorn
Established Member
Hi Folks
I've been off out of town for the week finishing off the kitchen I've been building for what seems like forever. :roll:
Got it all finished now except for some boxing in where the extractor duct is running and a freestanding butchers block trolley that I've been putting off til last, coz that's going to be fun!
I wanted to do a good "Work in progress" photo-journal to post here, but inevitably the camera got forgotten at all the key moments, and my photos are a bit pants. Total renewed respect for every one that manages to do the stage by stage photos of their projects!
The kitchen started with a blank canvas on site, because the kitchen is a new build onto the existing house. My brief was easy - to design a kitchen that maximised the space available; followed the unusual angles of the room; looked clean and simple; rural and "cottagey" yet also quite modern; not so modern that it would date too quickly; not so rural that it would look, well, too rural; and of course, extremely functional and beautiful to boot!
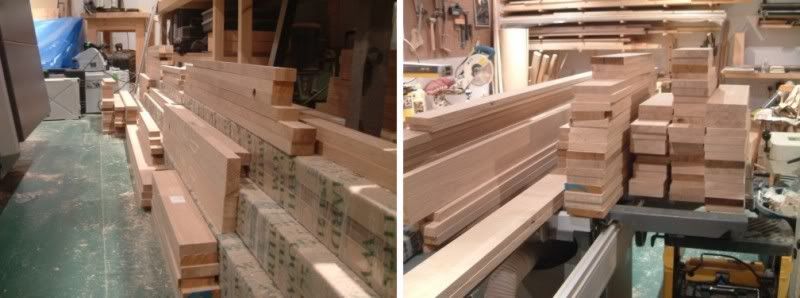
The English oak came from British Hardwoods. It was excellent quality with almost no wastage. The carcasses are made from birch ply (18 sheets) from a local supplier. In my 6x4m workshop I wasn’t left with much room to move!
Here’s some of the stock after cutting to length. The rest is in the garden on trestles.
I had recently bought the Festool plunge saw, and realized that it was time to make a “cut table” to bring the 18 sheets of ply down to size for the kitchen units. I needed this to be easily put up and dismantled and small to store. I just used loose-ish mortice & tenon joints and made the height to fit over my table saw.
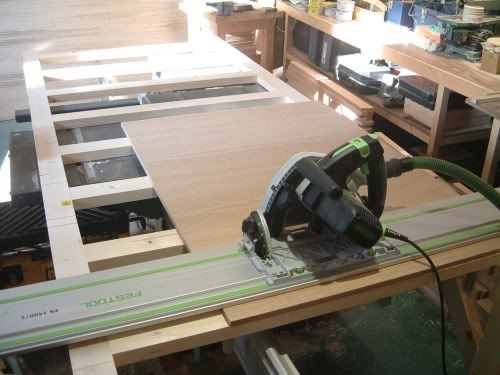
The Festool was a life saver on this project. In the workshop it allowed me to quickly cut the sheets to exact size and leaves a superb edge without any feathering.
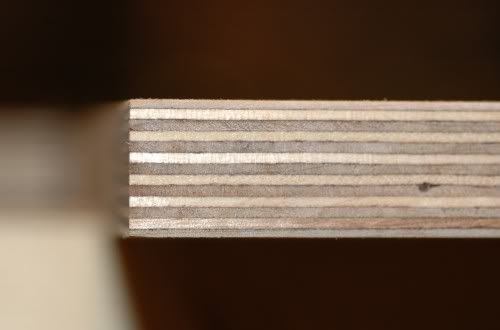
For doing repeat-sized cuts, this would have been slower than the table saw, because of having to measure each time, but since all the units are different sizes in this project, this wasn’t much of an issue this time.
But on site during installation, it truly came into its own, giving me the ability to trim parts by fractions of a millimetre with the same quality of cut. Also the plunge action allowed me to cut very neat kerf cuts for ventilation in the oven and microwave housings.
The unit carcasses were screwed and glued together on site and the oak face frames glued and pinned on. I used pocket screw joinery extensively for the frame work and anywhere the joins don’t show.
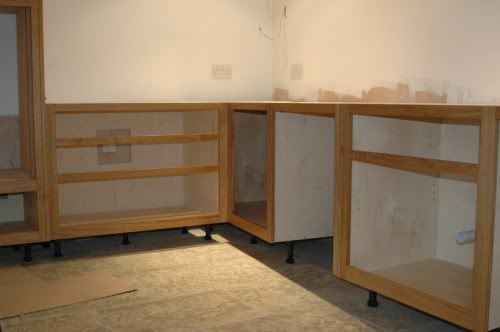
The panels on the sides of the units that are exposed where simple frame and panel construction, again using pocket screw joinery. I cut the grooves for the stiles on the table saw using the DeWalt groove cutting. It leaves a nice clean cut, allows for micro adjustment of 0.1mm and above all is very fast and easy to use.
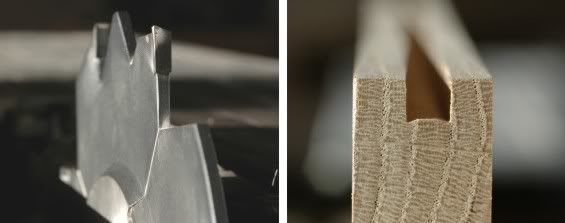
The doors where made using more traditional joinery. I cut the stile grooves for the panels on the router table so that they can be stopped top and bottom (so that the groove does not show through - what’s the point of fluffing about with haunched tenons?)
The mortices and tenons were cut using the Leigh FMT. Tenons first:

This leaves me with a twin tenon on the rails:
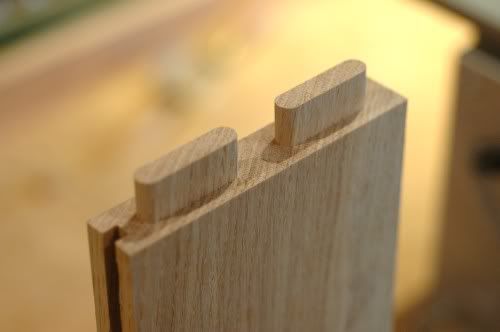
One or two hours later the rails are finished

And the mortices follow shortly after that
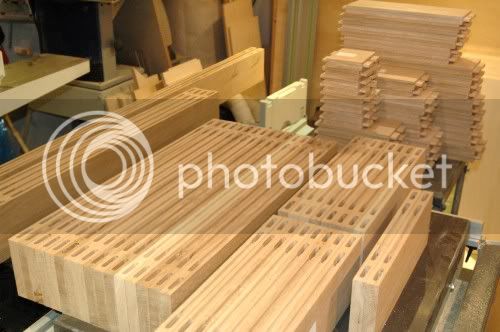
All the panels for the doors and elsewhere are cut from 6mm oak veneered MDF. I glued up the doors in batches depending on how many clamps I have.
I wanted an easy solution for morticing for the hinges, as I didn’t relish the idea of having to mark and cut all 48 hinge mortices by hand on site. I made up 3 different router jigs, two to take care of each of the common door sizes, and a third for cutting a single mortice for irregular sized doors.
The jig clamps onto the door, aligned top and bottom, which accurately locates the mortice position. I routed out the mortice and squared it up by hand. The same jig is then clamped to the faceframe on site, spaced away from the top by a 2mm spacer and the mortices are routed in the frame.

The granite worktop was cut using my dremel.. oh no sorry. That was done by some pros. They did a good job in the end, though they had to make a return trip because first time round they plastered all the joints with messy silicone. The customers did not want the sleek look of a polished worktop, and so this is honed rather than polished, and then buffed to a soft sheen with beeswax.
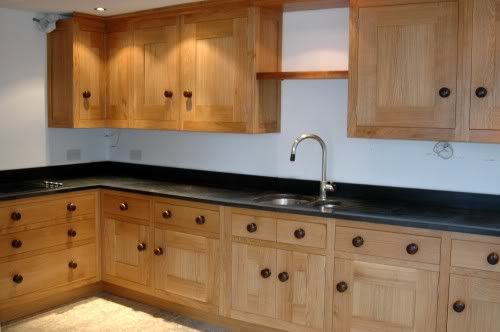
Here’s some pics of a few of the titbits
Base units:
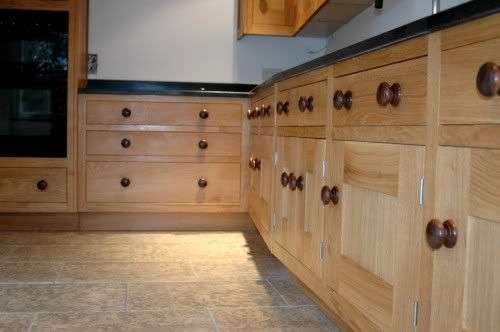
I had the knobs turned from black walnut at a local woodturning place. They are copied from an antique chest that the customers have and love.
Under-hob drawers and fridge:
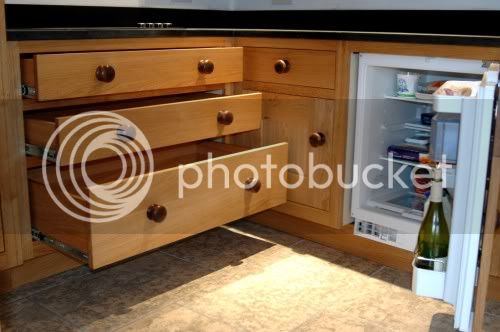
All drawers are on exposed full extension runners. Drawer construction is from oak and oak veneered ply using mostly pocket screws (hidden) and an applied oak front.
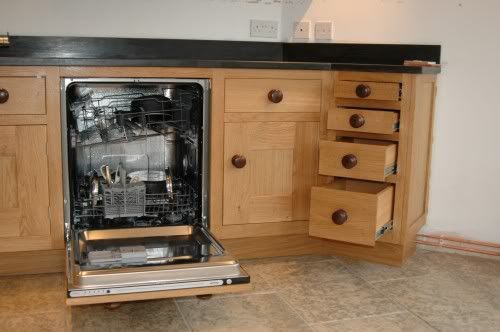
Dishwasher and small drawers:
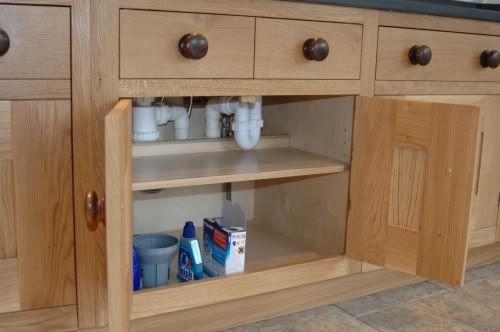
The inside of the sink unit:
The inside of the wall units:
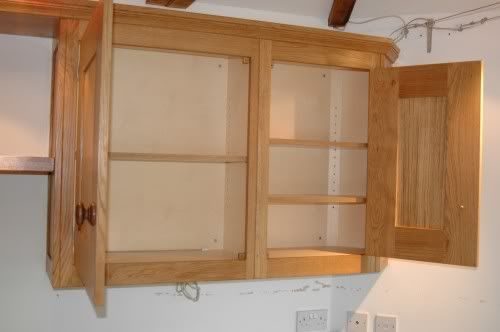
Each unit has a couple of oak-edged shelves which can be adjusted in height on spade-like shelving pegs.
The door closing mechanism:
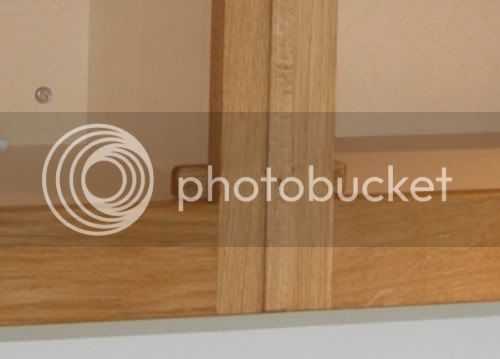
Each door has a couple of magnets recessed into the stiles top and bottom, hidden by oak plugs. These little “catches” in the photo have another magnet behind the plug which align with the ones in the doors. I experimented with these for a while and love the door action. The magnets (two in the doors, one in the catch) hold the door closed so softly that they are a pleasure to open. When you push a door closed, the air is displaced which slows the door to a soft stop and the magnets just pull it home.
The fridge freezer:
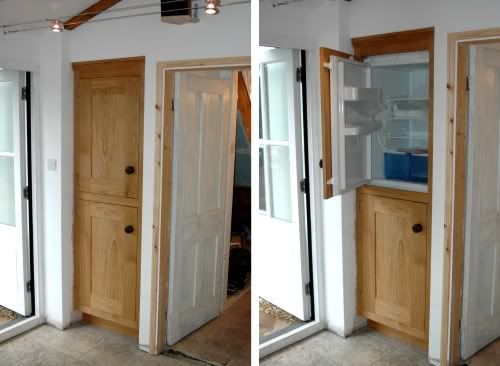
Don’t get me started on this one. The appliance doors were not designed for face-frame mounted external doors. I don’t know if you can see the “design opportunity” I came up with from the photo. Let’s just say it was a happy moment when the solution was seen to work well. The sun actually started shining through the windows, the bird’s started chirping…
Oh, and I did their adjacent downstairs toilet/utility room too
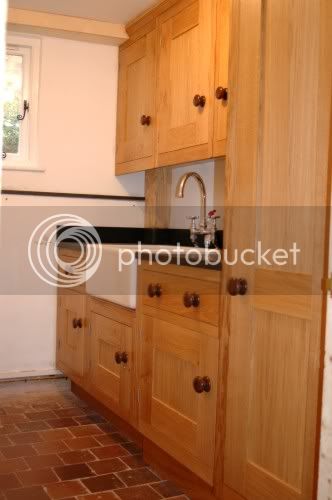
All hardwood is finished with several litres of Liberon’s finishing oil. The plywood is finished with 3 coats of a water based floor varnish.
I’d like to do a better work-in-progress account of the butcher’s trolley if you’ll tolerate the indulgence?
I've been off out of town for the week finishing off the kitchen I've been building for what seems like forever. :roll:
Got it all finished now except for some boxing in where the extractor duct is running and a freestanding butchers block trolley that I've been putting off til last, coz that's going to be fun!
I wanted to do a good "Work in progress" photo-journal to post here, but inevitably the camera got forgotten at all the key moments, and my photos are a bit pants. Total renewed respect for every one that manages to do the stage by stage photos of their projects!
The kitchen started with a blank canvas on site, because the kitchen is a new build onto the existing house. My brief was easy - to design a kitchen that maximised the space available; followed the unusual angles of the room; looked clean and simple; rural and "cottagey" yet also quite modern; not so modern that it would date too quickly; not so rural that it would look, well, too rural; and of course, extremely functional and beautiful to boot!
The English oak came from British Hardwoods. It was excellent quality with almost no wastage. The carcasses are made from birch ply (18 sheets) from a local supplier. In my 6x4m workshop I wasn’t left with much room to move!
Here’s some of the stock after cutting to length. The rest is in the garden on trestles.

I had recently bought the Festool plunge saw, and realized that it was time to make a “cut table” to bring the 18 sheets of ply down to size for the kitchen units. I needed this to be easily put up and dismantled and small to store. I just used loose-ish mortice & tenon joints and made the height to fit over my table saw.

The Festool was a life saver on this project. In the workshop it allowed me to quickly cut the sheets to exact size and leaves a superb edge without any feathering.

For doing repeat-sized cuts, this would have been slower than the table saw, because of having to measure each time, but since all the units are different sizes in this project, this wasn’t much of an issue this time.
But on site during installation, it truly came into its own, giving me the ability to trim parts by fractions of a millimetre with the same quality of cut. Also the plunge action allowed me to cut very neat kerf cuts for ventilation in the oven and microwave housings.
The unit carcasses were screwed and glued together on site and the oak face frames glued and pinned on. I used pocket screw joinery extensively for the frame work and anywhere the joins don’t show.

The panels on the sides of the units that are exposed where simple frame and panel construction, again using pocket screw joinery. I cut the grooves for the stiles on the table saw using the DeWalt groove cutting. It leaves a nice clean cut, allows for micro adjustment of 0.1mm and above all is very fast and easy to use.

The doors where made using more traditional joinery. I cut the stile grooves for the panels on the router table so that they can be stopped top and bottom (so that the groove does not show through - what’s the point of fluffing about with haunched tenons?)
The mortices and tenons were cut using the Leigh FMT. Tenons first:

This leaves me with a twin tenon on the rails:

One or two hours later the rails are finished

And the mortices follow shortly after that

All the panels for the doors and elsewhere are cut from 6mm oak veneered MDF. I glued up the doors in batches depending on how many clamps I have.
I wanted an easy solution for morticing for the hinges, as I didn’t relish the idea of having to mark and cut all 48 hinge mortices by hand on site. I made up 3 different router jigs, two to take care of each of the common door sizes, and a third for cutting a single mortice for irregular sized doors.
The jig clamps onto the door, aligned top and bottom, which accurately locates the mortice position. I routed out the mortice and squared it up by hand. The same jig is then clamped to the faceframe on site, spaced away from the top by a 2mm spacer and the mortices are routed in the frame.

The granite worktop was cut using my dremel.. oh no sorry. That was done by some pros. They did a good job in the end, though they had to make a return trip because first time round they plastered all the joints with messy silicone. The customers did not want the sleek look of a polished worktop, and so this is honed rather than polished, and then buffed to a soft sheen with beeswax.

Here’s some pics of a few of the titbits
Base units:

I had the knobs turned from black walnut at a local woodturning place. They are copied from an antique chest that the customers have and love.
Under-hob drawers and fridge:

All drawers are on exposed full extension runners. Drawer construction is from oak and oak veneered ply using mostly pocket screws (hidden) and an applied oak front.
Dishwasher and small drawers:

The inside of the sink unit:

The inside of the wall units:

Each unit has a couple of oak-edged shelves which can be adjusted in height on spade-like shelving pegs.
The door closing mechanism:

Each door has a couple of magnets recessed into the stiles top and bottom, hidden by oak plugs. These little “catches” in the photo have another magnet behind the plug which align with the ones in the doors. I experimented with these for a while and love the door action. The magnets (two in the doors, one in the catch) hold the door closed so softly that they are a pleasure to open. When you push a door closed, the air is displaced which slows the door to a soft stop and the magnets just pull it home.
The fridge freezer:

Don’t get me started on this one. The appliance doors were not designed for face-frame mounted external doors. I don’t know if you can see the “design opportunity” I came up with from the photo. Let’s just say it was a happy moment when the solution was seen to work well. The sun actually started shining through the windows, the bird’s started chirping…
Oh, and I did their adjacent downstairs toilet/utility room too

All hardwood is finished with several litres of Liberon’s finishing oil. The plywood is finished with 3 coats of a water based floor varnish.
I’d like to do a better work-in-progress account of the butcher’s trolley if you’ll tolerate the indulgence?


