Another companion video - Square Plate

UKworkshop.co.uk

Help Support UKworkshop.co.uk:

This site may earn a commission from merchant affiliate links, including eBay, Amazon, and others.
Had a quick 'squint' Bob ... will watch the whole series later tonight... looks absolutely brilliant once again..
Have already 'subscribed' to you on Youtube ... these videos are just superb. Almost like having a teacher right there !

Well done and thank you, once again 8) :D
 
I have also just watched this sequence very informative like all the others you have done. For a novice like myself I have picked up a lot just watching the techniques you use. Many thanks
 
Hi Bob,

Excellent video tutorial again! Guess I'll be looking for some square stock to try this out with. Watch this space!

Thanks again for all the time you've put into this.

Cheers,

Neil.
 
Er Bob? Are you human?? :shock:

It takes a certain kind of mind to be able to basically turn blind. Great to watch, I'm about half way through.

I'll expect the square plate in the post :whistle: :wink: :lol:
 
Thanks Bob, something to aim at,when I've learned to do some straight stuff, which could take some time. (nearly got a lathe)
Great tutorials.
pip
 
Thanks I have booked marked and will have a go when I get my
brothers wardrobe finished...Had my eye on this technique for a
while, Now you have done a tutorial it will save a lot of unnecessary
mistakes...And accidents :lol: :lol:
 
Just watched this latest vid Bob and yet again another excellent tutorial :D
Can i ask what sort of Vacuum chuck set you use.Is it just a normal shop vac attached :?:
 
Thanks, all!

Paul, I use the Nova vacuum adaptor which is simply a short piece of pipe attached to a ball bearing. The OD of the ball bearing is sized to fit snugly into the recess of the outboard hand wheel of Nova lathes which have a small set screw to retain it. The pipe section is sized to fit a standard (at least in North America) 1 1/4" shop vac hose. There are a couple of small holes in the side of the pipe section. To use it you need to bore holes in the side of the hose to match up with the holes in the pipe. A small bolt is threaded into one of the holes to retain the hose on the pipe. The other hole is left open to provide a bypass air flow to the shop vac so it is not deadheading when the system is in use.

I bought the adaptor when I bought my lathe, but when I looked at it I thought something that simple could never work so I stuck it in a drawer and kind of forgot about it for a year or two. Then I was working on a large platter one day and needed to mount it for removing the tenon. It was too big for any of my usual ways of reverse mounting so I decided to try out the vacuum method, figuring something like a platter wouldn't put too much strain on it. I mounted a melamine disk on a faceplate and applied some closed cell weatherstripping as a gasket. In my infinite wisdom I chose not to follow the manufacturer's instructions and did not bore the hole in the hose for the bypass air flow.

The system held the workpiece so well that I started to use it fairly often. All was well for almost a year and then my cheap, 15 year old shop vac started making some rather distressing noises when it was running. I took the motor apart and lubed the bushings and that quieted it down for a week or so, but the noise came back.

I went out and bought a new (hopefully better quality) shop vac and when I started using it I also bored the bypass air flow hole in the hose. That was a year ago last Christmas and it is still working fine with no signs of distress. The bypass air hole does not seem to have much effect on the ability of the system to hold on to a workpiece. I have no idea what kind of "inches of mercury" vacuum it develops but I am sure it is nowhere near the values that a proper vacuum pump develops. I use the tailstock to support the piece as long as possible and then remove it to turn off the little stub in the middle and to sand the base. The system seems to have plenty of "grip" for those operations.

On those occasions where I have gotten a bit too aggressive with my cut or had a catch the worst that has happened is that the workpiece has shifted a bit off center. I haven't had anything actually fly off the lathe. It seems to be fine for the kind of thing I use it for.

Take care
Bob
 
Thanks for the reply and explaination Bob,this system sounds just what i need. :D
Any chance of a piccy or two where the pipe connects to the lathe and the parts involved :?
 
Actually Bob I'd like a 'shop tour if you can manage it ? ;)
 
I enjoyed the video too Bob. Thanks.

Can I ask a question :) On the underside, you specifically said that you came in from the outside and out from the inside. On the top side, however, you did the wings by going all the way from the inside to the outside in one flow. Is that an OK method to use :oops:
 
it's to do with grain direction LW. John Jordan has an excellent teach aid that he uses to explain grain direction. I'll have to see if I can get a pic. It's basically a thin board that he's made bandsaw kerfs in and it shows how grain gets torn if you go the wrong way.
 
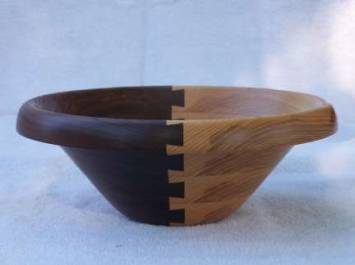
Lightweeder, since the wing "droops" then cutting the underside of it is the same cut as you make when hollowing a bowl, cutting from rim to center. The cuts from the foot to the highest point of the underside of the wing are the same as you make when turning the outside of a bowl, cutting from foot to rim. If you were turning a round bowl with a large, overhanging rim that had a deep finger groove under it, like this horrible example:
image027.jpg


you would form the finger groove the same way, cutting inward from the rim and outward from the bowl wall. On the top surface of the wing it is the opposite, where the the cut from the highest point of the rim out the the corner is like turning the outside of a bowl and the cut from the high point to the center is turning the inside. The cuts I was using to remove the bulk of the waste were all pretty much parallel to the face of the blank so can be made in either direction.

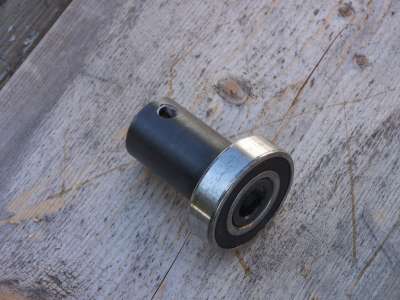
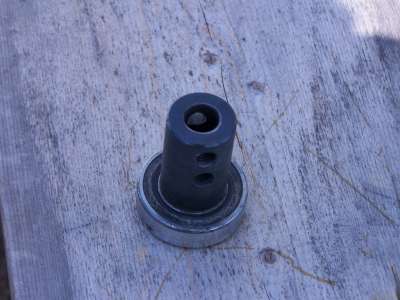
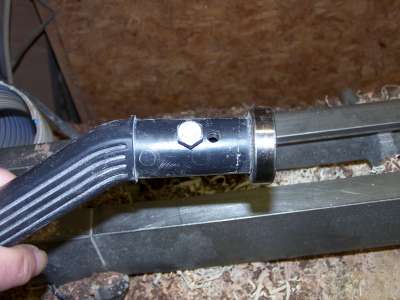
Paul, the Nova vacuum adaptor is a pretty simple piece:

100_8253-400.jpg


100_8251-400.jpg


100_8252-400.jpg


It actually has three holes in it. I am not sure what the third hole (on the opposite side) is for. Here is a picture of it mounted in the end of my shop vac hose:

100_8256-400.jpg


You can see the bypass air hole to the right of the securing bolt, which seems to be way oversized for the application. :) 
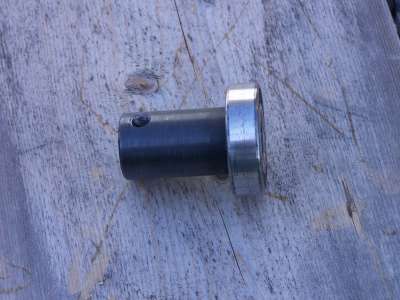
The bearing just slips into the recess in the outboard hand wheel and is secured by a set screw which tightens against the outer race.

Wizer, my shop is a disaster area with a narrow path through the junk between the door and the lathe. I would need a week to get it cleaned and organized enough to be willing to take pictures. :)

Take care
Bob
 
Back
Top