Wooden Block Santas (or Tomten in Sweden) - Introduction

UKworkshop.co.uk

Help Support UKworkshop.co.uk:

This site may earn a commission from merchant affiliate links, including eBay, Amazon, and others.

pulleyt

Established Member
Joined
24 May 2014
Messages
239
Reaction score
729
Location
Nottingham
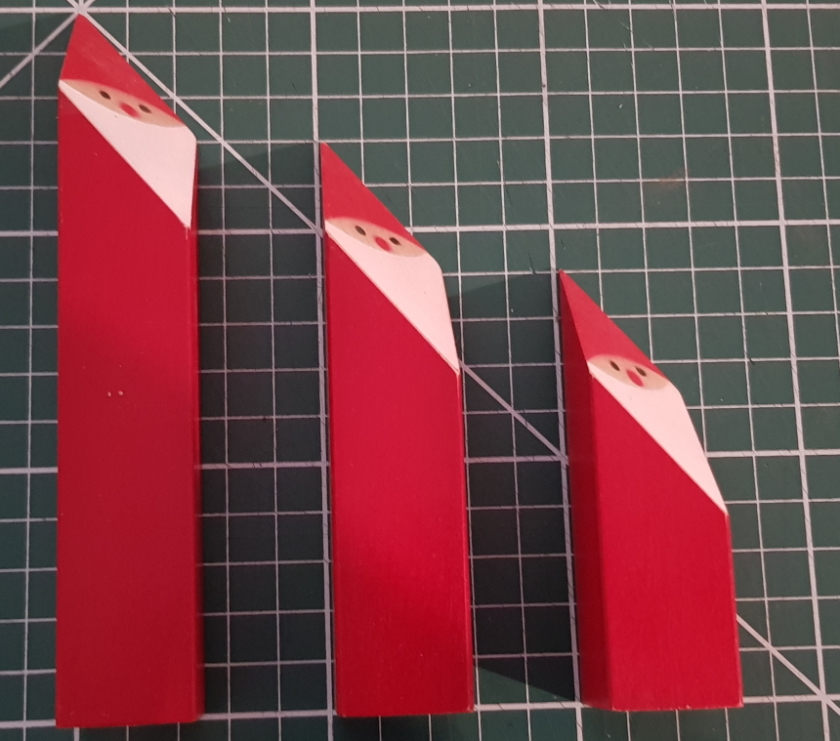
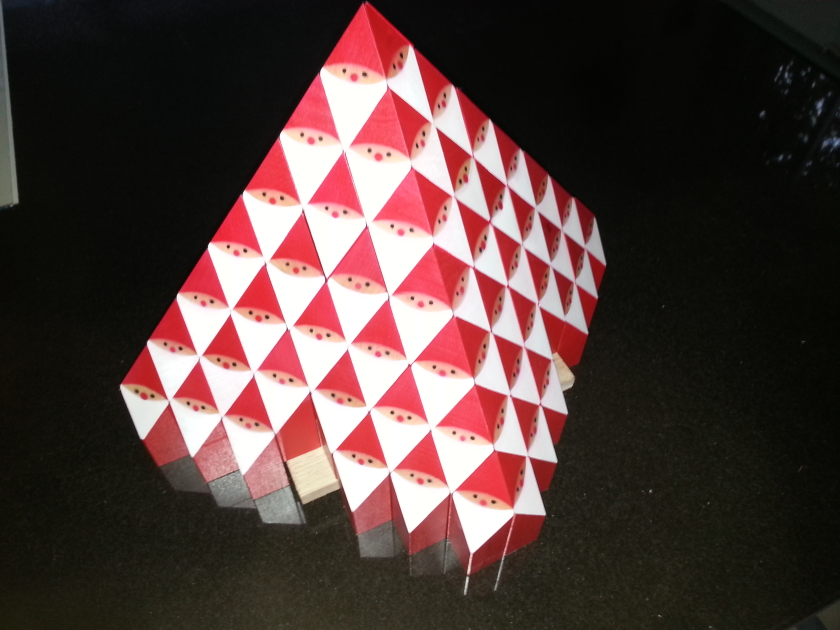
I've mentioned the Block Santas I made about four years ago as alternative Christmas cards and there has been some interest in how I went about the process so here is a retrospective WIP using photos from 4 years ago as well as a few hurriedly added photos to try and illustrate some of the steps along the way.
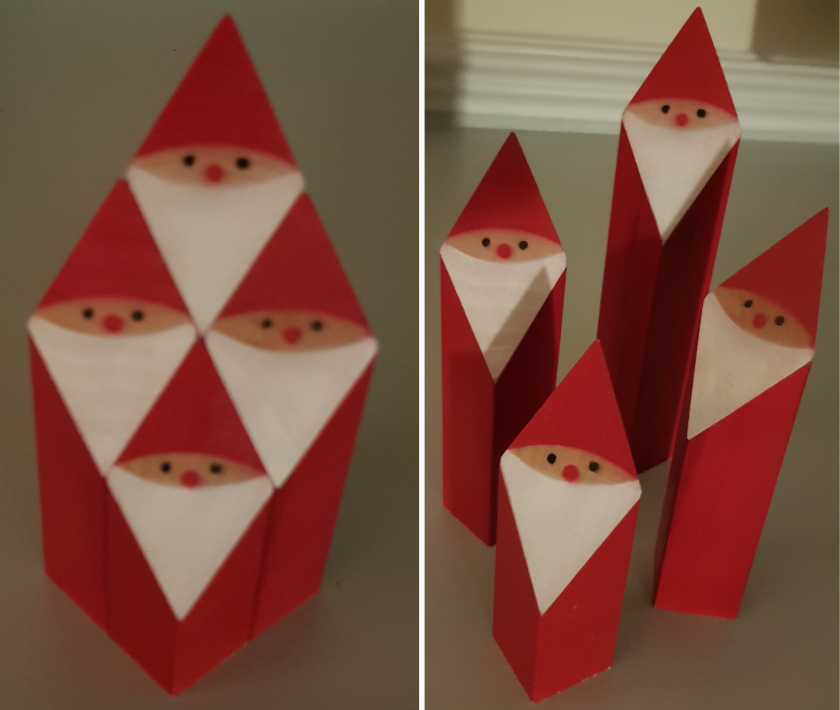
Block%20Tomten.png


These are by no means an original idea on my part and are based on items I saw for sale in shops across Stockholm in 2014. My partner really liked them and wanted to buy a set but, as usual I gave the response she dreads, "I can make those!".

I was bowled over by the simplicity of the geometric design and I really wish I had the kind of imagination that could come up with original ideas like this. I'm afraid I'm stuck in the murky realms of imitation and I truly hope I am not offending anyone's intellectual property rights in doing so.

When I made these the idea was to give them out as a 'perpetual Christmas card' and get me off the hook from ever sending another card. Sadly, it's developed into a bit of a tradition with the family and since then I have come up with a different small wooden decoration/gift each Christmas. But it's all good fun so no complaints...

At the time I made these I needed ninety sets of four santas as shown above, one tall, two medium and on short - a minimum of 360 individual pieces assuming they were all usable. So, jigs were essential for my sanity. At the time I used a Metabo mitre saw which I have since sold to make space for a different machine. But the principles are the same whether using a cross-cut sled on the table saw (how I would proceed these days) or cutting by hand with a bespoke mitre box .

I hope this all makes sense in the following posts, so here goes...
Trevor
 
I decided on a 25mm square stock and the following heights; tall santa at 150mm, medium at 120mm and short at 90mm, The heights were determined from trial and error to get the santas to stand together and create a 50mm square set with the rhombus shaped faces in alignment.

BlockSantas_WIP_000.jpg


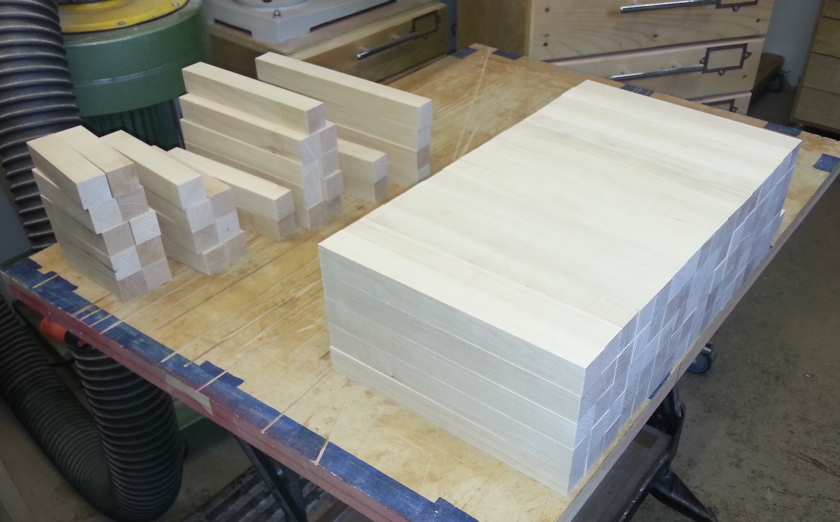
I had several pieces of maple that were cut from boards when dimensioning timber for a kitchen build many moons previous that I was able to machine the stock from. Once milled, I cut them to a length that to allow for two santas (probably something like 270mm). Each stick would produce either two medium or one short and one large. The offcuts were sorted as to get as many more as possible.

BlockSantas_WIP_001.jpg


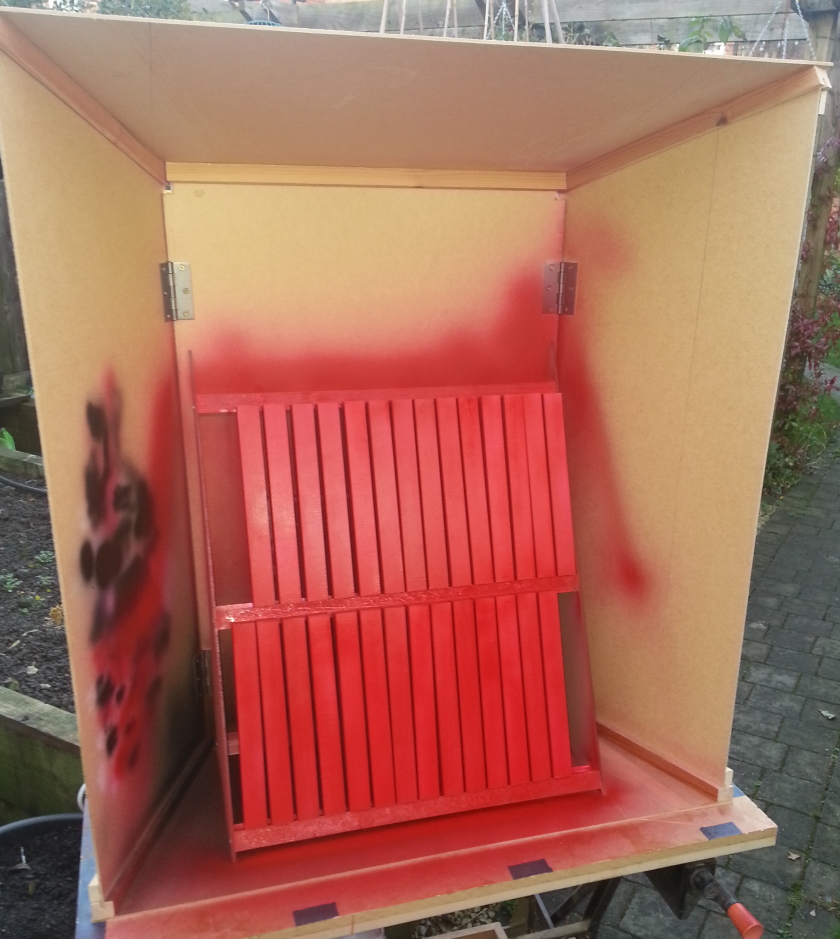
I took a small chamfer off each edge at the router table and then the stock was ready for painting. all the paint used was ordinary acrylic paint thinned down for air-spraying. I used the top-feed spray gun that came with my compressor for the next stage and knocked up a spray booth and stand to load the stock for spraying.

BlockSantas_WIP_002.jpg
 
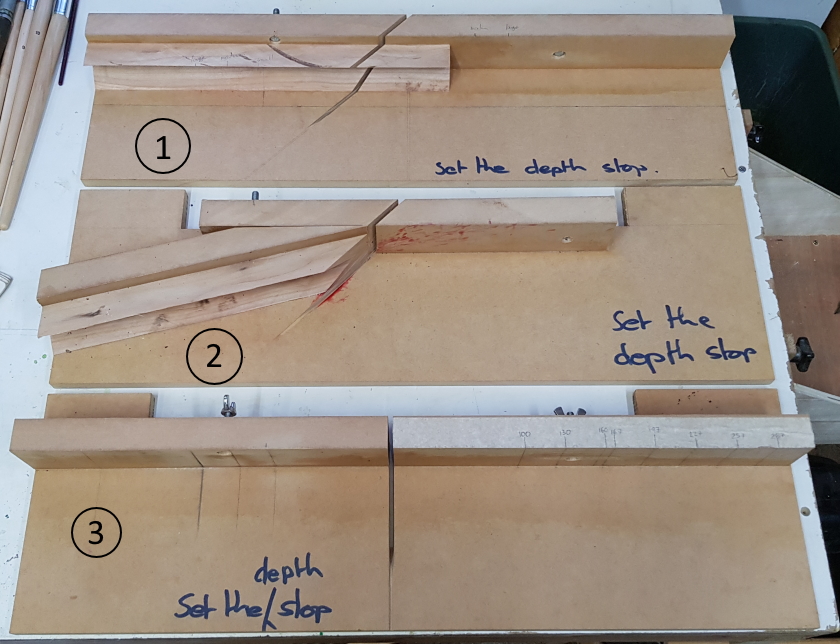
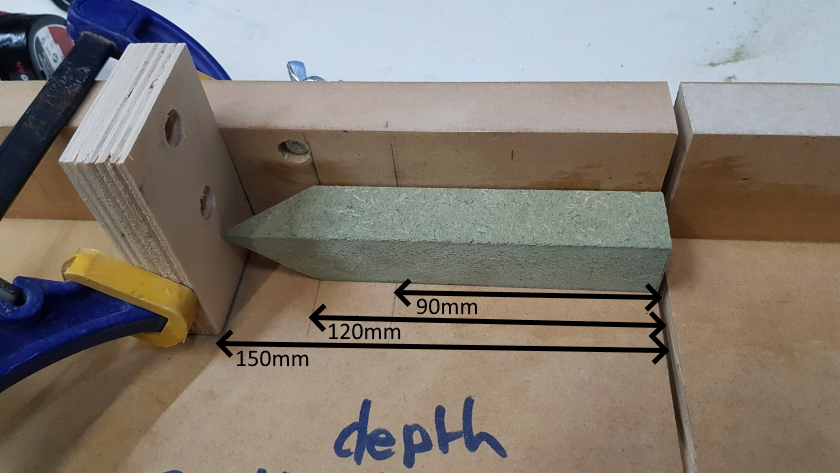
The face needed to be cut at an angle of 60⁰ which was beyond the capability of the mitre saw. So I made three temporary tables that I could bolt to the fences of the mitre saw to make all the necessary cuts - I have just unearthed the tables from the depths of the wood shed as shown in the photos below.

BlockSantas_WIP_003.jpg


(The reminder to set a depth stop was so that I didn't end up chopping the temporary tables in half, if that makes sense).
I have no photos of the saw itself in use so I hope the following help to explain the cutting process.

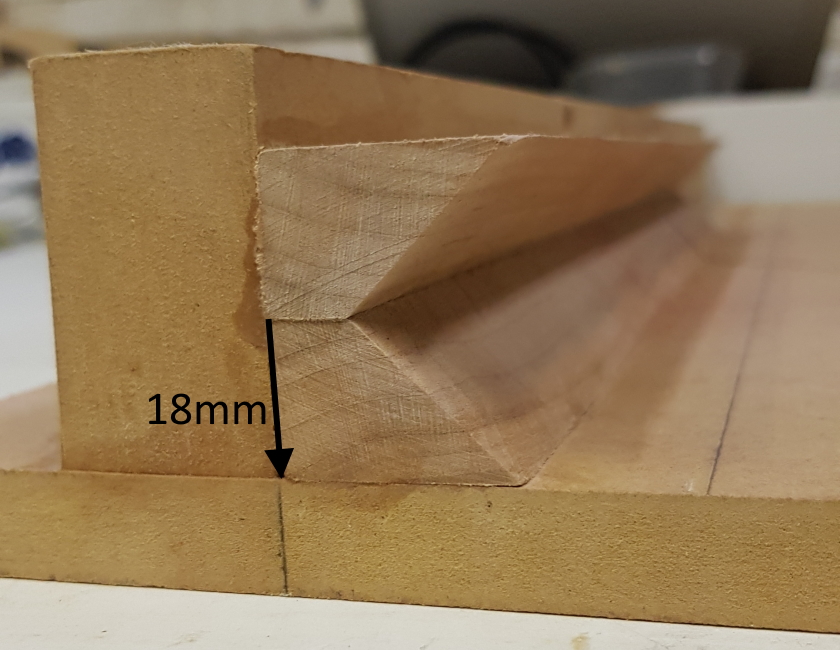
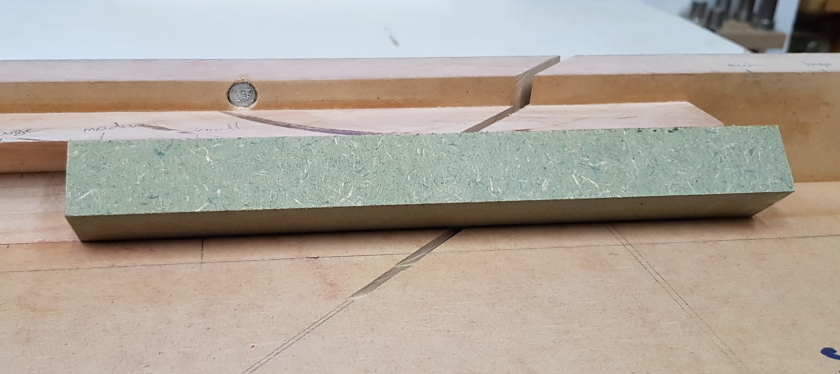
The first cut was using table 1 as shown above and was a 45⁰ cut across the diagonal. I cut a 45⁰ mitre on both edges of a board that had been thicknessed to 18mm using the table saw, 18mm being just over half the diagonal of the 25mm square. Returning the blade to 90⁰ I cut a strip ( probably 30mm) and then cut these to a suitable length for the jig and screwed them onto the temporary table.

BlockSantas_WIP_003a.jpg


Holding the stock into the 45⁰ slot against the fence, I cut each stick either in half to create two medium sized santas or 30mm from centre to create a small and large santa.

BlockSantas_WIP_004.jpg


Things were starting to take shape :)

BlockSantas_WIP_005.jpg


Of course, this first step wouldn't be necessary if using a 60⁰ cross-cut sled or a bespoke mitre box jig.

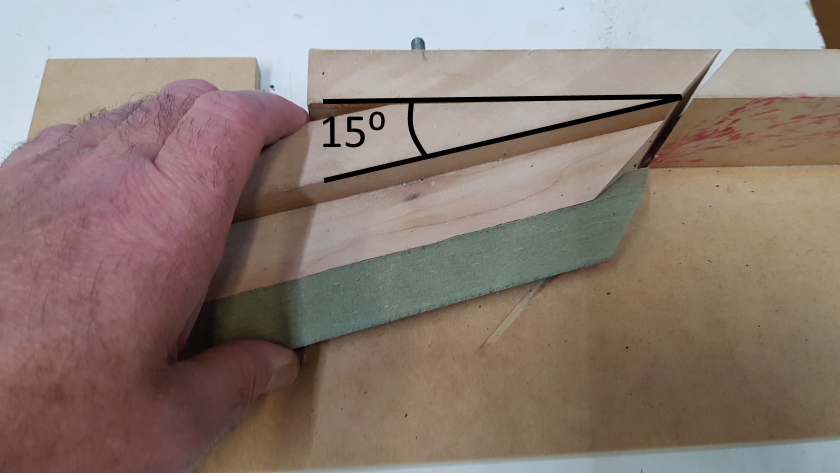
The next stage was to trim each of the 45⁰ faces to 60⁰. So table 2 has a 15⁰ offset from the main fence and each piece was trimmed (full safety gear definitely required as some of the off-cuts went whizzing away from the mitre saw!)

BlockSantas_WIP_006.jpg


I don't have a picture for the next operation, sorry.
I made another jig using the 45⁰ strips to create a cradle to hold each santa at 60⁰ to the face of the disc sander and cleaned up each rhombus face. This also ensured that each face was at the same angle exactly which is important when grouping them together.

Then each santa was all cut to 1mm over-length using table 3. Strictly speaking this didn't need a table, but I found the other cuts benefited from the zero clearance the tables provided so made it anyway.

BlockSantas_WIP_007.jpg


And finished to final length by sanding the base on the disc sander, this time using a fence to hold them at 90⁰ to the disc.

These could all be cut by hand if doing a smaller run as the use of the disc sander ensured the accuracy of both the 60⁰ face and the 90⁰ base. And I'll bet there are some on this board who could make the hand saw cuts accurate enough without sanding, but that's not me :cry:
 
Still no pix, sorry. It's quite possibly my end, it's happened before sometimes, but I have no idea how to fix it.
 
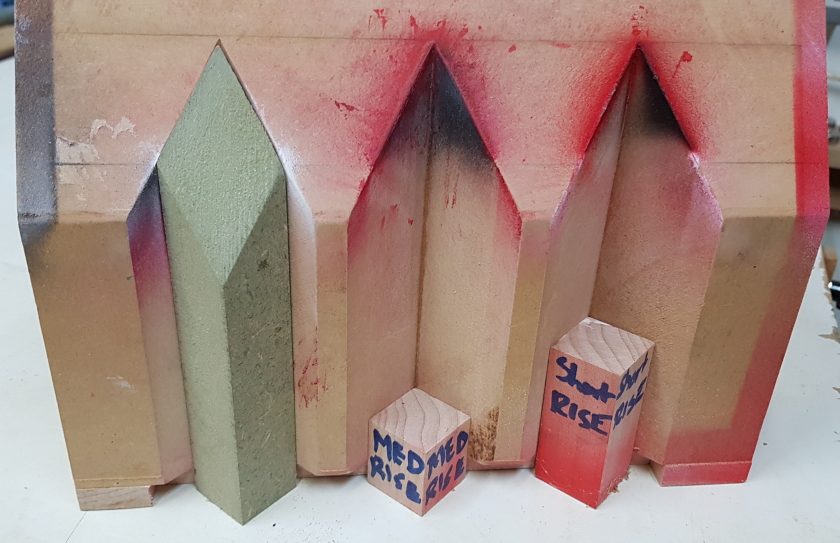
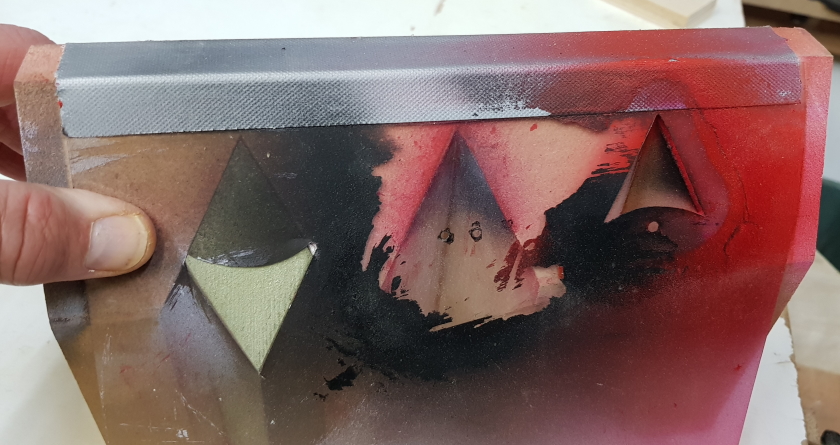
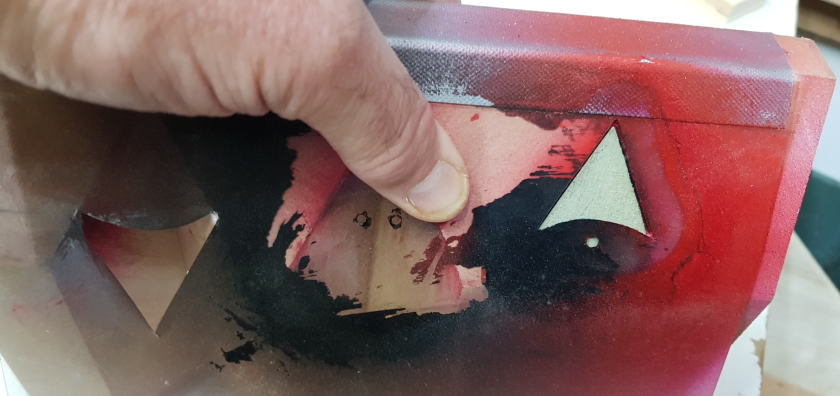
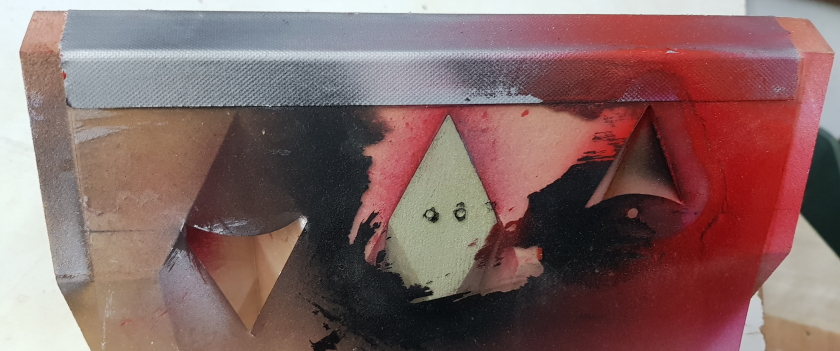
Again, I used a spray brush for this stage but all the painting could be done with care by hand if making a few santas. I printed templates for each of the three colours I used to create the face onto an acetate sheet. This was then fixed to a block to hold the santas in position.

BlockSantas_WIP_010.jpg


I'm afraid I can't remember how I spaced everything out to get to this stage but it the principle is shown. The jig was made the right height to accommodate a tall santa and a 30mm and 60mm riser was used to get the medium and short santas to the template.

BlockSantas_WIP_011.jpg


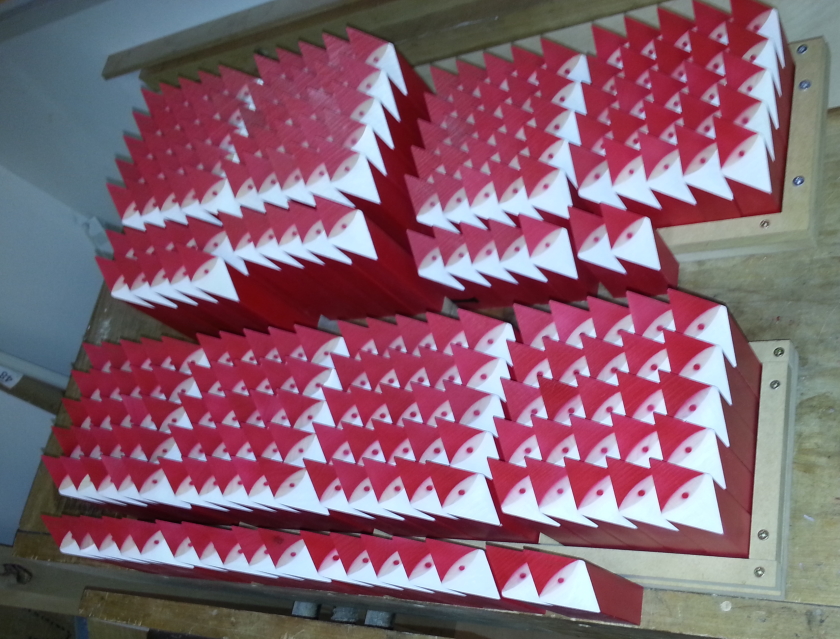
I started by painting all the beards and made drying racks to hold the faces horizontal to minimise the risk of paint runs. (Apologies that the photo doesn't show this that clearly)

BlockSantas_WIP_012.jpg


Then, the hat and nose ...

BlockSantas_WIP_013.jpg


... and finally the eyes.

BlockSantas_WIP_016.jpg


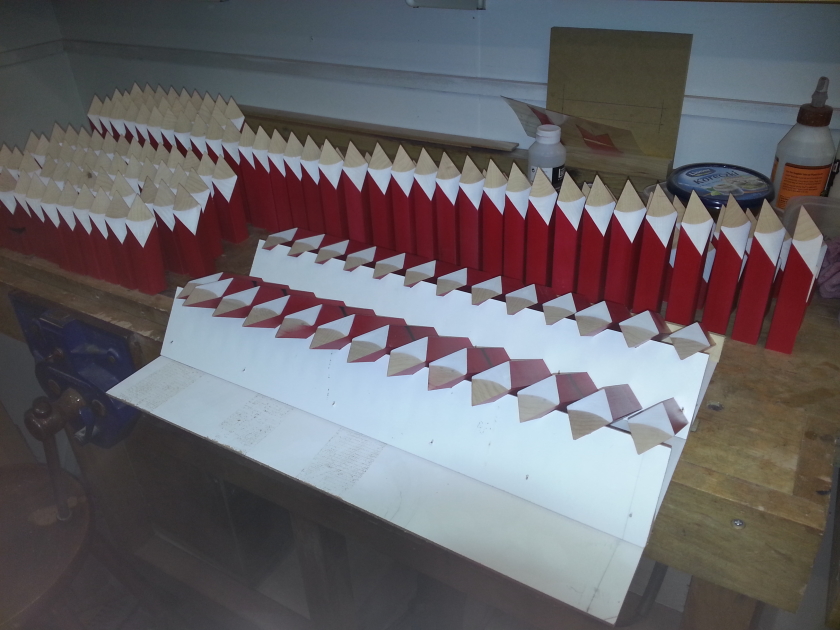
Making this number of sets I found it easier to manage the production line with a couple of trays to hold the blocks together.

BlockSantas_WIP_014.jpg
 
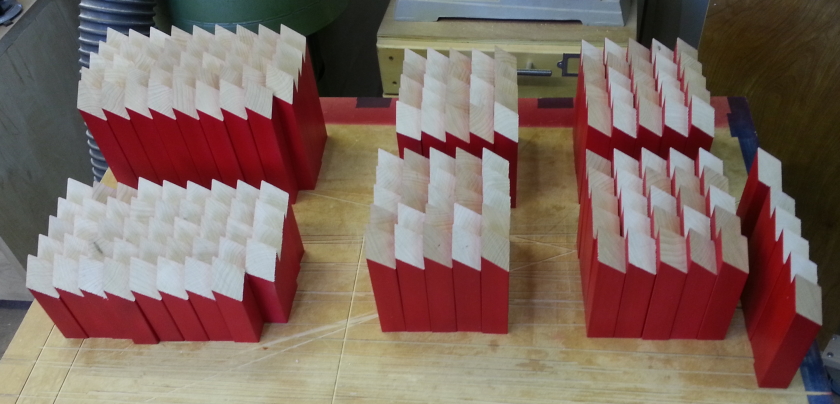
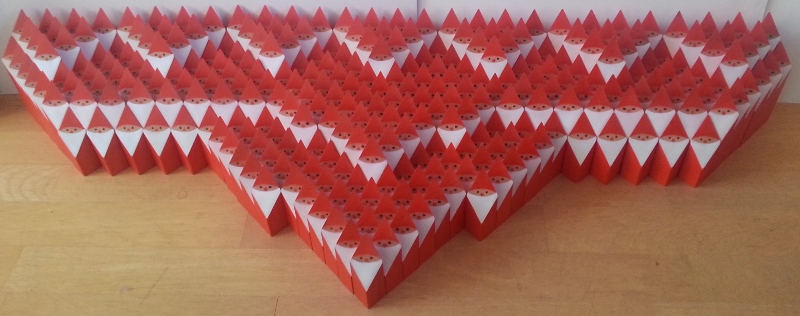
This was quite a production line but good tunes on the radio and the time soon passed. Once they were all made I couldn't resist playing around with the hordes of santas (the stuff of nightmares).

BlockSantas_WIP_017.jpg


Firstly, war games with an attack force ready to advance!

BlockSantas_WIP_018.jpg


And a pyramid of santa acrobats (using a series of tables to build up the layers).

Thank you for following this WIP,
Trevor
 
AES":1vcshlgm said:
Still no pix, sorry. It's quite possibly my end, it's happened before sometimes, but I have no idea how to fix it.

I think it's me. I'm trying to get to the bottom of this - sorry
 
thetyreman":fwst6s3b said:
I'm not seeing pics either unfortunately

Many apologies - I think I've sorted the pictures out now. I'd forgotten the way to edit links from dropbox to make them display - of course they worked for me so I ploughed on :cry:
 
Pics are working now :ho2
Thanks for sharing- that's all really well organised- right down to the drying racks.
I particularly loved the Santa pyramid.
=D>
 
That’s a brilliant WIP, thanks! I remember seeing these last year and being amazed at how many you made, so it’s no wonder you needed such a methodical approach!
 
I'm trying to work it out but failing. How did you make the jig for painting the santas (the 'v' slots) it looks like some mdf sections glued together but I can't work out how.

Really like these. Took me a little while to get it but I'm mostly there now. Will have a go...

.
 
ScaredyCat":1k4snzvx said:
How did you make the jig for painting the santas (the 'v' slots) it looks like some mdf sections glued together but I can't work out how.

I'm afraid I can't recall exactly how I made the painting jig (it was four years ago and I had just started my retirement so quite green still in terms of my experience).

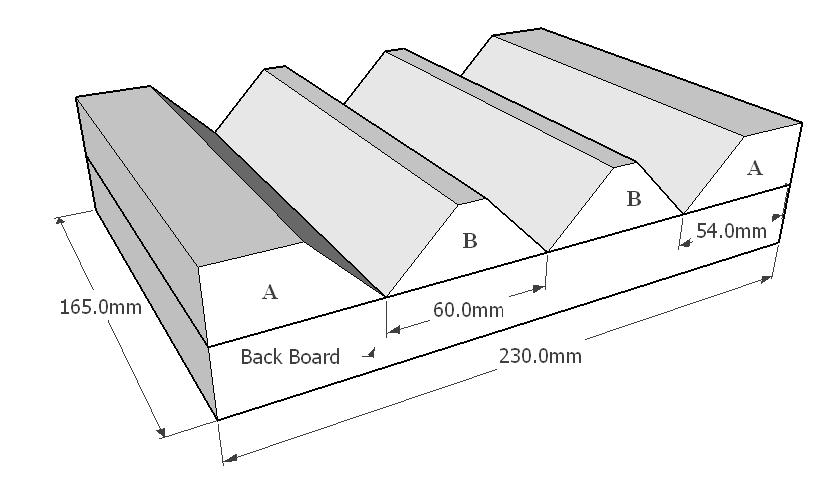
However, if I were to make it again here is how I would do it based on what I can see from the jig. Firstly, here is a diagram showing the pieces that comprise the jig cut out from 25mm thick mdf. All the dimensions are taken from my jig but they can be adapted to suit whatever material scraps you have to hand. There is only one dimension that is important in the second diagram and I'll highlight that later.

My jig starts with a piece measuring 230mm x 165mm x 25mm whic acts as a back board. I cut 45⁰ chamfers on another 25mm sheet of mdf to create pieces A and B. These were then glued onto the backing board to complete the first stage.

BlockSantaDiagram1.PNG


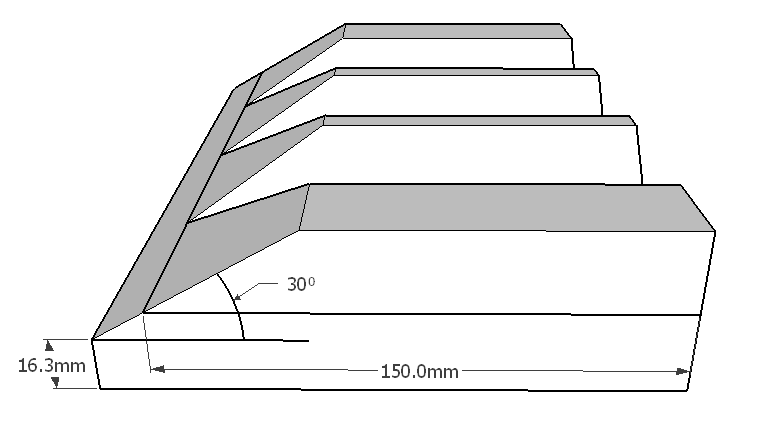
Next comes the trickier cut and I can't remember how I did this. But if I were to attempt it now I would set my table saw to 60⁰ (i.e. 90⁰ less the 30⁰ shown in the diagram below) and attach the jig to a carriage of some sort to make the cut. This requires a cutting depth of approx 68mm. And here the important dimension is the intersection of this cut and the glue line between the back board and the 'V' blocks which should be the same height as your tallest santa - in my case 150mm. With a suitable carriage you can take repeated cuts to creep up on the measurement.

BlockSantaDiagram2.PNG


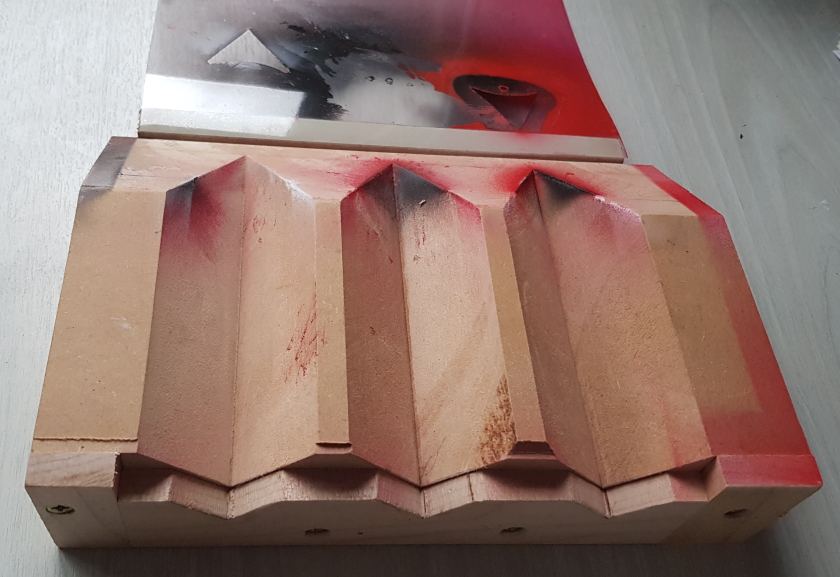
Alternatively, as can be seen in the photo below, you can add 'packing' to the base of the jig to bring it to the correct height
(I'm sure that I used packing because my mdf off cuts were a bit short and not because I made a real hash of 'hitting the mark' :!: )

BlockSantas_WIP_019.jpg


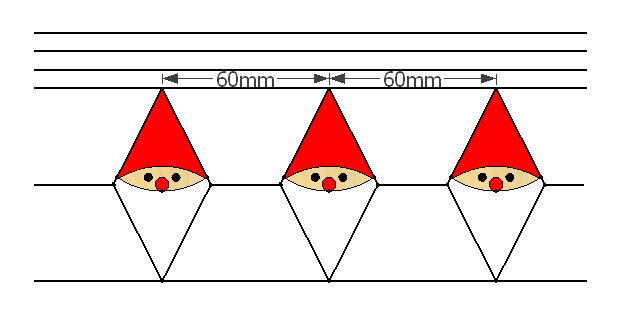
Finally, the template that I printed onto an acetate sheet, where I printed the three faces at 60mm centres to match the width of pieces 'B' in the first diagram.

BlockSantaDiagram3.PNG


I hope this helps and you enjoy making these,
Trevor
 
Back
Top